Email Templates (Email Editor)
Email Editor is a WYSIWYG HTML design tool for crafting bold, amazing-looking email messages in the form of Email Templates. You can use these templates in lieu of custom email HTML when creating a campaign.
Within this article, you will learn how to:
- Create a new email template
- Create and use subject lines
- Add dynamic fields and message tags
- Use an email template within a campaign or a notification template
- Organize your email template list page
- Restrict and share various pieces of content
For more information, check out the "Designing Emails & Messaging" course in PAR Academy (accessible via Punchh or your ordering platform).
Create a New Email Template
To create a new email template using the editor, navigate to Marketing Automation > Email Templates and click the + New Template button to open the Email Editor.
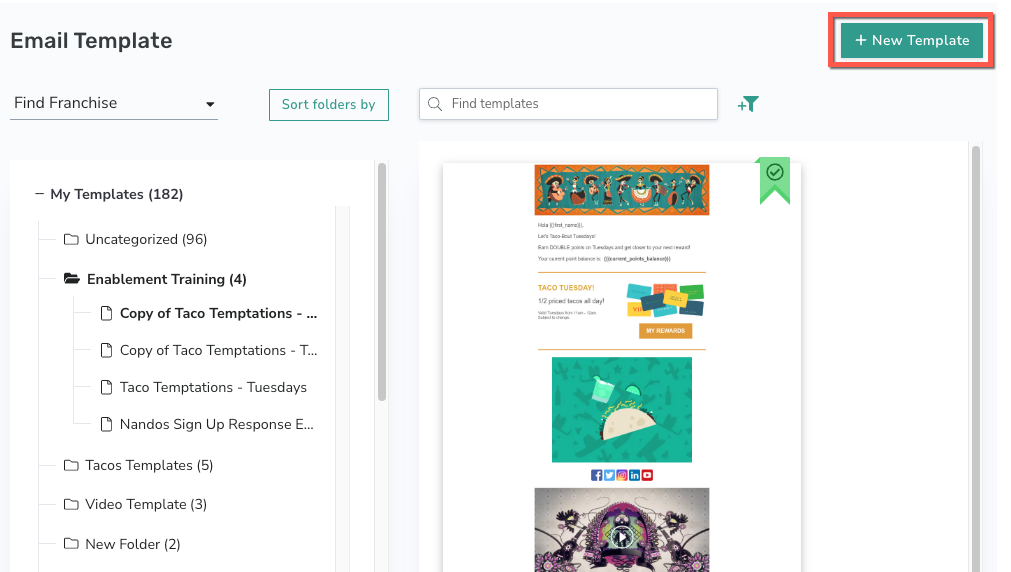
Review the following sections to learn about the available design options and settings.
After reviewing these sections, try out the Tutorial: Making Your First Email Template to create a sample template from start to finish.
Settings
The Settings tab affects the overall appearance of your email template. When starting a new email template, it is recommended to set up this section first:
Note: The email editor automatically adjusts text color in live email sends to ensure readability. If you set a text color that closely matches your background (for example, white text on a white background), the editor may override that color and display the text in a contrasting color when the email is delivered to your guests. Do not rely on color-matching to visually hide text content in your email templates.
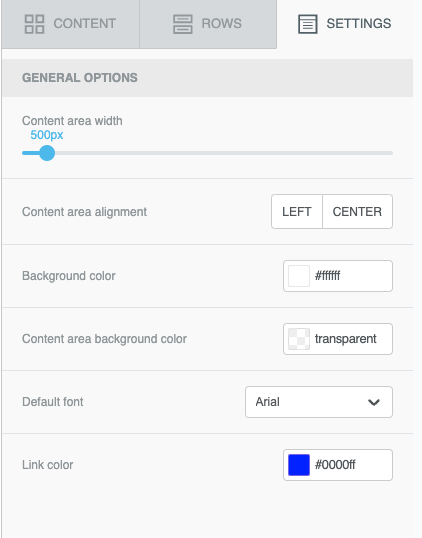
- Content area width: Use the slider to increase/decrease the content area width.
Note: Standard emails are typically 500-600px. Keep in mind the dimensions you set here when creating any images, GIFs, or videos for your email.
- Content area alignment: Choose to align your content to the left or at the center.
- Background color: Choose background colors for each row as well as the template as a whole.
- Content area background color: The color you select here becomes the default color for each new row you add (you can still change the background color of any individual content area later on).
- Default font: Select your default font. All of the listed fonts are compatible with web and mobile.
- Link color: Choose the color of any hyperlinks that appear within your content.
Rows
Use the Rows tab to create the basic structure of your template. Drag and drop one of the row structures to add a new area in which to place content.
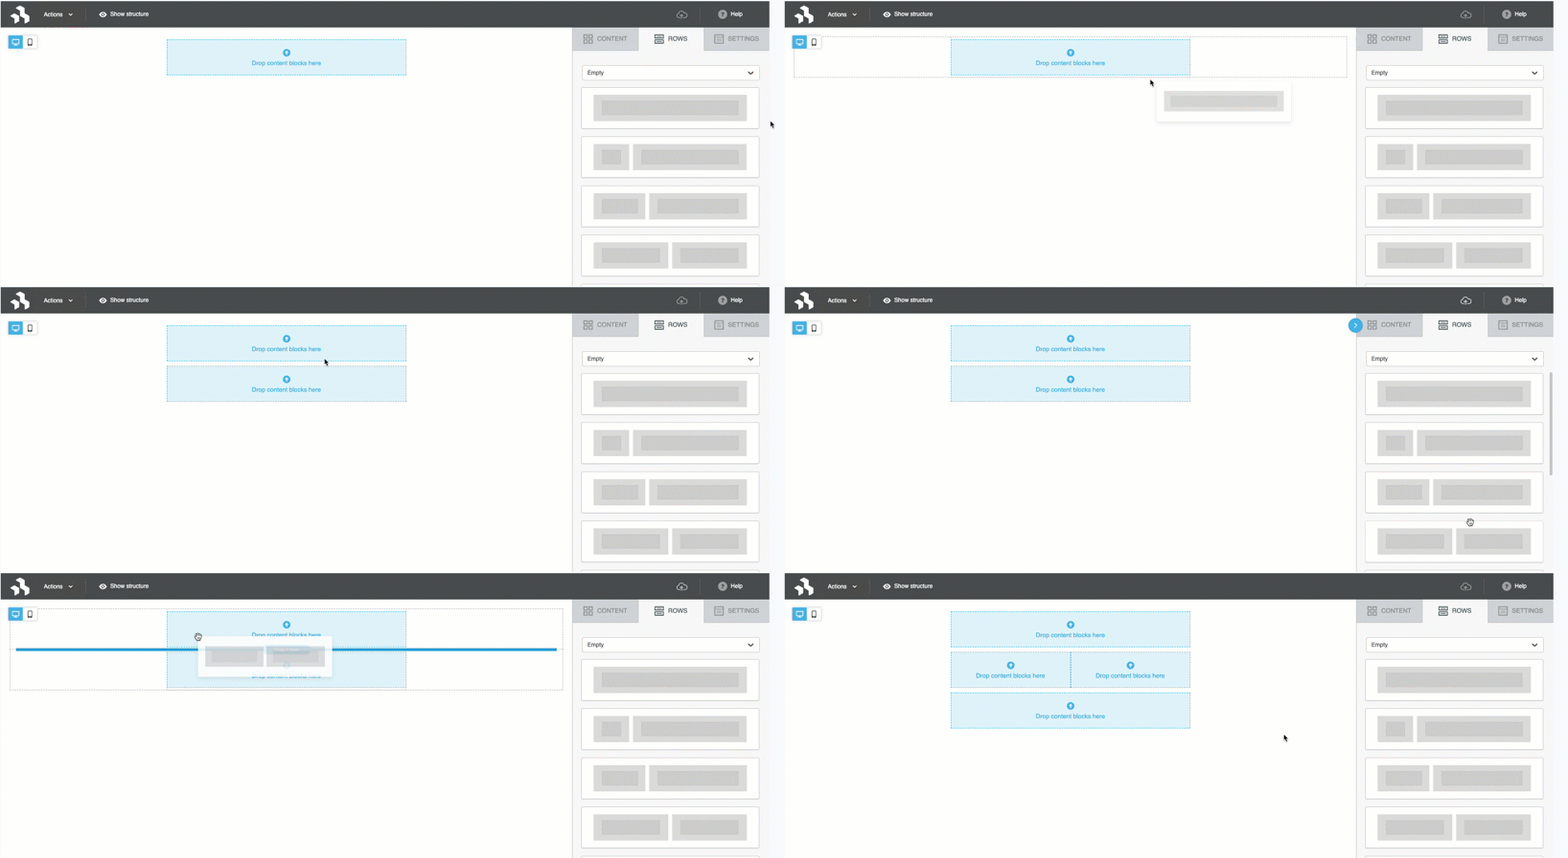
Row Properties
Select an entire row to show the Row Properties pane.
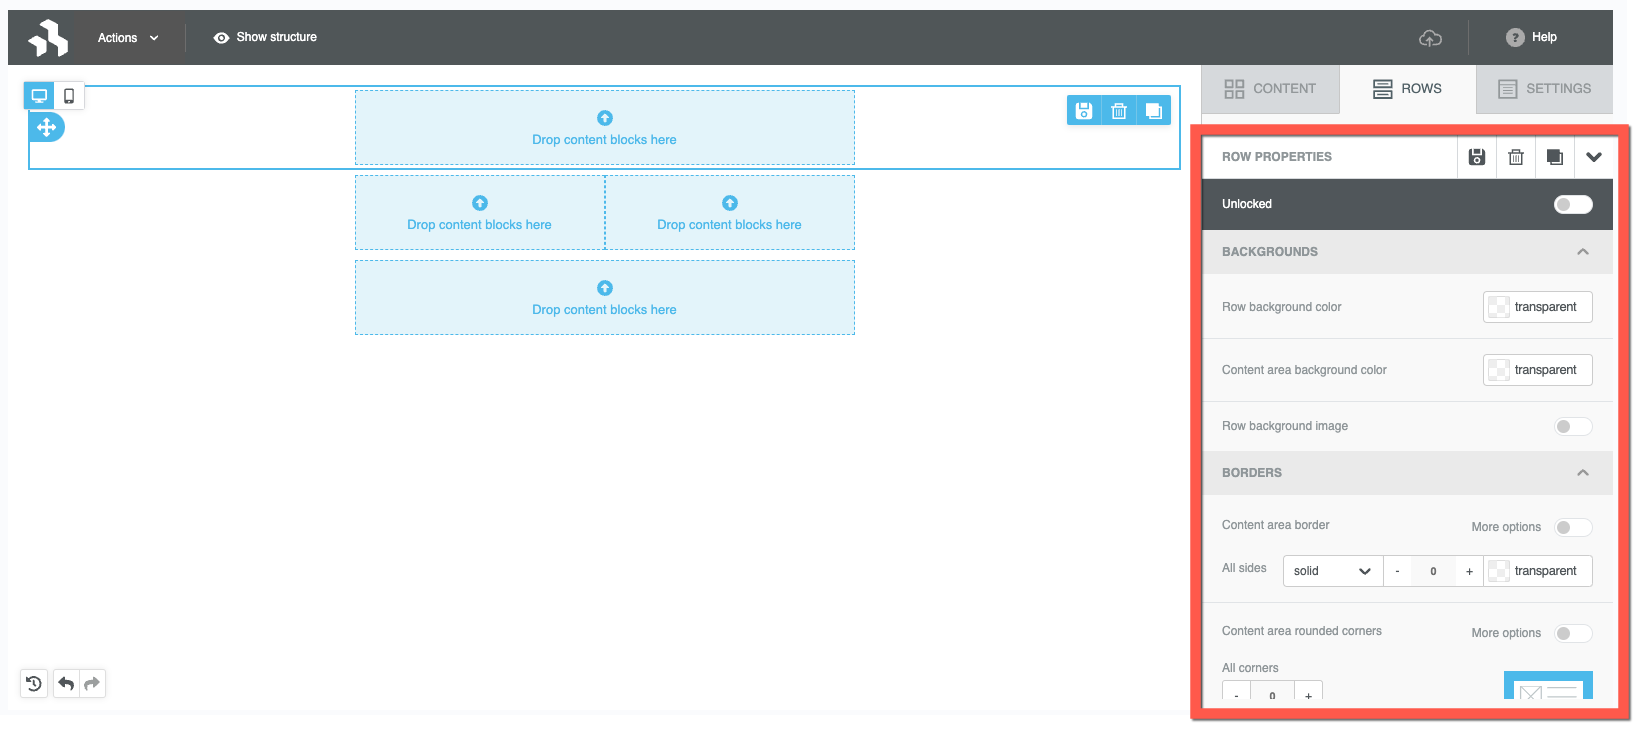
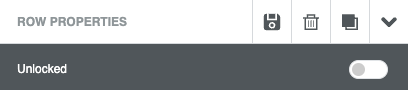
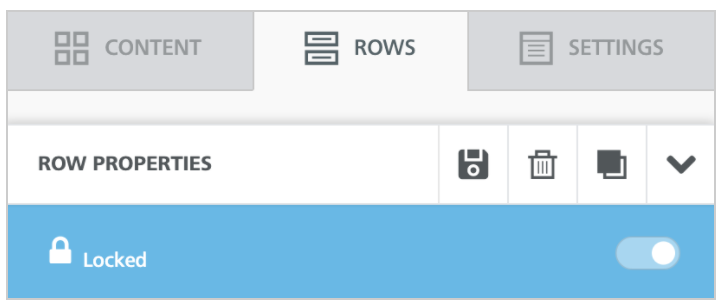
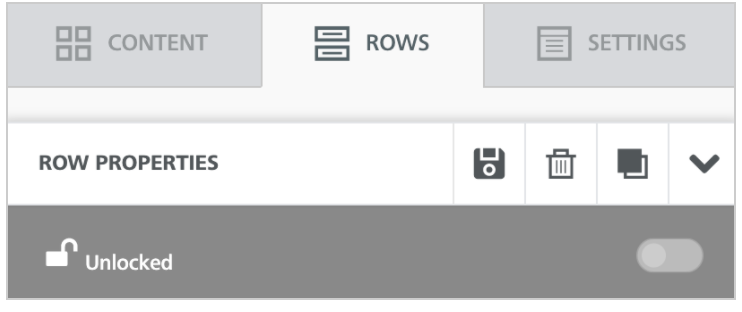
At the top of the pane you can Save, Delete, or Duplicate the row. Click Clear Selection to close the row properties pane. Use the Unlocked/Locked toggle to restrict editing access.
Backgrounds
- Row background color: Choose a color that will fill the full background of the row.
- Content area background color: Choose a color that will fill just the content area of the row.
- Row background image: Toggle on to have an image that will fill the full background of the row.
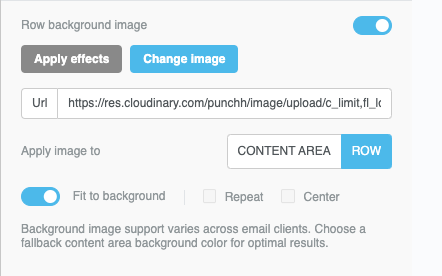
- You can then upload an image from the Media Manager or enter a URL.
- Other options include applying the image to just the content area or the full row.
- Select Fit to background, Repeat, and Center to change how the image is shown on the row.
- Select the Apply effects option, which appears after you have uploaded your image, to make further edits.
Borders
- Content area border: Choose the color and width of a border for the full row.
- Content area rounded corners: Use the -/+ buttons to round the corners of the content area only. This will not change the corners of the full row.
Layout
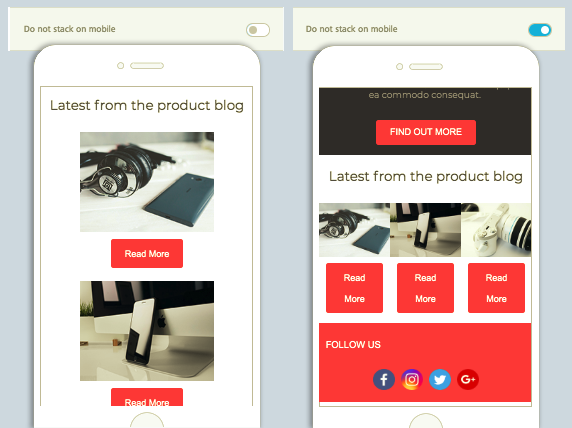
- Stack on mobile: Toggle On/Off. You can specify whether or not to stack the components of that row when it is displayed on a mobile device. You can see the difference in the image below.
- Hide on: Choose OFF/Desktop (Web)/Mobile (App) to hide the row when the email is viewed on a specific device. For example, you may want to hide the buttons to download your mobile app for desktop, as those would not be applicable for those users at that time.
Columns
Within the Column Structure, you can add a new column and resize the existing columns. To resize a column:
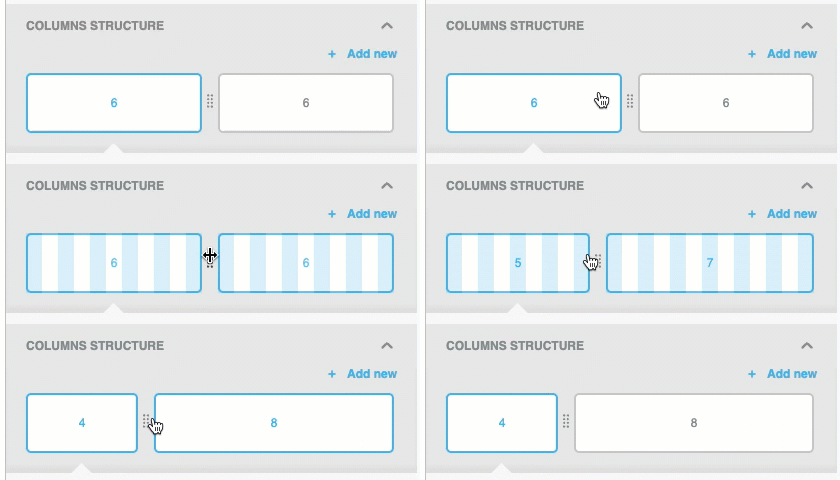
- Click on the divider present between.
- Move the divider back and front to adjust the column size as per your requirement.
Select a column within the Columns Structure section to make further edits to that specific column:
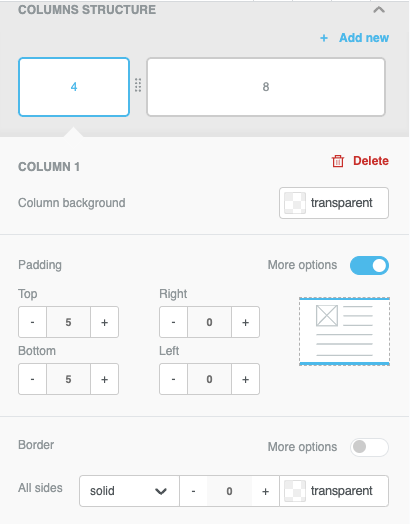
- Delete a column
- Change the background color
- Adjust the padding
- Use the +/- buttons or manually enter the number in the box.
- Add a border
Content
Drag a content tile into a content area to add it. Check the following sections for more detailed information about each content type:
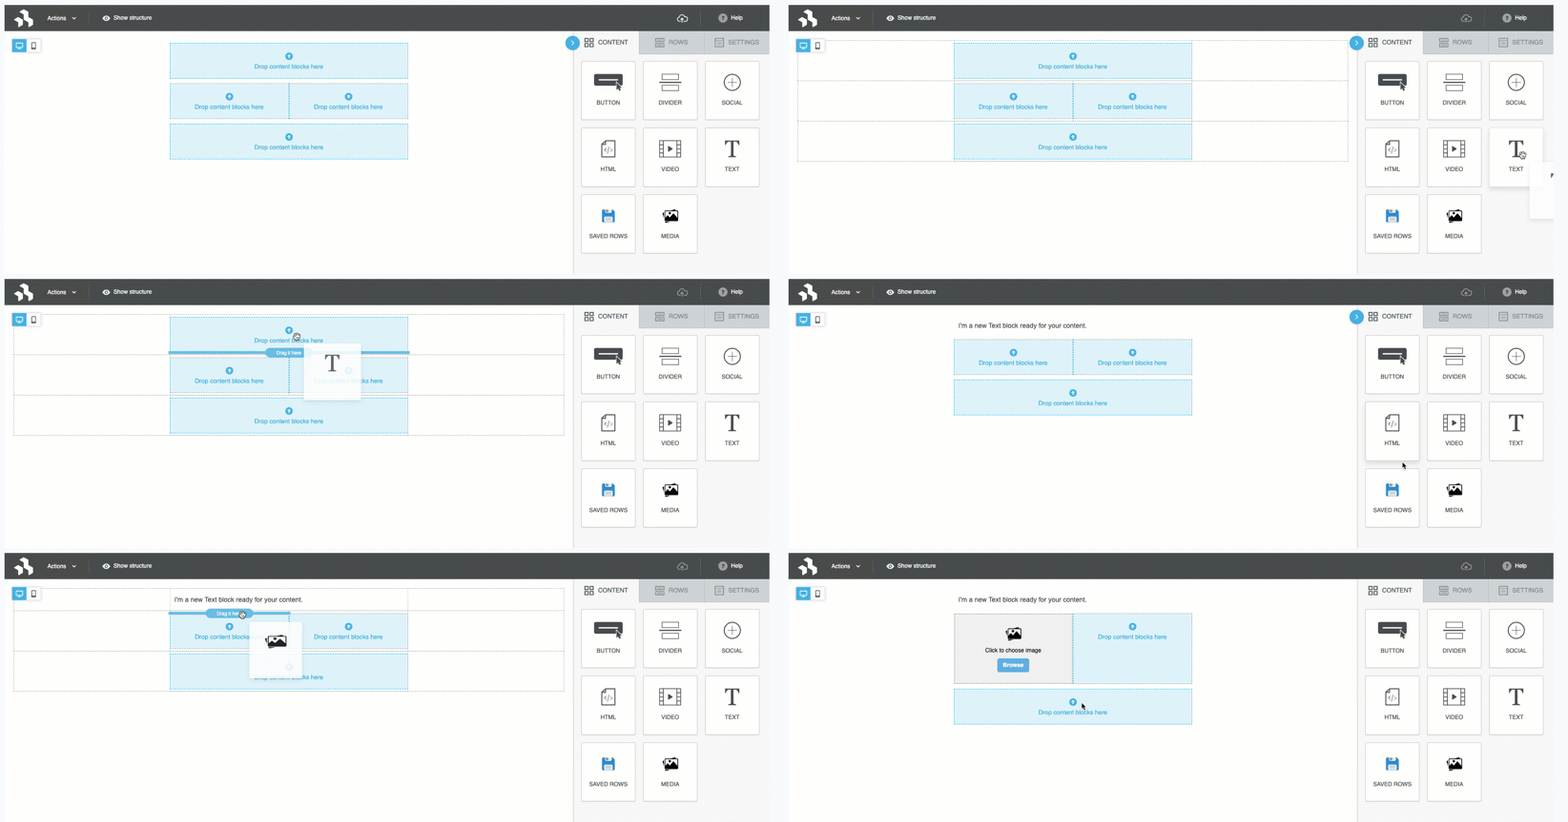
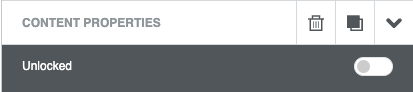
At the top of the each content properties pane you can delete or duplicate the content area. Click Clear Selection to close the content properties pane. Use the Unlocked/Locked toggle to restrict editing access.
Button
Click into the button to edit the text.
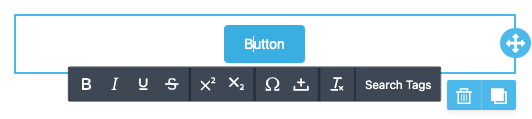
The Content Properties pane opens on the right with more options:
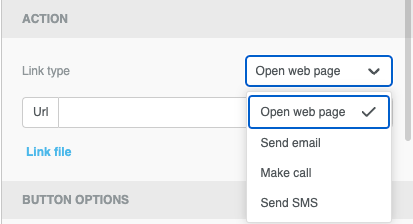
Action: Link Type
Four types of links are supported for buttons; open a web page, send an email, make a call, and send SMS. (The last two types should only be linked to buttons that are set to "Hide on Desktop".)
Button Options
- Auto width: Toggle Off to manually adjust the width of the button.
- Font family: Select the font the button text will appear in.
- Font weight: Select the weight (regular or bold) of the text.
- Font size: Select the size of the text.
- Background color: Enter the HEX code for the background color of the button.
- Text color: Enter the HEX code for the text color of the button.
- Align: Choose the alignment of the button within the content area.
- Line height: Choose the height of the button.
- Letter spacing: Choose the letter spacing of the text on the button. Leave at 0 for normal spacing.
- Text direction: Choose how the text appears on the button (left to right is the most common).
- Border radius: Set the rounded-ness of the button's corners. The higher the value, the more rounded the corners will be.

- Content padding: Choose how much padding is around the text on the button.
- Border: Add a border color around the button or just on specific sides.
Block Options
- Padding: Use the +/- buttons tochoose how much padding appears around the button within the content area, or manually enter the number in the box.
- Hide on: Choose OFF/Desktop (Web)/Mobile (App) to hide the content when the email is viewed on a specific device. For example, you may want to hide the buttons to download your mobile app for desktop, as those would not be applicable for those users at that time.
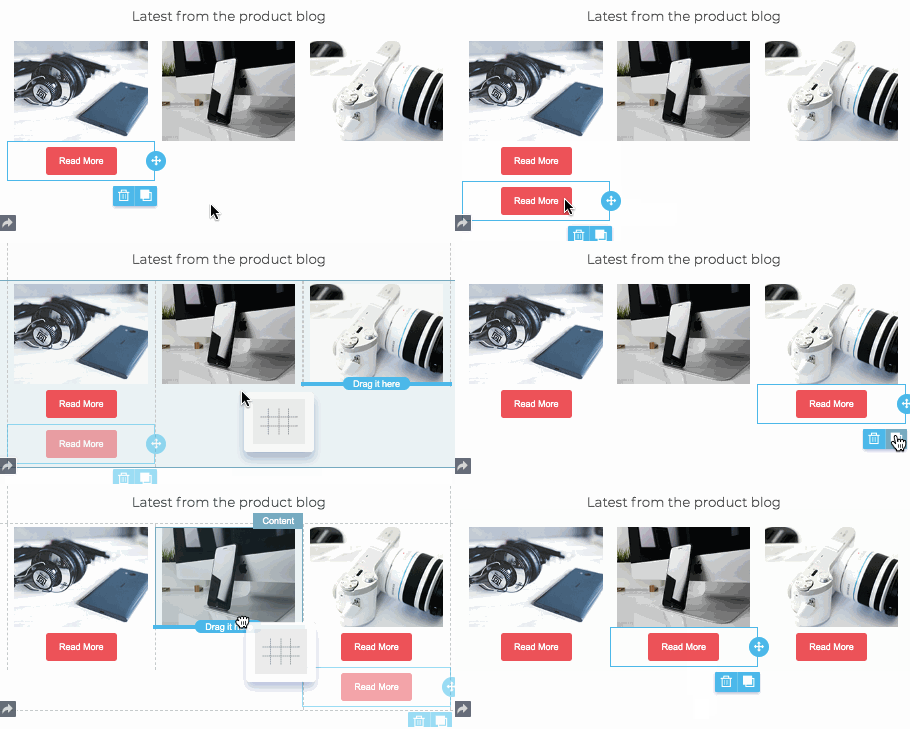
Duplicate Buttons It's likely that you will use the same button style for each of the buttons in your email. Save time by duplicating one and dragging it to another content area (make sure you change the URL for the new button).
Divider
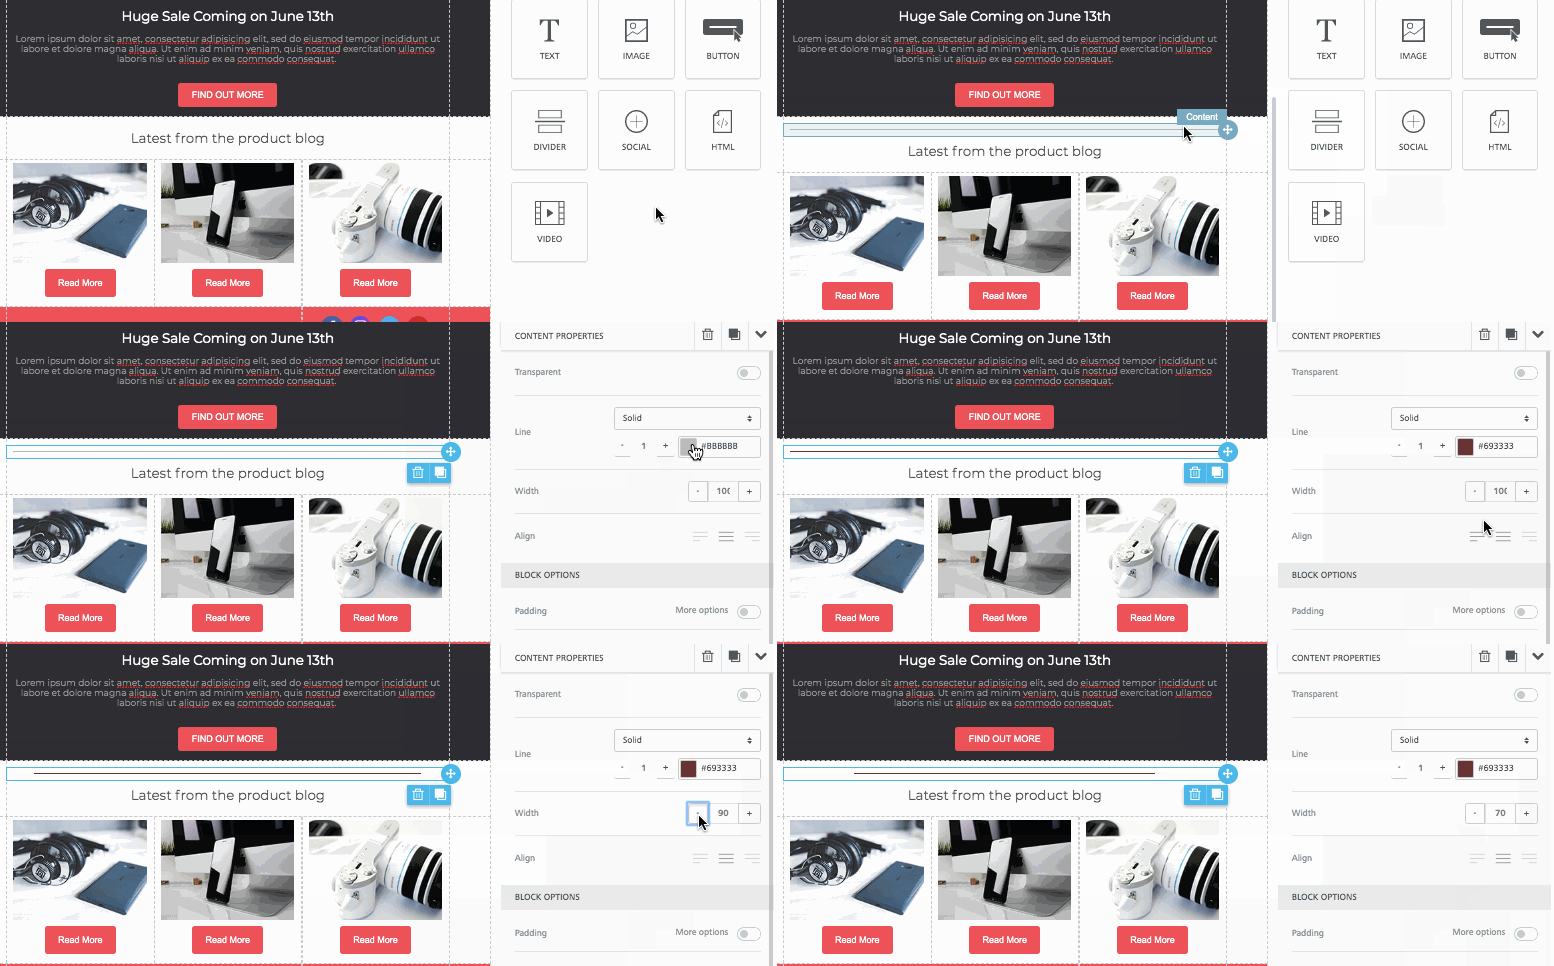
- Transparent: Toggle on to make the divider transparent. (Use this option if you are trying to add space between content elements but don't want a line to appear.)
- Line: Choose the style, size, and color of the divider line.
- Width: Choose how far the divider stretches across the content area.
- Align: Choose where the divider is placed within the content area.
Block Options
- Padding: Use the +/- buttons to choose how much padding appears around the divider within the content area, or manually enter the number in the box.
- Hide on: Choose OFF/Desktop (Web)/Mobile (App) to hide the content when the email is viewed on a specific device. For example, you may want to hide the buttons to download your mobile app for desktop, as those would not be applicable for those users at that time.
Social
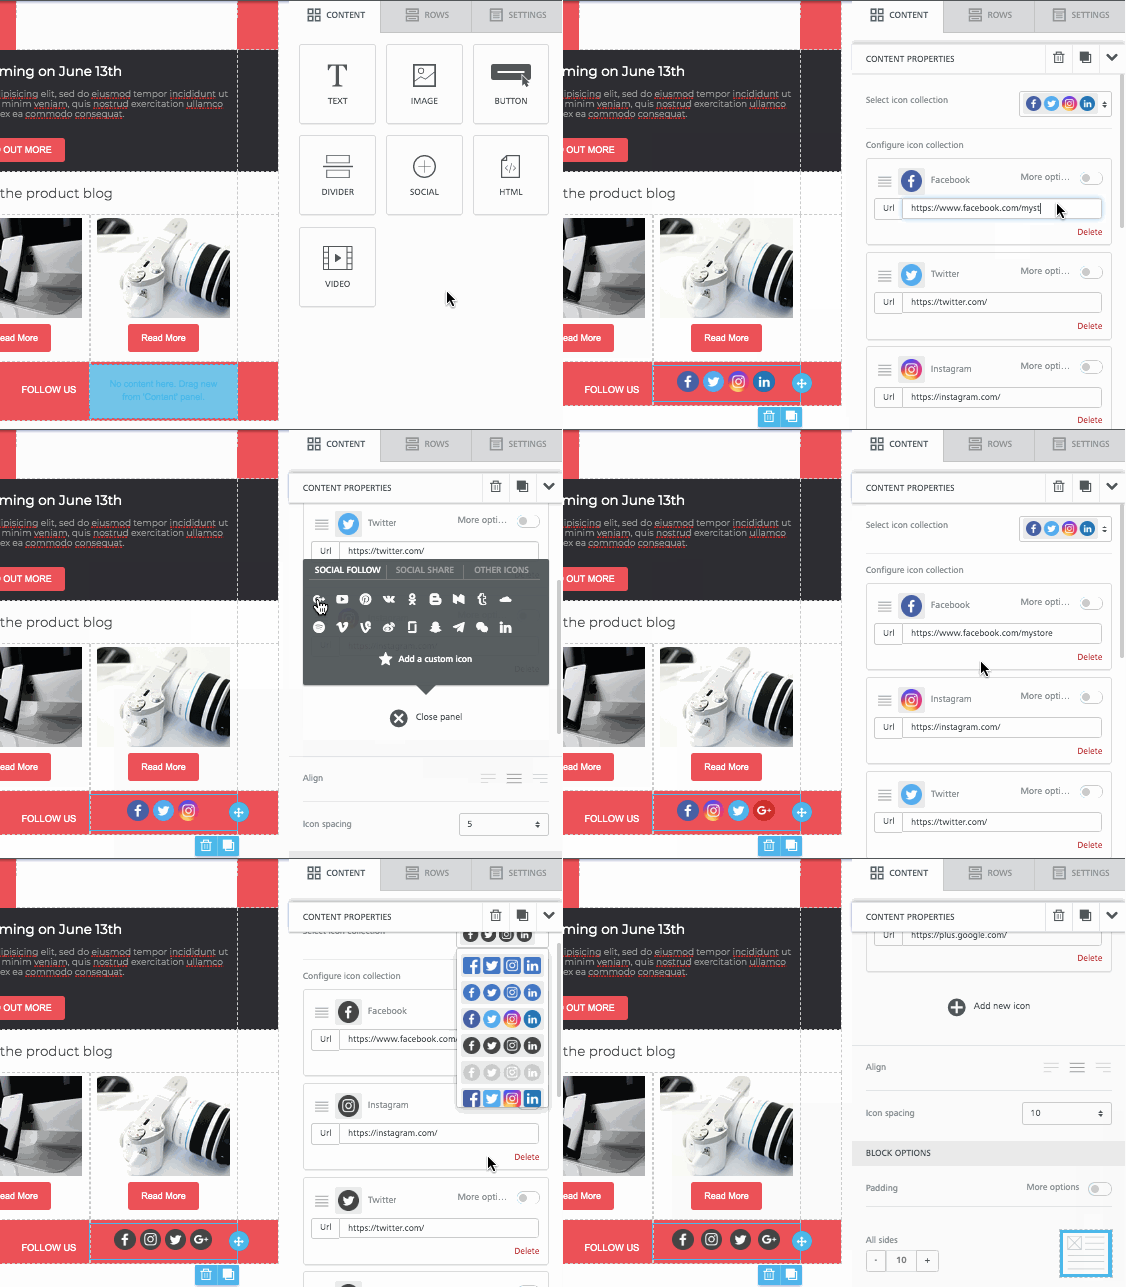
- Select icon collection: Select the style of the icons.
- Facebook: Add in your brand's Facebook URL, text, and alt text, as needed. (Click Delete to remove this icon.)
- X (Twitter): Add in your brand's X URL, text, and alt text, as needed. (Click Delete to remove this icon.)
- Instagram: Add in your brand's Instagram URL, text, and alt text, as needed. (Click Delete to remove this icon.)
- LinkedIn: Add in your brand's LinkedIn URL, text, and alt text, as needed. (Click Delete to remove this icon.)
- Add New Icon: Click to add another icon link to a different platform.
- Additional Socials: Apple Music, Blogger, Bluesky, Discord, Email, Facebook share, Glassdoor, LinkedIn share, Medium, Odnoklassniki, Odnoklassniki share, Pinterest, qZone share, SinaWeibo, SinaWeibo share, Snapchat, SoundCloud, Spotify, Telegram, Threads, TikTok, TripAdvisor, Tumblr, Twitch, Vimeo, Vine, Vkontakte, Vkontakte share, Web Site, WeChat, X share, YouTube, and LINK
- Other Icons: You can add your own custom icons to link to any website, email, sharing, etc.
- Align: Choose where the icons are placed within the content area.
- Icon Spacing: Choose how far/close the icons are in relations to each other.
Block Options
- Padding: Use the +/- buttons to choose how much padding appears around the social icons within the content area, or manually enter the number in the box.
- Hide on: Choose OFF/Desktop (Web)/Mobile (App) to hide the content when the email is viewed on a specific device. For example, you may want to hide the buttons to download your mobile app for desktop, as those would not be applicable for those users at that time.
HTML
Enter custom HTML code into the cell. Click Expand to enlarge and pop-out the window.
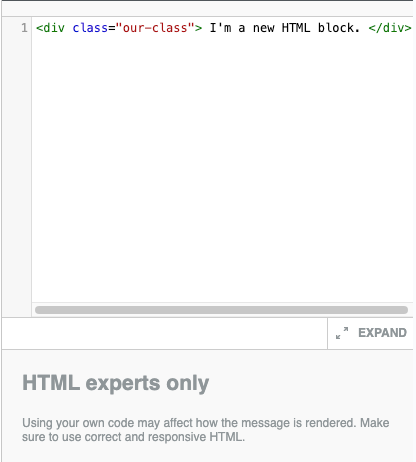
Block Options
- Hide on: Choose OFF/Desktop (Web)/Mobile (App) to hide the content when the email is viewed on a specific device. For example, you may want to hide the buttons to download your mobile app for desktop, as those would not be applicable for those users at that time.
Video
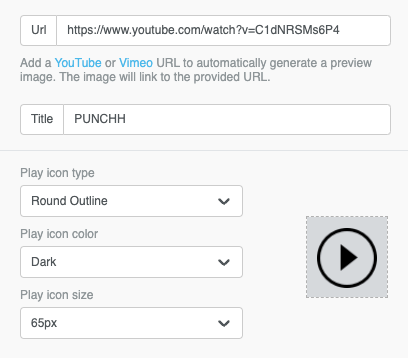
- URL: Embed a YouTube or Vimeo video.
- Title: Enter the title of your video.
- Play icon type: Select the shape of the play icon.
- Play icon color: Select the color of the play icon.
- Play icon size: Select the size of the play icon.
Block Options
- Padding: Use the +/- buttons to choose how much padding appears around the video within the content area, or manually enter the number in the box.
- Hide on: Choose OFF/Desktop (Web)/Mobile (App) to hide the content when the email is viewed on a specific device. For example, you may want to hide the buttons to download your mobile app for desktop, as those would not be applicable for those users at that time.
Text
Note: The email editor automatically adjusts text color in live email sends to ensure readability. If you set a text color that closely matches your background (for example, white text on a white background), the editor may override that color and display the text in a contrasting color when the email is delivered to your guests. Do not rely on color-matching to visually hide text content in your email templates.
Click into the content area to edit the text.

The Content Properties pane opens on the right with more options:
- Text color: Enter the HEX code for the color of the text.
- Link color: Enter the HEX code for the color of the link.
- Line height: Choose the amount of spacing between multiple lines of text.
- Letter spacing: Choose the amount of spacing between each individual letter.
Block Options
- Padding: Use the +/- buttons to choose how much padding appears around the text within the content area, or manually enter the number in the box.
- Hide on: Choose OFF/Desktop (Web)/Mobile (App) to hide the content when the email is viewed on a specific device. For example, you may want to hide the buttons to download your mobile app for desktop, as those would not be applicable for those users at that time.
Add an Unsubscribe Link
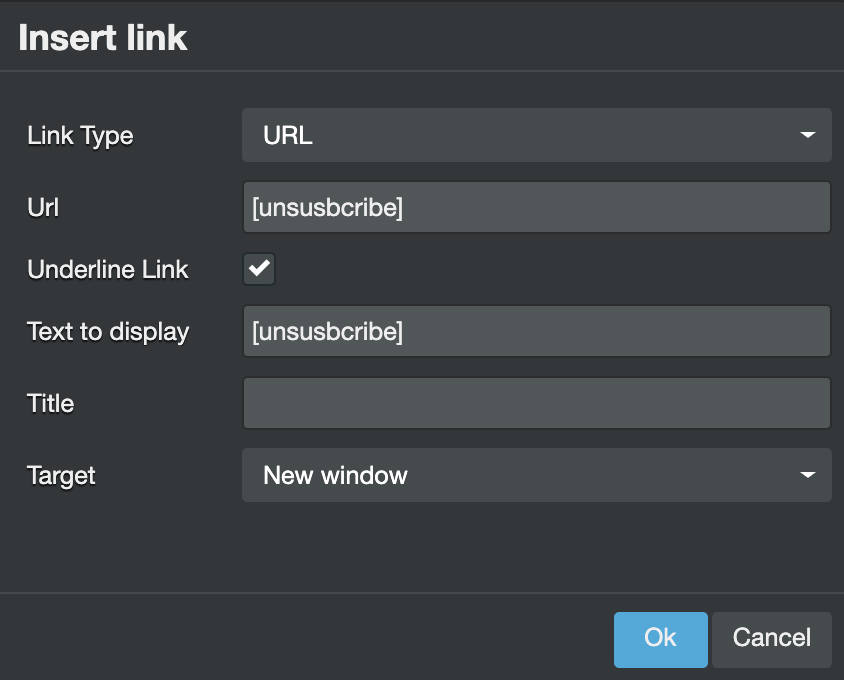
You can manually add an Unsubscribe Link using links. Select the text to link, and click the Insert/edit link icon. Set the Link Type to "URL" and the URL to "[unsubscribe]". In order for this to work properly, make sure that in the associated campaign the Add unsubscribe link to email flag is turned on at the bottom of the HTML Email field. Refer to the Campaign Management article for links to Punchh's campaign types.

Saved Rows
Saved Rows can be created and stored under Marketing Automation > Content Library. Refer to the Email Components article for more details.
- Click the Browse button in the saved row placeholder that appears once the block is dropped.
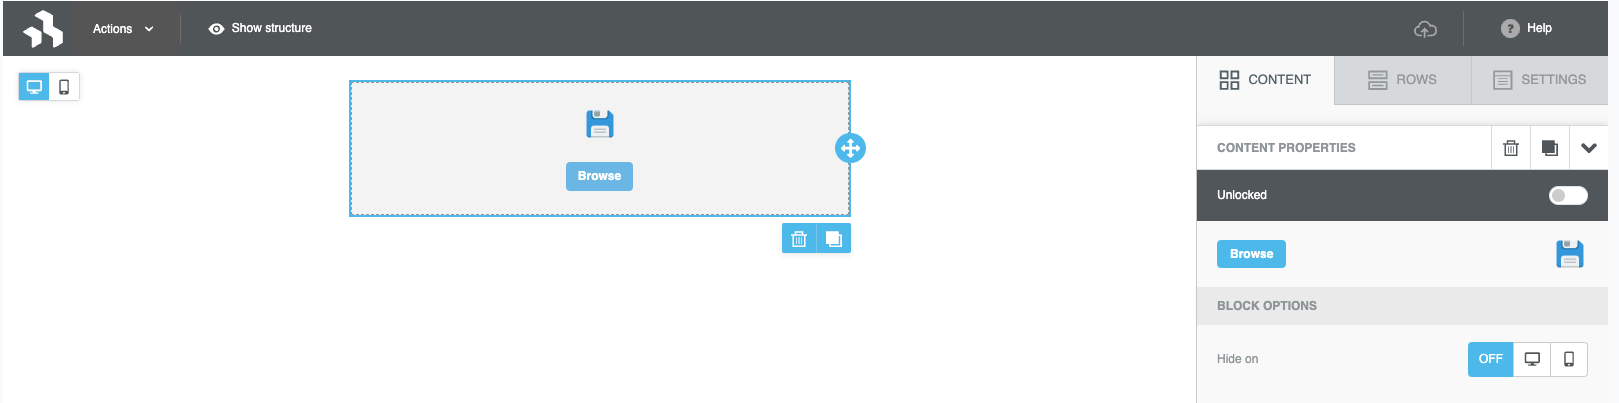
- A pop-up will appear displaying the available list of saved rows.
- Click on the saved row that needs to be configured to template. The saved row will be added to the template.
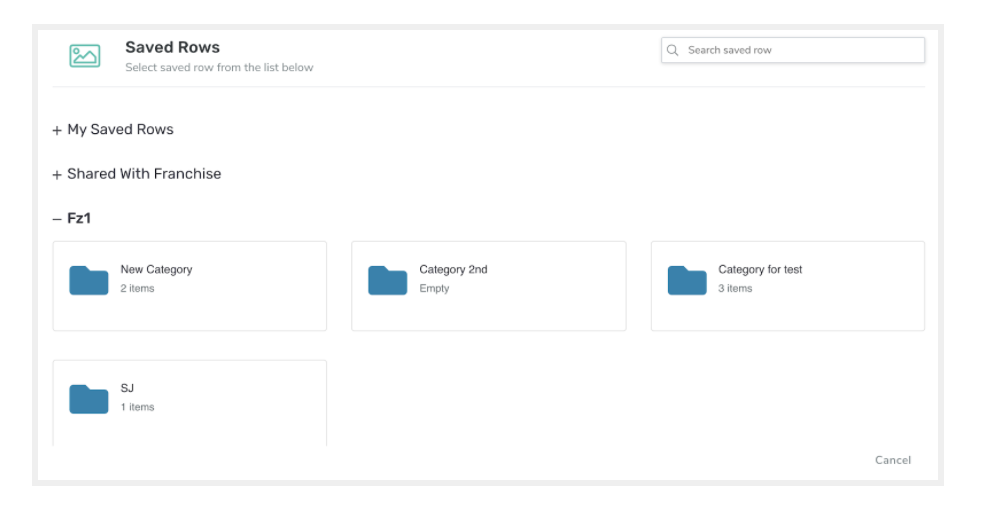
- Search the list using the name of the saved row to filter results in the list.
- Choose the required saved row and click on it. The selected saved row will be embedded in the template in the place where the Saved Row block was dropped.
Block Options
- Hide on: Choose OFF/Desktop (Web)/Mobile (App) to hide the content when the email is viewed on a specific device. For example, you may want to hide the buttons to download your mobile app for desktop, as those would not be applicable for those users at that time.
Media
- Add an image:
- Click the Browse button in the Media block.
- List of media available under Media Manager in Settings will appear here.
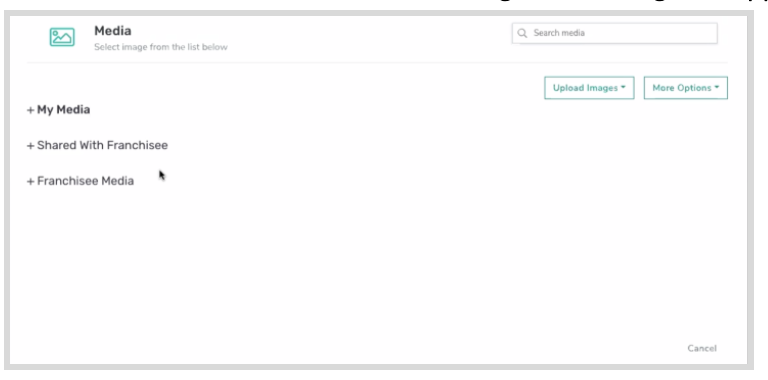
- Click the required image.
- The selected image will be embedded in the template in the place where the Media block was dropped.
- Width: To change the width of an image in its Content Properties, disable the Auto width toggle and use the slider to select a different width; this width will be absolute and will not resize based on window size. Click the Full width on mobile checkbox to ensure that extra large images do not run off the edges of the screen on mobile devices.
- Align: Choose where the image appears within the content area.
- Alternate Text: This text is displayed if the image fails to load, next to the cursor when the image is hovered over for a moment, or is read aloud if a visually impaired user is using a screen reader.
Action: Image Link
Specify a URL to open a web page or send an email/SMS when the image is clicked/tapped.
Block Options
- Padding: Use the +/- buttons to choose how much padding appears around the media within the content area, or manually enter the number in the box.
- Hide on: Choose OFF/Desktop (Web)/Mobile (App) to hide the content when the email is viewed on a specific device. For example, you may want to hide the buttons to download your mobile app for desktop, as those would not be applicable for those users at that time.
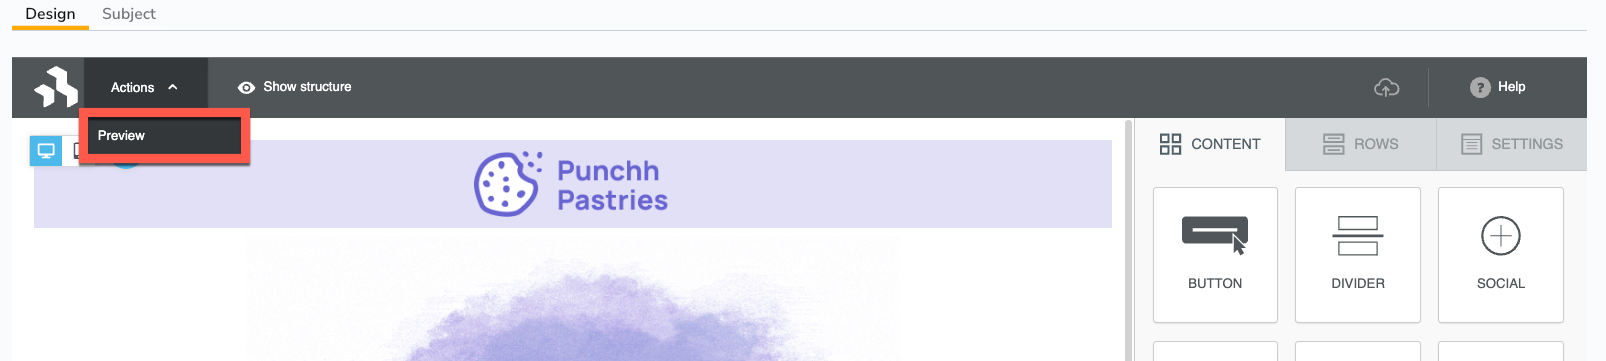
Preview
Click the Actions drop-down and select Preview at any time while designing your template to see what it will look like when viewed on a desktop and/or mobile screen.
Create Recommended Subject Lines for Template
Only full-access admins can add subject lines to a template. They can also edit or delete the added subject lines. Any number of subject lines can be added to a template. The added subject lines will display as recommended subject lines in the 'Subject Line Recommendations' drop-down in touchpoints.
How To Create and Use Recommended Subject Lines
How To Create a Subject Line
- Click + New Template.
- Click the Design tab.
- Design the template.
- Click the Subject tab.
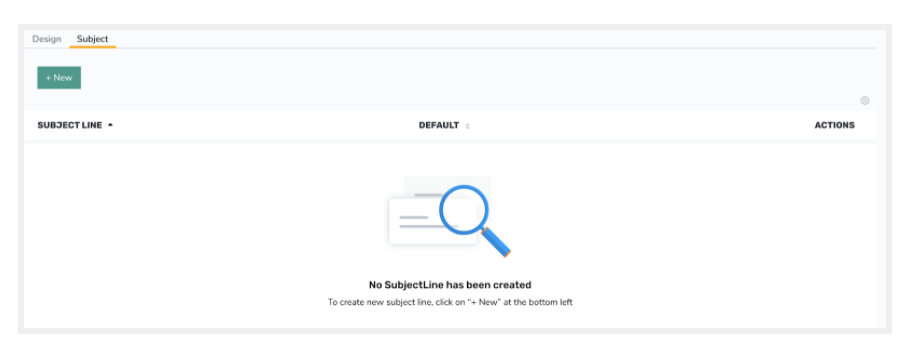
- Click + New to add a new Subject line.
- The pop-up opens. Enter a Subject and click Save.
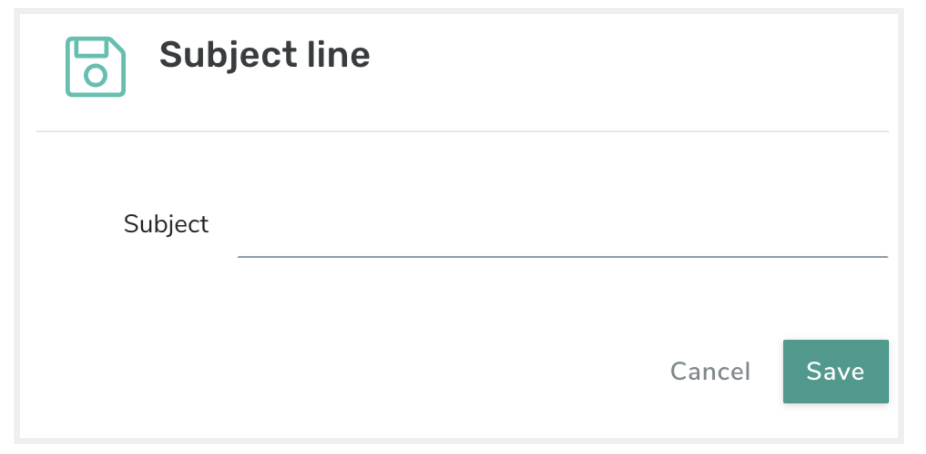
- Click on the default icon in a subject line to set it as default.

Using Recommended Subject Lines
Admins are allowed to use recommended subject lines in touchpoints as long as they have the necessary permissions. The recommendations will appear as a drop-down only when the new editor toggle is ON and a template is selected. The selected subject line recommendation will populate in the subject line field in the respective touchpoint page. This value will be set as the subject of the email. Admins with 'Subject Line access for emails' permission can modify the values.
- Go to Campaigns or System Messages.
- View the list of templates.
- Choose a template.
- The Subject Line Recommendations field will appear on the page once a template is selected.
- Choose a Subject Line from the drop-down.
- The selected subject line will appear in the Subject field present in the page.
- The value in the Subject field will be set as the subject for the email.
Adding a Dynamic Message Tag to a Template
This feature is available for full-access admins. Dynamic Fields & Message Tags can be added to a template from the Email Templates list or any touchpoints. The list of tags will vary depending on the place in the dashboard from where the template is created/edited.
How To Add Tags
- Drag and drop a text box in the design editor.
- Click into the text box to open the rich editor panel.
- Click Search Tags.

- Choose a touchpoint from the drop-down menu.
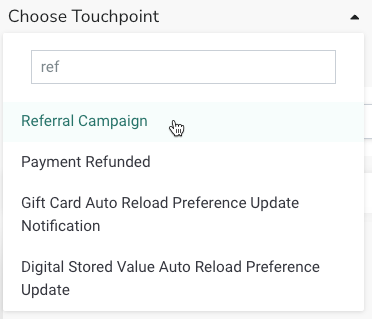
- The list of tags will appear.
- Click on the required tag. The list of tags will vary depending on the place in the platform from where the template is created/edited.
- The list will include the tags that are only associated with the particular touchpoint.
- If merge tags are accessed from the Email Templates list, then the list will include all available merge tags.
-
Click Insert.
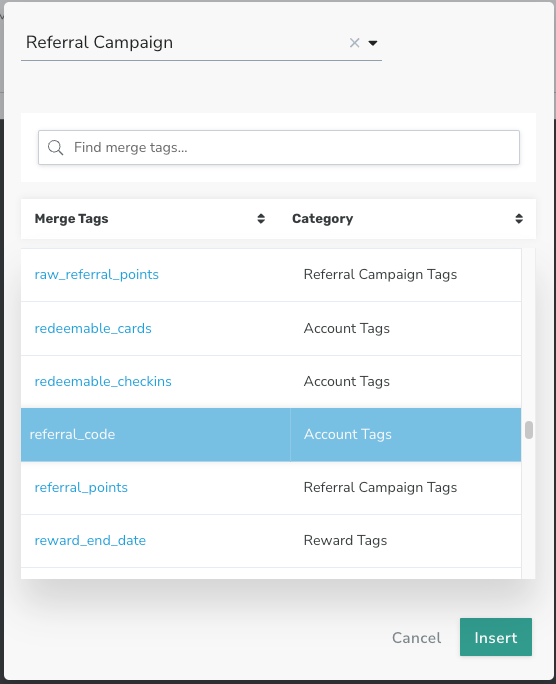
- The tag is then added to the text. You can edit the text as normal.

Use an Email Template in a Campaign or as a Notification Template
Admins are allowed to use templates created via the email editor in touchpoints as long as they have the necessary permissions. Drafts cannot be used in touchpoints. Empty folders cannot be viewed in the templates list in touchpoints. Only published templates can be viewed and used in touchpoints.
All campaigns with messaging (and one email-based notification template) are enabled to use templates created with the email editor tool.
How To Use Templates in Campaigns or System Messages
- To link an email template to a campaign, click the Enable Email Editor toggle in Step 2 of the campaign creation flow. This toggle controls whether the WYSIWYG email editor is visible — it does not control whether emails are sent.
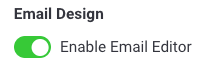
Note: Turning off the Enable Email Editor toggle does not remove your email template or affect email sending. When you disable the toggle, the WYSIWYG editor is hidden, but your previously configured email content is retained and the campaign will continue to send emails as configured. If you navigate to the next step and return to this page, the Enable Email Editor toggle will automatically re-enable and your existing email content will be restored. To fully remove an email template from a campaign, click the remove button directly on the template thumbnail. Review Campaign Message Options for more details.
-OR-
- To use an email template in a notification template, navigate to Loyalty Program > System Messages, select a System Message,and click the Enable Email Editor toggle.
- View the list of templates. Only published templates can be viewed.
- Hover over the thumbnail of a template that needs to be attached.
- Click the Choose this template icon.
- The template will open in the editor.
- Make any necessary changes.
- Click Save & Close. The template will be saved to the touchpoint.
Organizing Your Email Templates
This section explains how to manage, organize, and search for your various email templates.
Template Actions
To take certain actions to a single template:
- Select your desired folder from the Email Templates list page.
- Hover over the template to view the options:
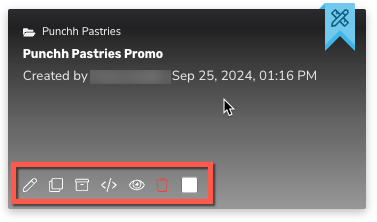
- Edit: Click to open the Email Editor and make changes to the template.
- Duplicate: Click to create a copy of the template. The copy will appear in the same folder as the original.
- Archive: Click to archive the template. This will make the template unavailable in campaigns, etc. for your brand/franchisees.
- Export as HTML: Click to export an HTML file of the template.
- Preview template: Click to preview the template in a separate window.
- Delete: Click to delete the template. This is a permanent action.
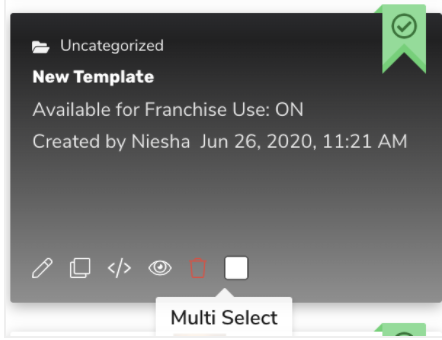
- Multi Select: Use this option to select multiple templates at once. See the following section for more details.
Move Multiple Templates
You may wish to move a template(s) from one folder to another. To do this:
- Select your desired folder from the Email Templates list page.
- Hover on a template.
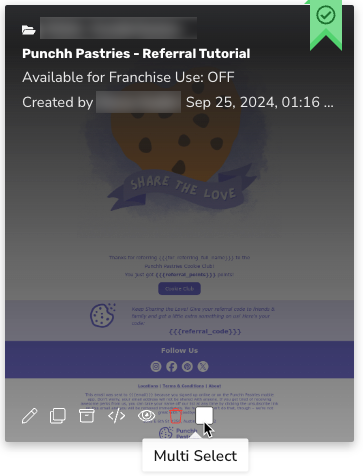
- Click Multi Select.
- Repeat this for all of the templates that need to be moved.
- Once you have selected all required templates, drag and drop them into the destination folder.
To move all templates from a folder:
- Check Multi Select on a template in the source folder.
- Click the More Options drop-down at the top of the page.
- Click Select all templates.
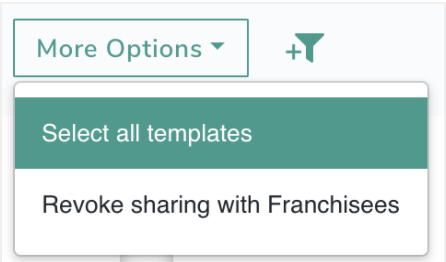
- Drag and drop the templates into the destination folder.
Template Folders
Adding a Folder
- The left side pane of the Email Templates page shows all folders for your brand.
- Most template folders are housed under My Templates. If you have the Franchise module enabled, you will have further options: Shared with Franchise and Franchise Templates (Corporate).
- To add a new folder, click + New Folder at the end the section.
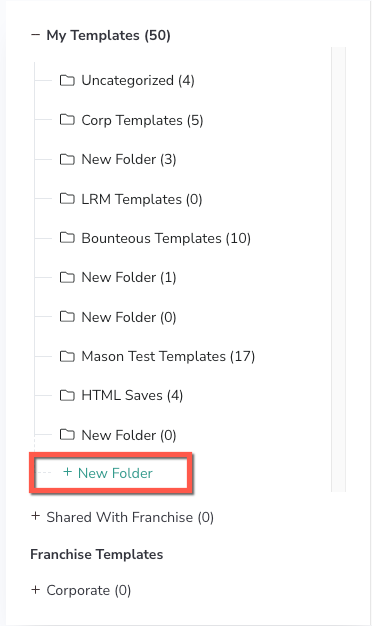
- A folder titled "New Folder" appears at the end of the list.
- Hover over the folder and click the Edit icon to change the name.
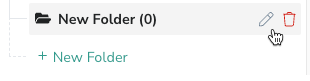
- Click the check icon to save.

Deleting a Folder
Deleting a folder will delete the folder and ALL templates associated with that folder (including those that are Shared with Franchise).
- To delete a folder, hover over the folder and click the Delete icon.
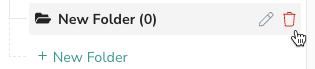
- A confirmation message appears. Click Yes, Delete.
Shared with Franchise
- If you mark a template as Available for franchise use, it appears in the Shared which Franchise section. (The checkbox is located at the bottom right when editing a template.)
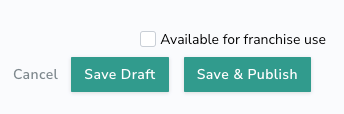
- The folder name and any templates within that folder that have been marked for franchise use appear under the section.
Sort, Filter, and Find a Template
There are several ways to filter and sort your templates so they are easy to find.
Search a Template
- Use the search bar at the top of the page to search for a title or keyword related to the template.
- Make sure you have selected the folder or entire section you would like to search in.
Sorting of Folders in Templates List
- Click the Sort Folders by drop-down to expand the list.
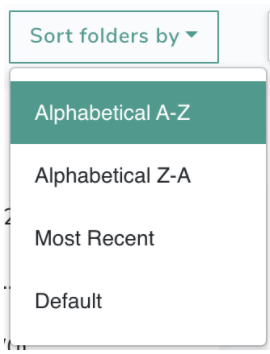
- Choose the necessary option by which you want the folders to be sorted.
Find Franchise
- Locate the Find Franchise drop-down above the folder list.
- Click the drop-down arrow to expand the list.
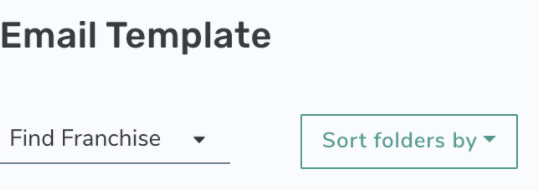
- It will display the list of franchises in the business that have templates.
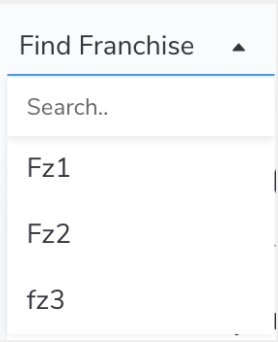
- Select the required franchise. The repository of the franchise will be highlighted.
- To search for a particular franchise, enter the franchise name in the search bar in the drop-down. Matching results will be displayed in the list.
- To clear the filter, click the X icon in the drop-down.
More Filters
- Click the Filter icon next to the search bar.
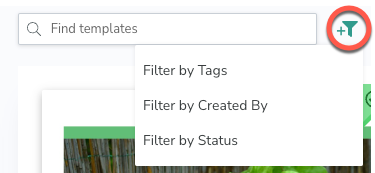
- The following values will appear:
- Filter by Tags
- Click Filter by Tags.
- The filter field appears.
- Enter the tag value to be searched.
- The list will filter and display results matching the tags.
- Filter by Created By
- Click Filter by Created By.
- The filter field appears.
- Enter the user to be searched.
- The list will filter and display results matching the user.
- Filter by Status
- Click Filter by Status.
- The filter field appears.
- Click the filter drop-down to see the following values for Corporate admin:
- Draft
- Available for Corporate Use
- Available for Franchise Use
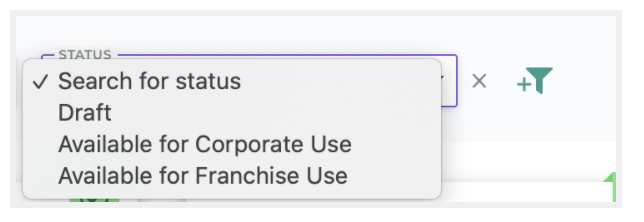
- Click the filter drop-down to see the following values for Franchise admin:
- Draft
- Published
- Select the value. The list will filter and display results matching the status.
- Any filter can be cleared by clicking on the close icon next to the filter field.
- Multiple filters can be applied to filter the list.
- Filter by Tags
Permissions and Access
This section explains how to restrict access to certain content within your templates, as well as the various permission levels available. This can be especially important if your brand has the Franchise module enabled.
Lock and Unlock Rows/Content Areas
Admins with full access can lock rows or content in a row in a template so that admins with restricted access cannot make changes to the locked portions in the template.
How To Lock/Unlock Rows
Admins with full access can lock rows or content in a row in a template so that admins with restricted access cannot make changes to the locked portions in the template.
- Open the email editor for a template.
- Select a row in the design editor.
- Toggle the Unlocked option to Locked so the row is restricted from Franchise edits.
-OR- -
Toggle the Locked option to Unlocked so the row is open to Franchise edits.
How To Lock/Unlock Content Areas
- Select a content area in a row.
- Toggle the Unlocked option to Locked so the row is restricted from Franchise edits.
-OR- - Toggle the Locked option to Unlocked so the row is open to Franchise edits.

Share and Revoke Sharing of Template(s)
This feature is available for all Corporate full-access admins in the email templates list.
How To Share/Revoke Sharing of a Single Template
- Go to the Shared with Franchise repository in the Templates list.
- Edit the template.
- Check the Available for Franchise use checkbox to share, or uncheck the box to revoke sharing.
- Click Save & Close.
When template sharing is revoked, the template is moved to only the My Templates repository under the instance of the same folder where it was existing in 'Shared with Franchise' repository. Revoking will not affect it if the template is already attached in any touchpoint. If a folder in the 'Shared with Franchise' repository does not have any shared template, then it will be hidden from the repository view.
How To Share/Revoke Sharing of Multiple Templates
- Go to the My Templates folder from where you want to share templates.
- Hover on a template and click Multi Select.
- Repeat this for all of the templates that need to be shared.
- Click the More Options drop-down at the top of the page.
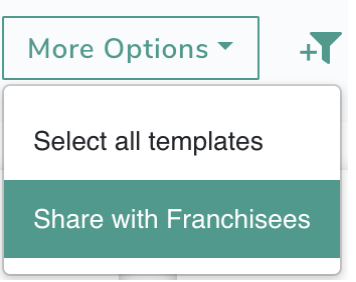
- Click Share with Franchisees.
- A confirmation pop-up appears. Click the Yes, Share button in the pop-up.
- All of the checked templates will be shared to Franchises.
- To share all templates from a folder:
- Hover on a template and click Multi Select.
- Click the More Options drop-down at the top of the page.
- Click Select all templates.
- Click the More Options drop-down again.
- Click Share with Franchisees.
- To revoke sharing:
- Click More Options to expand the drop-down.
- Click Revoke sharing with Franchisees all templates.
Permissions
There are four permissions associated with the Email Editor:
- Email Editor - Full Access
- Full access allows admins to create, modify, duplicate, and delete email templates and saved rows (reusable rows). Admins can lock/unlock content in the template. Admins can also predefine subject lines that can be used when using the template in touchpoints (i.e., in Campaign, System Messages, Membership Tiers, Survey, and any other place in the platform where the email editor is embedded. All permissions associated with this access apply for both corporate and franchise. But the corporate hierarchy does provide some privileges. Corporate can create templates for corporate use and also share them with franchises. Corporate can also use the templates created by franchisees.
- Email Editor - Restricted Access
- Restricted access allows admins to use email templates, media, and saved rows (reusable rows) published by full-access admins. Admins cannot create, modify, duplicate, and delete email templates and saved rows. Admins cannot make changes to locked content in the template. All permissions associated with this access apply for both corporate and franchise.
- Email Editor - Empty Rows Access
- Empty rows access allows admins to use empty and default rows in the editor when creating templates. By default, full access users are allowed to use empty and default rows.
- Subject Line Access for Emails
- This permission allows admins edit access to subject line for email message component field across all of the touchpoints on the platform (e.g., Campaigns, System Messages, Membership Tiers, etc.). Admins without this permission will only have read access to the subject field of email message component. They can use "Subject Line Recommendations" as configured on email templates by admins with "Email Editor - Full Access" permission. Admins will see a field "Subject Line Recommendations" across all touchpoints. Admins can choose one of the recommended subjects to go out in the emails. Also, if they have the "Subject Line Access for Emails" permission, they can edit or add a completely new subject to their emails.
When Franchise Module Is Enabled
- Corporate users with full access
- Can create drafts for their own use
- Can create and publish template for their own use
- Can create and publish template for franchise use
- Can create a reusable row (saved row) and publish for their own use
- Can create a reusable row (saved row) and publish for franchise use
- Can access drafts, templates, and saved rows published by franchises
- Can edit, delete, duplicate drafts, templates, and saved rows published by franchises
- Can lock a complete row (Header, Footer) in a template so that restricted-access admins can NOT make any changes to the row
- Can lock a particular row, and leave a module (section of row) unlocked as a placeholder for restricted-access admins to configure
- Can leave a row unlocked as a placeholder for restricted-access admins to fill
- Will have the following repositories in their template listing page visualization, 'My Templates' repository, 'Shared with Franchise' repository, and separate repository for each franchise under them
- Can see drafts and published in 'My Templates' repository; can see only templates shared with franchises in 'Shared with Franchise' repository; can see drafts and published templates of franchises in franchise repositories
- Corporate users with restricted access
- Have read-only access to templates and saved rows published by corporate full-access admin
- Have read-only access to templates and saved rows published by franchises
- Can use the available templates and saved rows in touchpoints
- Cannot edit a locked row or locked module or the contents in it
- Will have the following repositories in their template listing page visualization, 'My Templates' repository, 'Shared with Franchise' repository, and separate repository for each franchise under them
- Can see drafts and published in 'My Templates' repository; can see only templates shared to franchises in 'Shared with Franchise' repository; can see drafts and published templates of franchises in franchise repositories.
- Franchise users with full access
- Can create drafts
- Can publish template for their own use (this can be accessed by corporate)
- Has read-only access to templates and saved rows published by corporate in their respective listing page
- Can lock a complete row (Header, Footer) in their own template so that restricted-access admins can NOT make any changes to the row
- Can lock a particular row, and leave a module (section of row) unlocked as a placeholder for restricted-access admins to configure
- Can leave a row unlocked as a placeholder for restricted-access admins to fill
- Can create a reusable row (saved row) and publish for their own use (this can be accessed by corporate)
- Will have the following repositories in their template listing page visualization, 'My Templates' repository, and 'Shared with Me' repository
- Can see drafts and published in 'My Templates' repository; can see only templates shared by corporate in 'Shared with Me' repository
- A franchise admin cannot see templates of other franchises
- Franchise users with restricted access
- Has read-only access to templates and saved rows published by their franchise full-access admin
- Has read-only access to templates and saved rows shared by corporate in their respective listing page
- Can use the available templates and saved rows in touchpoints
- Cannot edit a locked row or locked module or the contents in it
- Will have the following repositories in their template listing page visualization, 'My Templates' repository, and 'Shared with Me' repository
- Can see drafts and published in 'My Templates' repository; can see only templates shared by corporate in 'Shared with Me' repository
- A franchise admin cannot see templates of other franchises
When Franchise Module Is Disabled
- There is no hierarchy of corporate and franchise
- Admins with full access
- Can create drafts for their own use
- Can create and publish template for their own use
- Can create a reusable row (saved row) and publish for their own use
- Can lock a complete row (Header, Footer) in a template so that restricted-access admins can NOT make any changes to the row
- Can lock a particular row, and leave a module (section of row) unlocked as a placeholder for restricted-access admins to configure
- Can leave a row unlocked as a placeholder for restricted-access admins to fill
- Admins with restricted access
- Has read-only access to templates and saved rows published by corporate full-access admin
- Can use the available templates and saved rows in touchpoints
- Cannot edit a locked row or locked module or the contents in it
Related Articles:
