Tutorial: Making Your First Email Template
Complete the following tutorial to create an example email template from start to finish.
Check out Email Templates (Email Editor) for a more in-depth look at this functionality.
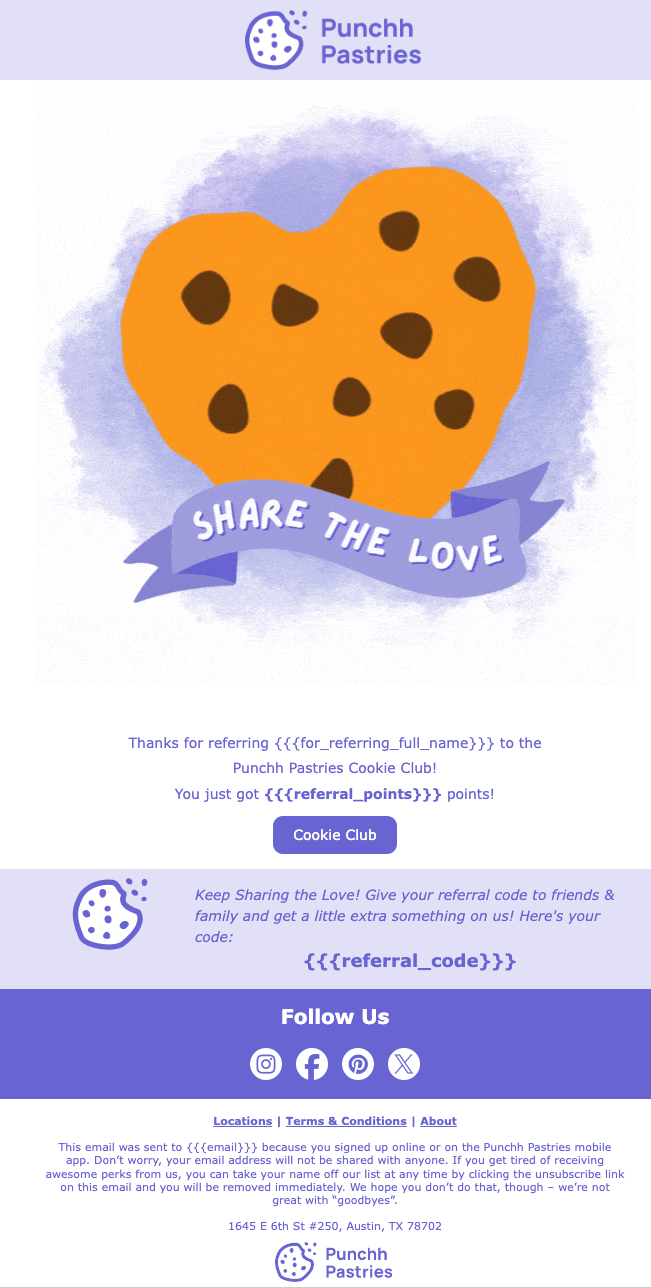
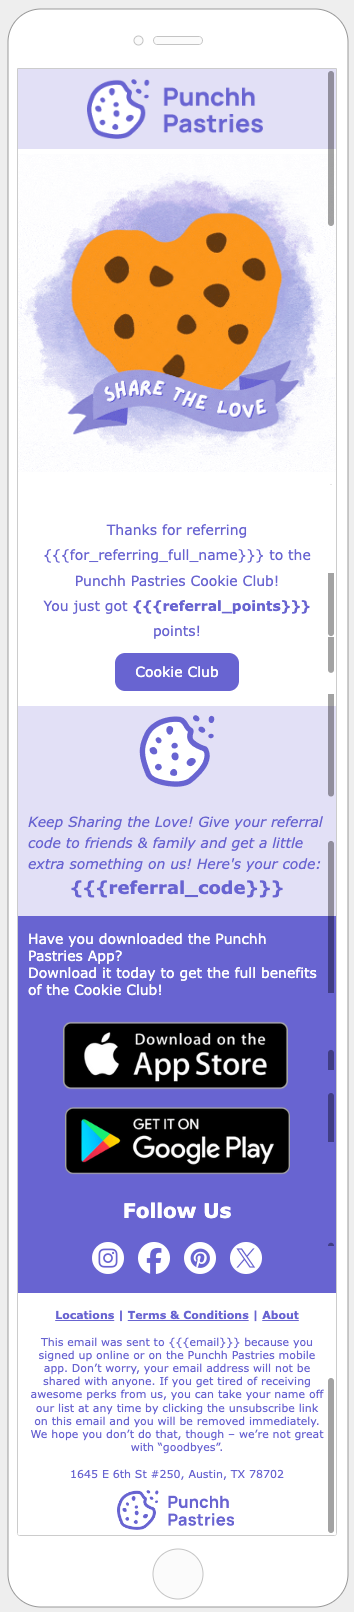
You will be creating the following email template (desktop and mobile versions shown below) for a fictional business called Punchh Pastries. This template will be used for their referral campaigns. All images for this tutorial can be found in the Files section at the bottom of this article. There are six main steps involved in this article; the objective of each is described below:
- Step 1: Upload Images
- Objective: Upload the images from the Files section at the end of this article to the Image Manager in the Punchh Platform.
- Step 2: Create a Folder
- Objective: Create a folder in the Email Templates list page to house the tutorial template you create.
- Step 3: Open a New Draft Template and Adjust the Settings
- Objective: Start creating a draft new template and change the overall settings for the email.
- Step 4: Design
- Objective: Create the structure and design of the email template row by row (eight rows total).
- Step 5: Preview
- Objective: Preview the completed email template as it would appear on desktop and mobile.
- Step 6: (Optional) Clean Up
- Objective: You have the option to delete the folders, images, and drafts created in the Image Manager and Email Templates pages.
Step 1: Upload Images
- Navigate to Marketing Automation > Image Manager.
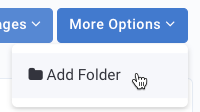
- Click the More Options drop-down menu.
- Click Add Folder.
- Name the folder "Punchh Pastries Tutorial."
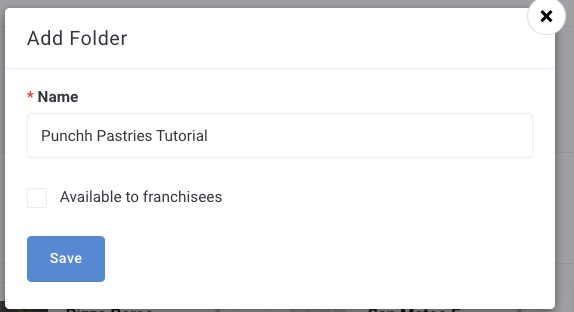
- Click Save.
- Scroll through the Media Manager and click the folder you just created to open it.
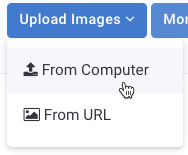
- Click Upload Images > From Computer.
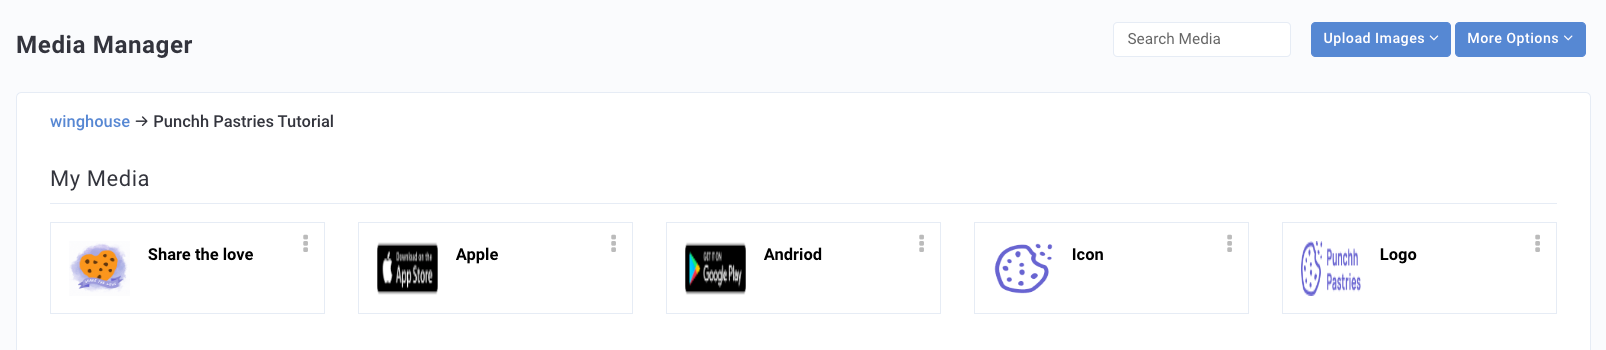
- Upload each of the images within the tutorial folder (located in the files section at the end of this article). Name each image similar to the names shown below.
Step 2: Create a Folder
- Navigate to Marketing Automation > Email Templates.
- In the left side panel, scroll to the end of My Templates and click + New Folder.
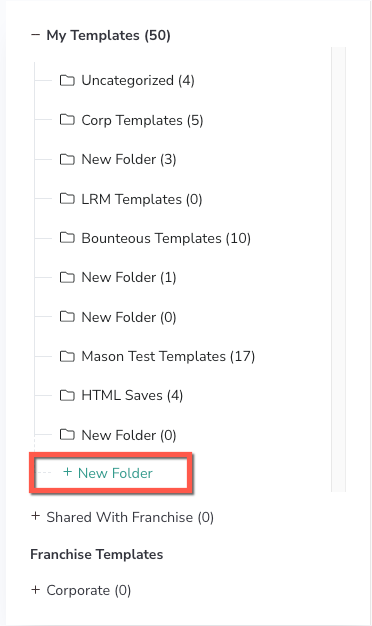
- A folder titled "New Folder" appears at the end of the list.
- Hover over the folder and click the Edit icon.
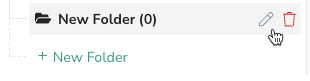
- Change the folder name to "Punchh Pastries Tutorial."

- Click the check icon to save.
Step 3: Open a New Draft Template and Adjust the Settings
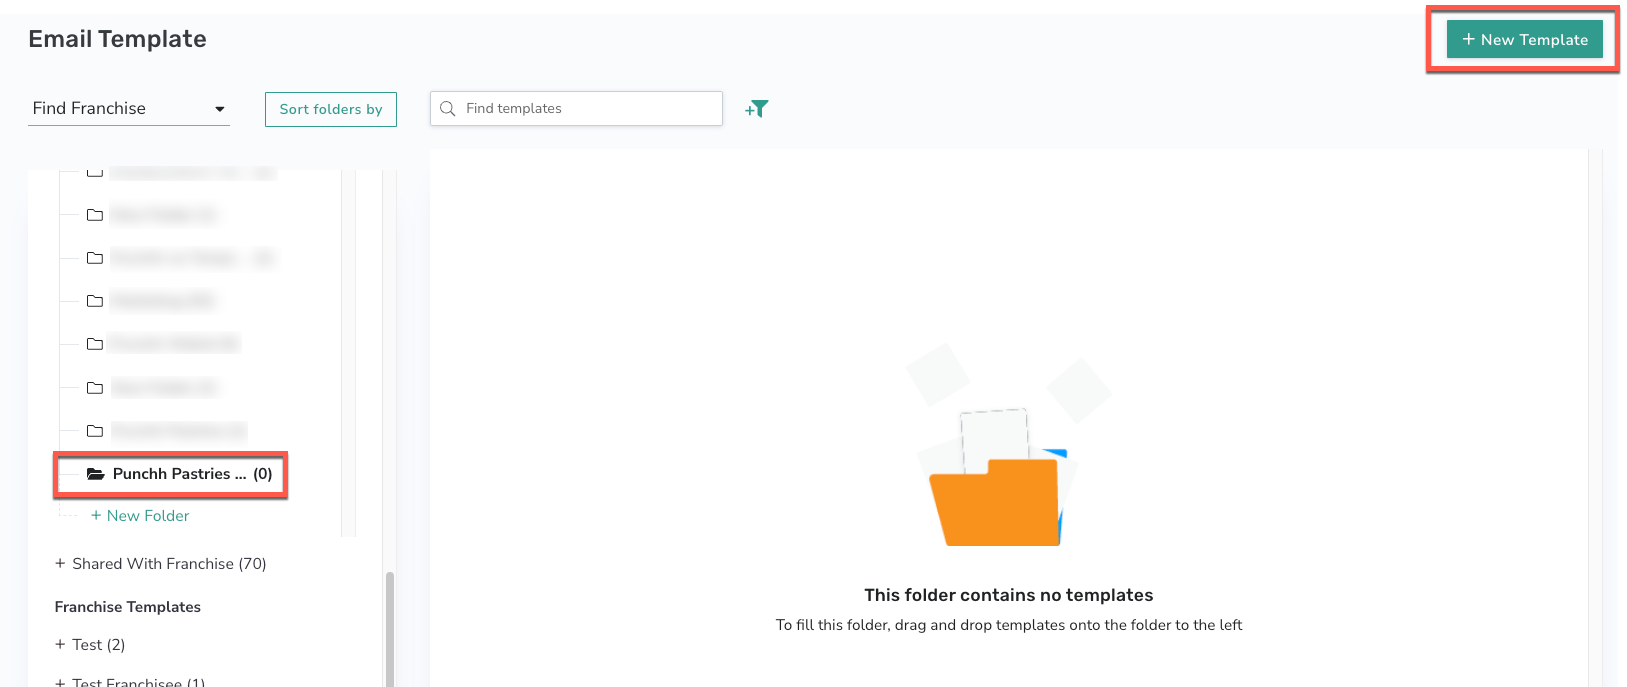
- In Marketing Automation > Email Templates, click the "Punchh Pastries Tutorial" folder you created in Step 2.
- Click the + New Template button.
- At the top left of the page, change the name of the template to "Punchh Pastries Tutorial."
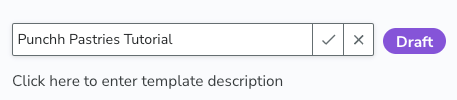
- Click the check icon to save.
- Click the Settings tab on the right.
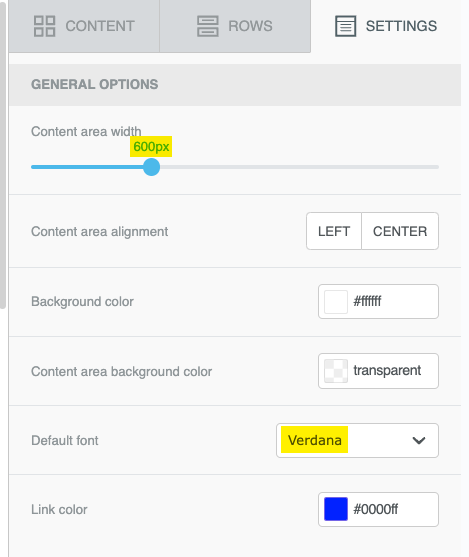
- Change Content area width to 600px.
- Change Default font to Verdana.
Step 4: Design
Below is the row structure for the email template tutorial you will be creating. There are eight rows total, and each row will be fully designed one at a time in the steps below. You can set up the all of the row structures beforehand or add them as you go through the design process.
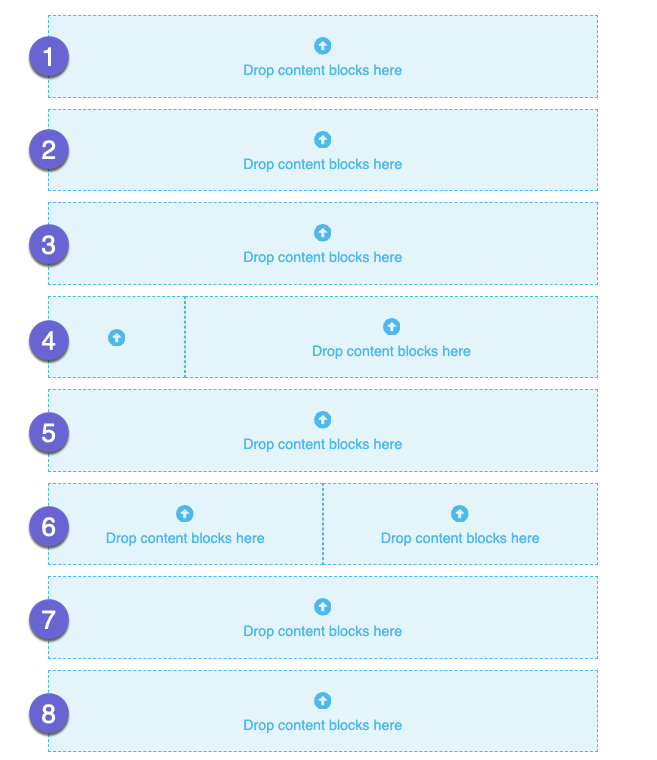
- To add a row, click the Rows tab.
- Drag the desired row format into the design editor.
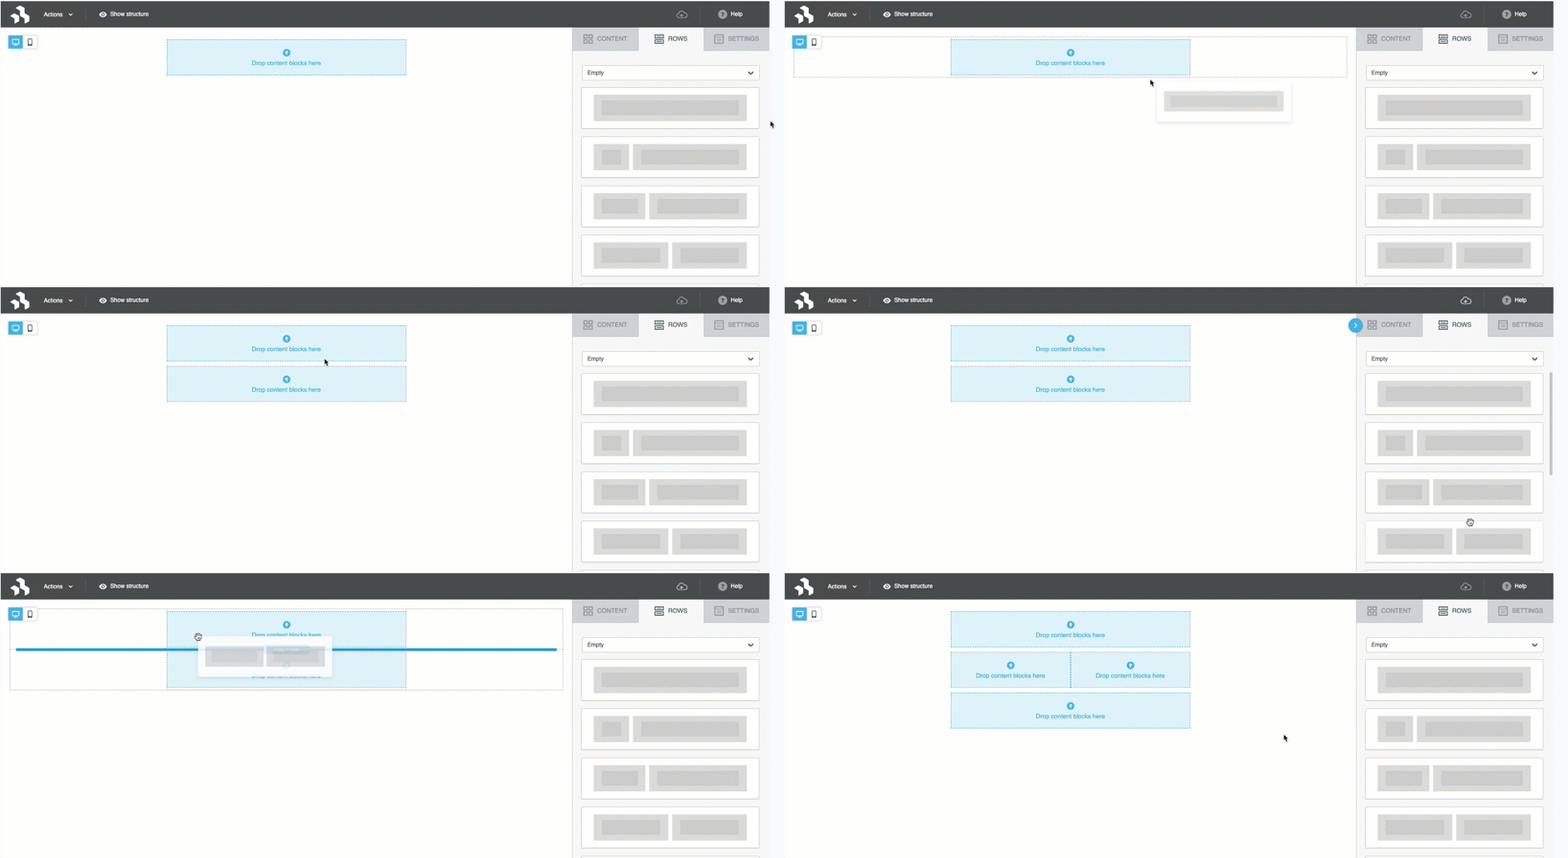
Row 1
- Click the Content tab and drag the Media content block into row one.
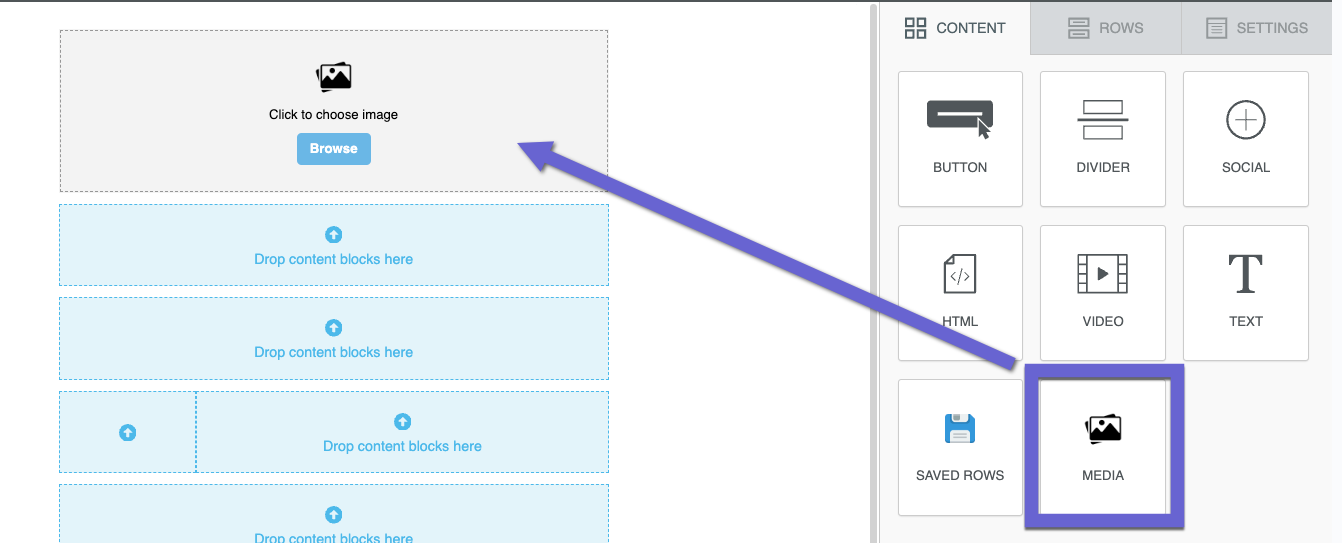
- Click Browse and upload the Logo image.

- Make sure the Content tab is selected to open the Content Properties pane.
- Toggle OFF the Auto width option.
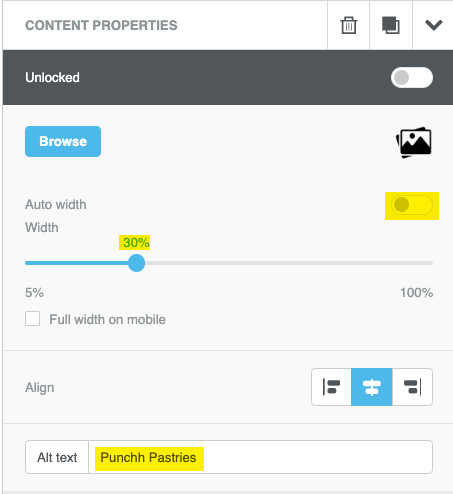
- Manually change the width to 30%.
- Change Alt text to "Punchh Pastries". (This is the text that will show when a user hovers their mouse over the logo.)
- Under Action, change the link to punchh.com (or use your own brand website). The default drop-down selection is Open web page, so the user will be navigated to the website if they click the logo.
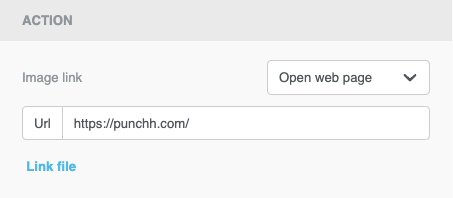
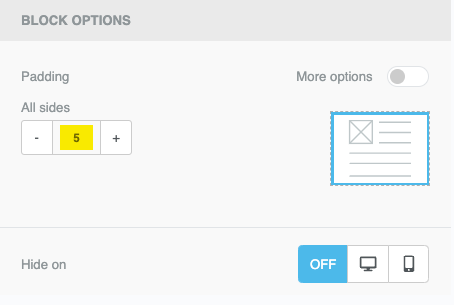
- Under Block Options, adjust the Padding of the content to 5 on all sides.
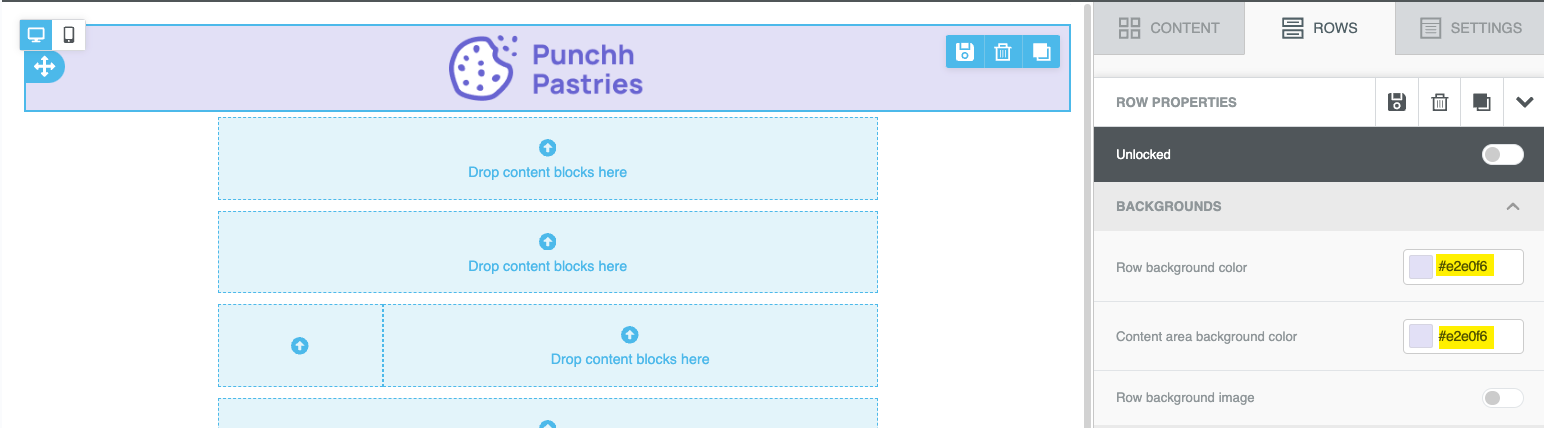
- Hover your mouse over the row so that the full row is highlighted. Click to select the full row.
- In the Rows tab, change Row background color and Content area background color to #E2E0F6 from the default "transparent."
Row 2
- Click the Content tab and drag the Media content block into row two.
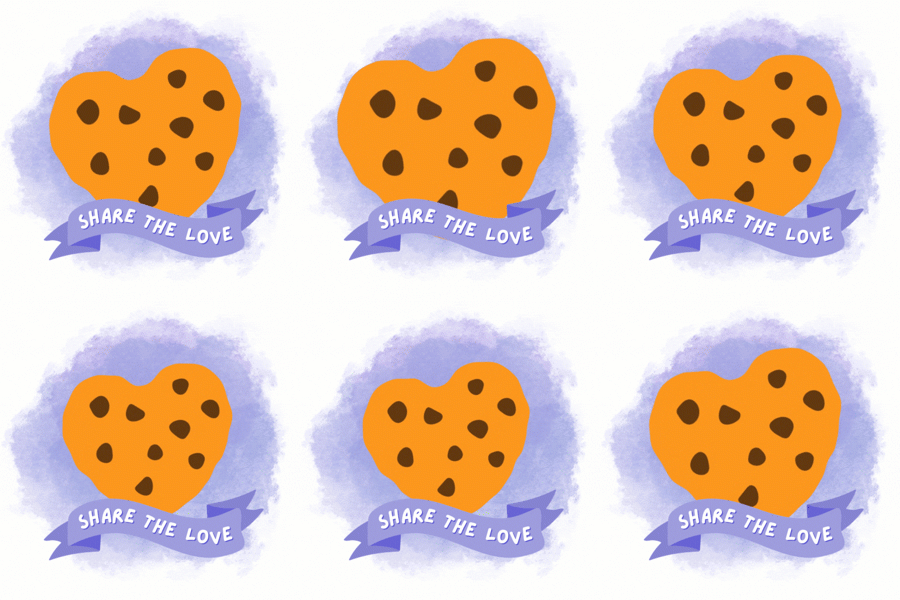
- Click Browse and upload the "Share the Love" GIF.
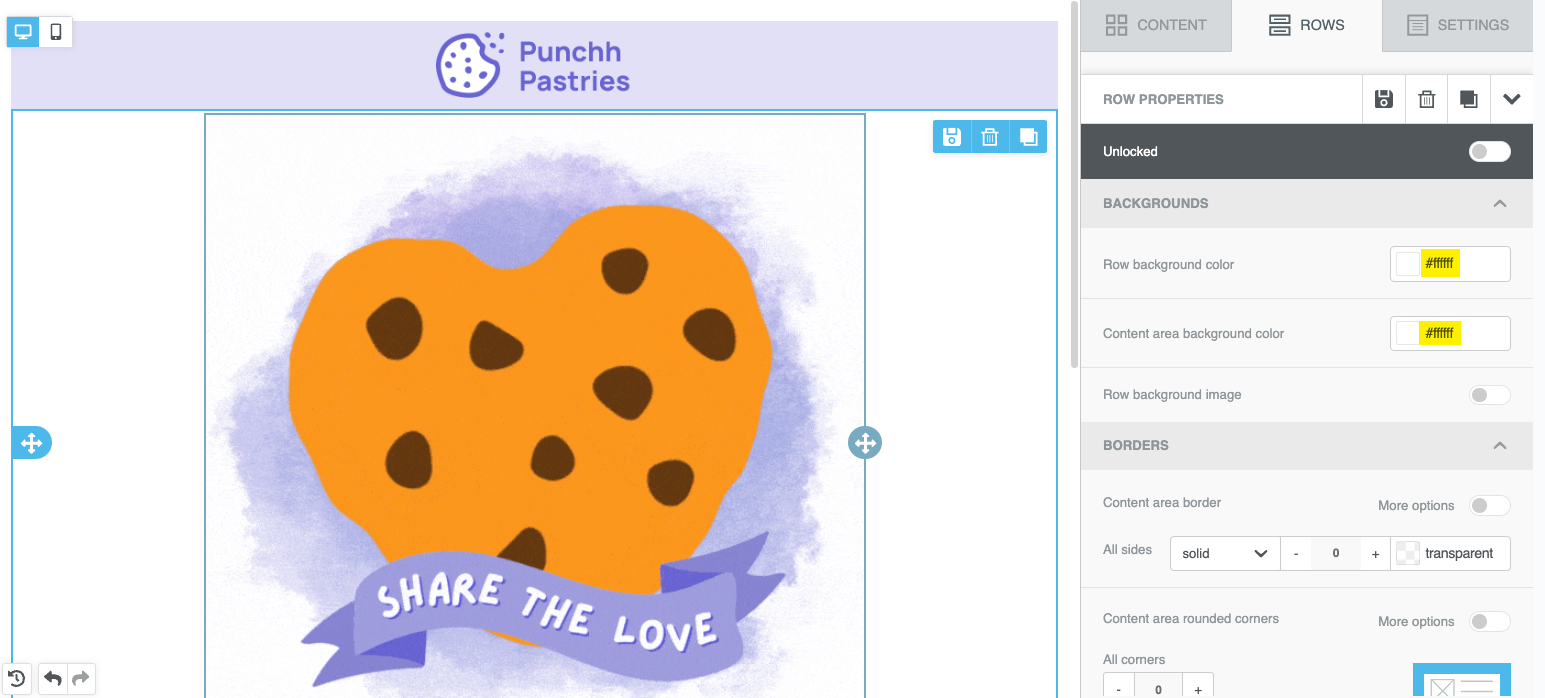
- Hover your mouse over the row so that the full row is highlighted. Click to select the full row.
- Change Row background color and Content area background color to white (#FFFFFF). This way, if a user views the email with dark/night mode on their device, this section will still remain white.
Row 3
- Click the Content tab and drag the Text content block into row three.
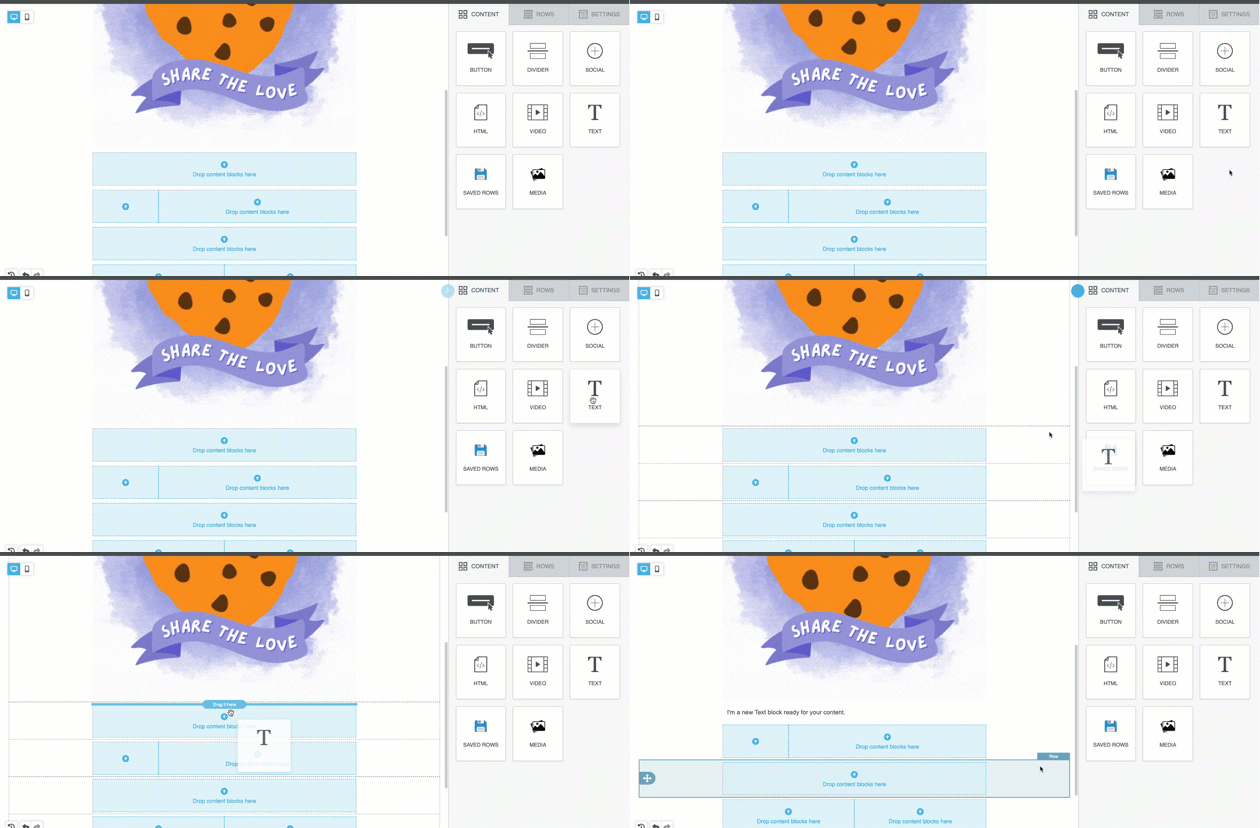
- Drag a Button content block immediately below the Text block in row three.
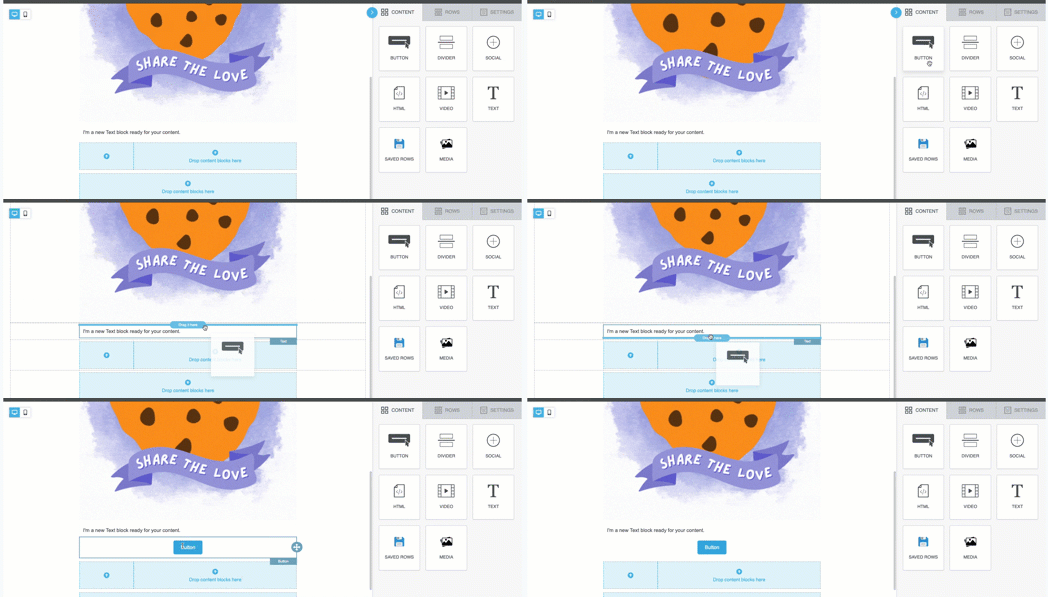
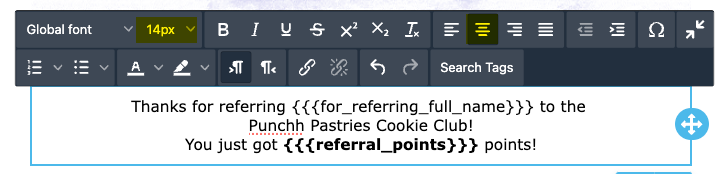
- Click into the Text content block to edit. Copy and paste the following content:
Thanks for referring {{{for_referring_full_name}}} to the
Punchh Pastries Cookie Club!
You just got {{{referral_points}}} points! - Change text size to 14px and make sure the {{{referral_points}}} tag is bold.
- Center the text.
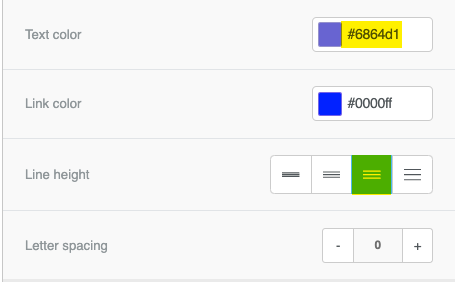
- In the Content Properties pane, change the text color to #6864d1.
- Select the third (180%) Line Height option.
- Click the Button content block.
- Change the text to "Cookie Club":

-
In the Content Properties pane, change the URL to your brand's loyalty program login page, or you can use "punchhpastries.com/cookieclub/login" as placeholder text. (This button should lead the user to the login page of their loyalty account so they can sign in.)
Note: As Punchh Pastries is not a real company, this example URL will not go to any site.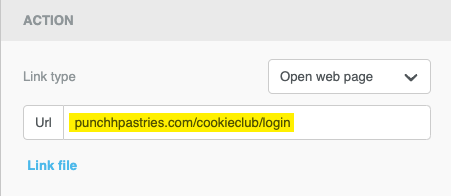
- Under Button Options, change the background color to #6864d1.

- Change the border radius to 10 for a more rounded look.

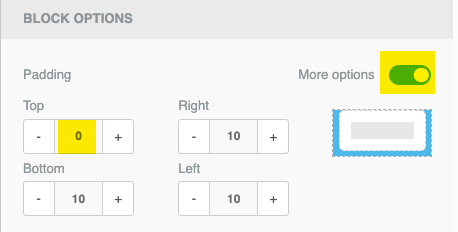
- Under Block Options, toggle on More options for Padding.
- Change the Top padding to "0."
Row 4
- Click the Content tab and drag a Media content block into the left column of row four.
- Drag a Text content block into the right column of row four.
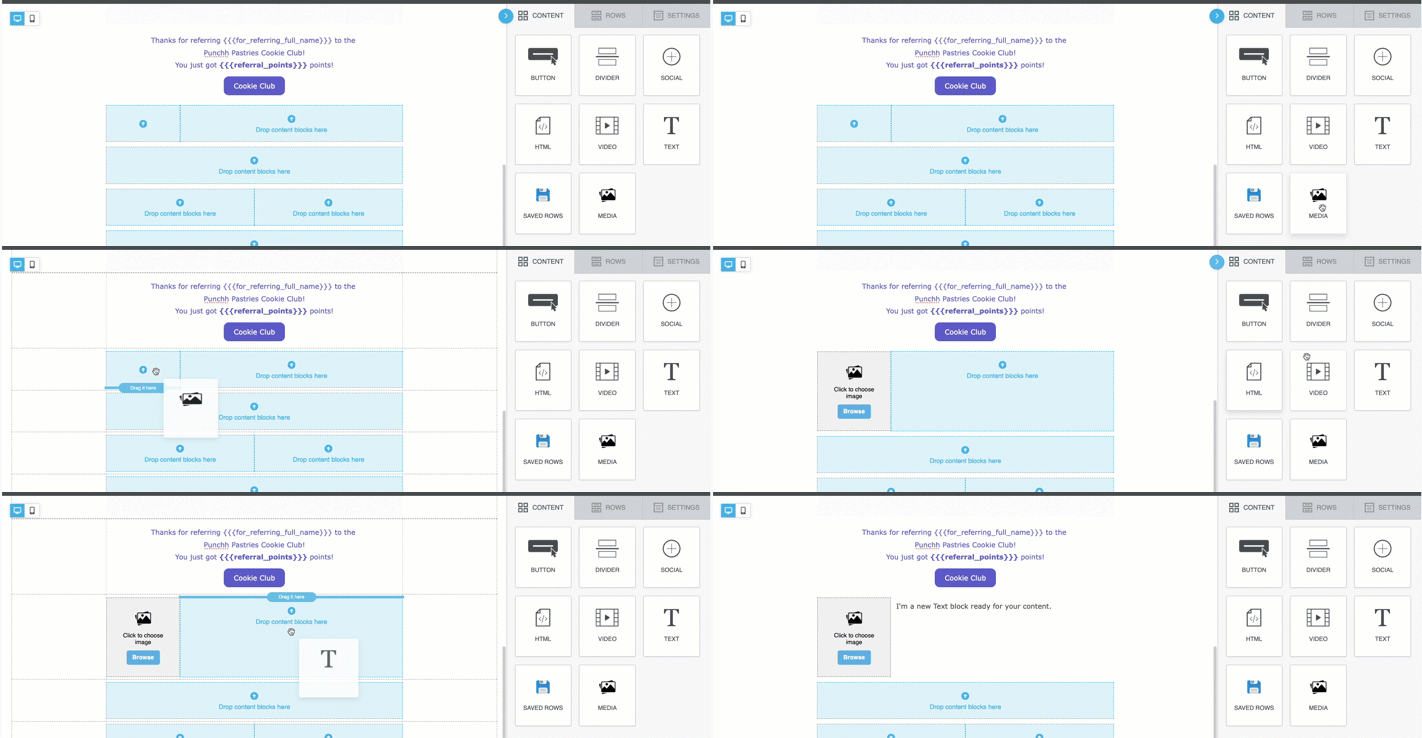
- Click the Media content block. Click Browse and upload the Icon image.
- Click into the Text content block. Copy and paste the following content:
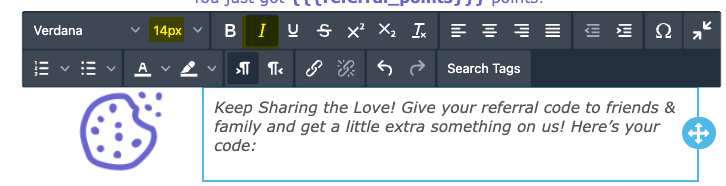
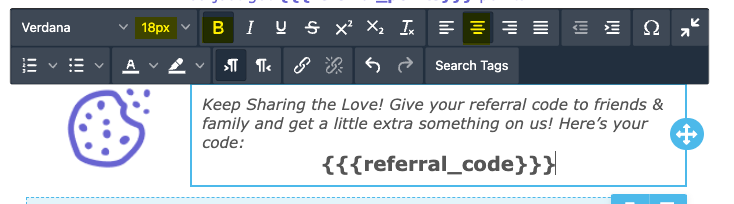
Keep Sharing the Love! Give your referral code to friends & family and get a little extra something on us! Here’s your code:
- Highlight the text and change the text size to 14px. Make sure the text appears in italics.
- Press Enter to create a new line within the text content box. Paste the following content:
{{{referral_code}}}
- Highlight the text and change the text size to 18px. Make sure the text appears bold.
- Center just this portion of the text.
- In the Content Properties pane, change the text color to #6864d1.
- Select 150% for the Line height.

- Hover your mouse over the row so that the full row is highlighted. Click to select the full row.
- Change Row background color and Content area background color to #E2E0F6.

Row 5
- Click the Content tab and drag a Text content block into row five.
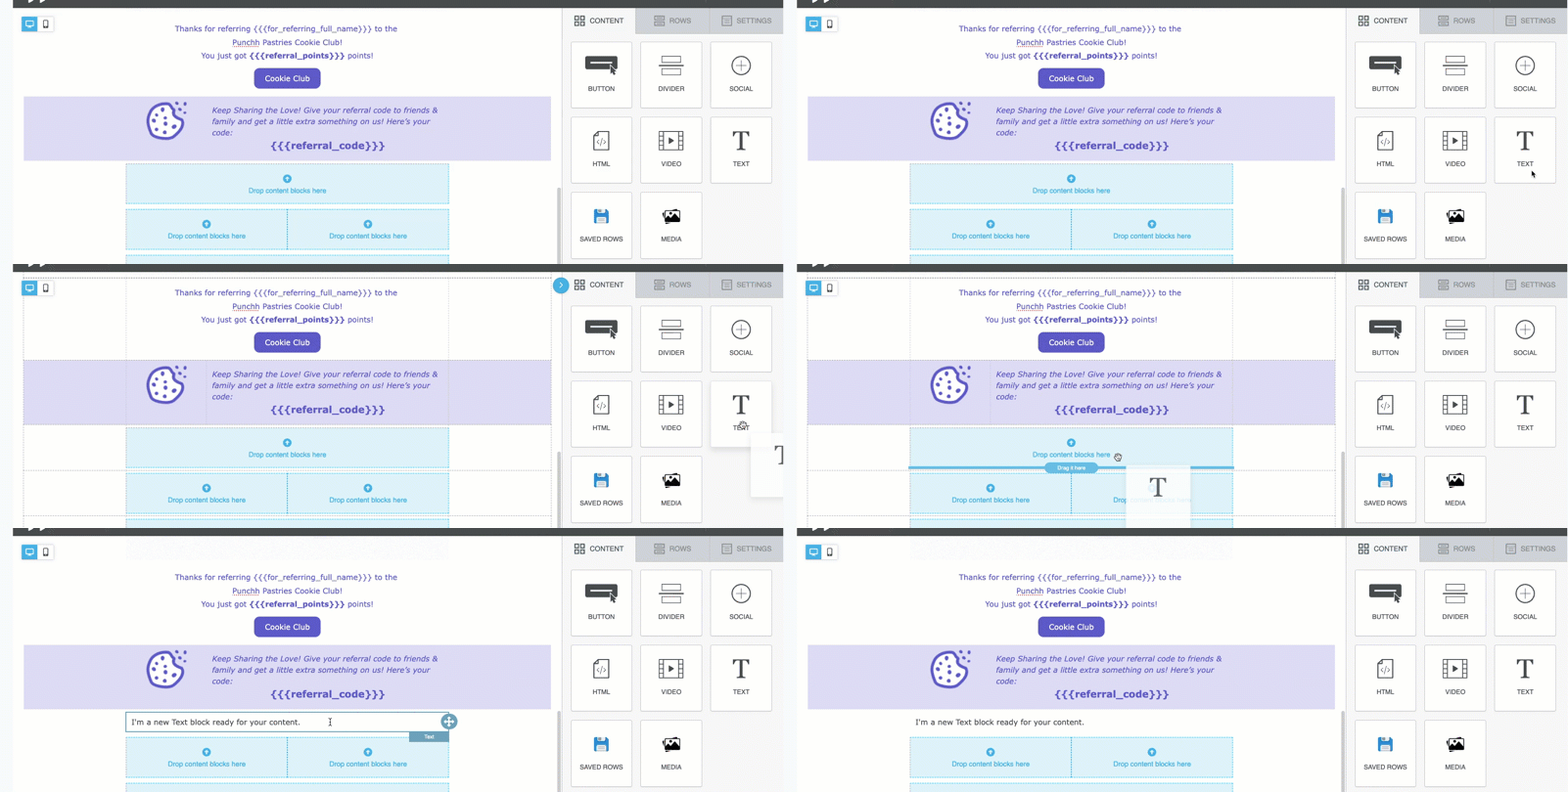
- Click into the Text content block. Copy and paste the following content:
Have you downloaded the Punchh Pastries App?
Download it today to get the full benefits of the Cookie Club! - In the Content Properties pane, change the text color to white #FFFFFF.
- Hover your mouse over the row so that the full row is highlighted. Click to select the full row.
- Change Row background color and Content area background color to #6864d1.

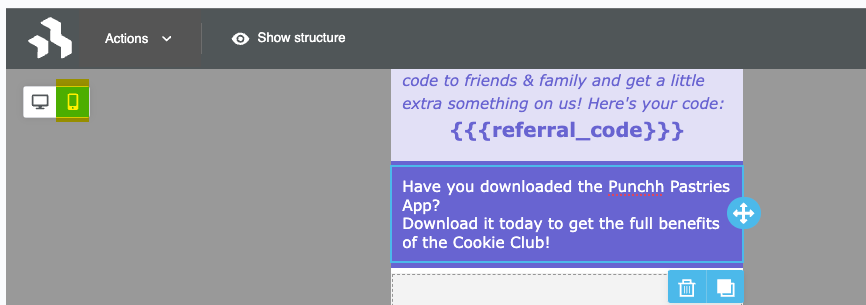
- Under Layout, select Hide on > Desktop, as this content (and Row 6) only pertain to users who are viewing this email on mobile.

- The row will become blurred in the current desktop view. Toggle over to the mobile view to view how the row appears on a mobile device.
Row 6
- Click the Content tab and drag a Media content block into both columns of row six.
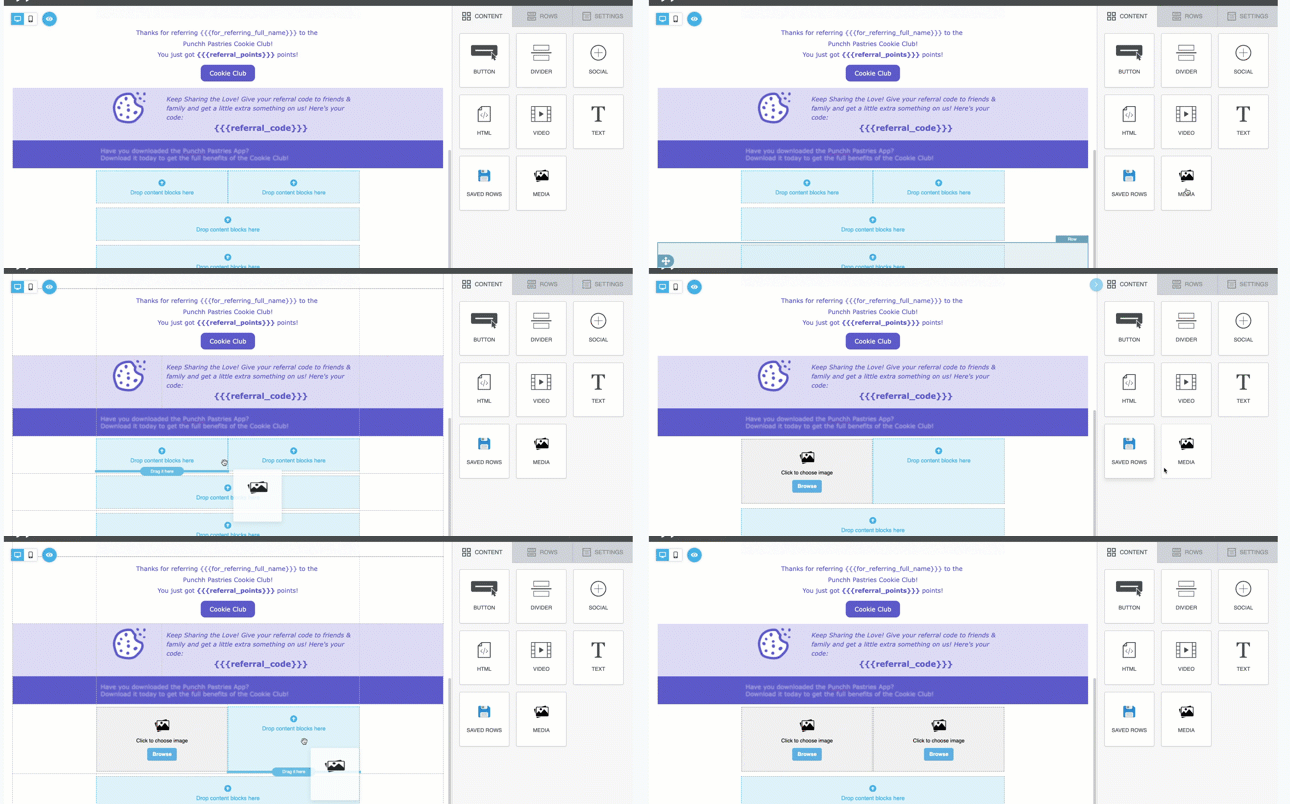
- Click the left content block. Click Browse and upload the Apple image.
- In the Content Properties pane, toggle OFF Auto width.
- Change the width to 75%.

-
Under Action, change the URL text to your brand's app link for the App Store, or you can use "https://apps.apple.com/us/app/punchhpastries/id1234" as placeholder text.
Note: As Punchh Pastries is not a real company, this example URL will not go to any site.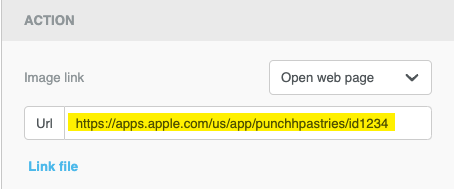
- Click the right content block. Click Browse and upload the Android image.
- In the Content Properties pane, toggle OFF Auto width.
- Change the width to 75%.

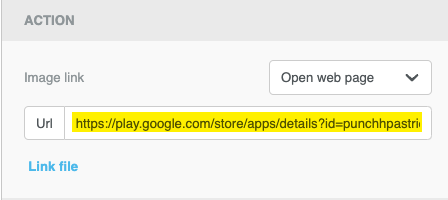
- Under Action, change the URL text to your brand's app link for the Play Store, or you can use "https://play.google.com/store/apps/details?id=punchhpastries" as placeholder text.
Note: As Punchh Pastries is not a real company, this example URL will not go to any site.
- Hover your mouse over the row so that the full row is highlighted. Click to select the full row.
- Change Row background color and Content area background color to #6864d1.
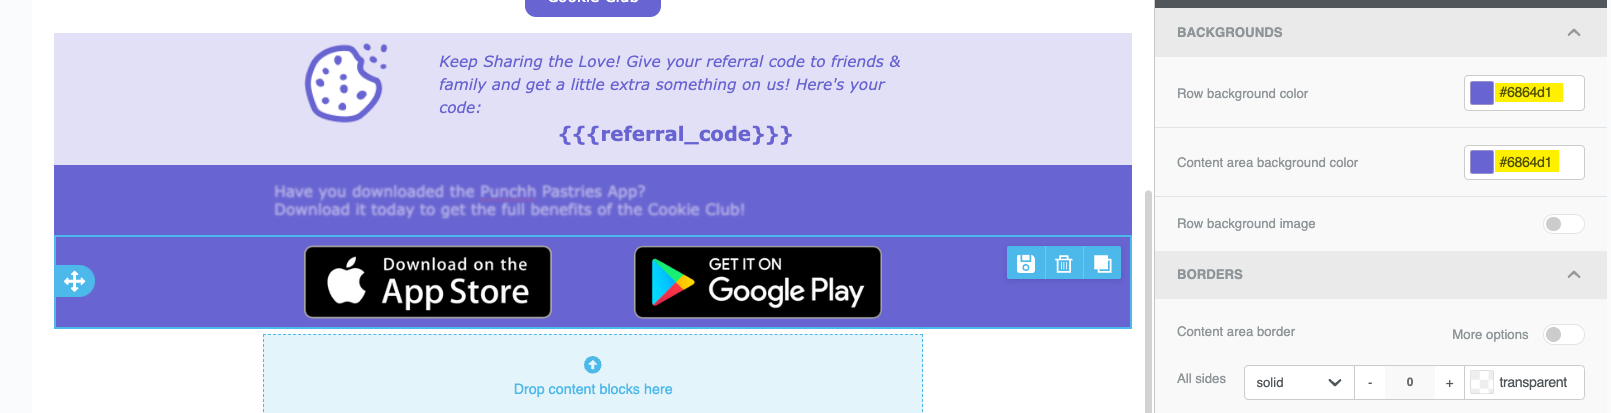
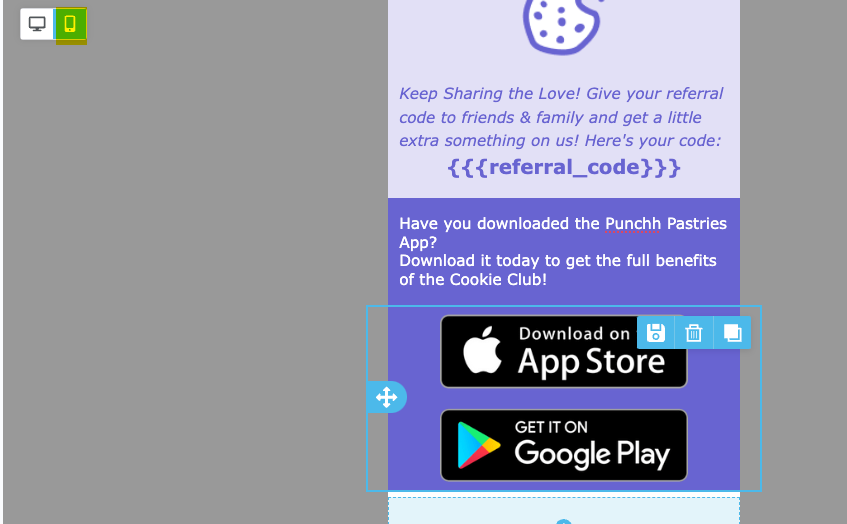
- Under Layout, select Hide on > Desktop, as this content (and Row 5) only pertain to users who are viewing this email on mobile.

- The row will become blurred in the current desktop view. Toggle over to the mobile view to view how the row appears on a mobile device.
Row 7
- Click the Content tab and drag a Text content block into row seven.
- Drag a Social content block immediately under the Text block in row seven.
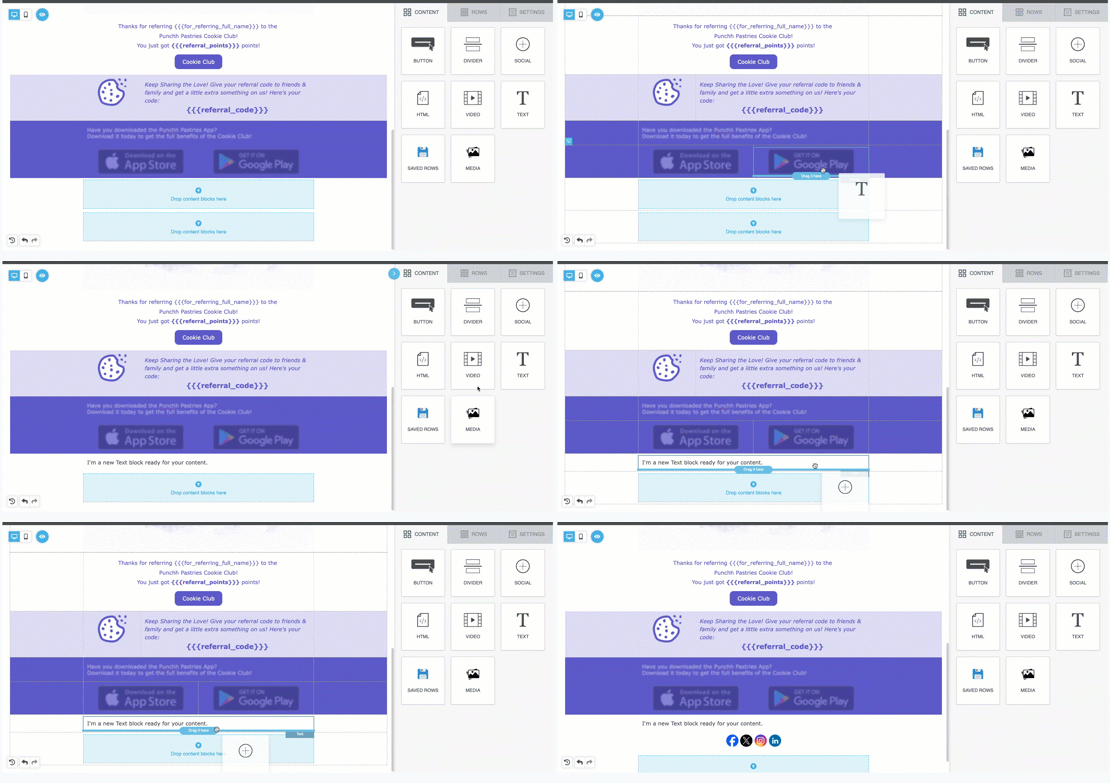
- Click in the text content area and copy in the following content:
Follow Us
- Highlight the text and change the text size to 20px.
- Center the text.

- In the Content Properties pane, change the text color to white #FFFFFF.
- Hover your mouse over the row so that the full row is highlighted. Click to select the full row.
- Change Row background color and Content area background color to #6864d1.
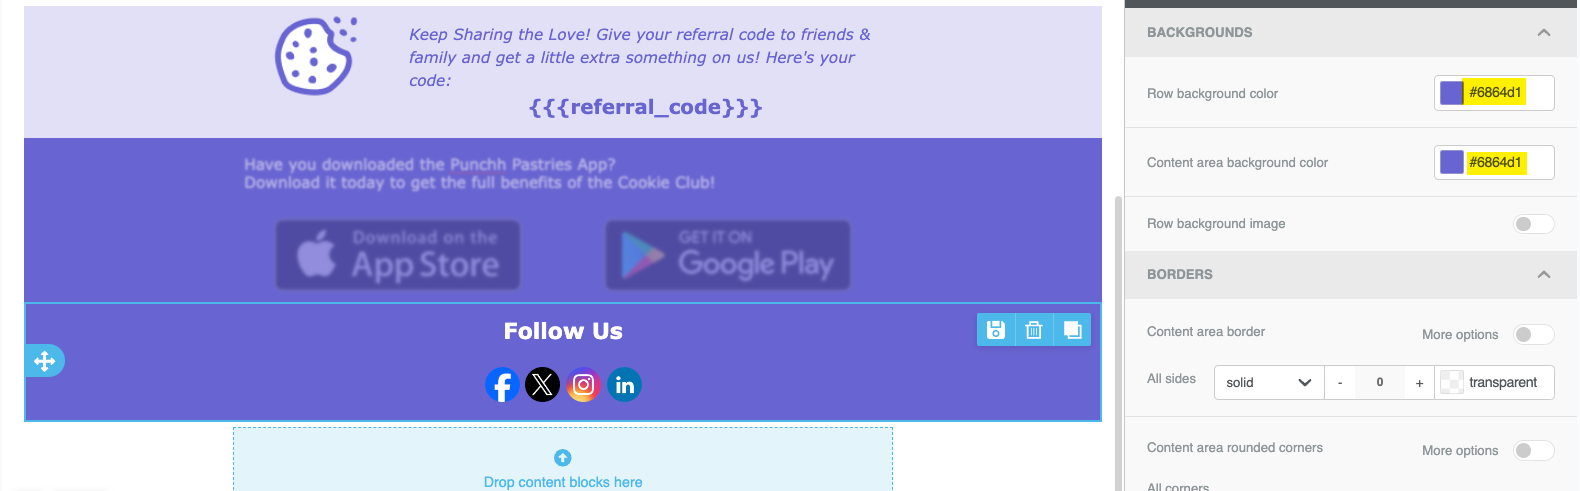
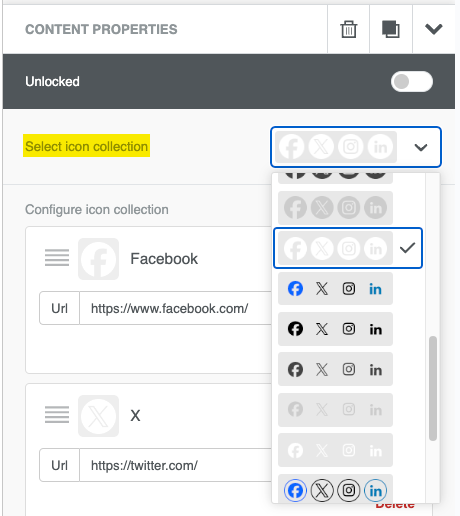
- Click the Social content area.
- In the Content Properties pane, select the all-white icon collection about mid-way down the drop-down menu.
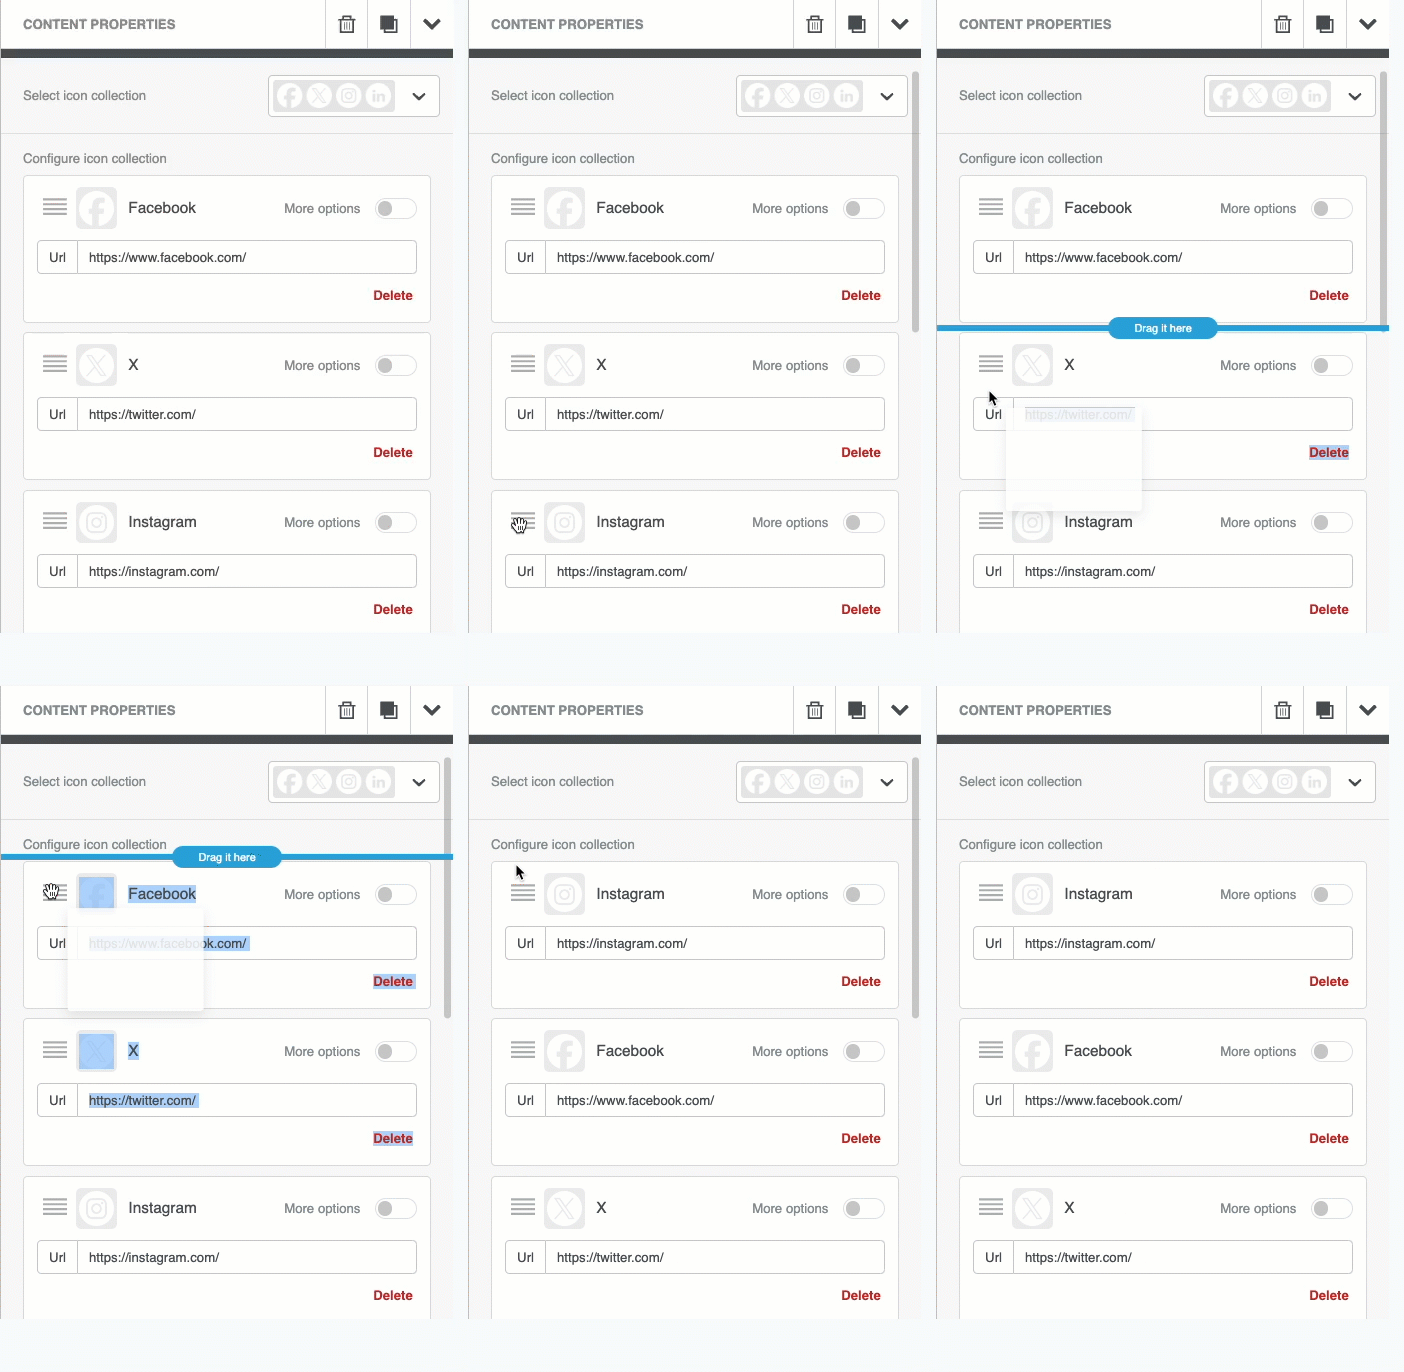
- Select the four-line icon next to Instagram and drag it to the top so it appears first in the list.
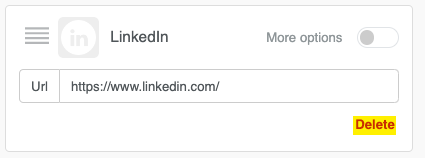
- Click Delete for the LinkedIn icon.
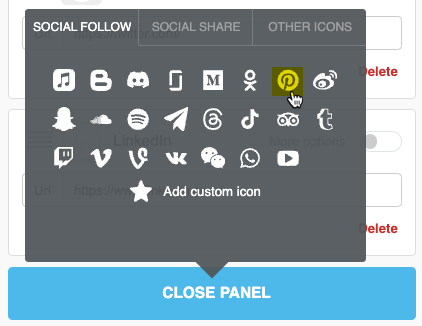
- Click the Add New Icon button.
- Select the Pinterest icon.
- Drag Pinterest to appear above Twitter (X).
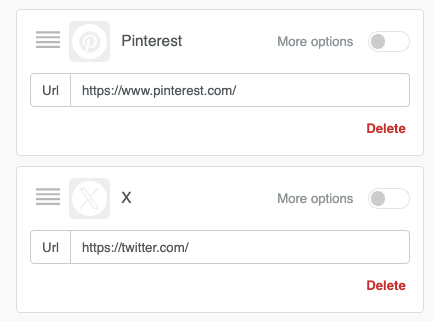
- (Optional) Enter in your brand's social URLs for all four icons.
- Change Icon spacing to 15. This will make it easier for users to select an individual icon on mobile.

Row 8
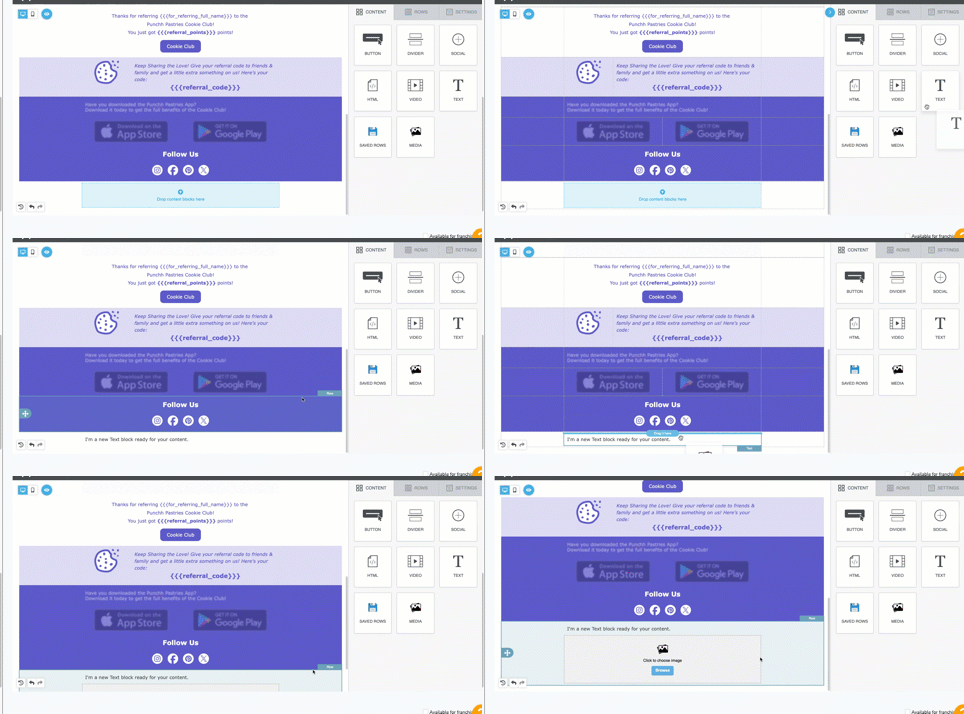
- Click the Content tab and drag a Text content block into row eight.
- Drag a Media content block immediately under the Text block in row eight.
- Click in the text content area and copy in the following content:
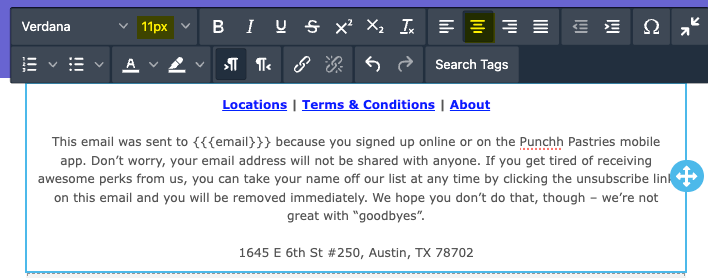
Locations | Terms & Conditions | About
This email was sent to {{{email}}} because you signed up online or on the Punchh Pastries mobile app. Don’t worry, your email address will not be shared with anyone. If you get tired of receiving awesome perks from us, you can take your name off our list at any time by clicking the unsubscribe link on this email and you will be removed immediately. We hope you don’t do that, though – we’re not great with “goodbyes”.
1645 E 6th St #250, Austin, TX 78702 - Highlight the text and change the text size to 11px.
- Center the text.
- Bold the first row.
- Add an extra line between each paragraph as shown below.
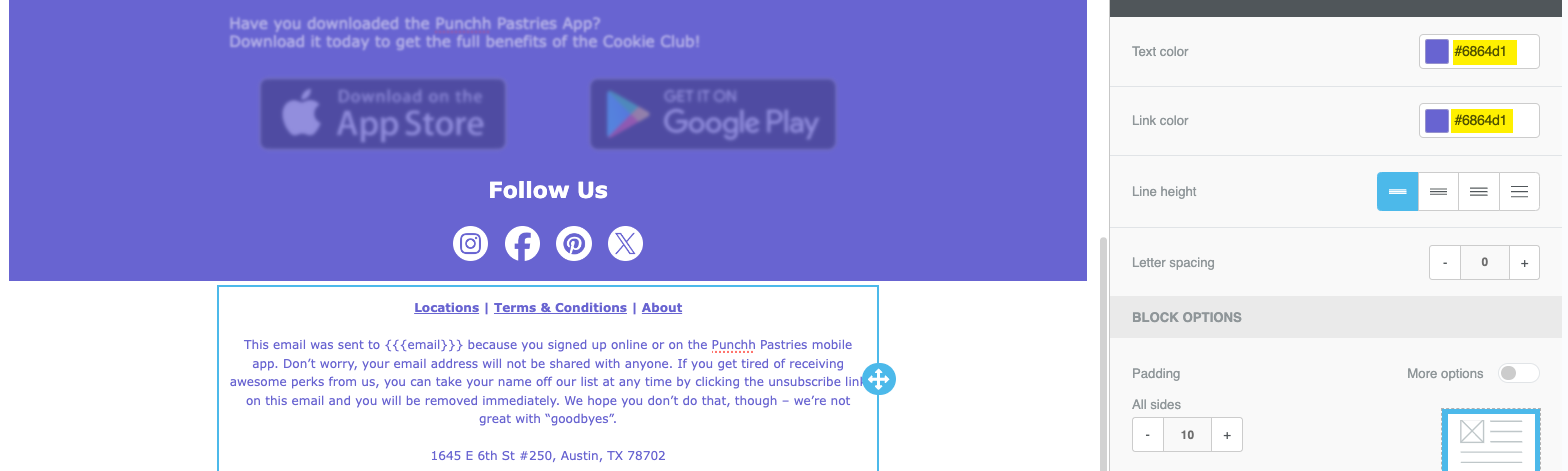
- In the Content Properties pane, change Text color and Link color to #6864d1.
- Click the Media content area.
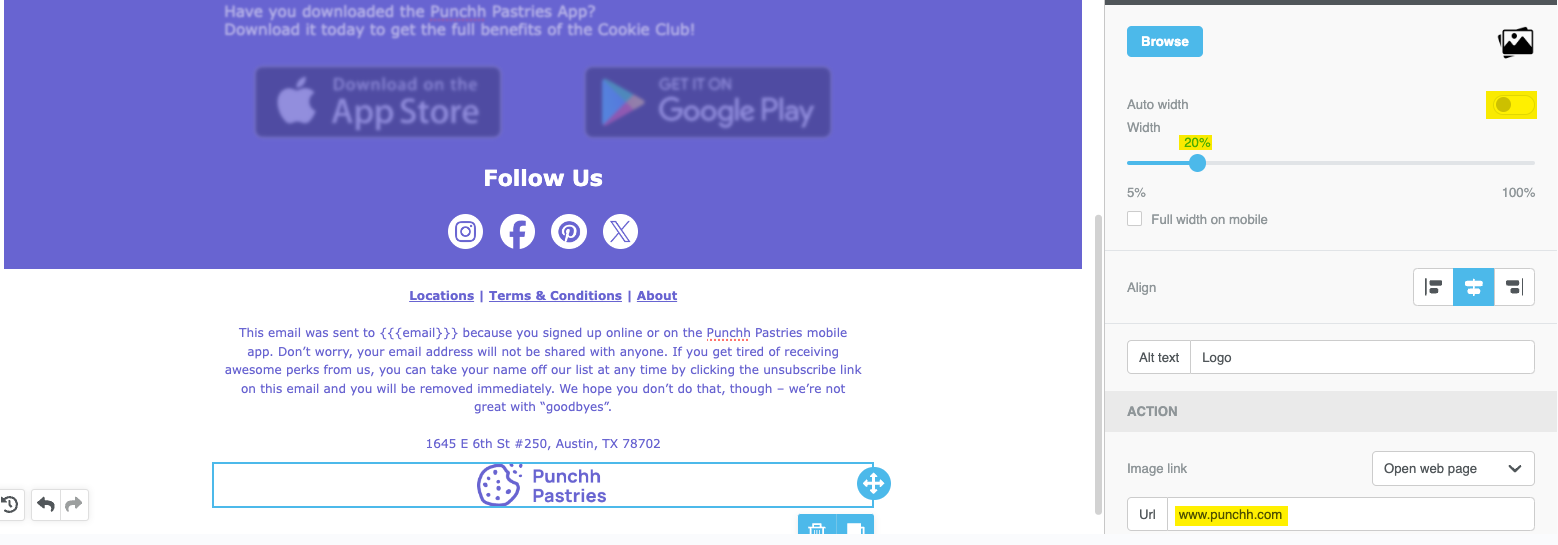
- Click Browse and upload the Logo image.
- In the Content Properties pane, toggle OFF Auto width.
- Reduce the width to 20%.
- Under Action, add your brand's website or Punchh.com to Image link.
Step 5: Preview
- Now that you have completed your email template, click Actions > Preview in the top left corner.

- The Preview mode window opens. Toggle between Desktop and Mobile to see how the email template would look on each device.
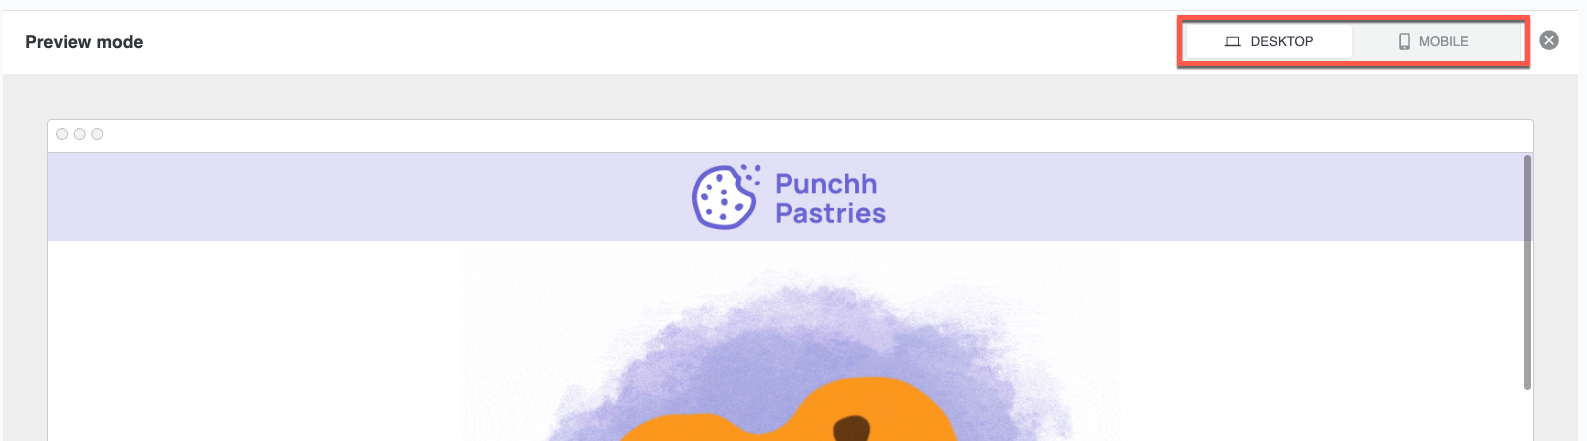
Notice that rows 5 and 6 do NOT appear in the Desktop view. - Click the X icon to close the preview mode.
- Click Save Draft to save your tutorial.
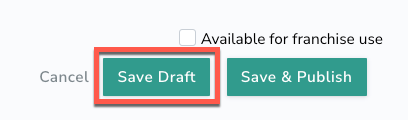
Once an email template is completed, you would typically click Save & Publish to mark the template as available for use in Campaigns or Notification Templates.
Step 6: (Optional) Clean Up
To ensure that this tutorial and its collateral are not used in any of your brand's live campaigns, it is recommended to delete its various components.
To delete the images:
- Navigate to Marketing Automation > Image Manger.
- Locate the folder "Punchh Pastries Tutorial".
- Click the three-dot menu on the right corner.
- Click Delete.
- The folder and the images are now deleted.
To delete the tutorial email template:
- Navigate to Marketing Automation > Email Templates.
- Locate the folder "Punchh Pastries Tutorial" in the left-side panel.
- Hover over the folder name and click Delete.
- A confirmation window appears, click Yes, Delete.
- The folder and the tutorial template are now deleted.
