Image Manager
This article was previously titled "Media Manager."
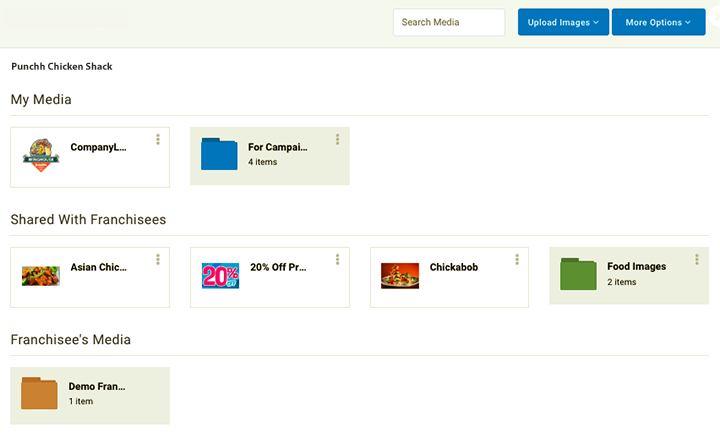
Image Manager is an image repository where admins may upload and organize marketing, branding, and promotional images to be shared with other users in your company. Instead of these images living on your desktops and email attachments, they'll be in one central media library. By controlling your company's media in this space, you can make certain your Franchisees and others are using only corporate-approved images in their campaigns and messaging and that your marketing is aligned across any number of locations.
Permissions
Admins with the Media Manager - Full Access permission enabled can access the Image Manager page to upload images and create folders. They will be able to move, rename, and delete existing folders and images. These actions can be performed by accessing the Image Manager through the Marketing Automation section or while using the Email Editor. Without permission, admins will be limited to using the images available to them by accessing the Image Manager only while using the Email Editor.
Uploading Files to Image Manager
When using images for campaigns, redeemables, rich messaging, and more, you have the option of selecting from any of the images in the Image Manager library or uploading a new one from your computer or a URL.
Supported File Types (all must be less than 5 MB):
- JPEG
- PNG
- GIF (GIFs are supported, however, if you upload a GIF from your computer directly, it will not animate. To have an animated gif, upload it using the URL option.)
From Your Computer
- Navigate to Marketing Automation > Image Manager and then to the folder where you want to add the image.
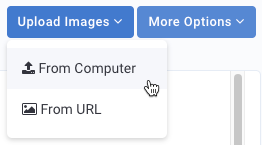
- Click Upload Images at the top right and select From Computer.
- Browse to find the image on your computer and then click Open
-
Give your image a Name. This name is important as it is what allows the image to be searchable and easily identified.
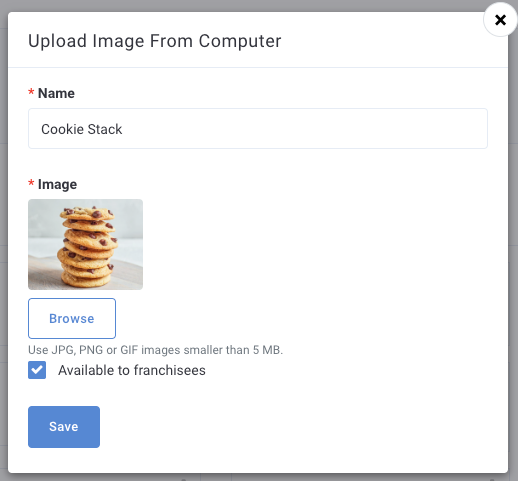
- Click the Available to Franchisee's toggle to allow Franchisees to use the image when creating campaigns, redeemables, etc.
- Click Save once finished.
Your image should appear in Image Manager and be available to use within a few seconds.
From a URL
Following the same general instructions shown above, click Upload Images and select From URL. Instead of uploading the image directly from your computer, provide a URL from which Punchh will download and add it to your media library.
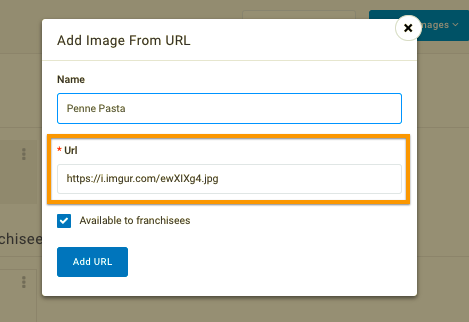
Ensure that your image isn't restricted access, such as behind an FTP login or in a private folder.
Add a Folder
Organize your media into folders for specific campaigns, types of images, and those accessible to Franchisees. To add a folder in the Image Manager library:
- Click the More Options button at the top right and select Add Folder.
- Name the folder.
- Click the Available to Franchisee's box to make the folder and all of its contents available to your Franchisee users.
After creating a folder, you can choose to share or revoke sharing access to it at any time.
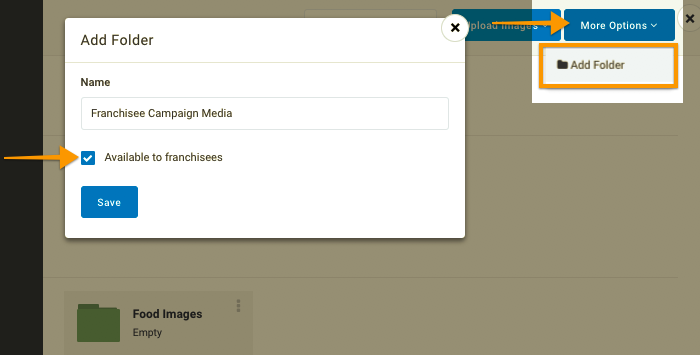
- Click Save to finish adding the folder. You may now enter it and add images.
Is there a storage limit to the Image Manager library? There currently is no limit on how many images you can store in your company's media library, nor is there a limit to the total disk space associated with those files.
Controlling image access
Admins may add images visible only to them and other admins, and they also have the ability to share access to images and folders with Franchisee users.
When a Franchisee uses Image Manager, they will only see the images they have personally added and those that have been shared with them. When a Franchisee user adds an image to the media library, it may be used by them or any other user in their franchisee group. Additionally, it will be visible to admin users, who can take actions on it, such as renaming it, revoking access, or deleting it.
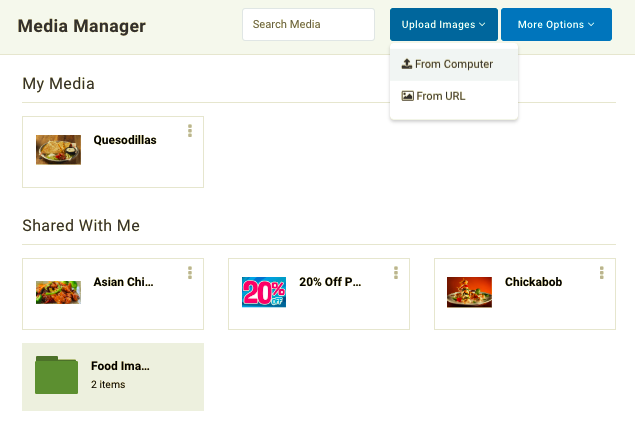
A Franchisee user may only see their uploaded images and those shared with them by admins.
What if I revoke a Franchisee's access to an image they have already added to a campaign? Revoking Franchisee access to an image will not affect any campaigns or redeemables that are currently using it after being added by a Franchisee. However, that Franchisee will no longer see that image in their media library and may not use it for other purposes moving forward.
File options
Click the top-right corner of an image file to show its options.
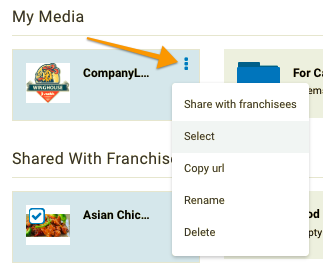
From here, you can:
- Share / revoke sharing with Franchisees
- Copy a shareable URL for the image
- Rename it
- Delete it
Revoke Sharing Access of Images
Click the top-right corner of a shared image file to show its options. Choose Revoke sharing from Franchisee.
Rename Images
Click the top-right corner of an image file to show its options. Choose the Rename option. Enter the new name and click update.
Delete Images
Click the top-right corner of an image file to show its options. Choose the Delete option.
Using Image Manager in Campaigns and Redeemables
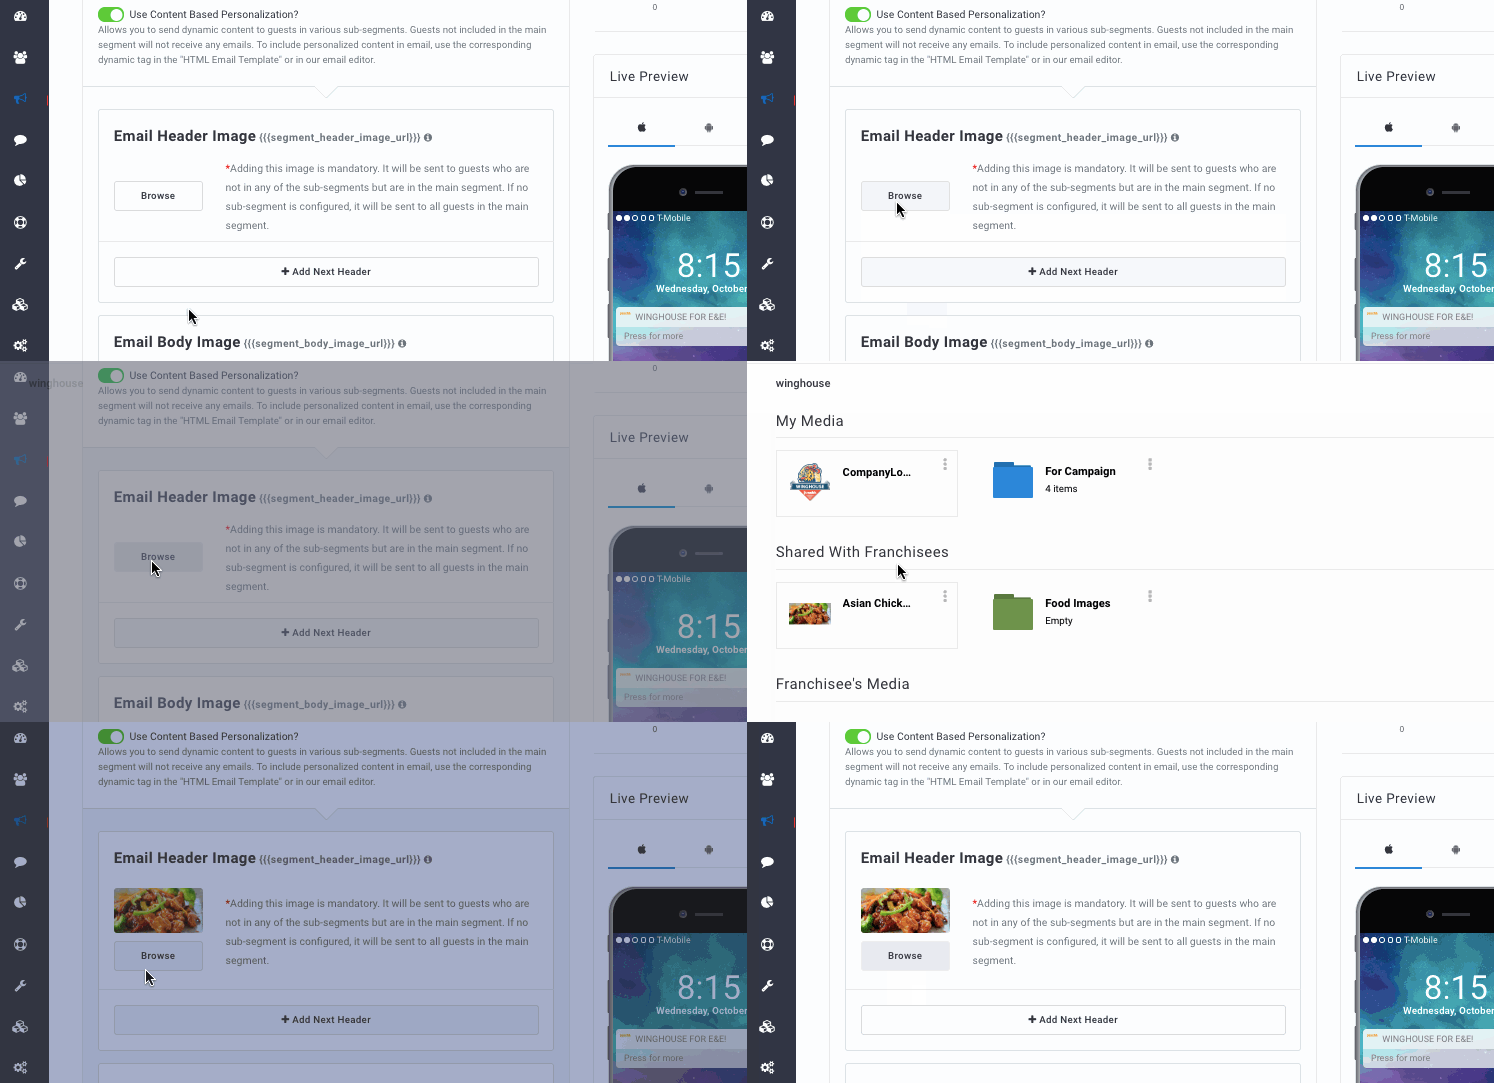
When adding images to a campaign using Content-Based Email Personalization, click the Browse button to open your media library and select from one of your accessible image files. You can use the Search Media bar to find the right one.
If you want to use an image not currently in the media manager, just upload it to the library at that time.