Checkin Survey Campaign
Note: This campaign is bundled as part of the Surveys Added Module available for an additional cost. To enable the Surveys module, speak to your Punchh Customer Success Manager about adding it to your service contract.
Many types of campaigns can be augmented with a survey in addition to their respective campaign messaging. These types of gift-giving campaigns require completion of the survey before the campaign's reward may be given. Unlike these campaign types that use a survey only as a side dish, a Checkin Survey campaign makes it the main course. As a guest checks in at one of your stores, they'll be presented with a push notification to complete a survey in the mobile app. Once complete, they'll receive any reward attached to that survey, and they'll be eligible for any additional campaigns that require the completed survey.
Before you can create a Checkin Survey campaign, you must have a saved Survey. If you haven't yet set up any surveys, contact your Punchh Customer Success Manager. They'll help you through each step of the survey creation and deployment process.
Create a New Checkin Survey Campaign
To create a new Checkin Survey campaign:
- Navigate to Marketing Automation > Campaign Management in your left-hand navigation toolbar.
- Click Create Campaign in the upper right corner.
- Click Other.
- Select the Checkin Survey campaign type.
- Click Create.
Step 1 – What
- Give your campaign a Name.
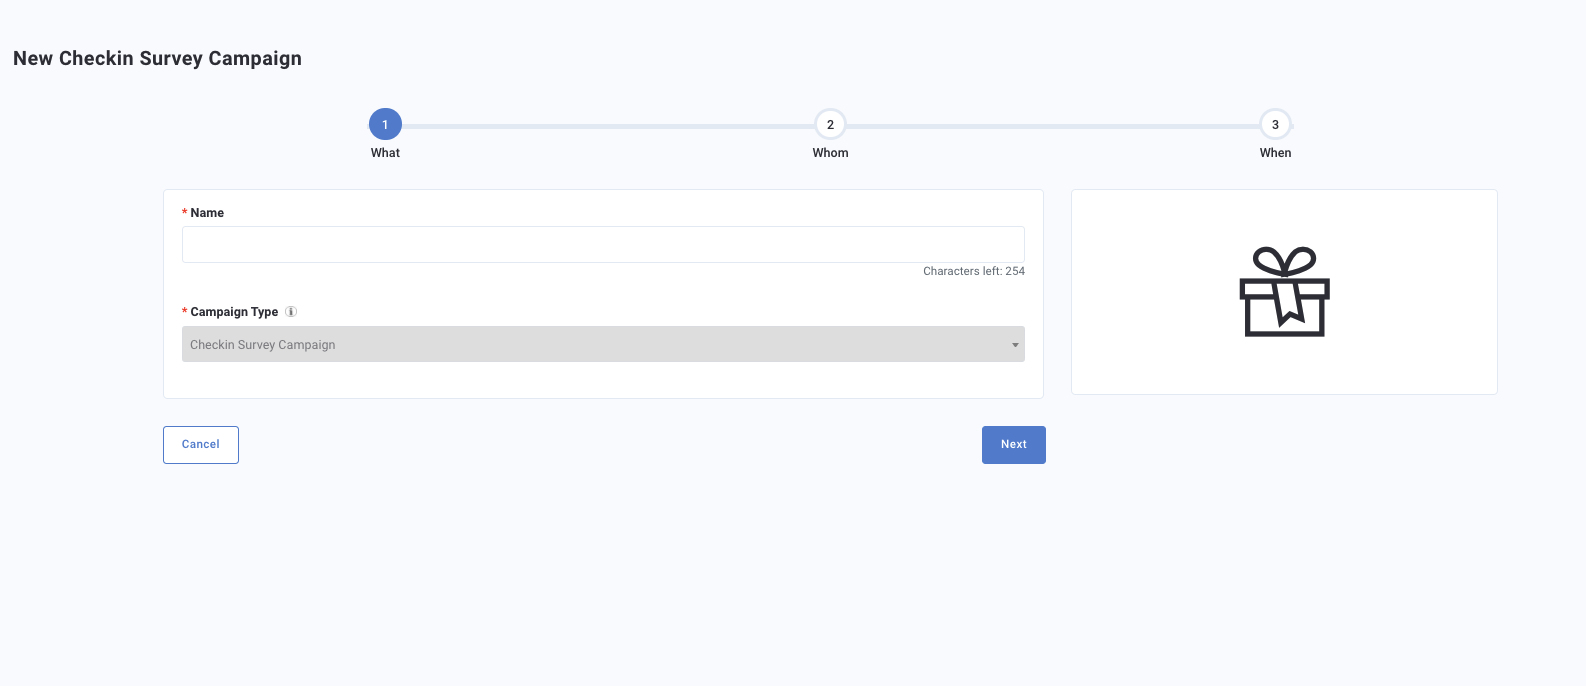
- Click the Next button.
Step 2 – Whom
Configure campaign settings such as audience targeting, qualification criteria, frequency, and other options as described below.
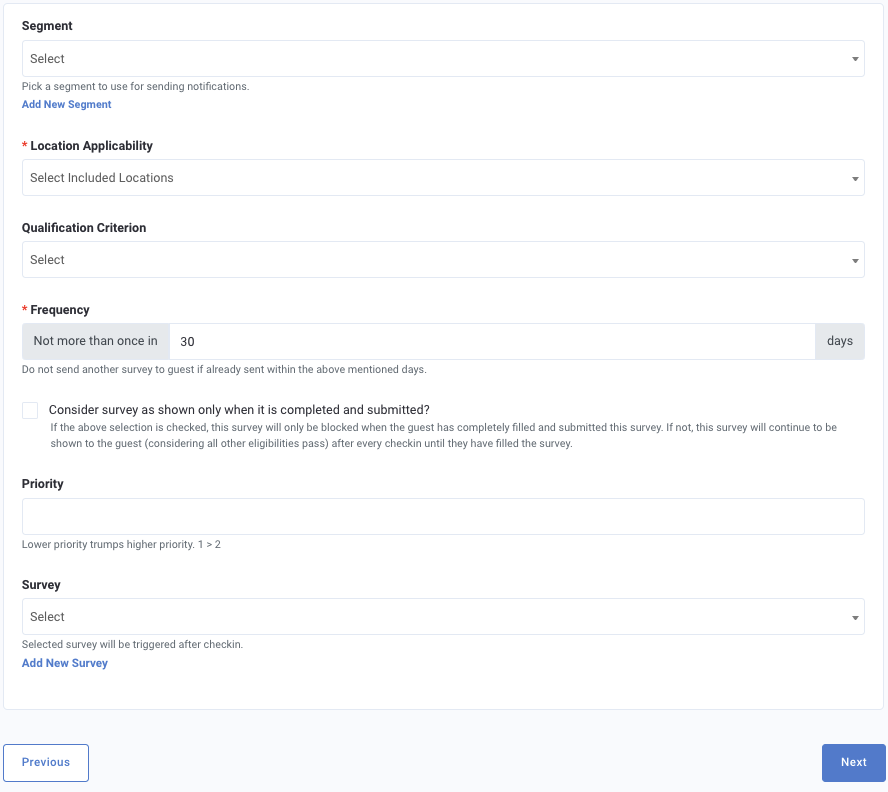
- Segment: Click the drop-down to select a guest segment to target with this survey after they complete a checkin. Leaving this field blank will include all guests.
Note: The Potential Reach gauge shows you how many guests in the segment could potentially take part in this survey campaign.
- Location Applicability: Use the drop-down to select a location/location group to limit this campaign to. This means that only guest checkins originating from these stores will receive the survey.
Note: If you don't specify a location(s), the campaign will be enabled for all locations. If you selected a segment for this campaign, Location Applicability will be ignored in favor of the segment. If you need both, you can set edit your segment to include location parameters.
- Qualification Criteria: Select from one of your qualification criteria to set the conditions (receipt items, time, guest data, etc.) that must be met in order for the survey campaign to trigger.
- Frequency: Set the number of days that must pass before the guest may be sent this survey another time. This defers to your survey settings, so if you choose only to send the survey one time, any frequency time set here will be disregarded.
- Consider survey as shown only when it is completed and submitted: Checking this box will require that the survey be completely filled out before it can be dismissed by the guest. If a guest fails to complete the entire survey, they will receive it every checkin (as long as the qualification criteria are met to trigger the survey campaign) until they fully complete it.
- Priority: In the event that you have multiple active campaigns, the priority field can be utilized to determine the relative order in which the campaigns will trigger.
The priority field of post redemption campaigns can only be accessed and edited by a Punchh admin. If you'd like to adjust the order of processing for your post checkin campaigns, please reach out to your Punchh Customer Success Manager for assistance.
- Survey: Use the drop-down to select one of your saved survey. This survey will trigger for a guest once they complete a checkin at your location. The survey will trigger be sent via the checkin flow within the app, therefore no further notification or messaging needs to be configured for this campaign type. If the survey is associated with a gift, the guest must complete the survey in order to receive their reward.
Once finished, click Next.
Step 3 – When
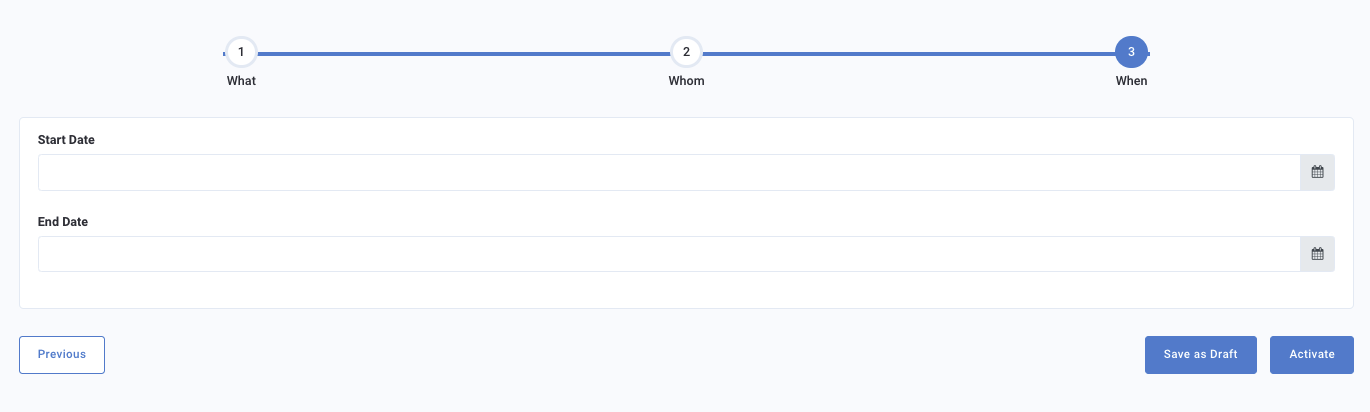
- Click the Start Date field to choose a date from the calendar for your campaign to activate.
- Click the End Date field to choose a date for your campaign to become inactive.
- Once you've finished with scheduling, you have two choices for finalizing your new campaign:
- Click Activate to save and schedule your campaign to go live at your scheduled start date (or immediately if your start date is today).
- Click Save as draft to save your campaign as a draft. Saving as a draft allows you to edit your campaign at a later date (and gives you the opportunity for approval by other members on your team, if required).
