Qualification Criteria
Qualification Criteria (QC) define the parameters your guest's check must meet in order to qualify for a promotion, a redeemable, or a gift. Typically, qualification criteria are set to determine the presence of some combination of the following parameters:
- Line Item Selectors
Presence and/or quantity of specific items (such as "Chicken Taco") or class of items (such as tacos, entrees, or appetizers) - Date/Time
Criteria can specify a date range by year, month, and/or day; specific hours of each day (like 5,6,7 for 5 pm-8 pm happy hour); or days of the week (Monday, Tuesday, etc) - Check Total
Set the requirement that a dollar threshold must be spent on the check before the criteria are met (i.e., over $25). - Additional Criteria
Less frequently used criteria are detailed in the Create new qualification criteria section below.
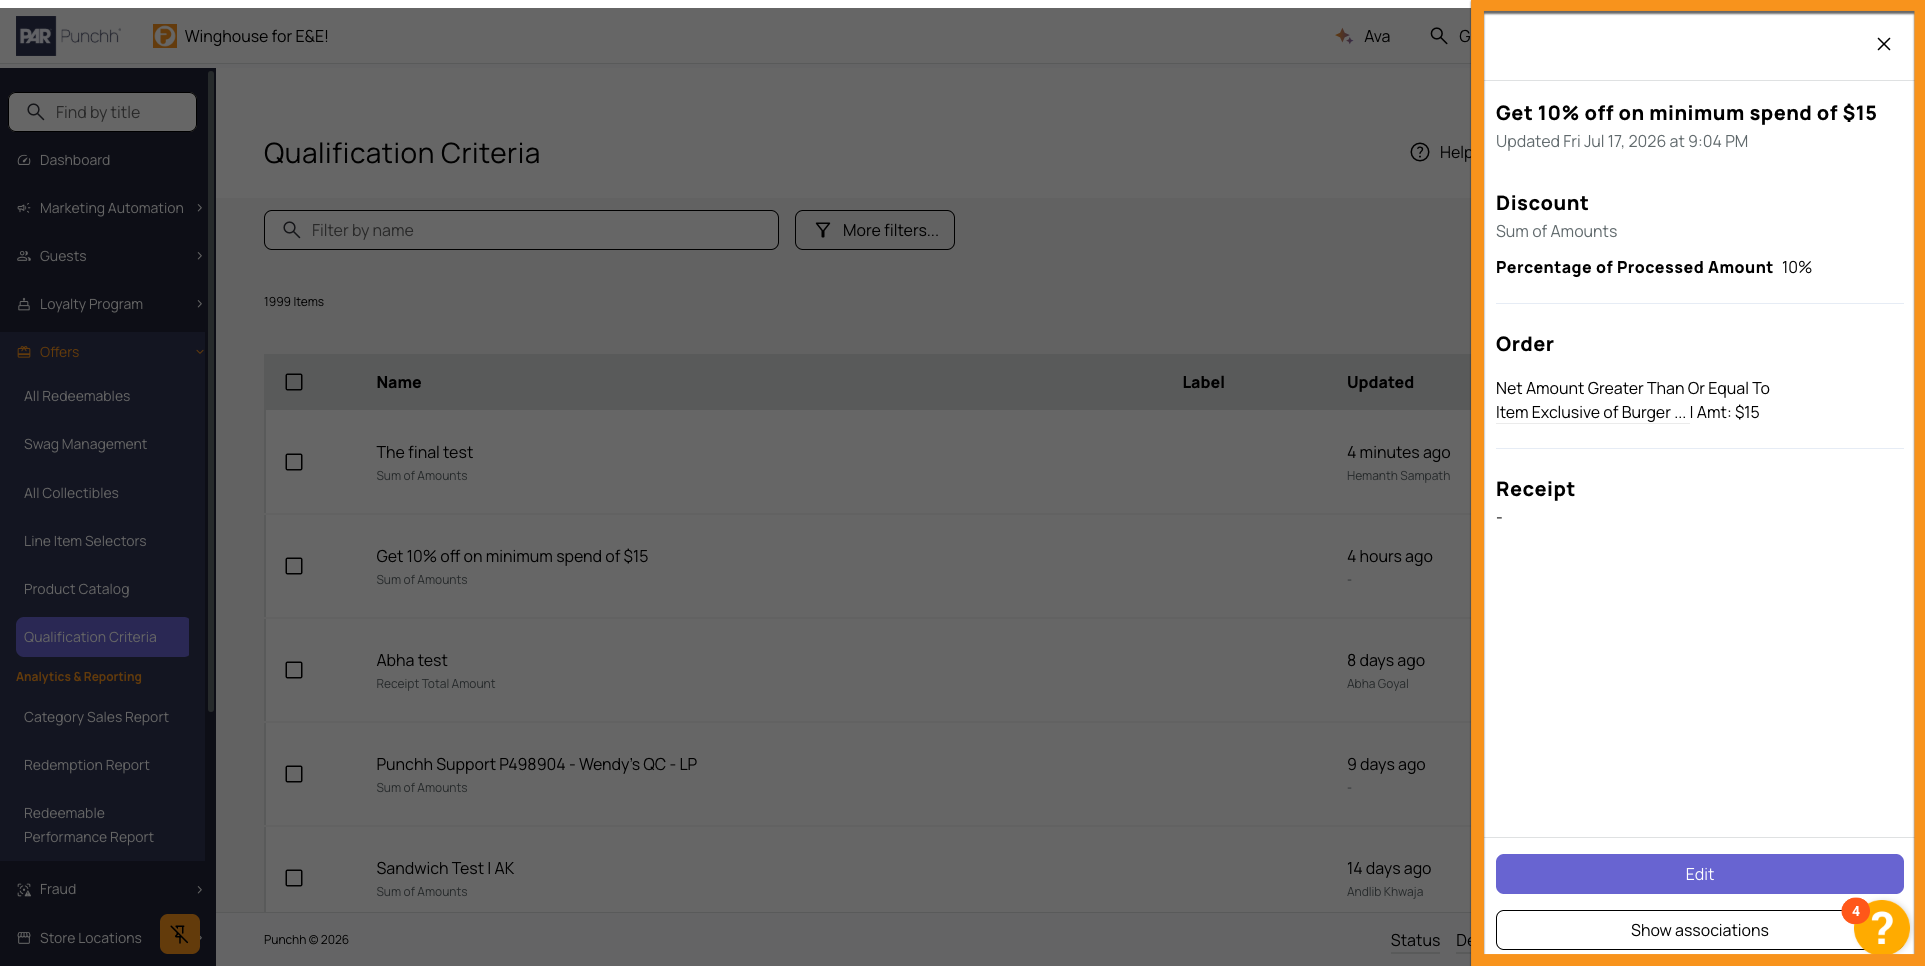
Qualification criteria can be created, deleted, or edited in the Qualification Criteria tab shown under Offers in your dashboard navigation menu on the left side of your screen.
Understanding Qualification Criteria
Qualification criteria are often created in advance of setting up a new rewards campaign. However, it is important to think of qualification criteria not as a part of any specific redeemable or campaign but rather as simply a set of conditions used to answer the yes or no question, "Have all of these rules been met on this receipt?" In this way, a single qualification criterion can be used for many campaigns/rewards.
For example, you may create a qualification criterion named "Kids Meal and Adult Entree" that checks for the presence of a Kids Meal and an Adult Entree. You may use "Kids Meal and Adult Entree" as the conditions of a redeemable for a free kids meal with purchase of an adult entree, or you may use "Kids Meal and Adult Entree" as the conditions of a redeemable that awards a guest 2x Points if they purchase both items.
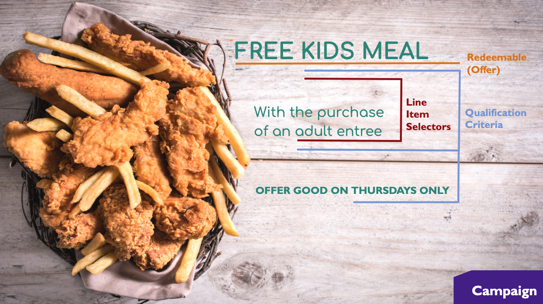
In the example above, our qualification criteria use two item selectors: a Kids Meal and an Adult Entree. Additionally, there is another qualification criterion, Thursday, that must be met. The majority of your menu (or merchandise) items are added during your initial integration. However, in the event of a new item, you'll need to create a Line Item Selector before you can create the qualification criteria that include it.
Create New Qualification Criteria
Follow the steps below to create new qualification criteria:
- Navigate to Offers > Qualification Criteria in the left navigation menu.
- Click the green + Create new button at the top-right.
- Work from existing qualification criteria: Click to copy the settings from an existing qualification criteria into your new form. This is useful if you are making similar rules and don't want to re-select the values each time.
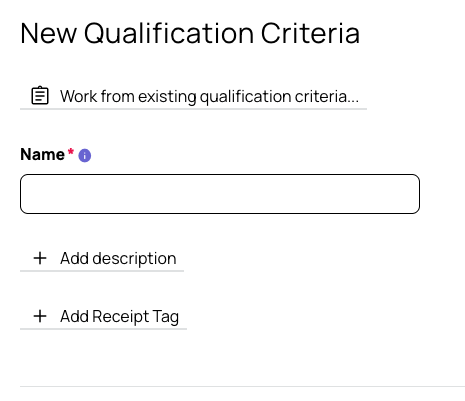
- Type a name for your qualification criteria in the Qualification Criterion field.
- (Optional) Add a description of the QC.
- (Optional) If you wish to add a Receipt Tag Name field, see our page on Receipt Tags for more information.
Discount
-
Click Discount method to select the type of function to be applied to the filtered menu items on the guest's receipt.
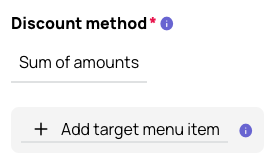
Please refer to our article on Discount methods for more detailed descriptions.
-
(Optional) Click + Add target menu item to choose which menu items the discount method applies. Leave blank if you want to select all menu items. (This field may not be applicable depending on which discount method you choose.)
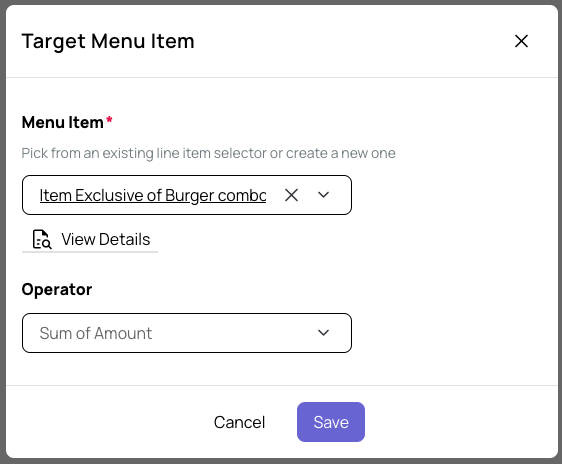
- Select the Menu Item from your existing line item selectors or create a new one.
- Select the Operator
- Leave as your Discount Method to make no further restrictions
- Maximum Unit Price
- Minimum Unit Price
- Exclude
-
After you have added your menu items, choose how the they are evaluated: (See How do I use the Logical Operator Strategy field when building a Qualification Criteria (QC)? for examples.)
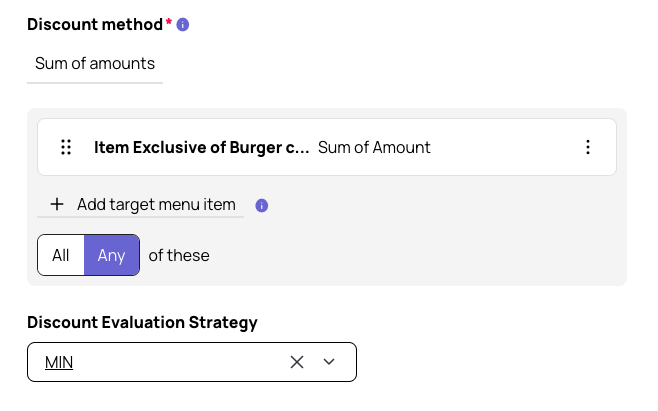
- All: All selected Line Item Selectors will be discounted.
- Any: Any of the selected Line Item Selectors can be discounted, based on the selection in the Discount Evaluation Strategy field.
- Discount Evaluation Strategy: If Any is selected, you can then select either the minimum-priced (Min) item to be discounted or the maximum-priced (Max) item to be discounted.
-
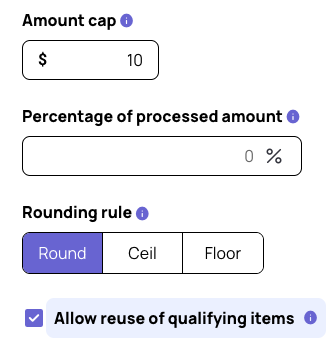
Amount cap: The maximum dollar amount that can be discounted on a receipt. For example, if the Amount Cap is set to $10 and the qualifying item costs $12, only $10 is discounted.
Note: When used with the Sum of Quantities processing function, the Amount Cap limits the count of qualifying line items rather than a dollar amount. For example, a cap of 3 means only 3 items qualify, even if more are present on the receipt.
-
Percentage of processed amount: The percentage of the processed value applied as a discount on a receipt. For example, setting this field to 50% applies a 50% discount to qualifying line items; a free item offer would be set to 100%.
Note: When used alongside an Amount Cap, the percentage is applied first and the cap limits the maximum resulting discount.
-
Rounding rule: The following rounding rules are applied to monetary amounts used in the selected Discount method. If a rounding rule is selected, it is applied to the final resulting value.
- Round: A rounded quantity rounds up or down to the nearest integer (whole number). For example, 1.5 rounds up to 2; 1.4 rounds down to 1.
- Ceil: A ceiled quantity always rounds up to the next nearest integer. For example, 1.2 rounds up to 2; 1.8 rounds up to 2; 1.01 rounds up to 2.
- Floor: A floored quantity always rounds down to the nearest integer. For example, 1.8 rounds down to 1; 1.2 rounds down to 1; 1.99 rounds down to 1.
-
Allow reuse of qualifying items: When enabled, an item that satisfies the qualifying condition of one offer can also be used to qualify a separate offer in the same transaction. For example, if a guest purchases a coffee that qualifies them for a BOGO meal offer, that same coffee can also qualify them for a second offer such as 10% off a sandwich.
Note: This field only appears when Multiple Redemptions is enabled for the business. It applies to referenced items (the qualifying condition), not to the targeted items receiving the discount — that behavior is controlled by the Allow Discount Stacking setting.
Order
- Click + Add order requirement to choose further restrictions for your discount method to be triggered.
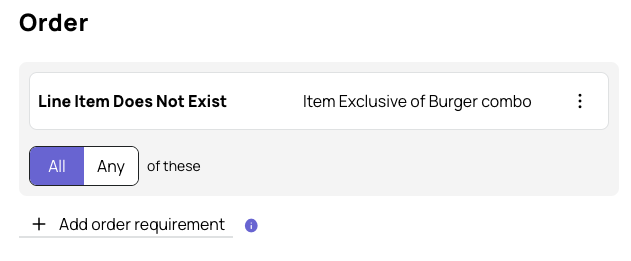
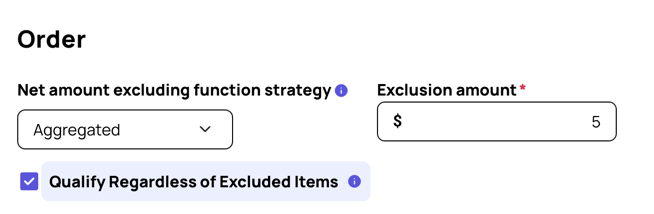
- Select a Rule and applicable Menu Item for which the rule applies:
- Line Item Exists: Enter a Line Item Sector that SHOULD be present on the receipt
- Line Item Does Not Exist: Enter a Line Item Sector that should NOT be present on the receipt
- Net Quantity Greater Than or Equal To: Enter the minimum number of qualifying items that must be present on the receipt
- Net Amount Greater Than or Equal To: Enter the amount the receipt total should be greater than or equal to.
- Net Quantity Equal To: Enter the exact number of qualifying items that must be present on the receipt.
- Net Amount Excluding Min/Max Priced Item Equal To or More: Allows you to exclude specific items from the receipt total when defining minimum purchase thresholds for discount eligibility. For example, "10% off a burger with a minimum purchase of $20,” the burger will be excluded from the minimum purchase amount. You can also set the specific quantity of items to be excluded. For example, "Get two $1 burritos with a minimum purchase of $15," the two burritos will be excluded from the minimum purchase amount.
(Delivery fees, taxes, andservice charges will not be considered in the minimum purchase amount.)
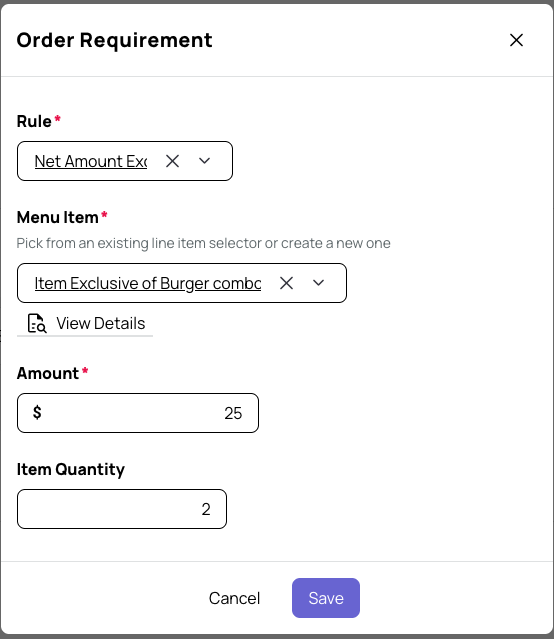
- (Optional) Net Amount Excluding Function Strategy: When using a Net Amount Excluding qualifier, use this drop-down to define how the selected menu items are excluded from the qualifying purchase amount. (See How do I use the Net Amount Excluding Function Strategy field when building a Qualification Criteria (QC)? for examples and full configuration details.)
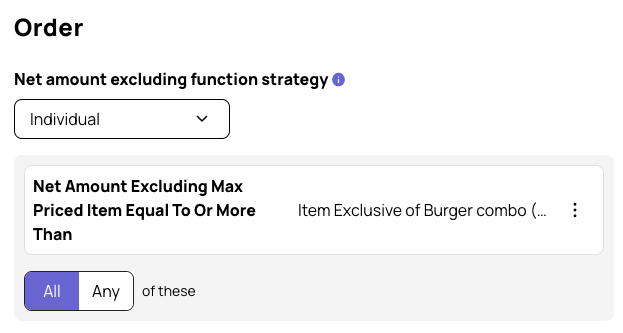
- Aggregated: All selected menu items are combined and excluded together as a single group before the minimum purchase requirement is evaluated. Use the Exclusion Amount field to set the minimum remaining receipt amount required to qualify.
- Individual: Each selected menu item is evaluated independently against its own configured minimum remaining amount. When this strategy is selected, the Exclusion Amount field is hidden and a per-item Minimum Amount field appears instead.
- Leaving a quantity blank means the system excludes all matching quantities of that item present on the receipt, regardless of how many units were purchased.
-
The Qualify Regardless of Excluded Items setting determines whether excluded items can block offer qualification when used with Net Amount Excluding qualifiers. When enabled, a receipt qualifies as long as the non-excluded items meet the required minimum; excluded items are left out of the calculation, but if the remaining items fall short of the minimum, the receipt is declined. Review here for more details.
- After you have made your order requirements choose how the conditions are evaluated: (See How do I use the Logical Operator Strategy field when building a Qualification Criteria (QC)? for examples.)
- All: All of the order requirements must be met.
- Any: At least one of the order requirements must be met.
Receipt
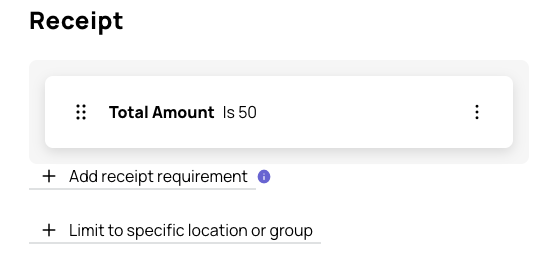
(Optional) Assign any additional Receipt Qualifiers to your QC. These are top-level criteria such as time of day of the week, time of day, or total receipt amount.
Refer to Receipt Rules/Qualifiers for more details. (For information on the available Data Operators (is, is not, etc.), refer to Data Operators and Input Examples.)
(Optional) Use the Effective location drop-down to select a location(s) or location group(s). The default (unselected) setting is all locations. You can select multiple locations or location groups as needed.
When a Qualification Criteria is created and tied to a specific Location Group, a “snapshot” of that location group is created. This means that any updates made to the Location Group after the activation of the QC will not be reflected in the Qualification Criteria.
Important: If you need to update the Location Group for a Qualification Criteria, you must create a new Location Group and a new Qualification Criteria.
(Optional) Check the box marked Enable Menu Item Aggregator.

- The Menu Item Aggregator is a "Squisher" function. There can be cases where the same line items passed to us from the POS may be treated differently, and this may lead to erroneous behavior. For example, a guest orders two of an item "Burger" with ID 5001 and Type 'M' but eventually cancels one of the two prior to the finish of the transaction. This cancellation leads to the addition of an item called (perhaps) "Voided Burger" of Type "D", but the ID is still 5001 and therefore the discount would still see the presence of two burgers on the receipt. In this case, erroneous behavior, such as a BOGO campaign, may be triggered. To avoid this, an admin can use an aggregator function on the Menu Item ID (in this case) to add all Menu Items with same ID at the end of the transaction. In the case mentioned above, the final quantity of the Burger will turn out to be 'One' thus preventing any potential processing errors.
Once finished configuring, click the green Update button to save your new qualification criterion.
Qualification Criteria Home Page
All your configured QCs can be created and managed from the Qualification Criteria Home Page under Offers > Qualification Criteria.
Filter and Sort Your List
-
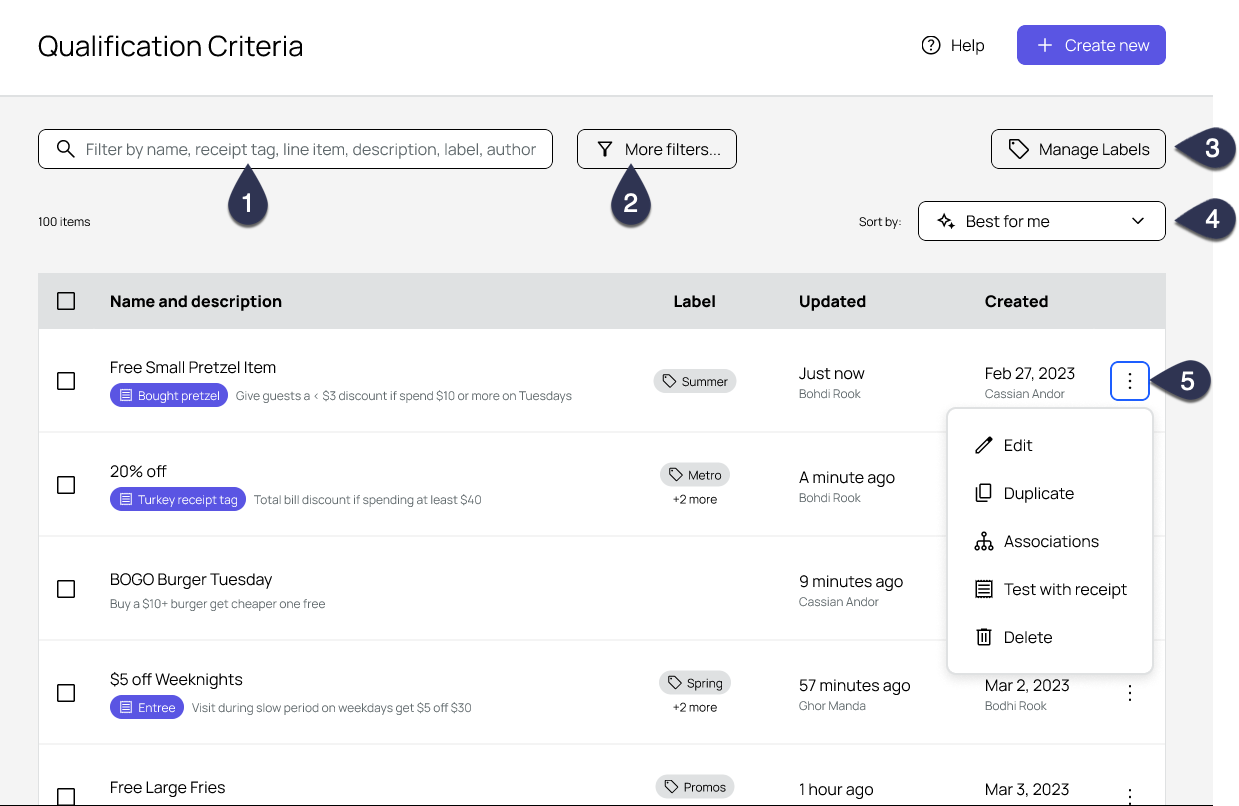
Qualification Criteria can be filtered by using the search bar.
-
Click More filters to narrow the QC list further by:
-
Receipt tag
-
Processing Method
-
Created By
-
Updated By
-
Target Unit Price
-
Amount cap
-
Percentage of processed amount
-
Rounding rule
-
Discount stacking turned on
-
Reuse of qualifying items turned on
-
Receipt rule are present
-
Location
Note: Your search filters will save if you navigate away from your filtered list and then click the back button on your browser to return. Additionally, your filtered list will create a unique link that can be copied/pasted to show the same filters in a new window.
-
-
Click Manage Labels to view, edit, and create QC labels.
- Click the three dots on the right of each label to Rename or Delete.
- Click Create label to create a new label. You can have up to 1000 labels for your business.
-
Use the Sort by option on the right to sort your QC list further.
-
More Actions: Click the three dots on the right of the QC for further actions:
-
Edit: Click to edit the QC.
-
Duplicate: Click to duplicate the QC. The create QC workflow will open with the name field populated as "QC name - copy" and other fields filled in from the original QC. You can then edit the QC as normal.
-
Associations:
-
Test with Receipt: See below for testing your QC
-
Delete: Click to permanently delete a QC. This can also be done by clicking the check box next to the QC name and then selecting Delete.
-
Steps to Test Your Qualification Criteria
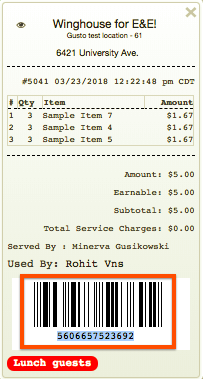
Before you activate a redeemable powered by your qualification criterion, you'll want to make sure that your criteria include (and exclude) receipts in the way you intended. Measure twice, cut once! You can use the Test Qualification with Receipt tab to see how your QC treats real receipts. In order to use this function, you'll first need a receipt barcode, as seen below.
To test the qualification criteria using a real receipt:
- While creating or editing a qualification criterion, click the Test Qualification with Receipt tab at the top.
- In the Transaction No field, enter a valid receipt barcode.
- In the Menu Item String field, you'll need to manually enter the item name(s) to check for.
This must be formatted as "Item Name | Quantity | Item Total Amount | Line Item Type | Menu Item id | Item Family | Item Major Group | Serial No." with a return (new line) for each additional item - Enter any additional criteria in the following fields:
- Amount
- Subtotal
- Receipt Time
- Location
- Last 4 digits of CC
- Barcode
- Employee ID
- Employee Name
- Revenue Code
- Revenue ID
- Channel (e.g. OnlineOrder POS Mobile etc.)
When finished, click the Evaluate button at the bottom of the page.
-
If your receipt matches the criteria you specified,d you'll see the following:

...and if your receipt doesn't match your specified criteria, you'll see:

QC List Details
The list view shows the QC's name, label, last updated time, and created date. Click on a QC in the list to view the QC's configuration, make edits, or show associations.