Items
The Items page is where you define items available for order and most of the settings that affect how the item is tracked and counted. The list can be sorted by clicking any of the column headers.
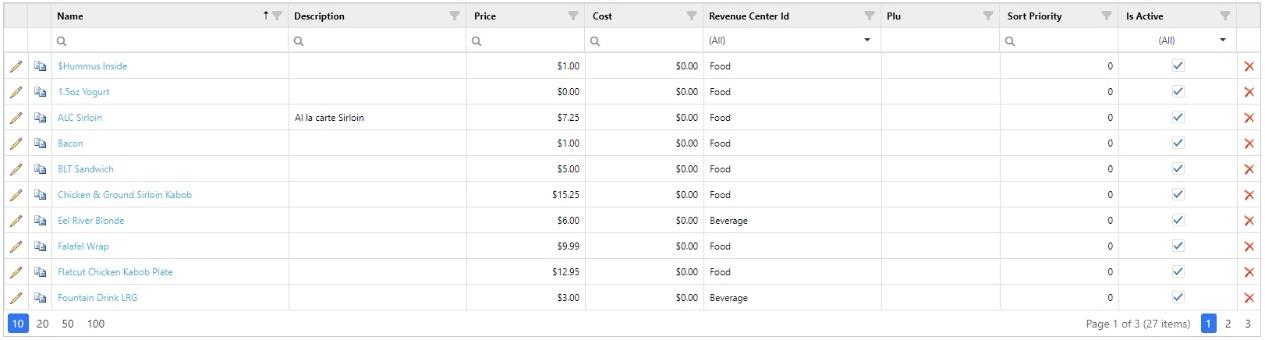
- Filter: Enter text in this field to only show items that contain that text.
- Revenue Center Filter: Enter text in this field to only show items assigned to revenue centers that contain the entered text.
- Add: Click to open the Edit Item dialog.
- Active check box: When checked, the item is active and can be ordered normally. When unchecked, the item is not active and cannot be ordered.
Edit Item
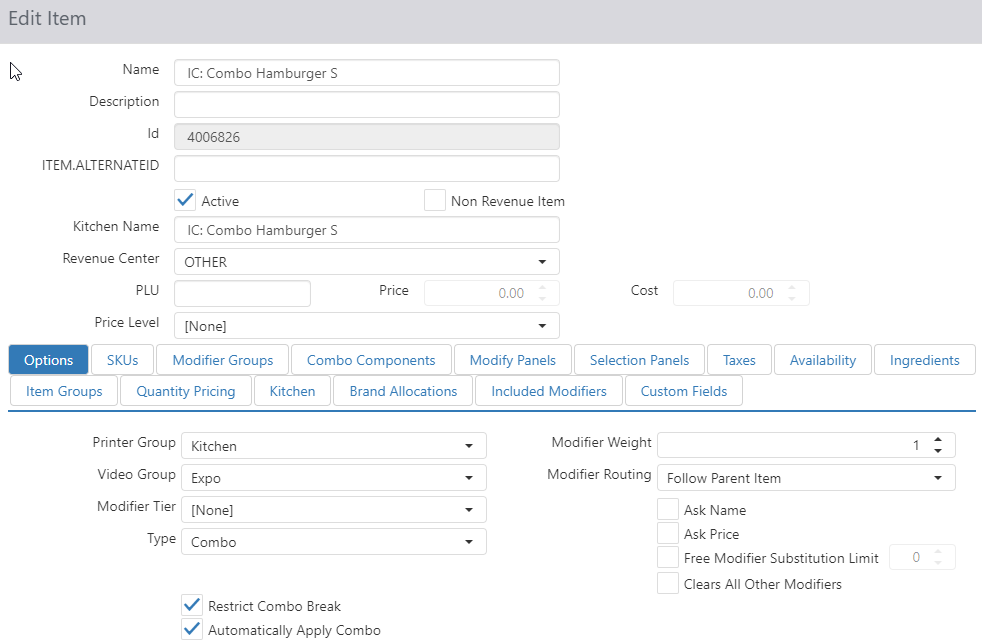
- Name: Name of the item.
- Description: If desired, a longer description of the item can be entered here. This description is only displayed on the Items page, not on the Register application. Items can be sorted by Description.
- Id: The ID number of the item. This is automatically assigned and cannot be changed.
- Active: The item can be ordered. When this box is unchecked, any associated buttons are not displayed on the Register.
- Non-Revenue Item: Sales of this item are not included in gross sales or net sales calculations.
- Kitchen Name: Alternate name to be displayed on kitchen chits and kitchen displays.
- Revenue Center: Revenue center under which sales of the item and its modifiers are to be reported.
- PLU: Identifier used by external systems.
- Price: Price of the item. This can be negative.
- Cost: Cost of the item.
- Price Level: Price level that is to override the item price.
Options Tab
- Printer Group: Printer group the item is to be routed to when sent to the kitchen.
- Video Group: Video group the item is to be routed to when sent to the kitchen.
- Modifier Tier: Modifier tier to be used to calculate price when item is a substitution modifier.
- Type:
- Normal: Regular item.
- Chicken: NO LONGER USED.
- Gift Card: Transaction that request authorization be gift card provider.
- Loyalty Item: Item that activates a third-party loyalty account.
- Pizza: NO LONGER USED.
- Combo: Item is comprised of one or more other items.
- Restrict Combo Break: Appears when Combo Type is selected. Restricts the cashier from breaking combos and selling individual items at a discounted price.
- Prepaid: Item that requires authorization/activate through the Prepaid Processor defined in Options.
- Comp Card: Specifies that this Item is a Comp Card configured for Paytronix (examples of Item Name: Guest Relations, Charitable Donations). See Options > Comp Card tab.
- Discount: Drop-down appears when Type of Comp Card is selected. Choose from a list of Discounts having an External ID and is a Loyalty Discount.
- Gift Card Type:
NOTE: This drop-down list only appears if Type is set to Gift Card.- Cash Out: Deducts stored value from a gift card.
- Issue: Adds stored value to a new gift card.
- Reload: Adds stored value to a previously issued gift card.
- Prepaid Item Type:
NOTE: This drop-down list only appears if Type is set to Prepaid.- Code: Employee enters code to activate at time of sale.
- Code on Receipt: Code required for activation is printed on receipt.
- PIN on Receipt: PIN required for activation is printed on order receipt.
- Automatically Apply Combo: Automatically create a combo if a complete set of combo components is ordered individually.
NOTE: This check box only appears if Type is set to Combo. - Restrict Combo Break: Blocks the cashier from breaking a combo into individual items sold at discount
-
Limit by Selected Destination: Restricts the item price to only be used at selected destinations
NOTE: This check box only appears if Type is set to Combo.
- Add Destination: Destinations at which to limit the item price
- Modifier Weight: Count towards the modifier group's min/max/free settings, when ordered as a modifier.
- Modifier Routing:
- Follow Parent Item (the default): The modifier displays on the kitchen display and prints on the printer group for the parent item only.
Example: A sandwich is ordered with extra cheese. The order is displayed and printed at the sandwich station normally. - Route Separately: The modifier and the parent item are displayed and printed separately on their own kitchen displays and printer groups.
Example: A ham sandwich is ordered with hot ham instead of cold. The ham part of the order displays and prints at the grill station, while the rest of the sandwich order (without the ham) displays and prints at the sandwich station. - Parent item also follows modifier: The parent item and modifier are displayed and printed on both the parent item's and the modifier's kitchen display and printer group.
Example: A pepperoni pizza is ordered. The entire order is displayed and printed at the dough station, the sauce and cheese station, and the toppings station. - Parent item only follows modifier: The parent item and modifier are only displayed and printed on the modifier's kitchen display and printer group.
Example: A ham sandwich is ordered with hot ham instead of cold. However, in this case, the grill has the ability to finish the entire sandwich order, so the entire order displays and prints at the grill.
- Follow Parent Item (the default): The modifier displays on the kitchen display and prints on the printer group for the parent item only.
- Ask Name: When ordered, employee is prompted to enter item name.
- Ask Price: When ordered, employee is prompted to enter item price.
- Exception Mod: NO LONGER USED.
- Free Modifier Substitution Limit: Limits the number of modifiers that can be substituted without charge.
- Clears All Other Modifiers: For modifiers only, adding this modifier clears all other modifiers except required or deferred modifiers.
SKUs Tab
Product barcode identifiers used to order item via barcode scanner or 'Lookup Item' screen.
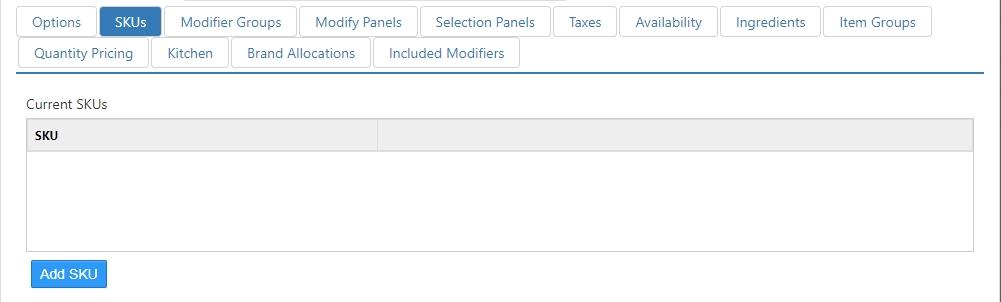
- Current SKUs: A list of barcode numbers currently associated with the item.
- New SKU: Enter a new SKU in the field and click the 'Add' button to add it to the Current SKUs list.
Modifier Groups Tab
Modifier groups that are to be available when the item is ordered or modified.
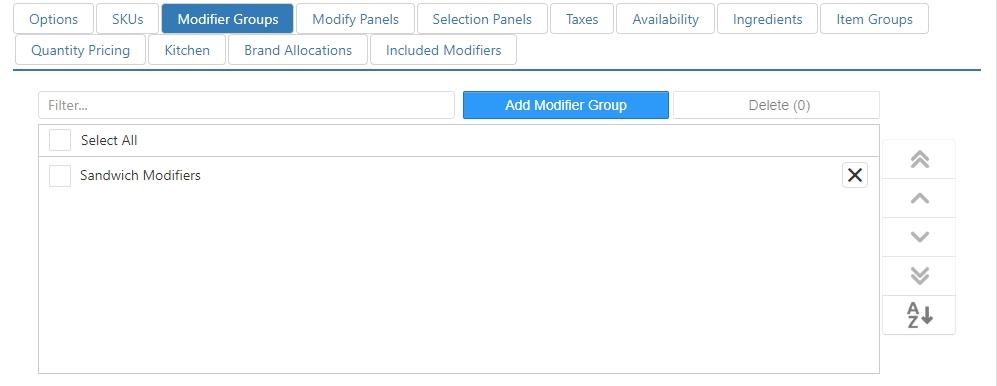
NOTE: Modifier groups are configured on the Modifier Groups page in Settings Editor (see Modifier Groups).
Combo Components Tab
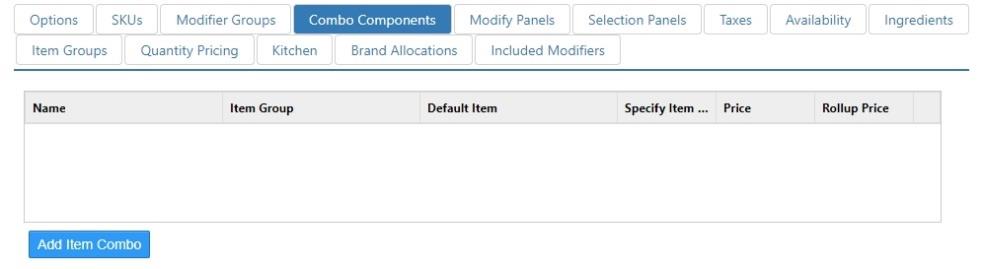
A list of components that belong to the combo.
NOTE: This tab only appears if Type (on the Options tab) is set to Combo.
-
Edit: Click on the item name to edit an existing combo component.
-
Add Item: Click to open the Add dialog.
-
Delete: Select the red 'X' correlated to a component in the list to remove it.
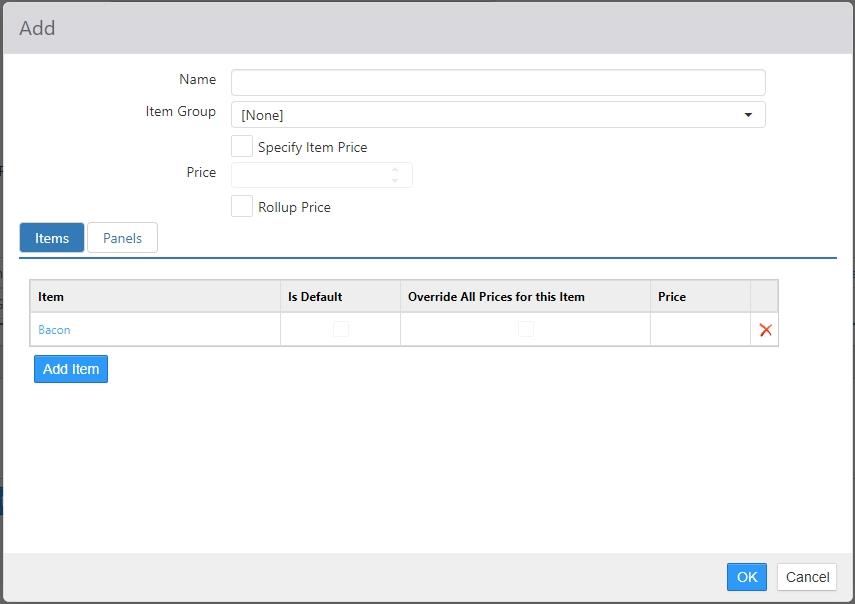
Use the Add or Edit component dialog to specify what items are eligible to be part of the combo component. Both dialogs work the same.
- Name: The name of the combo component. For example, "Entree," "Drink," or "Side Dish."
- Item Group: The item group to which the component is assigned.
- Specify Item Price: When checked, the price entered here overrides the item's normal price.
- Price: The price of this component.
- Rollup Price: When checked, the price isn't displayed separately on the 'Order List' screen on the Register, but is included in the total price of the combo.
- Items list: The items that are eligible to be this component of the combo.
-
Edit: Click on the item name to edit an existing combo component.
-
Add Item: Click to open the Add combo item dialog. The Item drop-down list now displays Item Description in addition to Item Name.
-
Delete: Select an item in the list and click Delete to remove it.
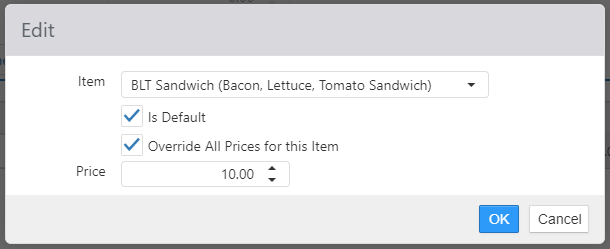
Use the Add/Edit combo item dialog to define an item that can be made a part of this combo. Both dialogs work the same.- Item: Use the drop-down list to select the item.
- Is Default: When checked, this item is used as the default item for this combo component. NOTE: If no item is set as a default, and if the combo has a selection panel configured, the panel can still be dismissed and the combo added to the order without all of its components being defined. See the section on the Selection Panels tab, below.
- Override All Prices for this Item: When checked, the price specified in this dialog overrides all other prices for this item when it is in a combo.
- Price: Enter the price of the item.
-
Modify Panels Tab
Panels that are to be displayed in place of the 'Modify' system screen.
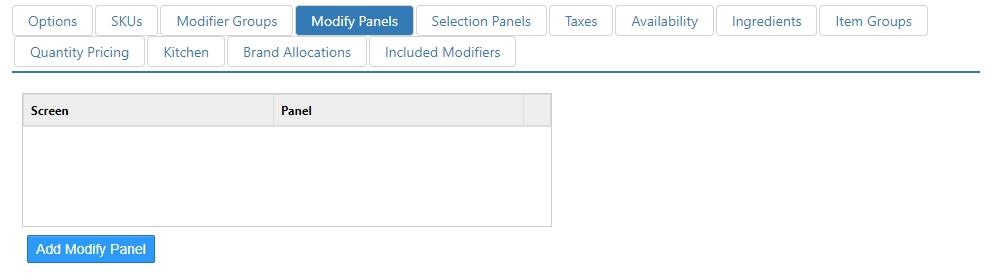
- Screen: Current screen that triggers the selected panel.
- Panel: The panel to be shown, when screen matches.
Selection Panels Tab
Panels that are to be displayed when the item is ordered or selected.
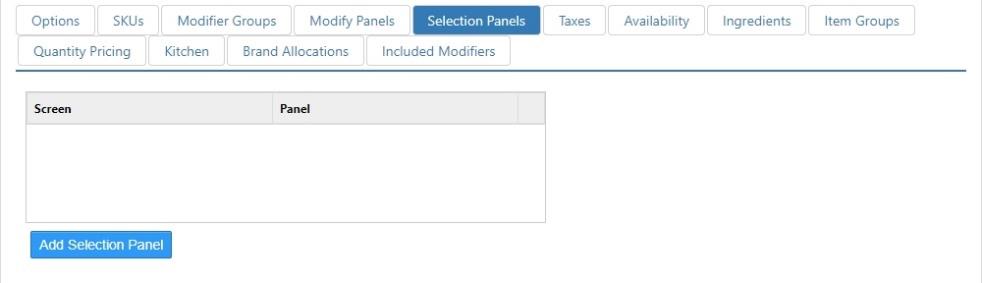
- Screen: Current screen that triggers the selected panel. Configured on the Screens page.
- Panel: The panel to be shown, when screen matches. Configured in Layout.
- Add: Click this button to open the Add dialog, then select the Screen and Panel using the drop-down lists.
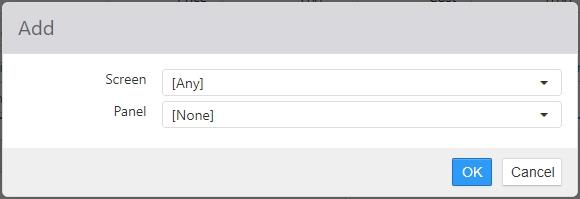
NOTE: If a combo has a selection panel configured, and if at least one component does not have a default item specified, then the system enters "out-of-sequence" mode. This means that the component selection panel can be dismissed and the combo added to the order without all of its components being defined. This allows cashiers to take orders as they are spoken by the customer without having to interrupt them to ask for the combo components they want.
The Register application will not allow the order to be closed before all components of the combo are selected. To select missing components, select the combo on the Order List to display the selection panel again.
Taxes Tab
Taxes that are to be applied to the item, in addition to those inherited via the revenue center.

Availability Tab
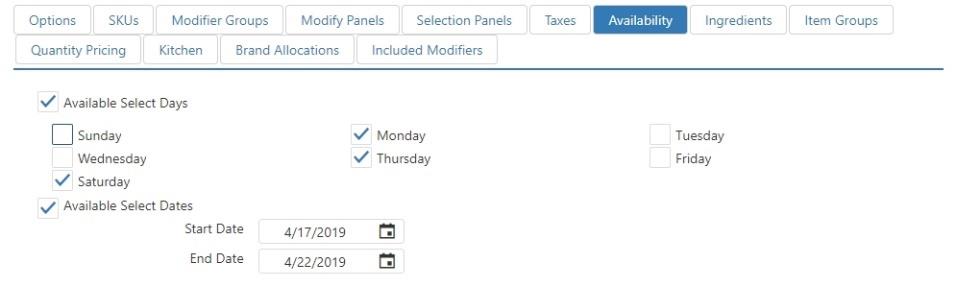
- Available Select Days: Item can only be ordered on the checked days of the week.
- Available Select Dates: Item can only be ordered within the defined date range.
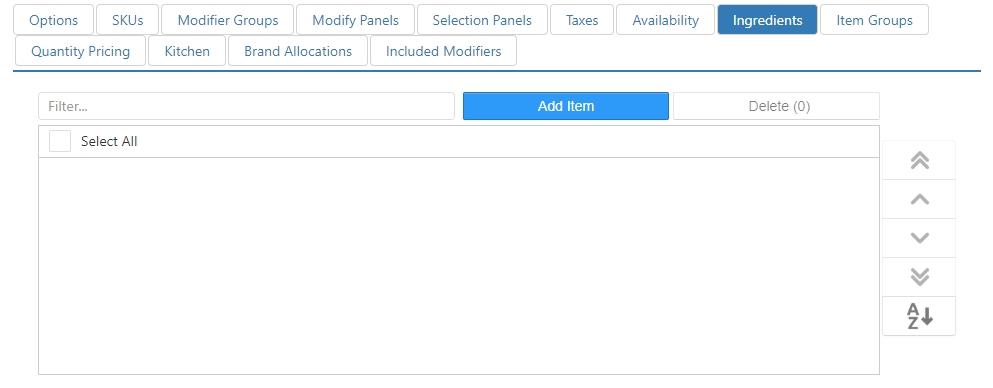
Ingredients Tab
Items that are considered ingredients when calculating modifier prices, and when determining valid modifier codes on Customer Portal.
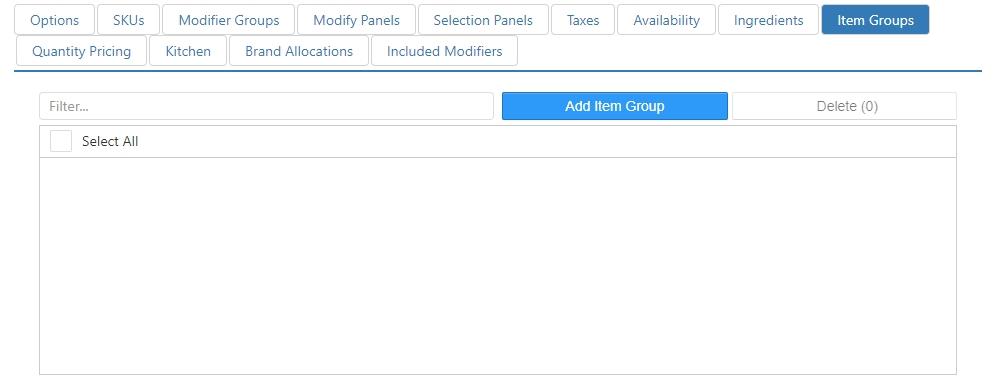
Item Groups Tab
Item groups that the item belongs to.
- Select All: Select this in order to select all available Item Groups.
- Add Item Group: To select an Item Group select this button.
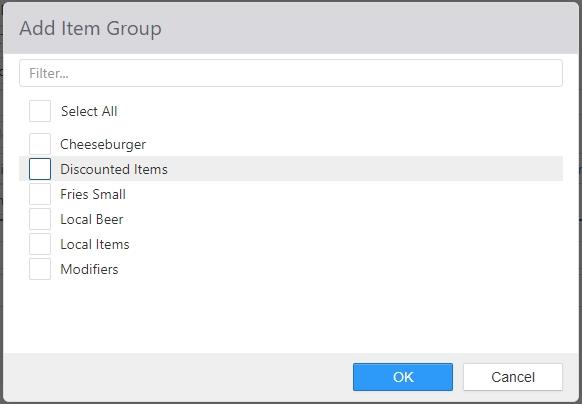
NOTE: Changes made on this tab are also made in the appropriate item group on the Item Groups page, and vice versa.
Quantity Pricing Tab
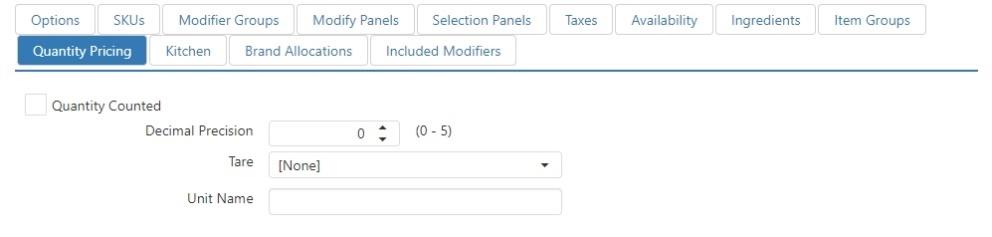
- Quantity Counted: Item is ordered by weight.
- Decimal Precision: Number of decimal places of weight.
- Tare: Tare that the item is packaged in.
- Unit Name: Name of the unit of measure.
Kitchen Tab
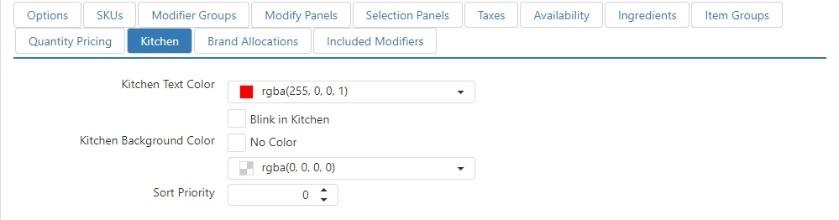
- Kitchen Text Color: Color of the item text when displayed on kitchen display.
- Blink in Kitchen: Item name flashes on kitchen display.
- Kitchen Background Color: Color of the item background when displayed on the kitchen display.
CAUTION: Be careful when setting background colors and text colors. Setting colors that are too similar to each other can result in items being illegible on the kitchen display.
- Sort Priority: Position on the kitchen chit and kitchen display relative to other items. Order items and modifiers appear sorted by Sort Priority (ascending) and then by time ordered (ascending).
Brand Allocation Tab
Distribute sales of the item across more than one brand. Click the 'Add' button to open the Edit Brand Choice dialog, wherein you can select a brand and set its weight.
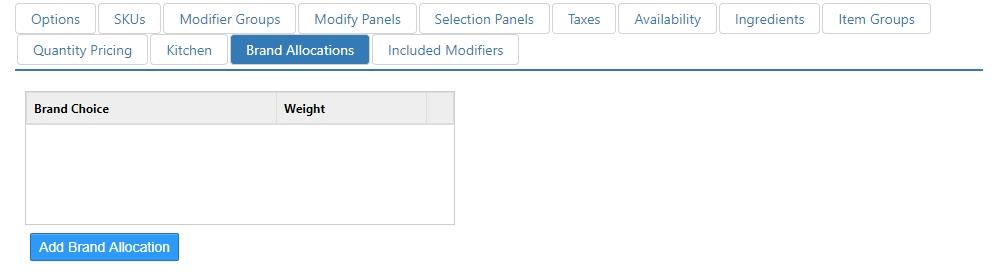
- Brand Choice: Brand to allocate sales to.
- Weight: Percent of the net sales to allocate to the selected brand.
Included Modifiers Tab
Modifiers that are implied as being included in/on the item by default.
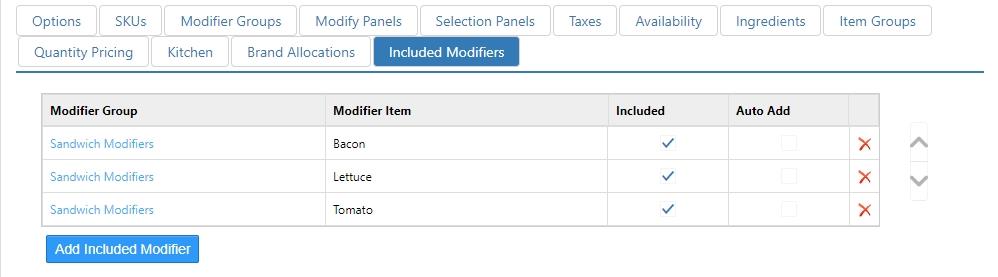
Click the Add button to create a new included modifier. Select a modifier and click the Edit button to edit an existing modifier.
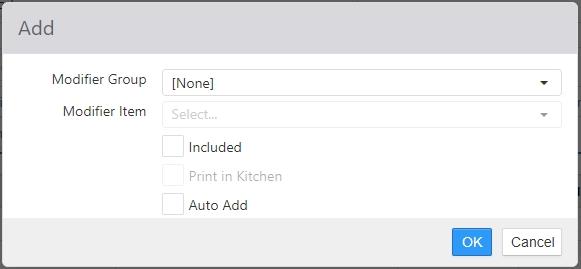
- Modifier Group: Modifier group the included modifier belongs to.
- Modifier Item: Modifier that is included.
- Included: Modifier is included in/on the item.
- Print in Kitchen: Always print the modifier in the kitchen, even when not selected.
- Auto Add: Automatically add the modifier when the item is ordered.
Custom Fields Tab
Allows the user to create/define custom fields for items to leverage customer-specific data and provide cleaner data management and usage.
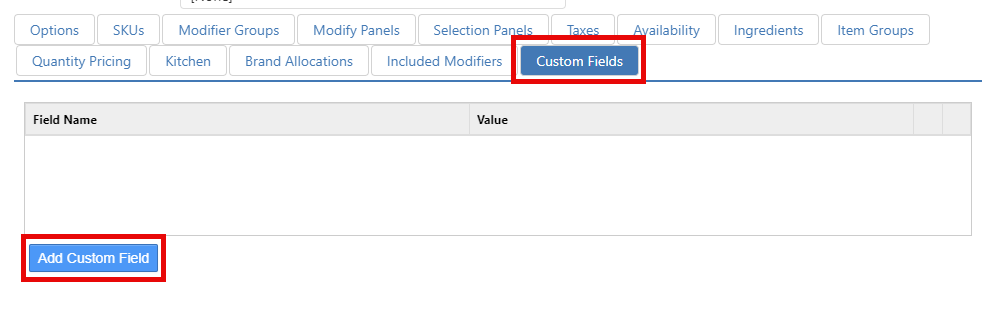
To add a custom field:
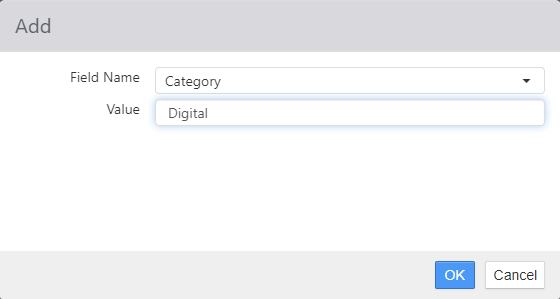
- Select the Add Custom Field button.
- Select a Field Name from the provided dropdown.
- Enter the desired text in the Value field.
- Click OK to save.