mParticle Implementation
Overview
mParticle is a Customer Data Platform (CDP) that acts as a central hub for customer data. Punchh's integration with mParticle brings user and engagement data from Punchh into mParticle's profiles. This helps you analyze and use data from Punchh, all first-party properties, and other vendors. You can then segment your users with Punchh data or connect it to other vendors and activation points. The following article explains the implementation process to connect Punchh and mParticle. Contact your Punchh representative for additional guidance while completing these steps.
Supported Events: Punchh to mParticle
Refer to the mParticle Webhooks Adapter Overview for more details. (For overall details on these event types, refer to the Events Framework article in the Developer Portal.)
| Event | Description | Payload |
|---|---|---|
| Guest | This includes created/updated events triggered as and when they happen in the Punchh system. | Example Payload |
| Loyalty Check-in | This includes user check-in events triggered as and when they happen in the Punchh system. | Example Payload |
| Gift Check-in | This includes user gift check-in events triggered as and when they happen in the Punchh system. | Example Payload |
| Redemptions | This includes user redemptions, created/updated events triggered as and when they happen in the Punchh system. | Example Payload |
| Rewards | This includes events where a user is gifted/issued a reward in the Punchh system, triggered as a result of any configuration or activity. | Example Payload |
| Transactional Notifications | This includes transaction-based events such as gift card auto-reload, payments, etc. | Example Payload |
| Marketing Notifications | This includes events that are based on campaigns. | Example Payload |
Ingest External User ID in Punchh
Part of the Punchh + mParticle integration is sending unique user identifiers stored as external_source in Punchh and the corresponding values to mParticle to be used within segmentation. (If there is no identifier selected, then by default, Punchh would send external_source as blank and external_source_id as Punchh user_id under events data payload.)
Create New Users in Punchh via Sign-up API With External Source ID
Punchh allows external identifiers to be sent with the user profiles via sign-up API under the external_source and external_source_id fields. There will be a uniqueness for the value associated, and the same value cannot be associated with multiple profiles. Review the following API documentation on our Developer Portal for more details:
- Mobile Sign-up API and SSO Sign-up API: These allow you to send external identifiers with user profile at the time of sign-up under
external_source(e.g., “customer_id”) andexternal_source_id(e.g., “skjfbvjfbnjdfnsdkncsmb”) value with the string data type.
Update External Source ID for Existing Users
Punchh also allows external identifiers to be added to a profile via a user update endpoint where that value does not exist in Punchh and is not associated with any other profile already to maintain uniqueness. Review the following API documentation on our Developer Portal for more details:
- Mobile User Update API and SSO User Update API: These allow you to update external identifiers with user profile under
external_sourceas “customer_id” andexternal_source_idas “skjfbvjfbnjdfnsdkncsmb” value with the string data type. - Dashboard User Update API: This allows you to update
external_source_idin the Punchh system based on the user ID and email address (if present already). If the user is not present in Punchh, it will return a 404 error.
Note: Contact your Punchh representative to enable the External User Identifier flag within the platform for your brand (if not already enabled).
Outbound Platform Configuration
Contact your Punchh representative to ensure you have Webhooks set up for your business and to obtain the host URL, API Key, and Secret through mParticle. You will use this information to set up the outbound webhooks adapter, described below.
Outbound Webhooks Adapter
- Navigate to Data Sharing > Outbound Webhooks.
- Click the Adapters tab.
- Click on Create Adapter to set up an adapter.

- Fill out the following fields:
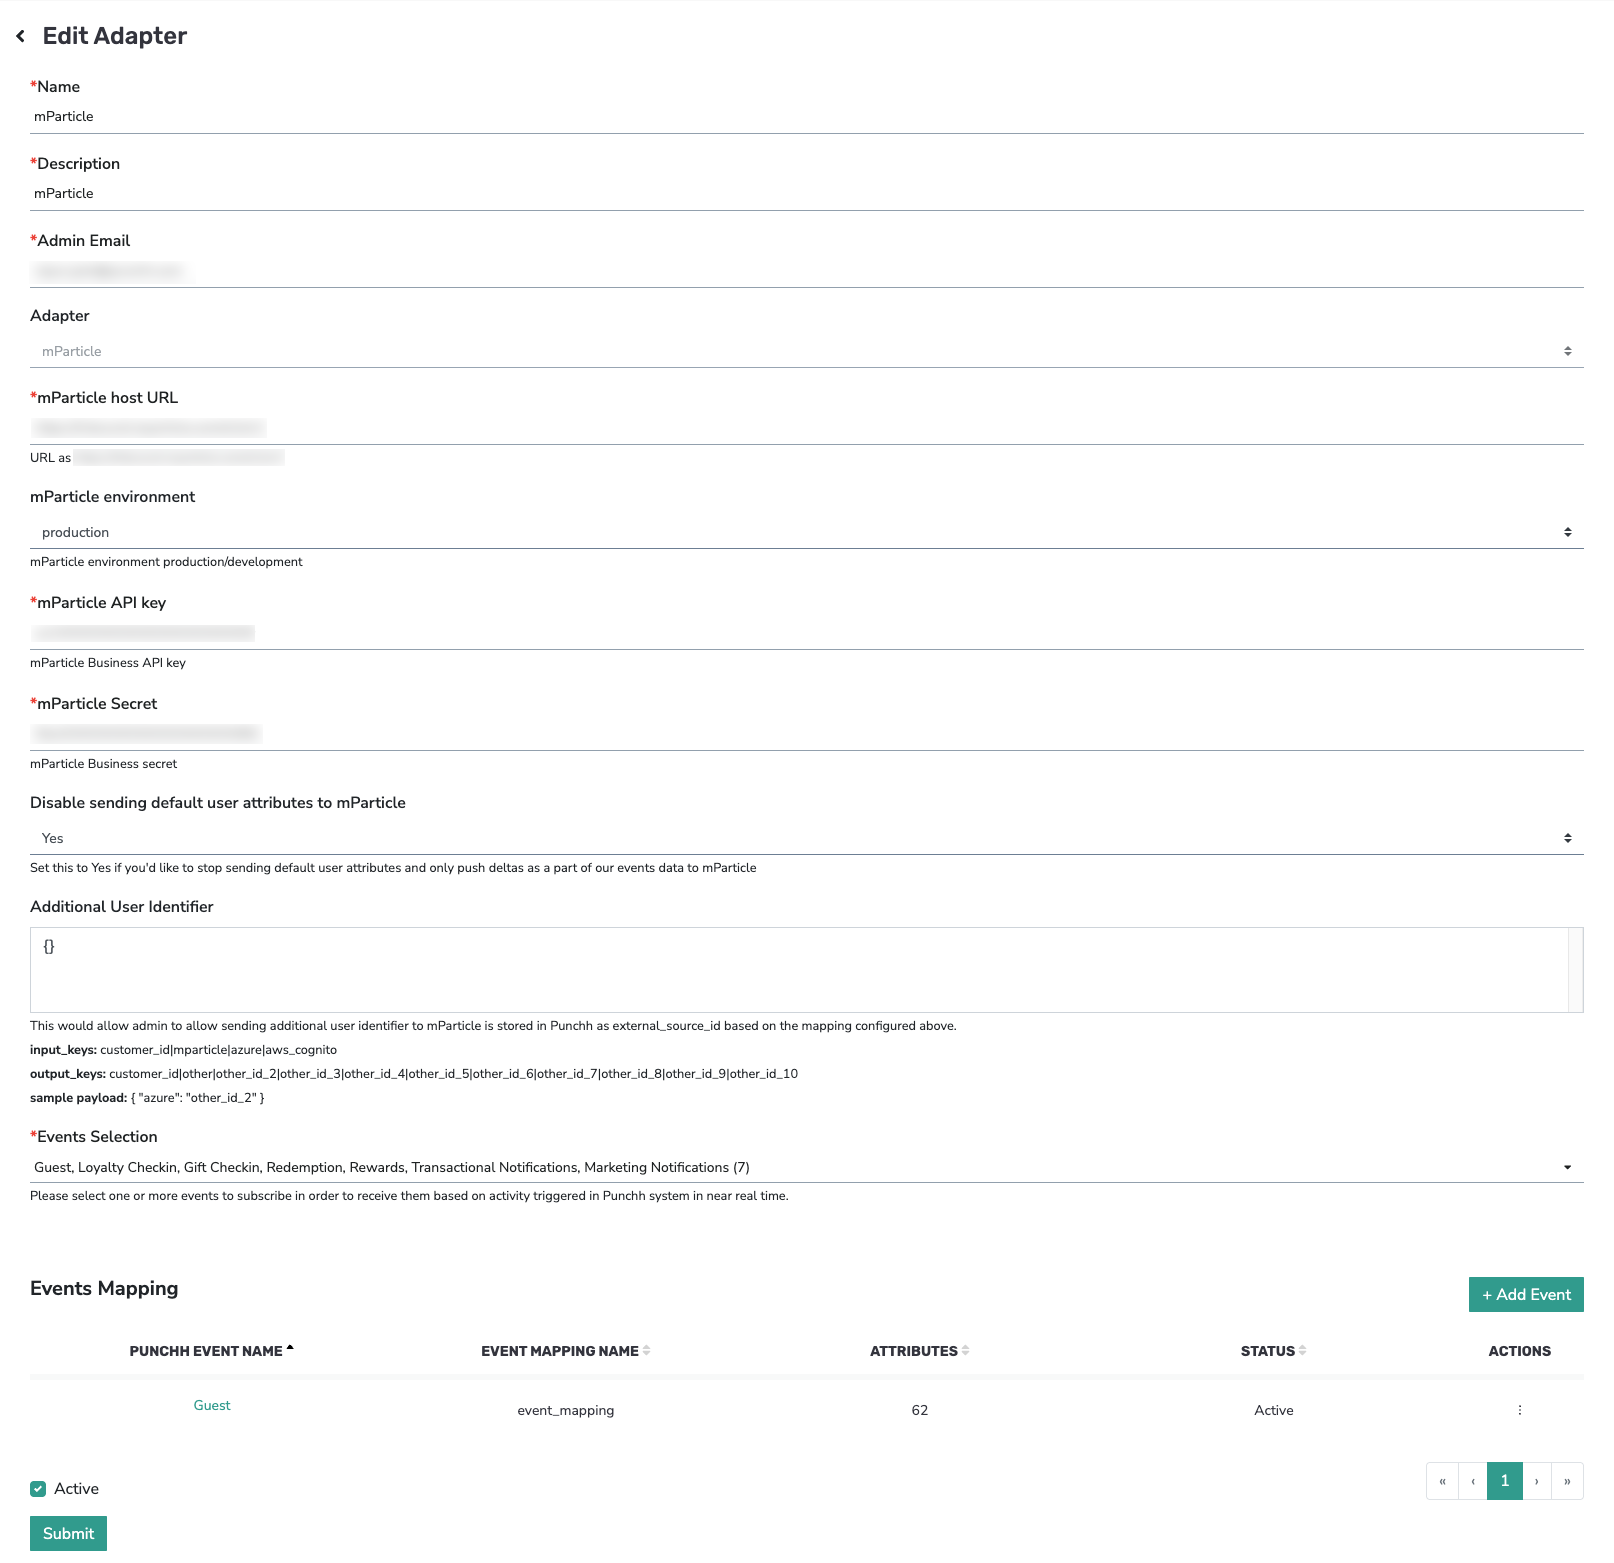
- Name: Enter a name such as "mParticle Adapter".
- Description: Enter a description of the adapter.
- Admin Email: Enter your admin's email address.
- Adapter: Select mParticle from the drop-down menu.
- mParticle host URL: [provided by mParticle]
- mParticle environment: Select production from the drop-down menu.
- mParticle API Key: [provided by mParticle]
- mParticle Secret: [provided by mParticle]
- Disable sending default user attributes to mParticle: Select Yes or No from the drop-down menu.
- If Yes, then the system will stop sending default user attributes in the events data payload except for the Guest event.
- If No, then the system will continue to send default user attributes in the events data payload.
- Additional: User Identifer: Use this field to send additional user identifiers, such as
customer_id, to mParticle. - Under Event Selection, check the box next to the events you wish to include. Refer to the Supported Events section to see which events can be selected.

- The Event Mapping section allows you to subscribe to required events and select fields to remove/modify attribute names while sending them to mParticle as part of event data.
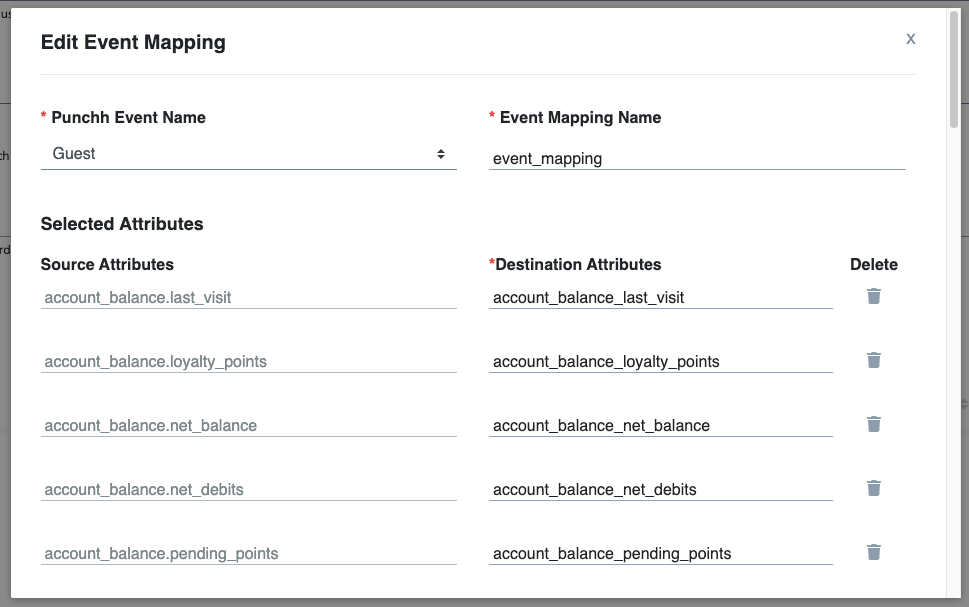
- Click Add Event to create a new event mapping.
- Punchh Event Name: Select the event in the drop-down menu.
- If Transactional Notifications and Marketing Notifications are selected, then select the sub-event type under Punchh Event Type.
- Event Mapping Name: Enter a name for the event mapping.
- Destination Attributes: Modify the attribute names, as needed.
- Delete: Click the trashcan icon to delete any attributes, as needed.
- Click on Submit to enable the Webhook Adapter.
Inbound Platform Configuration
Use the following steps if you wish to have Punchh ingest mParticle segments. Note: Only user profiles found in both mParticle and Punchh would be included in these segments.
Ensure you have Webhooks set up for your business. Contact your Punchh representative with questions.
Inbound Webhook
- Navigate to Data Sharing > Inbound Webhooks.
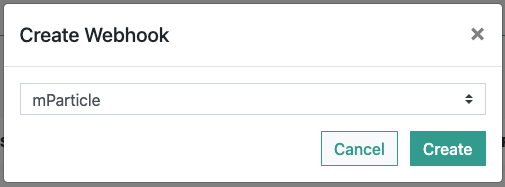
- On the Webhooks tab, click + Create Webhook.

- Select mParticle from the drop-down menu.
- Click Create.
- Click the mParticle name that appears in the Webhooks list.

- Copy the App URL and API Key.
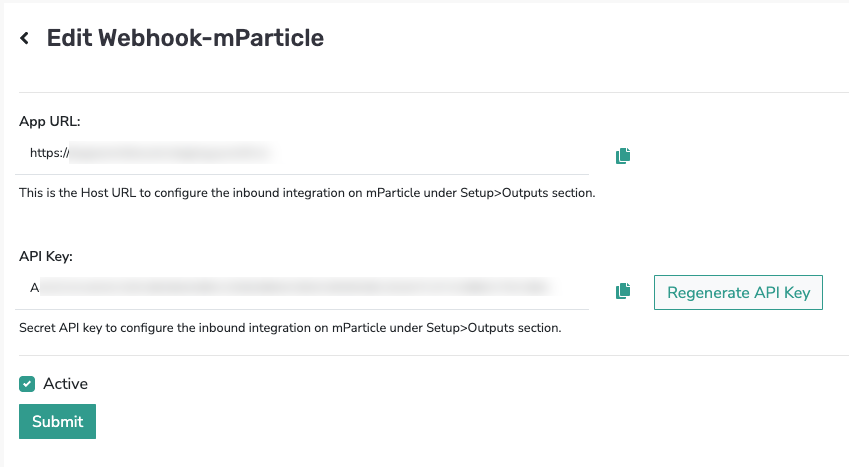
- Click Submit.
- Navigate to the mParticle platform.
- Click Setup > Outputs.
- Configure your Event Output and enter the URL and API Key obtained in the above steps. Refer to Connect an Event Output in mParticle for more details.
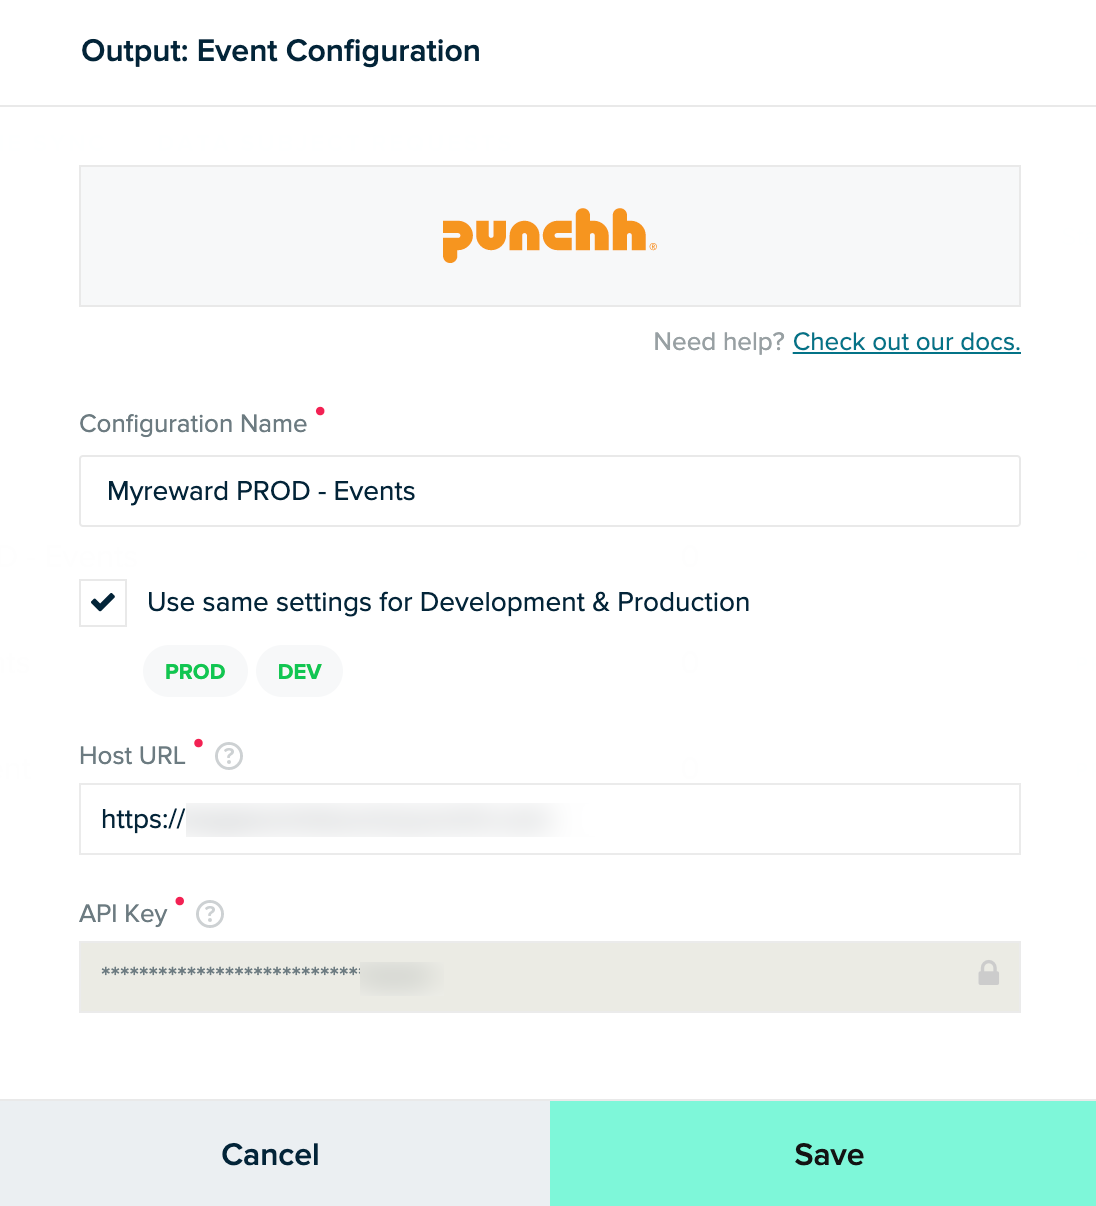
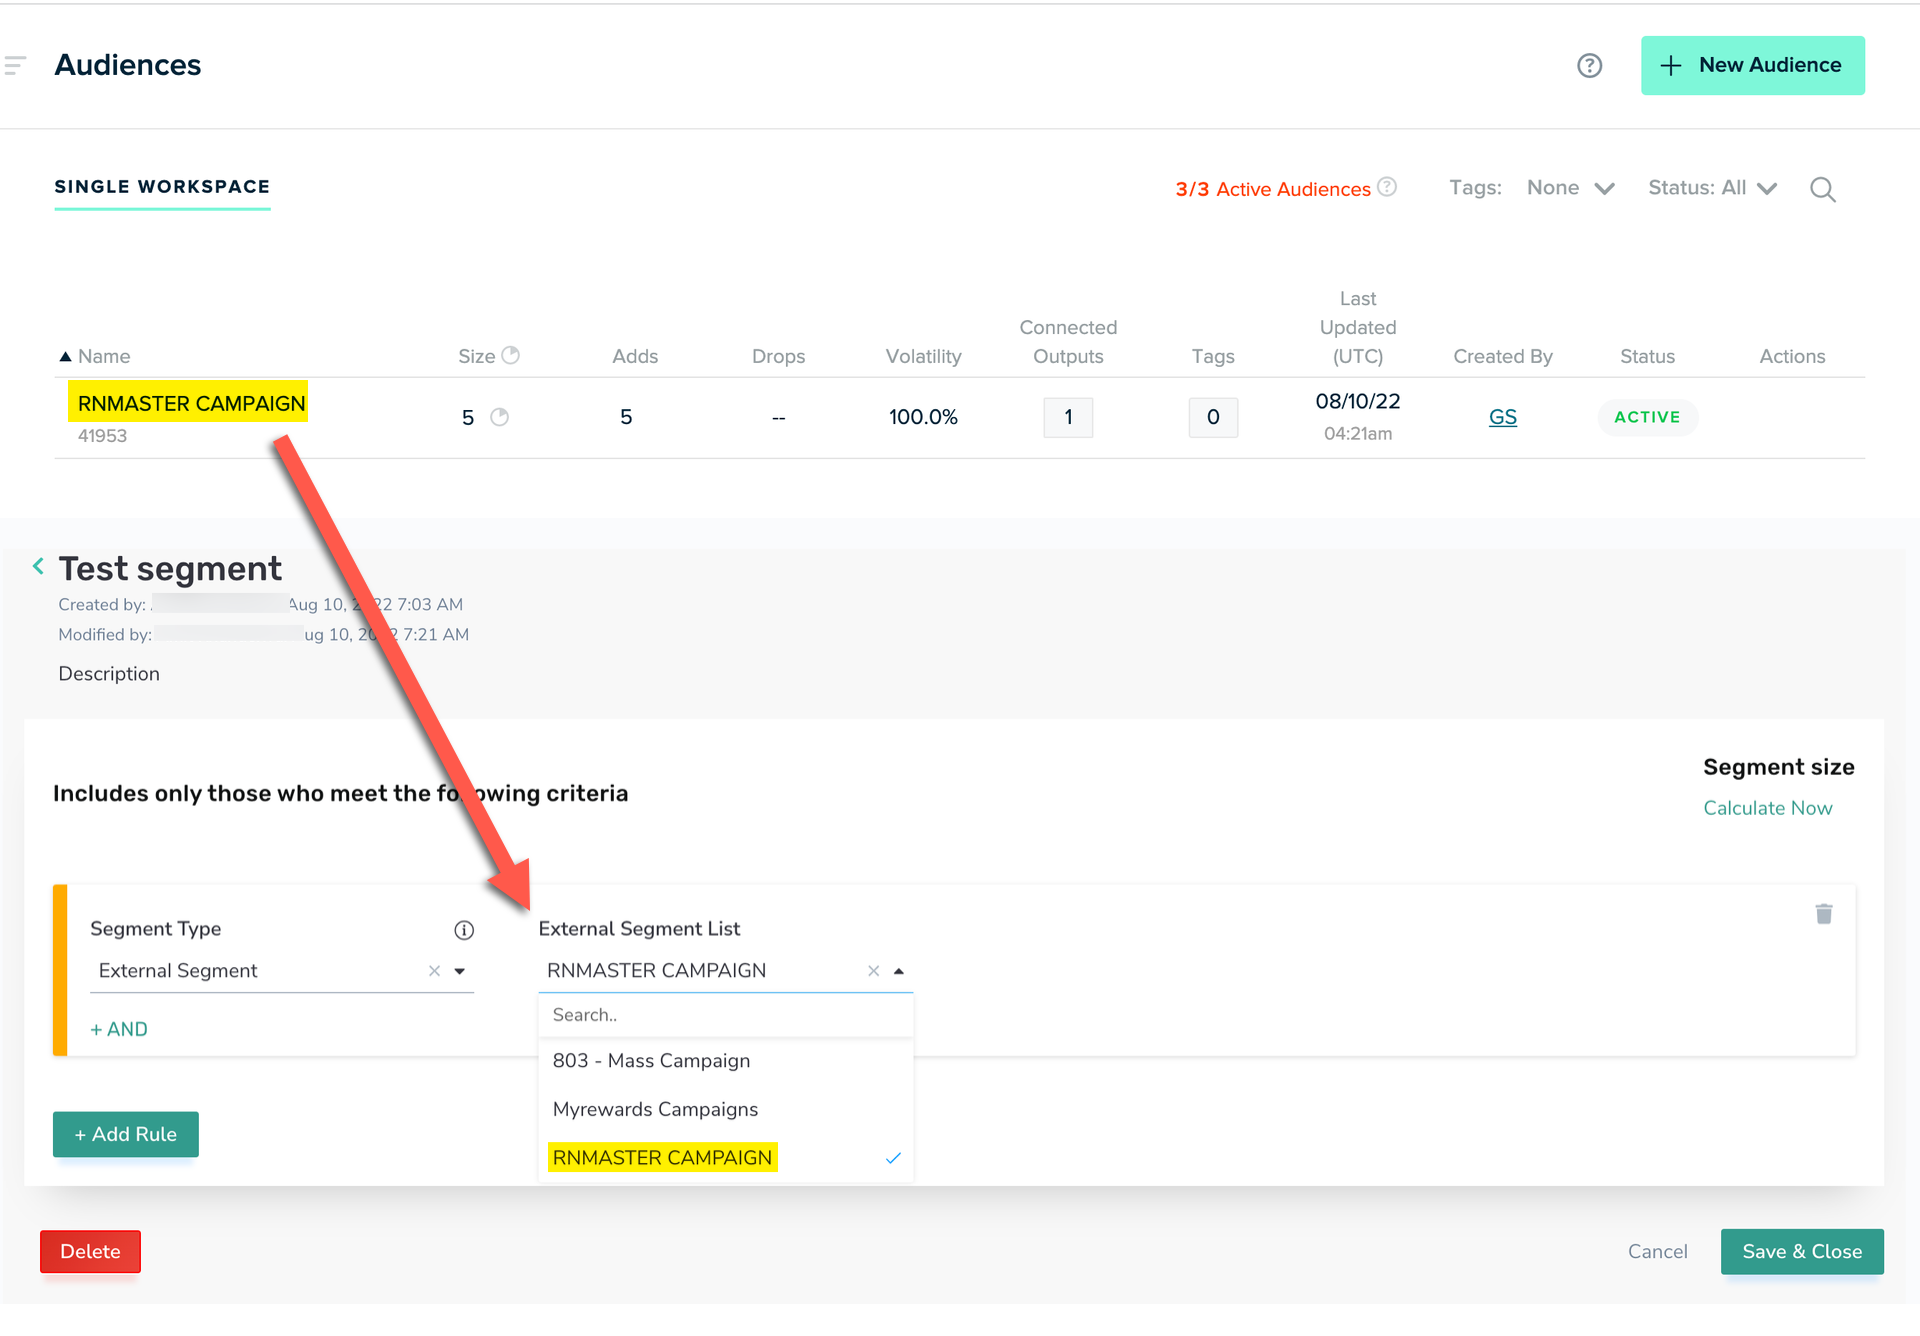
- Once the segment sync is initiated from mParticle, an Audience is created in the mParticle platform, and an external segment of the same name appears in the Punchh platform.