Webhooks
This article was previously titled "Webhooks Manager."
Webhooks
Webhooks allow various business systems/clouds to integrate with the Punchh Platform. Navigate to Data Sharing > Inbound Webhooks or Data Sharing > Outbound Webhooks on the left side panel to view the Inbound and Outbound pages.
Learn More! For a more comprehensive look at Webhooks visit our Developer Portal at Events Framework - Webhooks.
Inbound Webhooks
The Inbound Webhooks page details events coming in from other third-party systems to Punchh.
Webhooks

- Allows to setup/edit of inbound webhooks
Logs

- Displays the last 100 webhooks published based on events
Outbound Webhooks
The Outbound Webhooks page details events going out from the Punchh system to your third-party systems.
Home
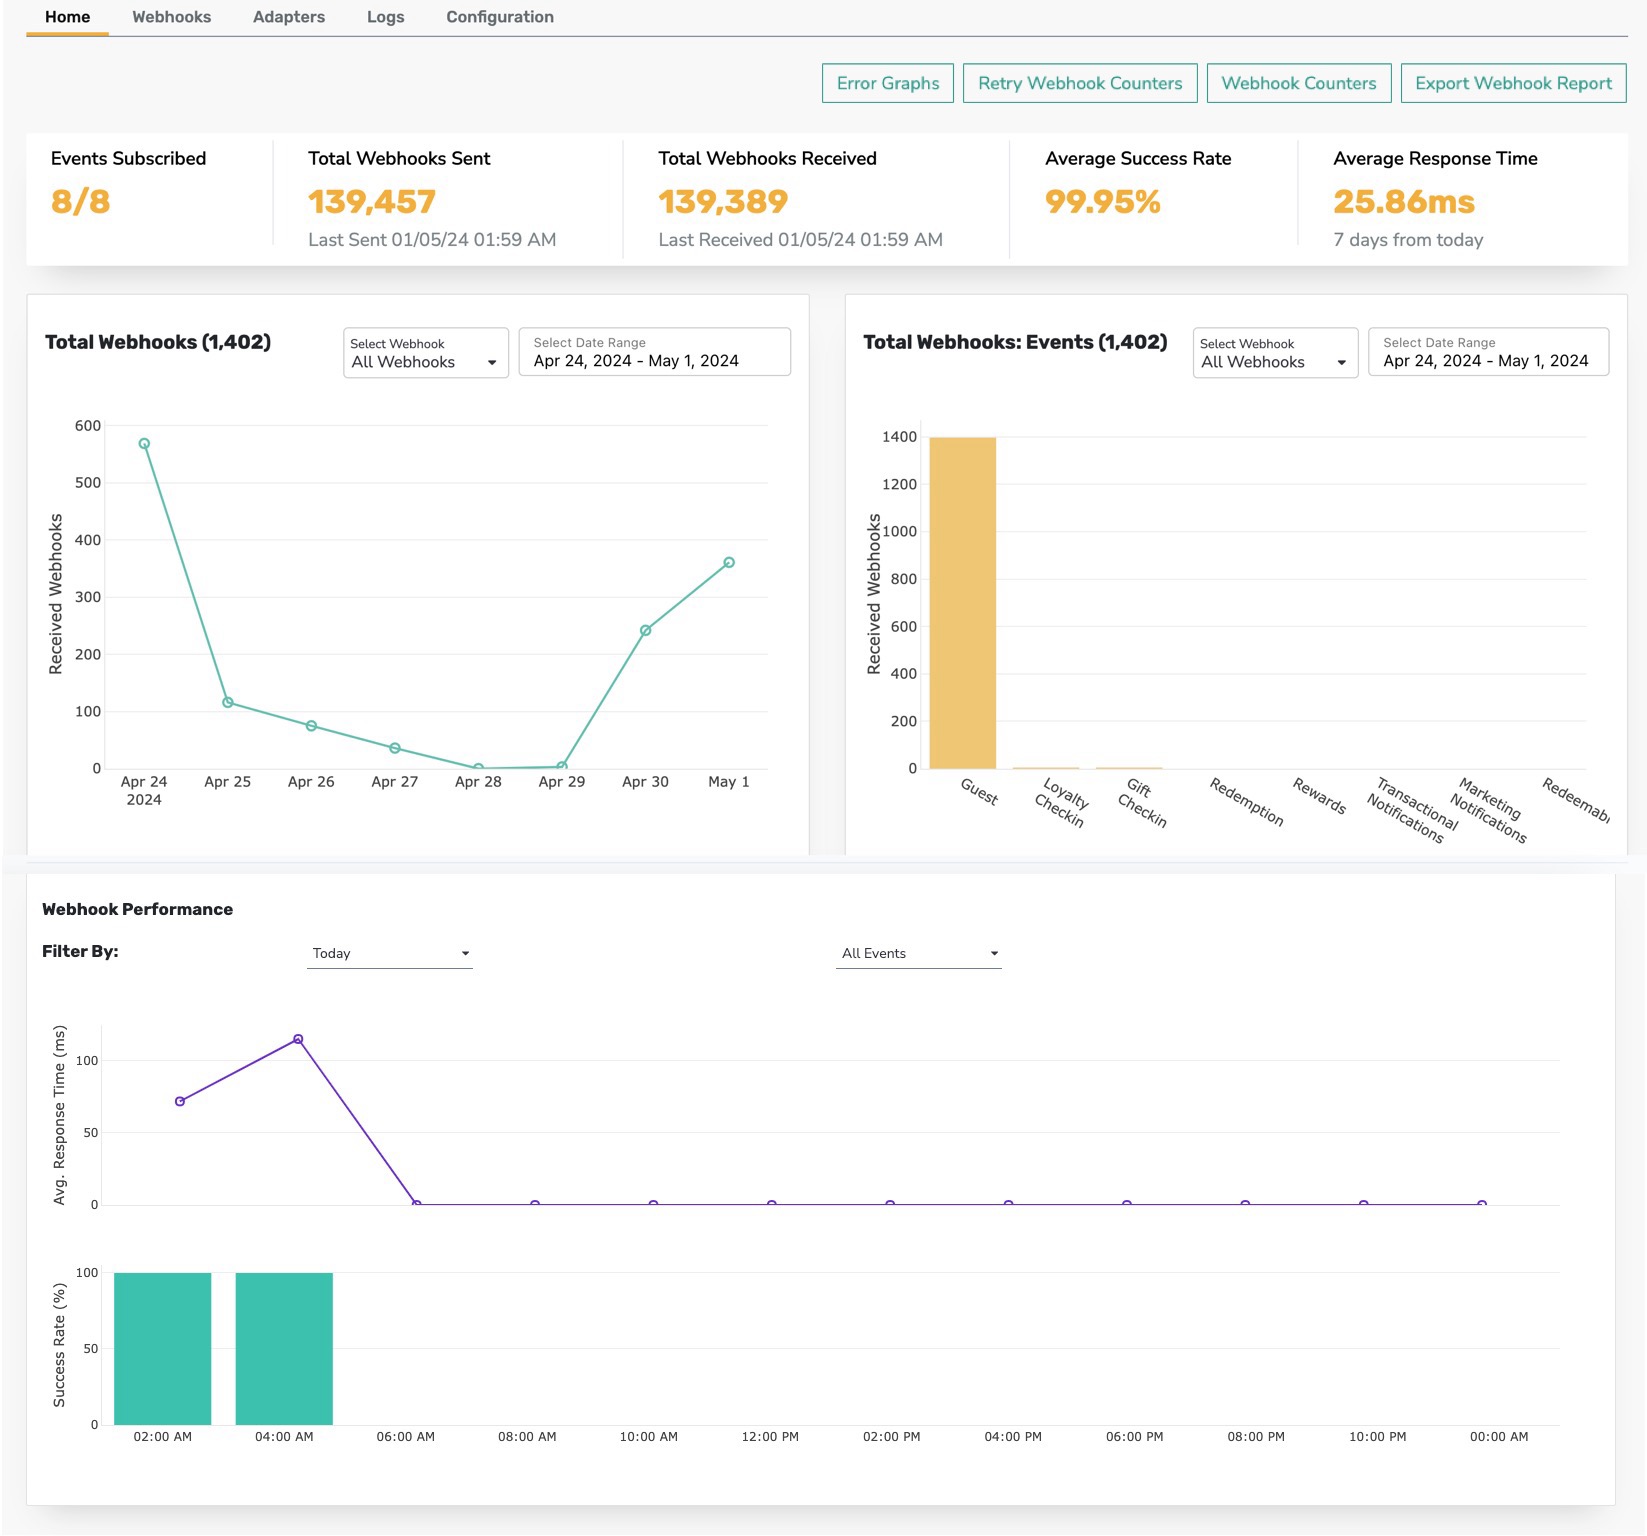
- Displays overall activity of the webhooks published
- Includes activity-related stats for events sent and received by the target system
- Displays average response time and success rate
- Error Graphs display any webhooks performance errors that can be filtered by date, event, and type
- Retry Webhooks Counter tracks and displays webhook retry message details
- Webhooks Counter option allows you to filter by events based on the date
- Export Webhooks Report allows you to export a webhook count report as a CSV file
- You can export this report immediately or set up a recurring schedule:
- Immediately: Choose a date range and emails for an immediate file download or email report.
- Daily: Choose a time for sending the email and the report will be sent daily at the selected time for the 24-hour period before the schedule runs.
- Weekly: Choose a day and time for the starting 7-day report that will be sent weekly on the given day and the chosen time for the 7 days when the schedule runs.
- Monthly: Choose a start date and time for the schedule to run on and the data sent will be of the previous month.
For example, a report scheduled to arrive on the 15th of each month at 2 AM will have data from the 15th of the previous month at 2 AM to the 15th of the current month at 2 AM.
- All previously scheduled exported jobs will be listed in the Schedule Export Jobs section
- You can export this report immediately or set up a recurring schedule:
Webhooks
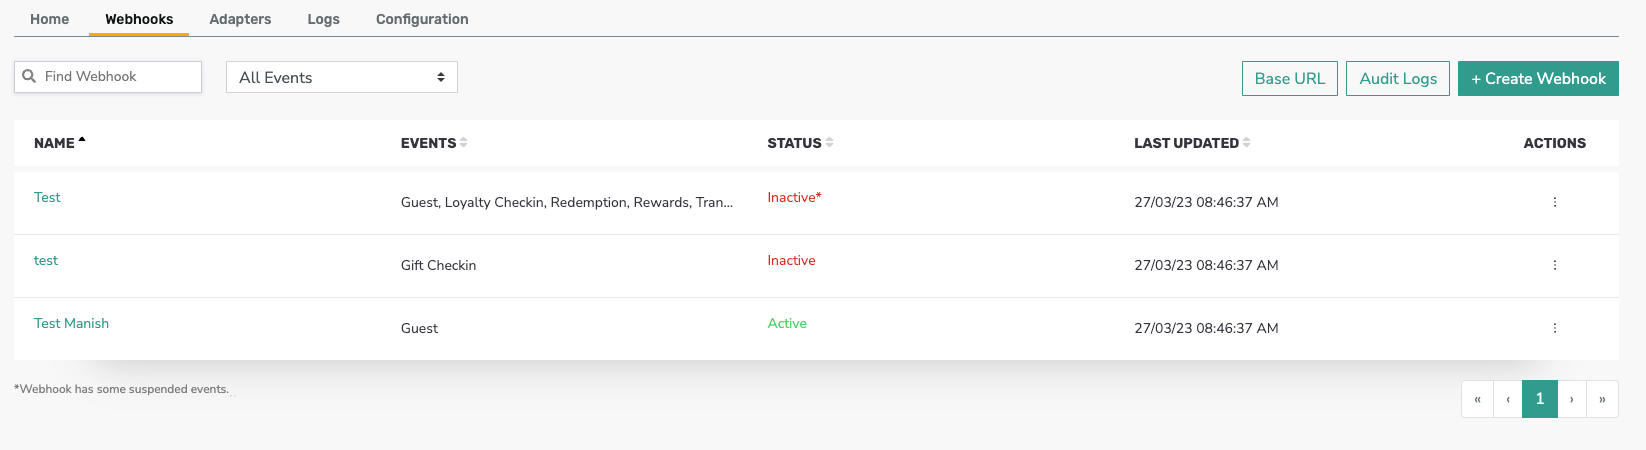
- Allows to setup/edit base URL under Base URL
- Allows to setup/edit webhook for the events required to subscribe
- Allows to send test request
Adapters
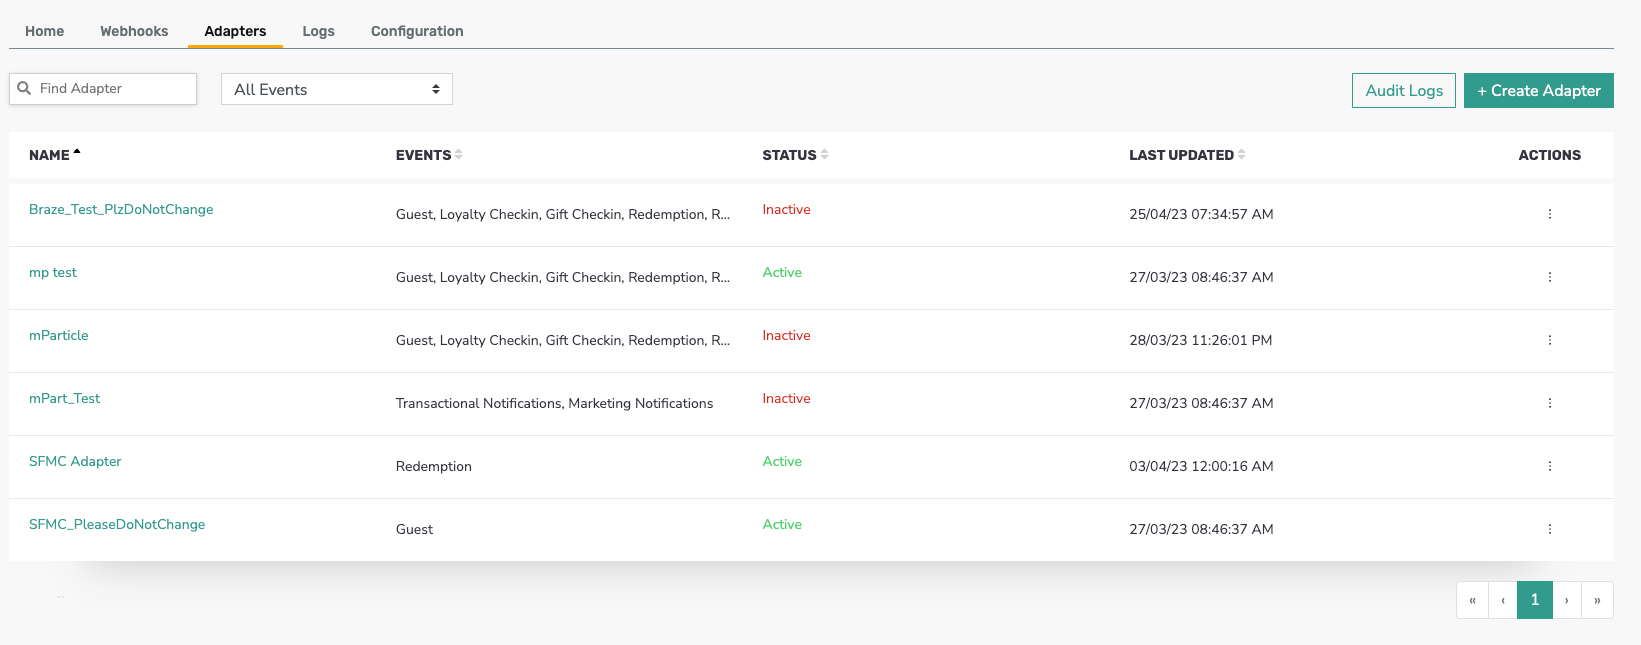
- Displays and filters Adapter details
- Create Adapter allows you to add more adapters (mParticle, Braze, and SFMC are currently supported)
- The Actions menu provides additional options:
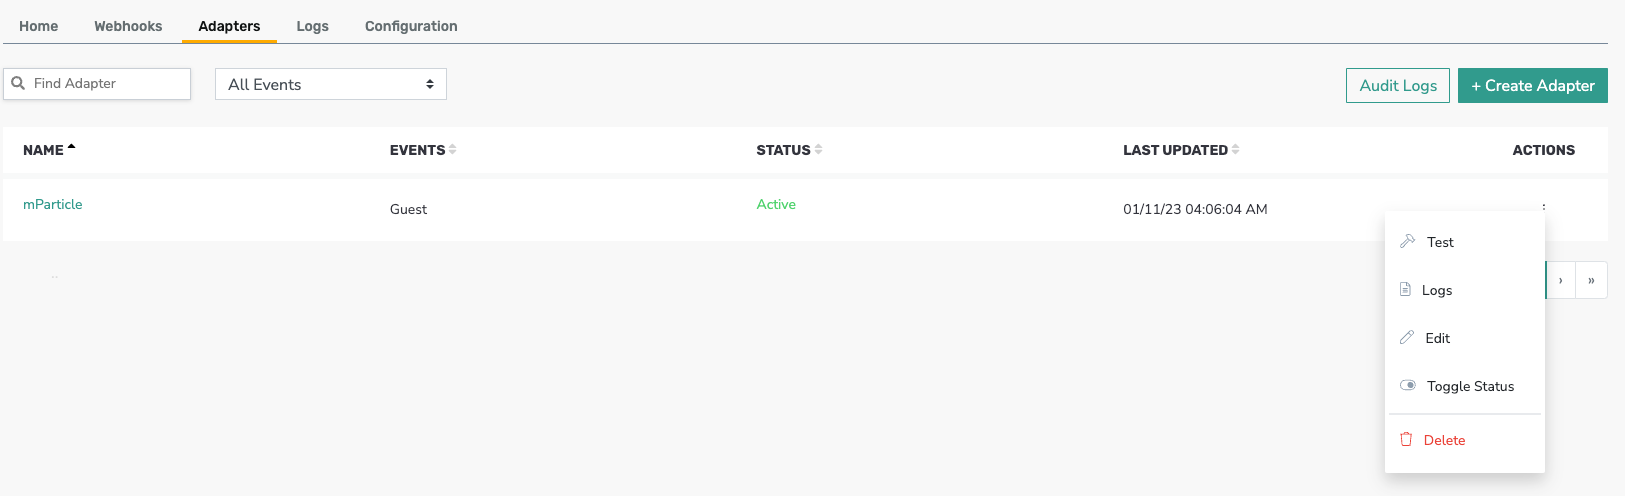
- Test: Click to test the adapter. A list appears with all the events included in that adapter. Use the Actions menu again to show the webhook response.
- Logs: Click to view the adapter log details.
- Edit: Click to edit the adapter.
- Toggle Status: Click to activate or deactivate the adapter.
- Delete: Click to permanently delete the adapter.
| Adapter | Specific Configurations Fields |
|---|---|
| mParticle |
|
| Braze |
|
| Salesforce Marketing Cloud |
|
Logs
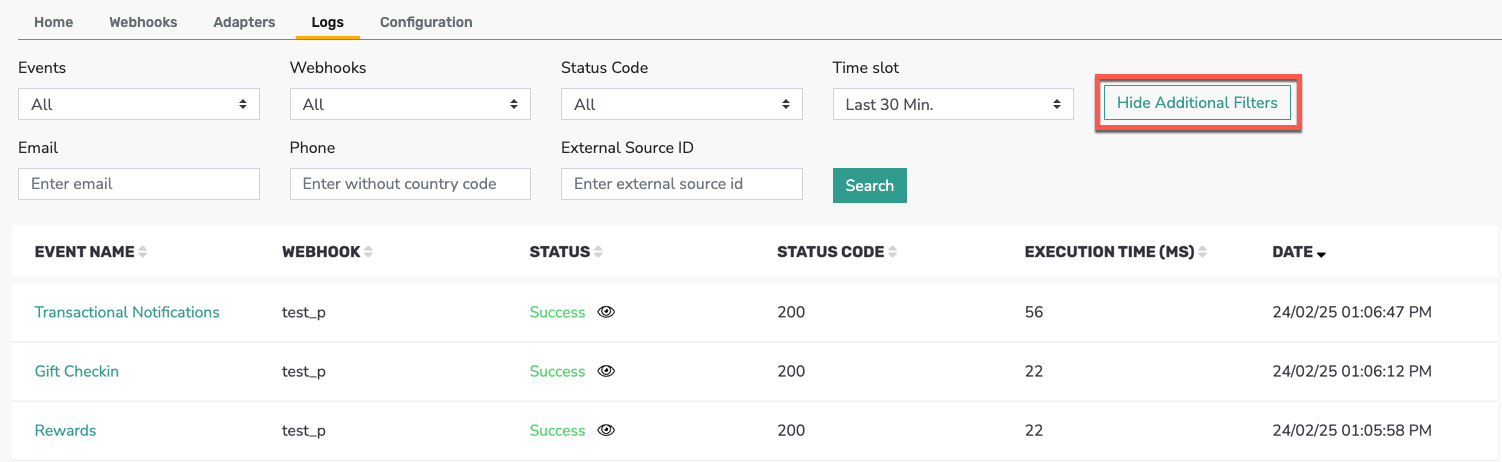
- Displays the last 100 webhooks published based on events including additional details like request/response, response time, etc.
- Click Show Additional Filters to display options to search by Email, Phone, External Source ID.
- If you select Marketing Notifications or Transactional Notifications as the Event type, a second drop-down menu appears titled Event Sub Types.

- If you select Custom Date Time as the Time Slot, From and To fields appear.

Configuration
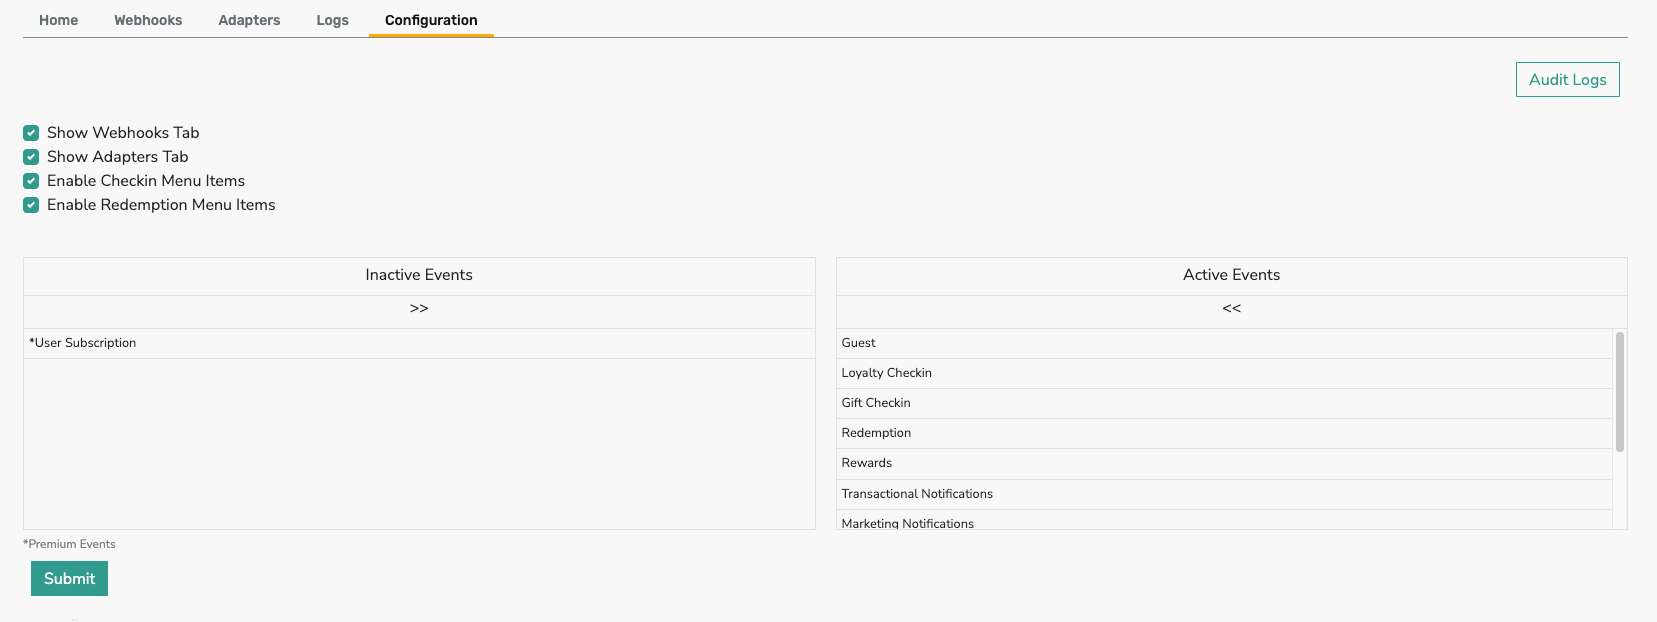
- Allows you to select and show certain interface options within the Webhooks sections:
- Show Webhooks Tab / Show Adapters Tab: Toggle on/off as needed. The Adapters tab is specifically for setting up mParticle, Braze, or SFMC. The Webhooks tab is for all other webhooks.
- Check Enable Checkin Menu Items and/or Enable Redemption Menu Items to enable menu item level data to be sent out for loyalty checkin and redemption events.
- Select the events your brand will utilize under Active Events. Leave any unneeded events under Inactive Events.
Configure Webhooks
- From the left side menu go to Data Sharing > Outbound Webhooks > Webhooks Tab
- Click on the Base URL > Add New URL to set up the base URL and name. This base URL will be displayed while setting up the webhook.

- Create a new Webhook by clicking on the Webhooks tab > Create Webhook.

- Enter a Name and Description for your Webhook.
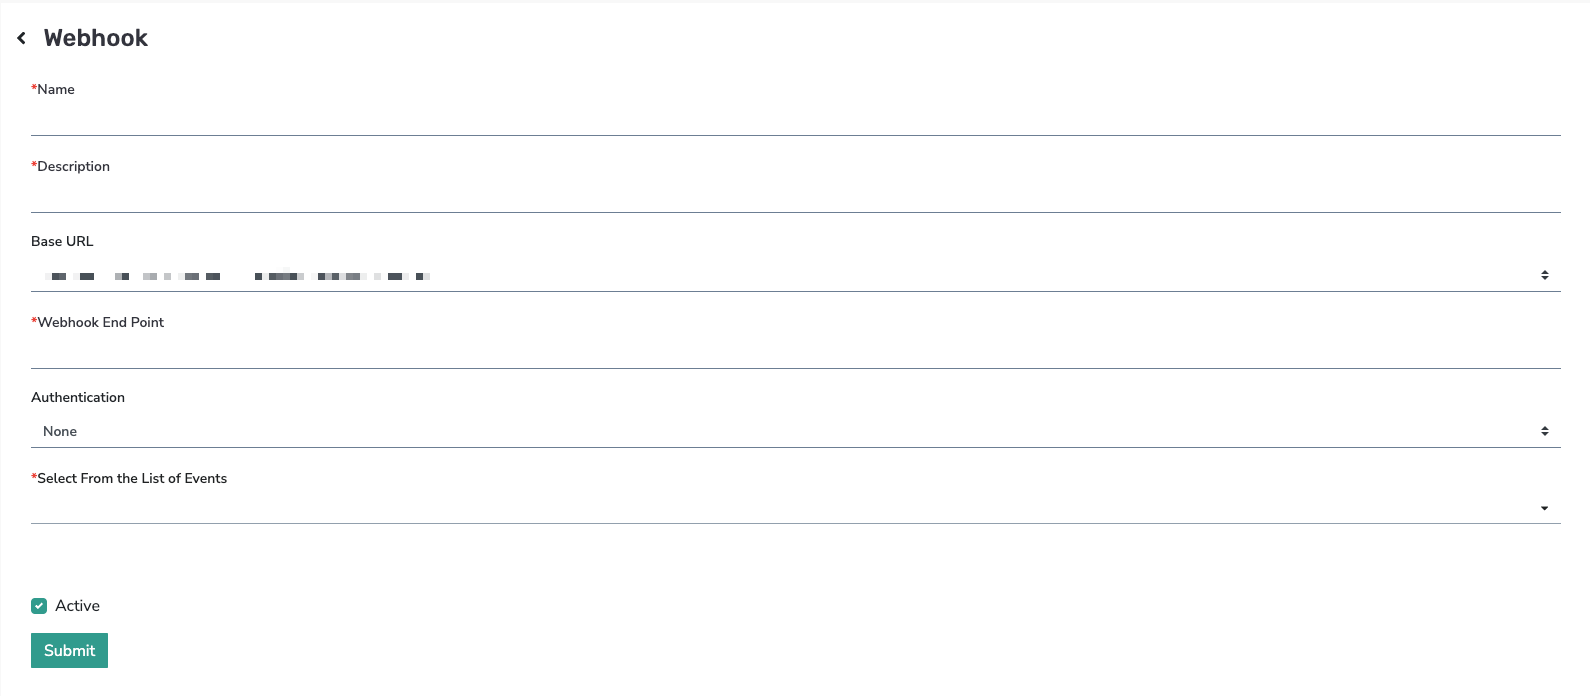
- Select the Base URL, enter the path (Webhook End Point), and choose authorization (Authentication).
- Subscribe to the events that you want to add. (Refer to the Events Framework section in the Developer Portal for details on all event types.)
- There are major events that cover the majority of use cases: Guest, Loyalty/Gift Checkin, Redemption, Rewards, and Coupon Issuance/Redemption.
- These events cover most reward or points gifting, signups, checkins, and redemption scenarios.
Transactional and Marketing Notifications
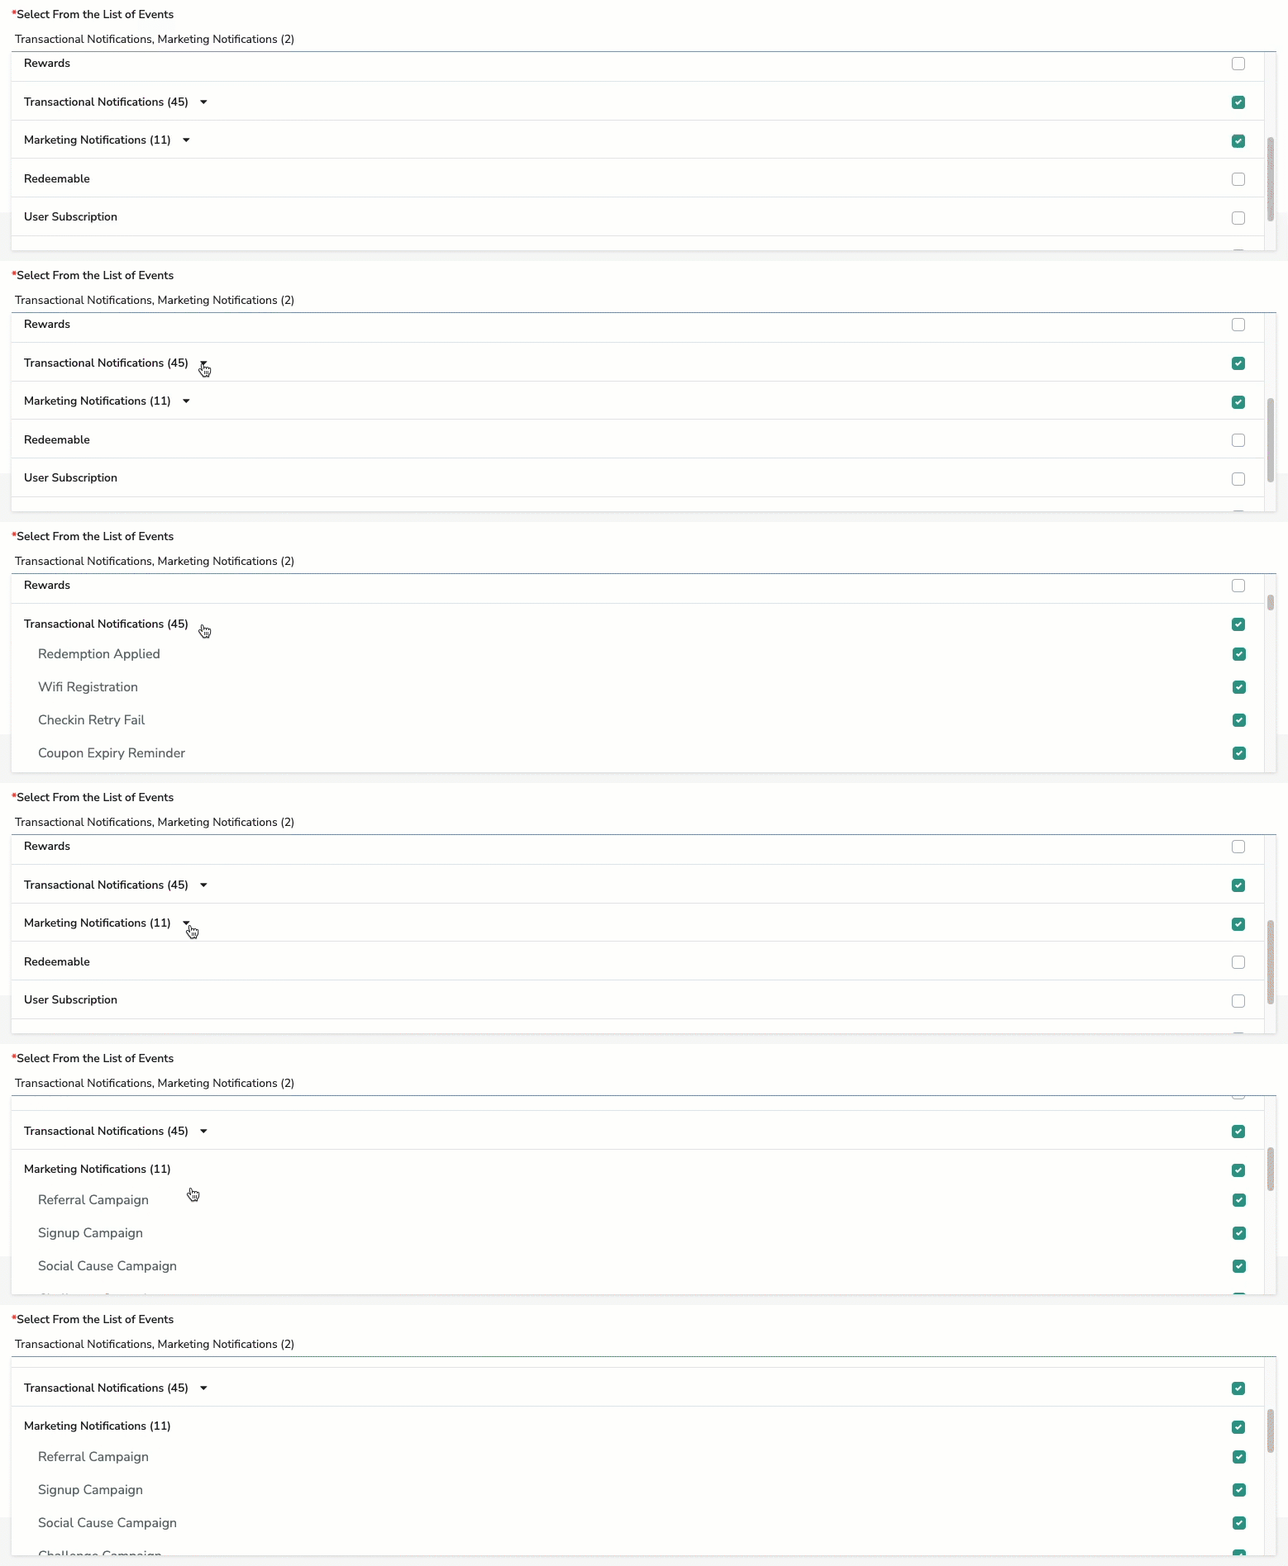
- Marketing and Transactional Notifications events cover specific scenarios which do not trigger major events eg. points expiry reminder, gift card related events etc.
- Marketing and Transactional Notification events should only be selected for scenarios when there is no direct gifting (Reward event) or signup (Guest event) or checkin (Loyalty Checkin event) or redemption (Redemption event) involved.
- In the List of Events drop-down menu, you have the option to select or deselect specific subevents under Transactional Notifications (45 subevents) and Marketing Notifications (11 subevents). If you select the main event only, all subevents will be selected.
- Punchh recommends reviewing the list of subevents and deselecting any that are not required for your business.
- Previously configured events will include ALL subevents until you edit the Webhook in the platform.
- Click on the checkbox to make it Active, and then click on Submit to save it. In case of any issue, it will display an error message.
- Once verification is completed, the webhook will be ready to receive the subscribed events with "Active" status.
- In case the verification is not successful, the status will remain "Inactive" and no data will be pushed to that webhook.
- From the webhook list you can select another operation via the three dots button under Actions to test with some dummy event samples. You can also edit or delete the webhook from here and see logs specific to the selected webhook.
