Post Checkin Offer Campaign
Post-checkin Offer campaigns are intended to gift a guest extra points/punches, a redeemable, or a digital collectible upon making a purchase and performing a loyalty check-in. Post-checkin campaigns are triggered by a guest scanning their receipt barcode after a purchase and are based on receipt time. (Note: This is based on the timezone of the location where the checkin happened.) For example, a guest may receive a redeemable such as a free side with the purchase of a sandwich, or a guest may receive double points/punches if they make a purchase during happy hour every Tuesday.
If you set your campaign to award the guest with a redeemable, the offer entices them to return to your store because they have a gift awaiting them next visit. If you set your campaign to award extra points/punches on certain days, you can entice guests to visit your store on those days/times.
Create a New Post-checkin Offer Campaign
To create a new Post Checkin Offer campaign:
- Navigate to Marketing Automation > Campaign Management in your left-hand navigation toolbar.
- Click Create Campaign in the upper right corner.
- Click Automations.
- Select the Post-checkin campaign type.
- Select Yes to include an offer in this campaign.
- Click Create.
Step 1 - What
- Enter a name for your campaign in the Name field.
- Click the Gift Type drop-down and choose what type of reward the guest will receive post-checkin. Depending on your choice, complete the following steps for:
For Gift Redeemable
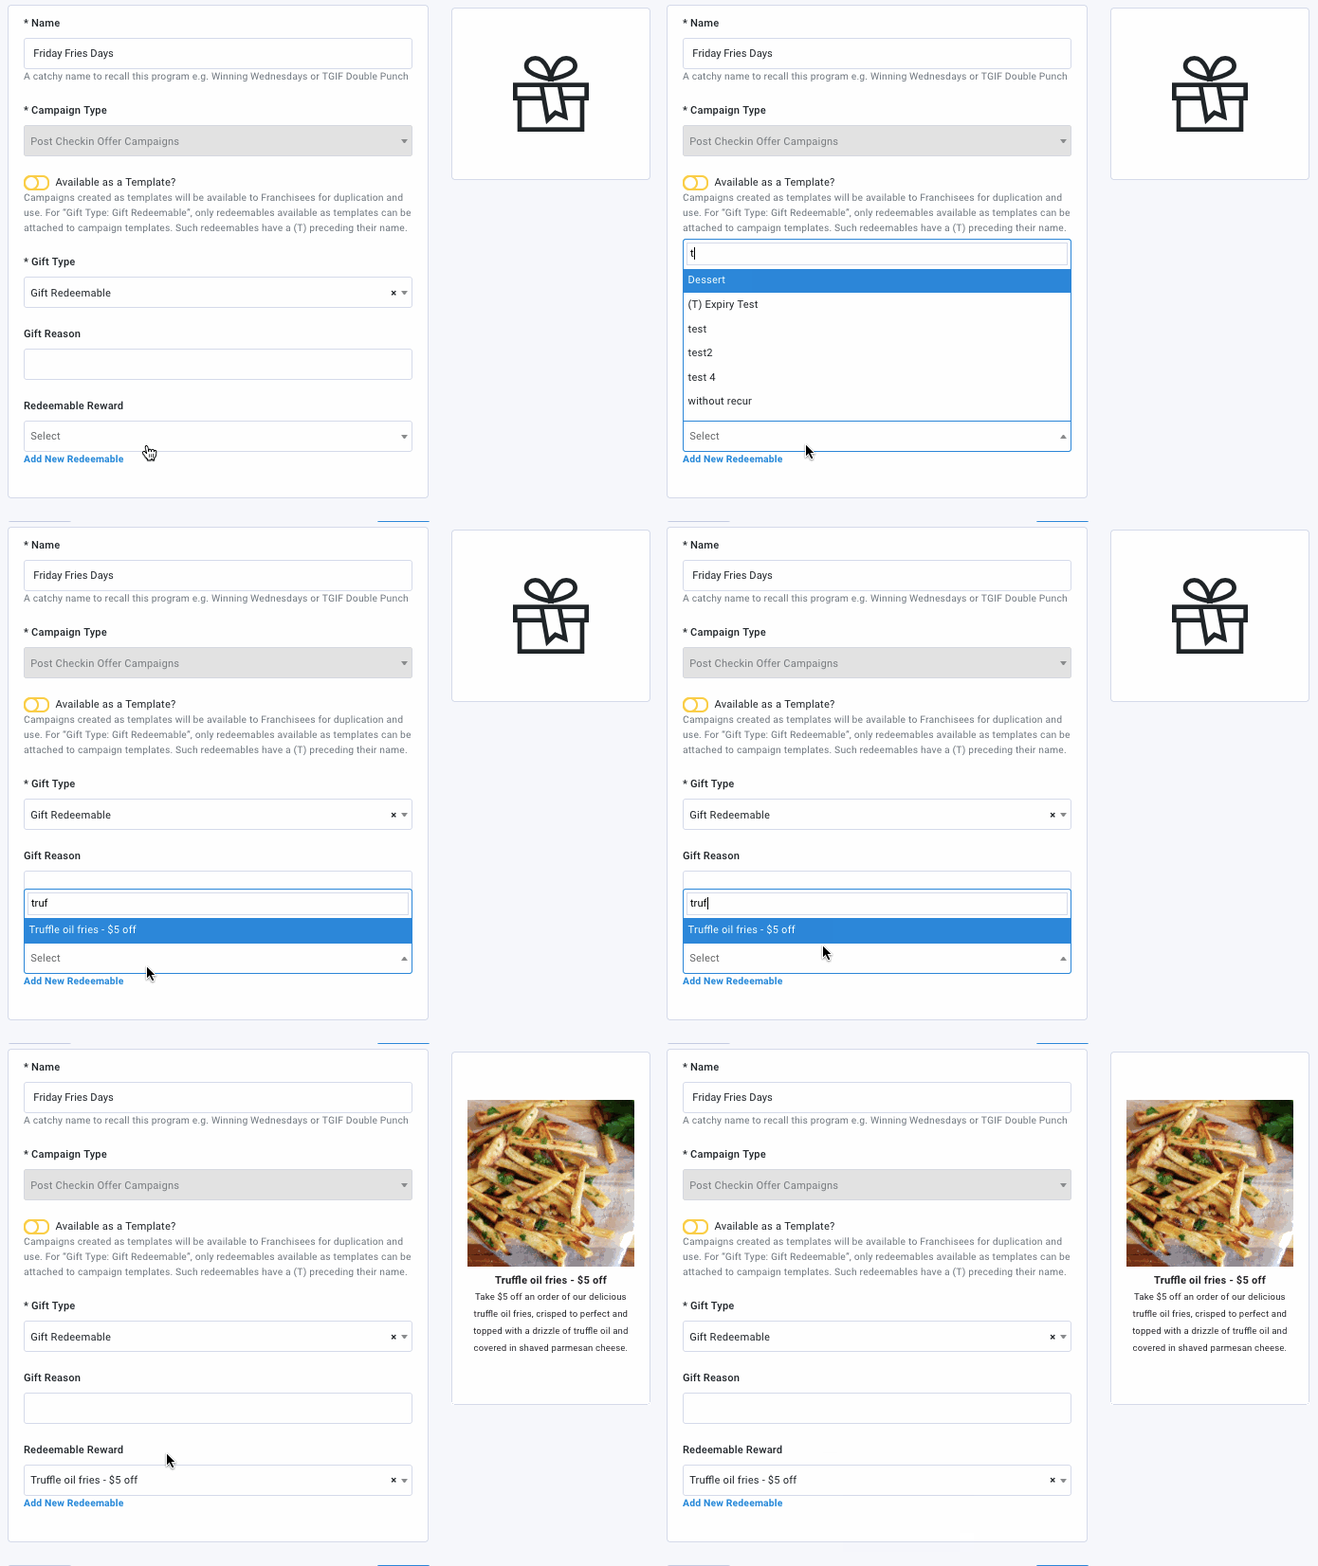
Click the Redeemable Reward drop-down and select the redeemable you want to associate with this offer.
A preview thumbnail for your redeemable will appear along with its title and description.
For Gift Points
Use the Gift Points field to select the method of gifting. Use the drop-down menu to select:
Note: It is important to consider your brand's base conversion rate if you are selecting 'Times' or 'Percent' as the gifting method. Review How to Gift Additional Points Based Only on the QC Items for more details.
- Fixed Points: Enter the number of set points the guests will be gifted.

- Times: Enter the number by which the base earned points will be multiplied. For example, if you want to offer double points, enter '2.' This means if the guest earns 10 points as a base, they will be gifted 20 points total (10x2).

- Percent: Enter the percentage of the base earned points the guest will earn as the additional reward. For example, if you want to offer an additional 50% of points, enter 50. This means if the guest earns 10 points as a base, they will be gifted an additional 5 points (50% of 10).

Use qualification criteria processed value for earn points calculation?
If you've chosen to use the Times or Percent options above, you can select the QC checkbox to apply the points only to the items specified in the qualification criteria.

There are several considerations to keep in mind when utilizing this checkbox. Review How to Gift Additional Points Based Only on the QC Items for more details.
For Gift Derived Rewards
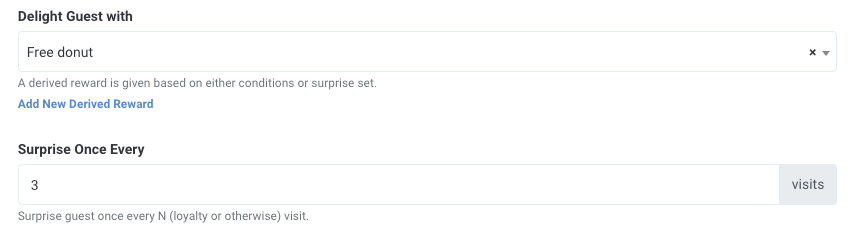
Click the Delight Guest with drop-down menu to select the derived reward you want to gift.
In the Surprise Once Every field, enter a number to control how often this campaign reward will trigger for the guest.
For example, if you enter "3" then this offer will trigger on an initial visit and then on every 3rd visit the guest makes.
For Currency
Enter the dollar amount of currency to gift the guest in the Gift Currency field.

Next, you will be able to set the expiry of the currency. You have three options:
-
For Expiry (In Days), enter how many days after the guest receives the currency you want it to expire in the Expiry (In Days) field. For example, if you want the currency to expire one week after the guest earns it, you would enter the number 7.
If you want the currency to expire the same day, enter '1' for the Expiry (In Days) field, OR enter the same date into the Explicit Date of Expiry field. For example, if the campaign is set to deliver on 9/15/25 and you enter '1' into the Expiry (In Days) field, the currency would expire on 9/15/25 at 11:59 PM. The same is true if you had entered 9/15/25 in the Explicit Date field.

-
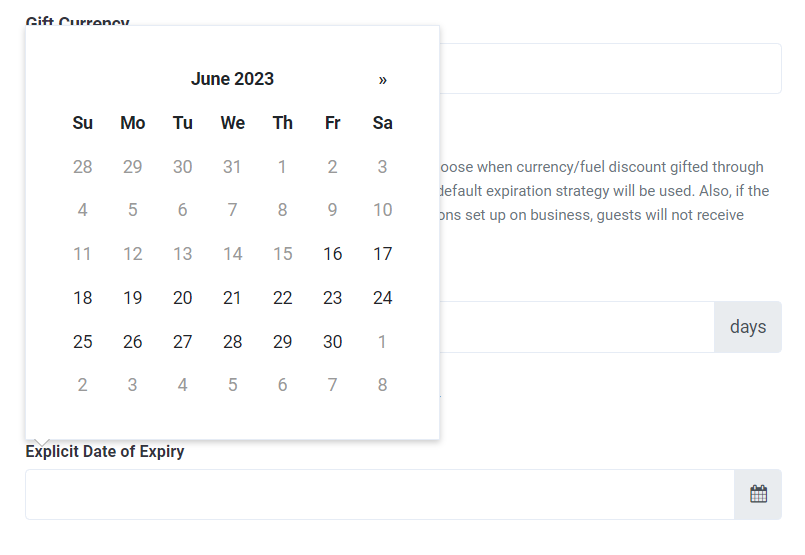
For Explicit Date of Expiry, click the field and use the calendar to select which day the currency will expire for all guests, regardless of when they earned it.
-
For Default Expiry, leave both the Expiry (In Days) and the Explicit Date of Expiry fields blank. This will result in the campaign using the business's default expiration strategy.
For Gift Collectible
You can also configure a combo gift — select both a redeemable and then a collectible to reward guests with both at the same time.
- Click the Collectible drop-down and select the digital collectible you want to award to guests.
- A preview of the selected collectible will appear.
- In the Gift Reason field, add a short message describing the type/purpose of this gift-giving campaign. This message will appear in the guest's account history.
- Click Next to move on to Step 2.
Step 2 - Whom
Configure campaign settings such as audience targeting, qualification criteria, gifting frequency, and other options as described in the section below. Depending on your subscription to Punchh added modules, you may not see all of these settings.
Campaign Settings
-
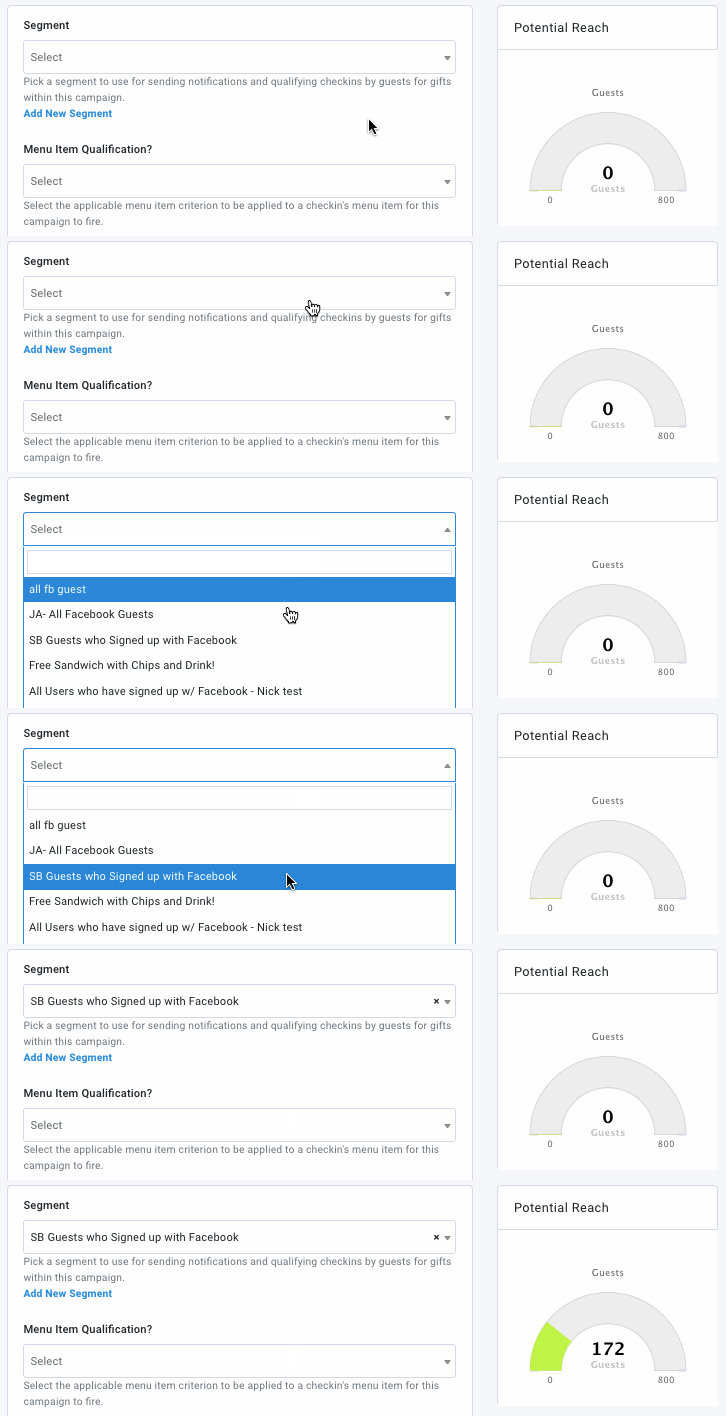
Segment - Click the drop-down to select from one of your guest segments this offer will be targeted to. If left blank, this campaign will apply to all guests.
The Potential Reach gauge will show you how many guests are in that segment that could potentially take part in this offer campaign.
-
Menu Item Qualification - If this offer is based on the purchase of a specific item, you can click the Menu Item Qualification drop-down to choose the corresponding qualification criteria.

-
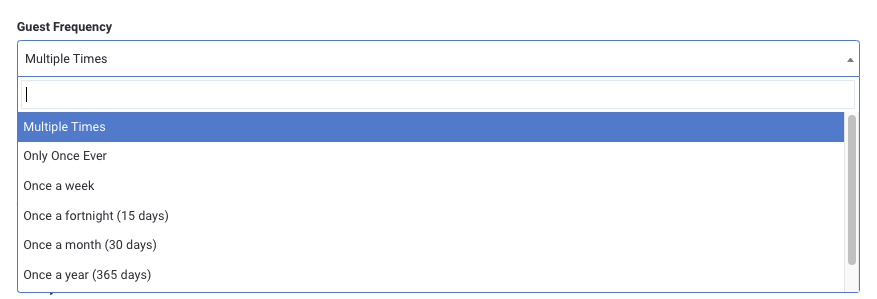
Guest Frequency - Click the drop-down to choose how many times a guest can be notified or rewarded for this campaign.
Gifting frequency is based on scan time, not receipt time.
-
Finite Gifting - Enter a number to specify the maximum number of rewards/guests will be gifted by this campaign.
For example, entering "1000" in this field (and "Only Once Ever" for Guest Frequency) limits this campaign offer to the first 1000 guests only.

-
Location Applicability - Use the drop-down to select a location/location group to limit this campaign to. This means that only receipts originating from these stores are eligible for this offer. If you don't specify a location(s), the campaign will be enabled for all locations.
If you selected a segment for this campaign, Location Applicability will be ignored in favor of the segment. If you need both, you can set edit your segment to include location parameters.

-
Survey - Use the drop-down to select one of your saved Surveys or create a new one from this section. This survey will trigger for a guest once they open the push notification message sent out with this campaign. The guest must complete the survey in order to receive their reward.

-
Control Group - Specify a percentage of guests who will be randomly excluded from receiving this offer. By creating a control group, you can gauge the effectiveness of your campaign. Did guests who received the offer spend more money, return more frequently?
Warning: When using a control group, ensure that your campaign is not advertised to the general public or some guests may be upset when they are excluded.

-
Priority - In the event that you have multiple active campaigns, the priority field can be utilized to determine the relative order in which the campaigns will trigger.
The priority field of post checkin campaigns can only be accessed and edited by a Punchh admin. If you'd like to adjust the order of processing for your post checkin campaigns, please reach out to your Punchh Customer Success Manager for assistance.

- Additional Scheduling Controls - Click Show more scheduling controls to reveal more granular, detailed time/date settings. Use the check boxes to specify what days of the week and/or hours of the day the campaign will be active.
These scheduling options are based on receipt time.
Messaging
Add messaging for each of the notification types you want to send. Refer to Campaign Message Options for full details
Click Next to move to the final step.
Step 3 - When
- Click the Start Date field to choose a date from the calendar for your campaign to begin.
- Click the End Date field to choose a date for your campaign to end.
Note: The start and end dates are based on your business timezone.
- In the Execution Delay field, enter the time (in minutes) that will pass post-checkin before a guest receives the offer.
This is useful for ensuring that, if awarding a free item, the guest doesn't just redeem it immediately, but rather on their next visit. However, if gifting extra points, a delay may be unnecessary. - Once you've finished with scheduling, you have the following options for finalizing your new campaign:
- Click Activate to activate your campaign at your scheduled start date (or immediately if your start date is today).
- Click Save as Draft to save your campaign as a draft. All fields you've entered, including Step 3 scheduling details, are saved. You can reopen the draft from the Campaign List at any time to continue editing or schedule the campaign.
- Click Previous to go back and edit settings from the prior step.
Note: Save as Draft is not available after a campaign is activated. To stop an active campaign, you must deactivate it from the Campaign List.
