Post Checkin Message Campaign
Post-checkin Message campaigns are a great way to maintain a connection with your guests after they've made a purchase at one of your stores. You can choose to send a simple thank you message to your guests, or you may take the opportunity to engage your guest with a new offer, incentivizing them to return.
Create a New Post-checkin Message Campaign
To create a new Post-checkin Message campaign:
- Navigate to Marketing Automation > Campaign Management in your left-hand navigation toolbar.
- Click Create Campaign in the upper right corner.
- Click Automations.
- Select the Post-checkin campaign type.
- Select No to include an offer in this campaign.
- Click Create.
Step 1 - What
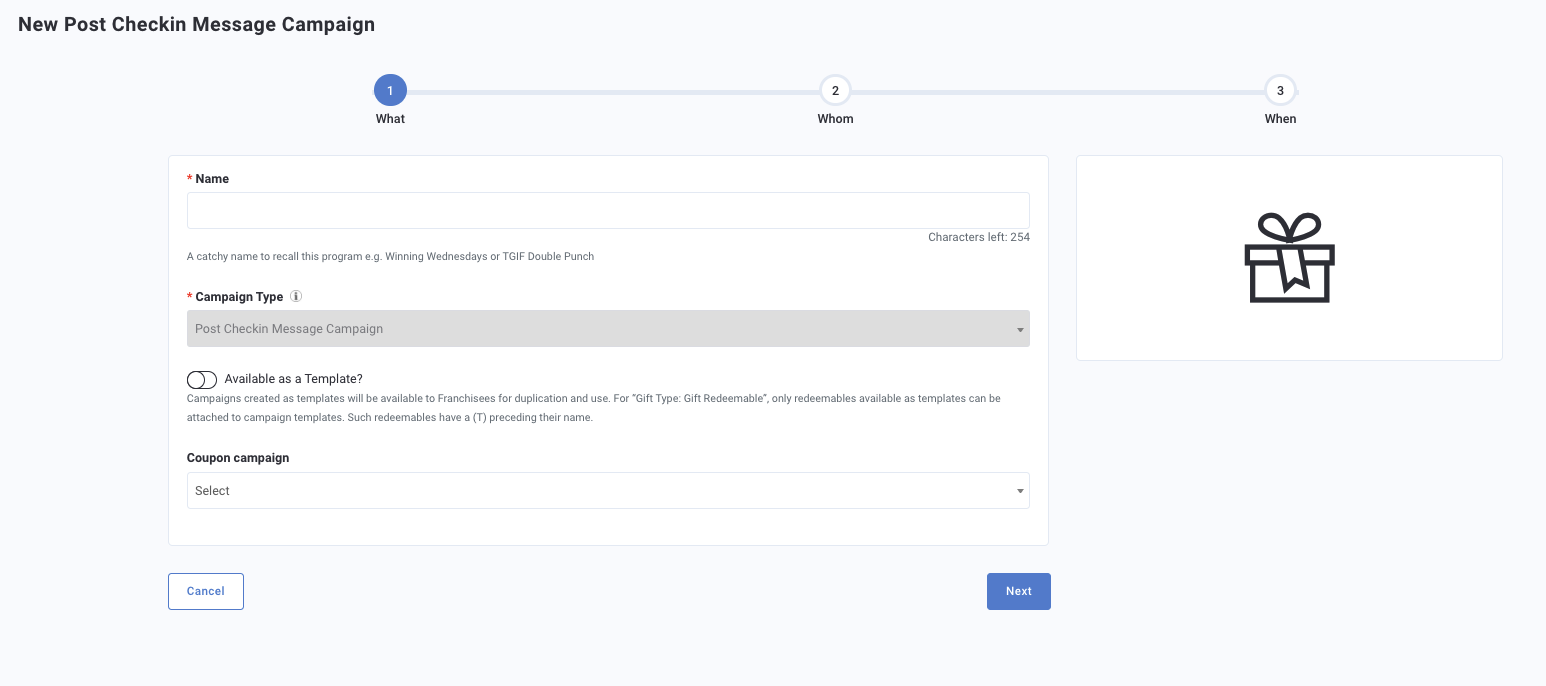
- Give your campaign a Name.
- Toggle the Available as a Template option to set this campaign as an available template for franchisees.
- Select the appropriate Coupon Campaign option as needed.
- Click Next.
Step 2 - Whom
Configure campaign settings such as audience targeting, qualification criteria, gifting frequency, and other options as described in the section below:
Depending on your subscription to Punchh added modules, you may not see all of these settings.
Campaign Settings
- Segment - Click the drop-down to select from one of your guest segments this offer will be targeted to.
The Potential Reach gauge will show you how many guests are in that segment that could potentially take part in this offer campaign.

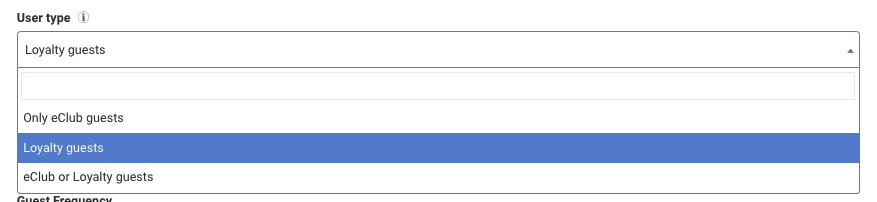
- User Type - Click the drop-down to select from Guest category that this campaign will be available for.
- Menu Item Qualification - If this offer is based on the purchase of a specific item, you can click the Menu Item Qualification drop-down to choose the corresponding qualification criteria.

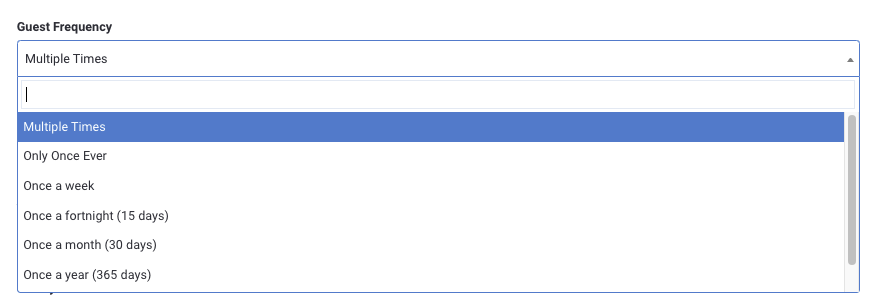
- Guest Frequency - Click the drop-down to choose how many times a guest can be notified for this campaign.
This is based on scan time.
- Location Applicability - Use the drop-down to select a location/location group to limit this campaign to. This means that only receipts originating from these stores are eligible for this offer. If you don't specify a location(s), the campaign will be enabled for all locations.
If you selected a segment for this campaign, Location Applicability will be ignored in favor of the segment. If you need both, you can set edit your segment to include location parameters.

- Survey - Use the drop-down to select one of your saved Surveys. This survey will trigger for a guest once they open the push notification message sent out with this campaign. In the event that a survey is associated with a gift, the guest must complete the survey in order to receive their reward.

- Control Group - Specify a percentage of guests who will be randomly excluded from receiving this message. By creating a control group, you can gauge the effectiveness of your campaign. Did guests who received the offer spend more money, return more frequently?
Warning: When using a control group, ensure that your campaign is not advertised to the general public or some guests may be upset when they are excluded.

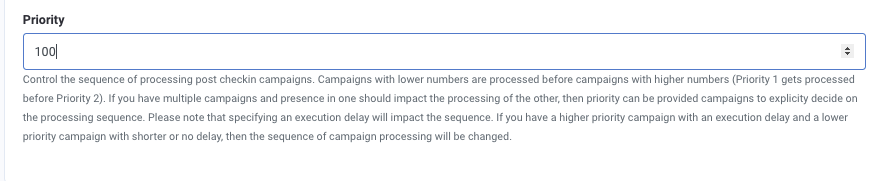
- Priority - In the event that you have multiple active campaigns, you can use priority levels to determine the relative order in which the campaigns will trigger.
For example, selecting a priority of "1" for Campaign A, "2" for Campaign B, and "50" for Campaign C means that in a situation where multiple campaigns' conditions are met, Campaign A will trump all other campaigns with a lower priority. Only one campaign will fire per guest transaction. Now, if Campaign A is a one-time-only offer that has previously been redeemed but is still active in the Punchh system, the next time the guest visits and meets required criteria, Campaign A will not fire and the campaign with the next-highest priority level (in this case Campaign B) will fire instead.
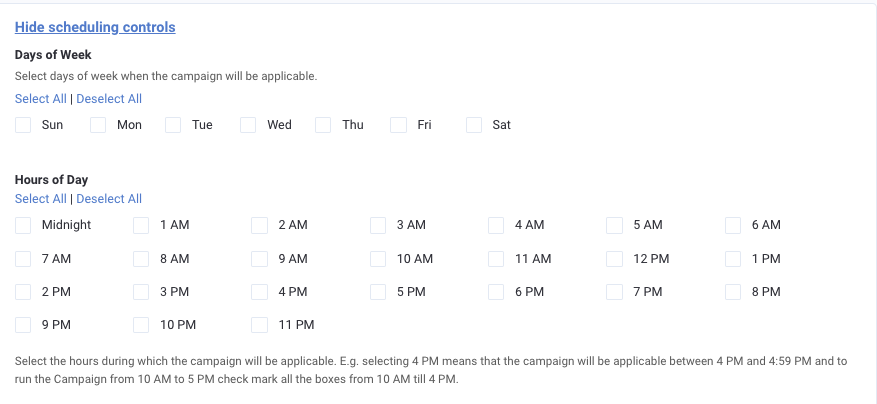
- Additional Scheduling Controls - Click Show more scheduling controls to reveal more granular, detailed time/date settings. Use the check boxes to specify what days of the week and/or hours of the day the campaign will be active.
These are based on receipt time.
Messaging
Add messaging for each of the notification types you want to send. Refer to Campaign Message Options for full details
Click Next to move to the final step.
Step 3 - When
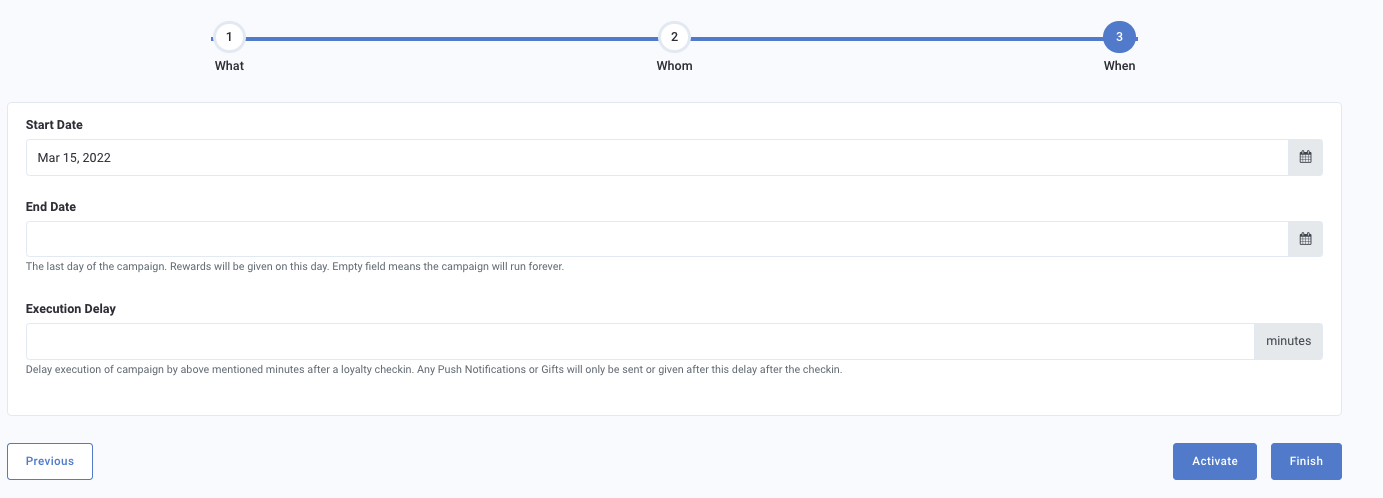
- Select a Start Date and End Date for your campaign.
These dates are based on Coordinated Universal Time (UTC), formerly known as Greenwich Mean Time. - In the Execution Delay field, enter the time (in minutes) that will pass Post-checkin before a guest receives the message.
This delay is useful for ensuring that the guest is no longer in the store when they receive their message, so they'll be tempted to return. - Once you've finished with scheduling, you have the following options for finalizing your new campaign:
- Click Activate to activate your campaign at your scheduled start date (or immediately if your start date is today).
- Click Save as Draft to save your campaign as a draft. All fields you've entered, including Step 3 scheduling details, are saved. You can reopen the draft from the Campaign List at any time to continue editing or schedule the campaign.
- Click Previous to go back and edit settings from the prior step.
Note: Save as Draft is not available after a campaign is activated. To stop an active campaign, you must deactivate it from the Campaign List.
