Mass Notification Campaign
Mass Notification campaigns are configured to send messages by way of push notifications, SMS messages, rich messages, and/or emails. You can use segments and locations to target specific groups of guests. There is no gift or reward attached to this campaign type.
If you wish to create a Mass Notification campaign with Split Testing, refer to the following article: Campaign Split Testing
Create a New Mass Notification Campaign
- Navigate to Marketing Automation > Campaign Management in your left-hand navigation toolbar.
- Click Create Campaign in the upper right corner.
- Select Mass Campaign.
- Select No when asked to include an offer in this campaign.
- Click Create.
Step 1 - What
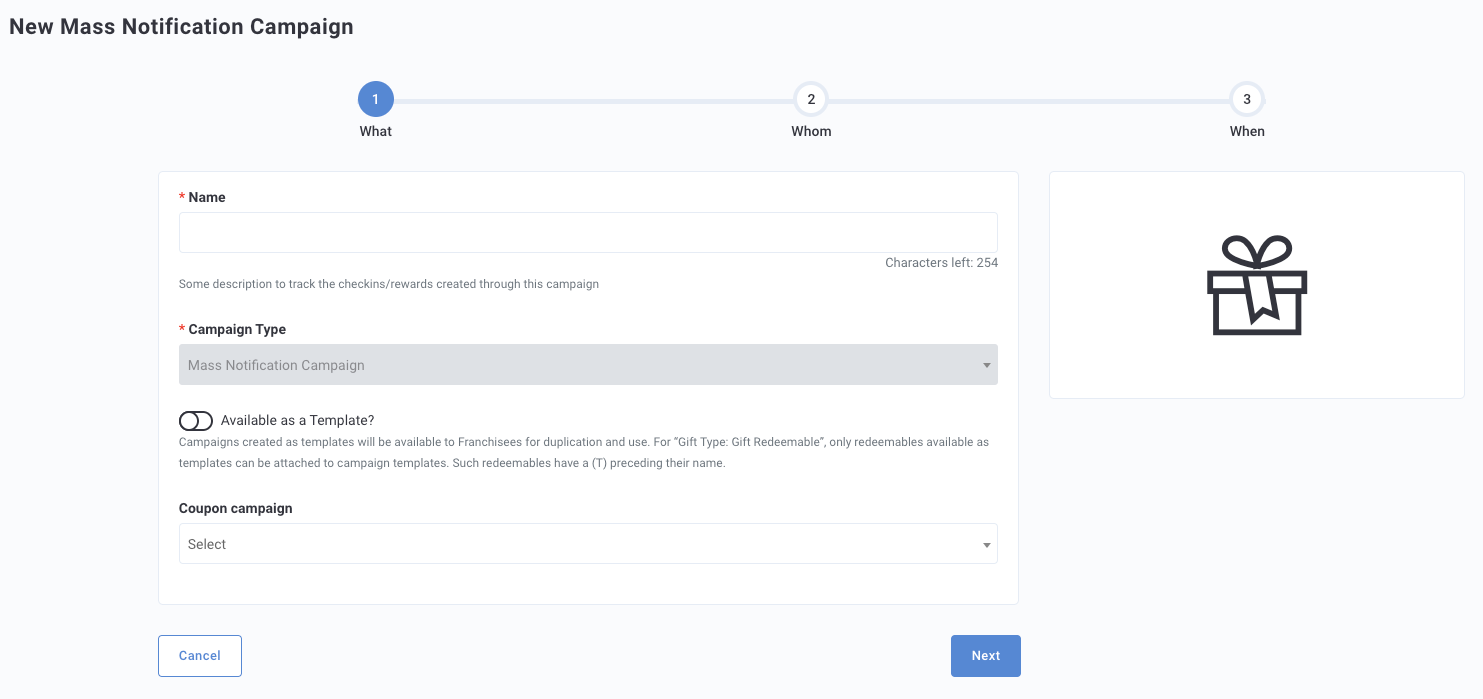
- Enter a name for your campaign in the Name field.
- Optional: Use the Template drop-down to base this campaign on a saved template.
- Click Next to move on to Step 2.
Step 2 - Whom
Configure campaign settings such as audience targeting, qualification criteria, notification frequency, and other options as described in the section below. Depending on your subscription to Punchh added modules, you may not see all of these settings.
If you wish to create a Mass Notification campaign with Split Testing, refer to the following article: Campaign Split Testing
Campaign Settings
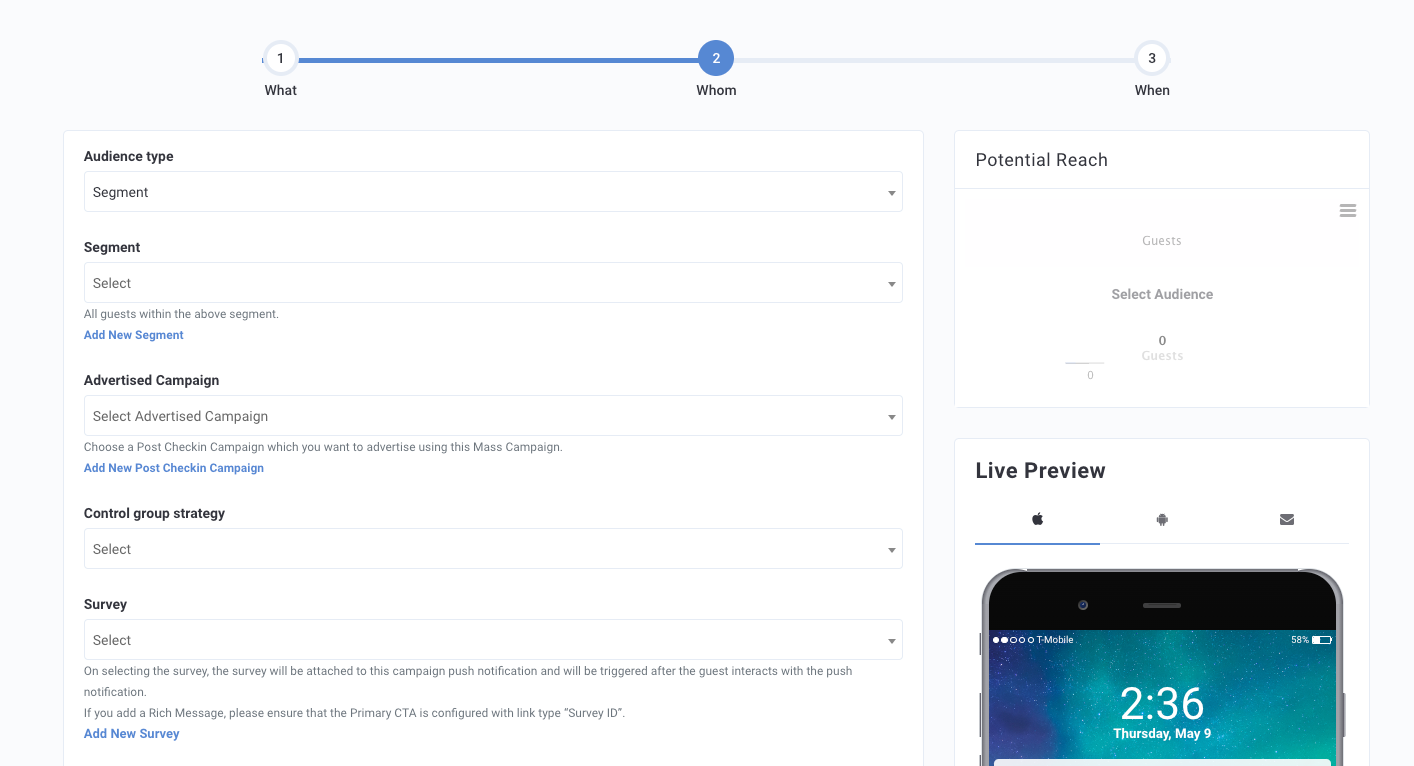
- Audience Type: Select Segment or Location to determine how this campaign will be targeted.
- Segment / Location: Use the drop-down to select the segment or location(s) this campaign will target.
- Control Group Strategy: Select Random to hold out a percentage of guests from receiving this campaign, allowing you to measure its effectiveness. (When using a control group, ensure that your campaign is not advertised to the general public, or some guests may be upset when they are excluded.)
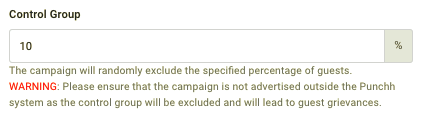
- Advertised Campaign: Enable if this campaign is being promoted publicly.
Note: Mass Notification campaigns do not include a gift. If you need to attach a redeemable or points, create a Mass Offer Campaign instead.
Messaging
Add messaging for each of the notification types you want to send. Refer to Campaign Message Options for full details.
Click Next to move on to Step 3.
Step 3 - When
-
Click the Frequency drop-down to choose how often a guest will receive this message.
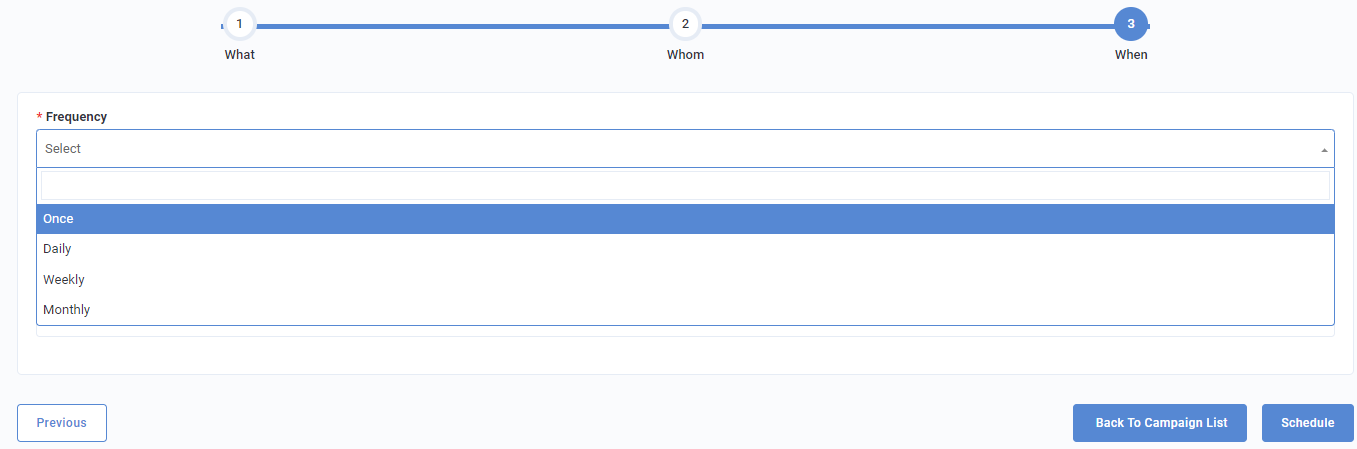
- Once: If you choose Once as the frequency and select Simultaneous global start, the Use Recommended Send Time option appears. When enabled, Send Time Optimization (STO) delivers your campaign messaging at the time each individual guest is most likely to engage, based on their activity history.
Note: Use Recommended Send Time is not available when Staggered start (based on recipient time zone) is selected
- Daily: Select Daily to send the campaign each day for a set period of time.
- Weekly: Select Weekly to send the campaign on a set day of the week.
- Repeat every: Enter how often you want the campaign to repeat. For example, if you want the campaign to run every 3 weeks, enter '3.'
- Day of the Week: Enter the day of the week the campaign should send.
- Monthly: Select Monthly to send the campaign once a month.
- Repeat every: Enter how often you want the campaign to repeat. For example, if you want the campaign to run every 3 months, enter '3.' You must enter a value in this field. If you want the campaign to run every month, enter '1.'
- Repeat on: Enter the count of the day the campaign should send. For example, if you want the campaign to run on the 1st Saturday of the month, enter '1'.
- Day of Week: Enter the day of the week the campaign should send. E.g. 'Saturday." You cannot use this field on its own. It must be configured along with the Repeat on field.
-OR- - Day of Month: Enter the date of the month the campaign should run. For example, if you want the campaign to run on the 13th of every month, select '13'. Use this field on its own; do not use it in combination with Repeat On and/or Day of the week.
When scheduling a Monthly campaign, there are two main ways to define when it should run. You should only choose one of the options below:
- Repeat On + Day of Week, e.g., the 2nd Tuesday of each month
- Day of the Month, e.g., the 15th of every month
If both are happen to be set, priority is given to the Day of the Week + Repeat On combination, and the system will ignore the Day of the Month altogether. This ensures the system doesn’t try to apply both rules at once, avoiding conflicts.
- Once: If you choose Once as the frequency and select Simultaneous global start, the Use Recommended Send Time option appears. When enabled, Send Time Optimization (STO) delivers your campaign messaging at the time each individual guest is most likely to engage, based on their activity history.
-
Under Start Time, select one of the following options:
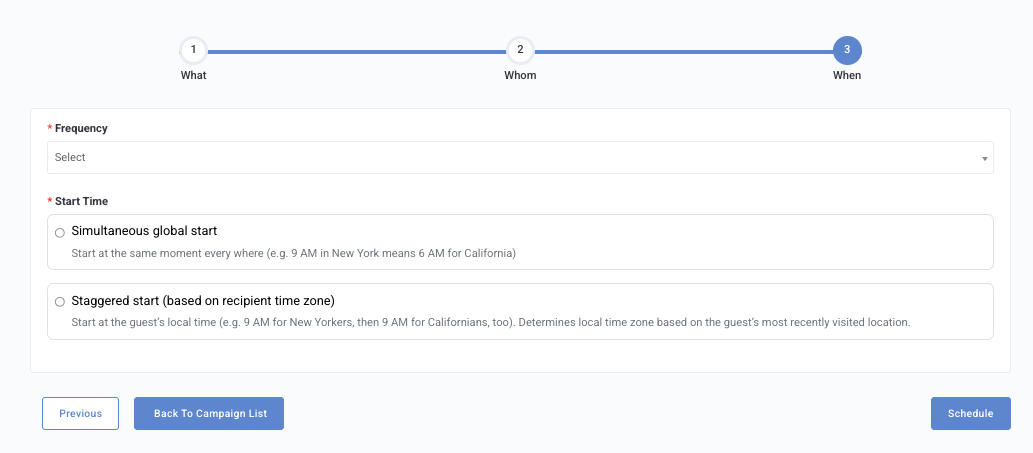
- Simultaneous global start Sends the campaign at the same clock time for all guests. For example, a 9 AM start time reaches guests in New York at 9 AM Eastern and guests in California at 9 AM Eastern (6 AM Pacific).
- Select a Global Start Time and date when your campaign will beign.
- Use the Timezone drop-down to select the timezone used for scheduling.
- Staggered start (based on recipient time zone): Sends the campaign at the equivalent local time for each guest. For example, a 9 AM send reaches New Yorkers at 9 AM Eastern and Californians at 9 AM Pacific. The platform determines each guest's time zone based on their most recently visited loyalty check-in location.
- Click the Local Start Time field and choose the date and time you want guests to receive the campaign in their local time zone.
- Use the Fallback Timezone drop-down to select your brand's default timezone. This is used as the fallback send time for guests whose time zone cannot be determined.
Note: Staggered start (based on recipient time zone) is not available for Variable Points campaigns. If you're configuring a Variable Points campaign, only Simultaneous global start is available.
- Simultaneous global start Sends the campaign at the same clock time for all guests. For example, a 9 AM start time reaches guests in New York at 9 AM Eastern and guests in California at 9 AM Eastern (6 AM Pacific).
-
End Time: If you choose to make this campaign recurring (daily, weekly, or monthly), your starting and ending time frames will reflect the start and end of the recurrence. In other words, if you choose Weekly, you'll choose the day of the week for it to be sent each week, beginning on the first occurrence of that weekday after your start date.
-
Once you've finished with scheduling, you have the following options for finalizing your new campaign:
- Click Schedule to schedule your campaign to go live at your scheduled start date (or immediately if your start date is today).
- Click Save as Draft to save your campaign as a draft. All fields you've entered, including Step 3 scheduling details, are saved. You can reopen the draft from the Campaign List at any time to continue editing or schedule the campaign.
- Click Previous to go back and edit settings from the prior step.
Note: Save as Draft is not available after a campaign is scheduled. Once a campaign has been scheduled, you must deactivate it from the Campaign List to make further changes.
Managing Mass Notification Campaigns
All campaigns are listed on the Campaign Management page. Click a campaign name to view its summary and performance details.
To stop a campaign that is currently running, click the three-dot menu to the right of the campaign name and select Deactivate.
Tip: Deactivating a campaign stops future sends but does not recall messages that have already been delivered.
