Line Item Selectors
Line item selectors (LIS) are used to identify and define each of the items in your point-of-sale system. We can't offer a free appetizer, drink, etc if we don't define what this item is according to your POS. You will use the Line Item Selectors to build Qualification Criteria to offer discounts to your guests. It should be noted that a LIS does not define the discount, but just the item(s) that will be considered when building the discount.
Create a New Line Item Selector
When building a new Line Item Selector you will define the Base Item, a Modifier, or both.
- Base Item: A base item is the 'main' item. For example a hamburger.
- Modifier: A modifier is an item that may accompany a base item. For example, if the base item is a hamburger a modifier could be pepper jack cheese.
To create a new line item selector, you will need the SKU(s) or PLU(s) for the item(s) you want to create.
-
Navigate to Offers > Line Item Selectors using the left-hand navigation toolbar.
-
Click + Create new at the top-right.
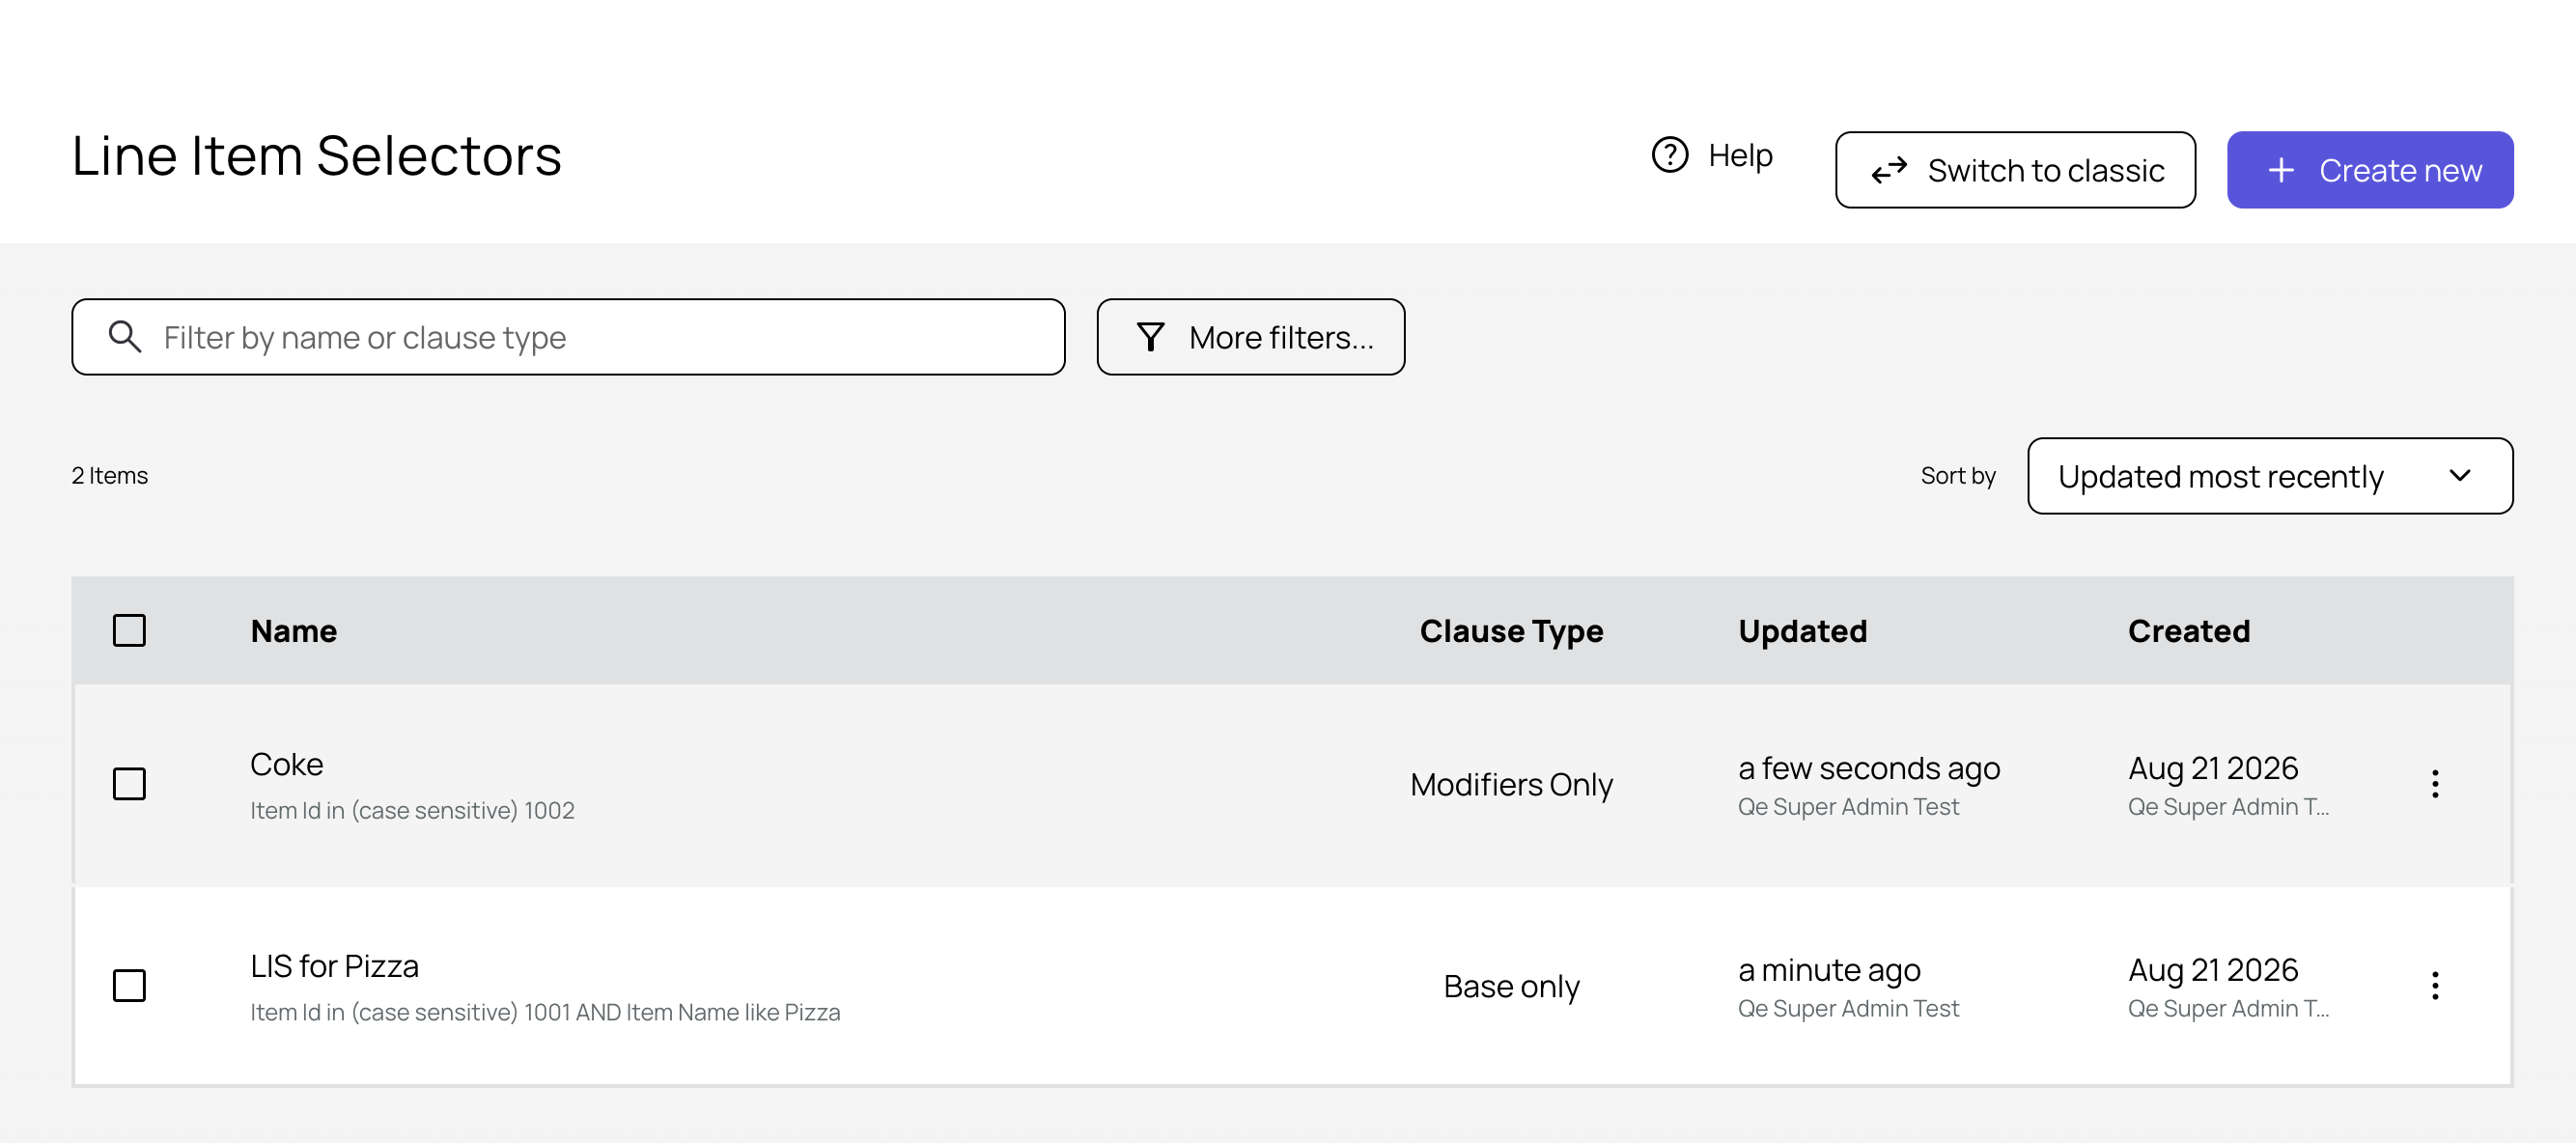
-
Enter a name for your new item selector in the Name field. (This will be the name shown within the Punchh Platform but does not necessarily need to be the exact name of the item.)
-
For both base items and modifiers you will complete at least one of the following attributes. Select an operator from the drop-down menu and then enter the value in the text field. Review the Data Operators and Input Examples article for how to use the operators listed.
Depending on your POS type, you may need to create your line item selector with Name or ID number(s).- Item Name - The name of the item as it appears in your POS system.
- Item ID - The ID# of the item(s) as it appears in your POS system. This is the third and most specific level in the POS hierarchy.
If you have a unique Item Name but no Item ID, then we recommend only using the Item Name. This is because, when creating a qualification criteria, both fields must be present and true. Using only one (the most specific one) will eliminate potential misses.
- Item Family - The ID# of the item family as it appears in your POS system, this is the middle (second) level in the POS hierarchy.
- Item Major Group - The major group ID# is the top level in the POS hierarchy, above the family group, and item ID.
- Item Serial Number - (If a single item) the serial number of the item as it appears in your POS.
- Item Total Amount- Choose an exact price or range of prices.
- Quantity - If you need to account for more than one item, denote the quantity here.
- Line Item Type - Choose if the item is a Menu Item (M), a Discount (D), a Service Charge (S), a Tax (T), or a Payment, such as a gift card (P).
Note: Do not use any other letters other than these options as this could cause errors.
-
Filter Item Set: Select one of the following options from the drop-down menu to determine how the discount will be applied to the item(s).
- Only Base: The LIS will be considered a base item and the discount will be applied to only the base item value. (Note: If the item is passed as a modifier on the receipt with a decimal value in the serial number, it will be still considered a base item.)
- Only Modifier: The LIS will be considered a modifier and a discount will be applied to only the modifier amount value.
- Base and Modifiers: The discount will be applied to the base and modifier total value.
-
When Only Modifier is selected from the Filter Item Set menu, the Modifiers section appears. Add your Modifier Attributes, as described above in Step 4.
- Maximum Discounted Modifiers: Enter a number if you wish to limit the amount of modifiers that will be discounted. For example, if you are discounting up to two pizza toppings, you will enter '2' in the field. Leave the field blank if you don't want to cap the discounts for modifiers, e.g. "unlimited toppings."
- Modifier Selection Rule: Select how the discount will be applied based on the modifier price. Select Maximum Unit Price to discount the most expensive modifiers first. Select Minimum Unit Price to discount the least expensive modifier first. For example, if you discount up to two pizza toppings, and the guest selects three toppings, with Minimum Unit Price selected, the two least expensive toppings will be discounted with the third most expensive remaining full price.
Note: If this field is left blank, the discount will be applied to the items as they appear on the receipt, which may cause some confusion with guests. If you have entered a number in the Maximum Discounted Modifier field is it recommended also to select an option from the Modifier Selection Rule drop-down to avoid this.
-
If Base and Modifiers is selected from the Filter Item Set menu, you will see the Base Items section, the Modifiers section, as well as these additional fields:
-
Exclude items where net payable amount after discount is zero? If the net amount for the modifier after discount is zero then the modifier will not be further evaluated for additional discounting. However, the base of the same LIS can be evaluated for additional discounting. Additionally, checking this box prevents the transaction from counting towards certain campaigns, receipt tags, or other conditional gifting. See this FAQ article for more details.
-
Add Modifier Filter Conditions: These settings apply qualification rules directly to the Line Item Selector (LIS), to control how items are filtered before being evaluated by the Qualification Criteria (QC). These options serve as a filtering mechanism to associate relevant modifiers with their corresponding base items, ensuring only qualified items are considered for discounting. See the Base and Modifiers section for examples on how to utilize these fields.
- Modifier Quantity: Defines the quantity of modifiers that should be associated with a base to qualify for an offer
- Modifier Amount: Defines the amount from modifiers that should be associated with a base to qualify for an offer
-
-
When finished, click the Update button at the bottom to save your new item selector.
POS ID Hierarchy
Think of your Item ID, Item Family, and Major Group as a hierarchy, moving from least to most specific. This is useful when creating redeemables/qualification criteria with groups in mind, i.e., Free Drink with purchase of Entree. The hierarchy functions as the example below:
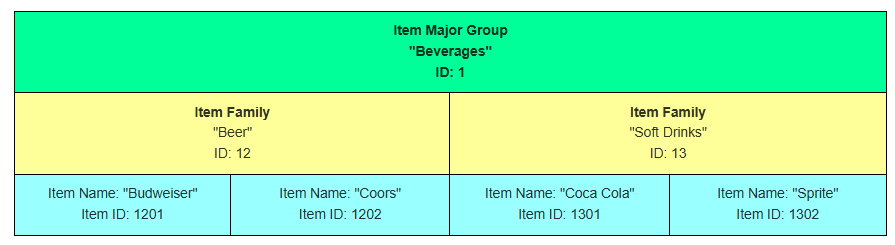
Creating Group and Family ideas is particularly useful when creating qualification criteria, as you cannot stack modifiers (like using Item ID for "Coca-Cola" and using the SKU for "Sprite"). Using the Item Family ID for "Soft Drinks" takes care of both of those items (and others as well).
Line Item Selector Home Page
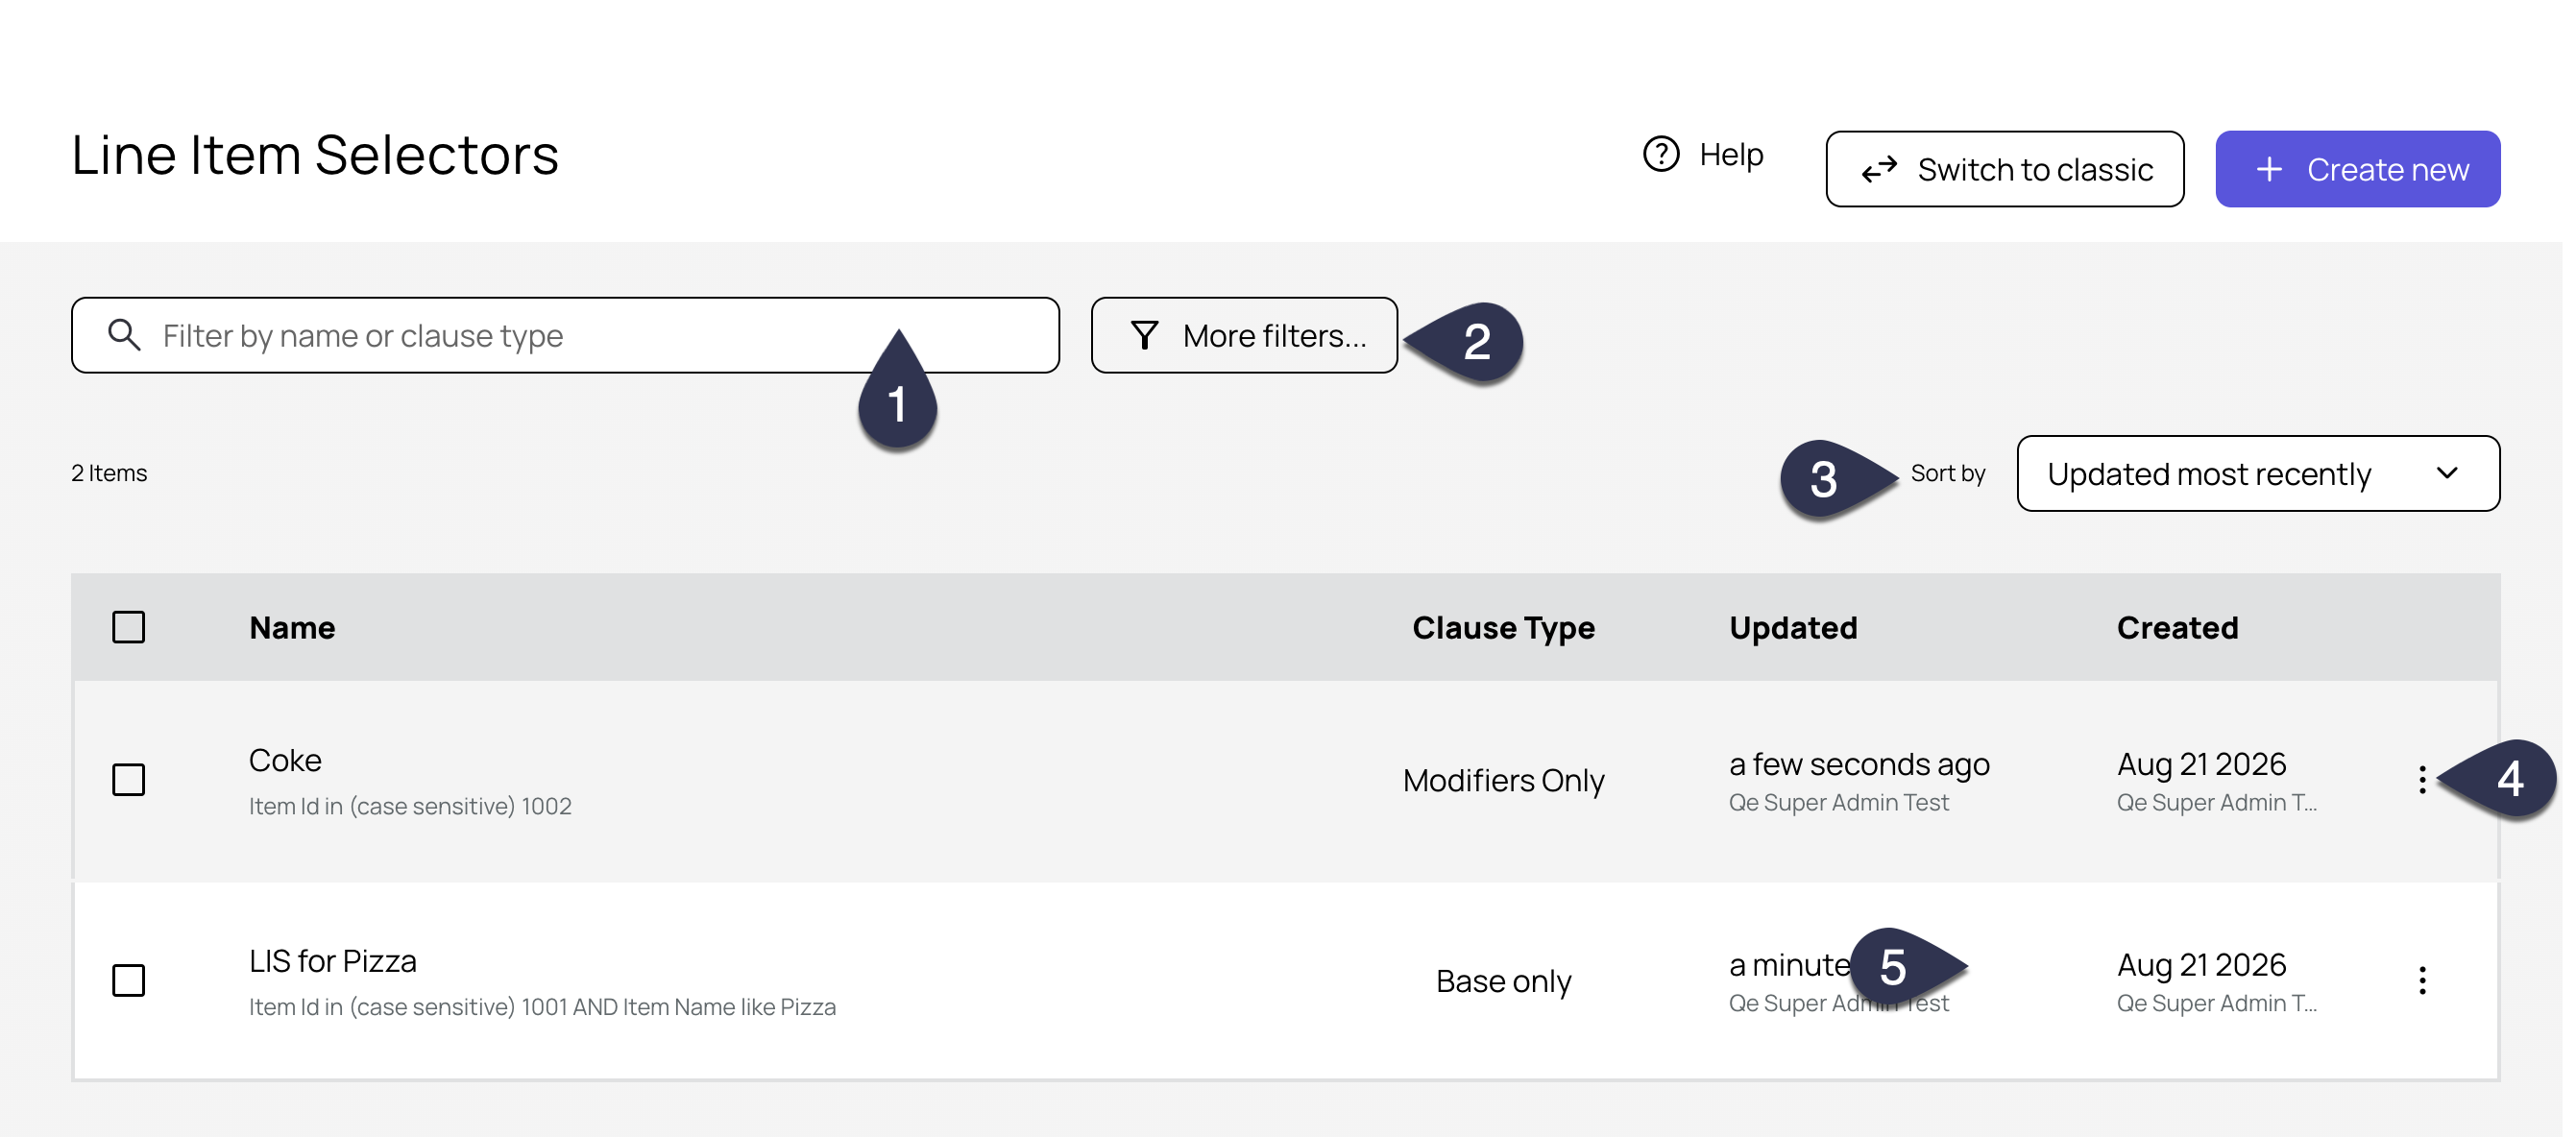
All your configured Line Item Selectors can be created and managed from the Line Item Selector Home Page under Offers > Line Item Selectors.
-
Line Item Selectors can be filtered by using the search bar.
-
Click More filters to narrow the LIS list further by:
- Clause Type: Base Item, a Modifier, or both.
- Created by
- Updated by
-
Use the Sort by option on the right to sort your LIS list further.
-
More Actions: Click the three dots on the right of the LIS for further actions:
-
Edit: Click to edit the LIS.
-
Duplicate: Click to duplicate the LIS. The create LIS workflow will open with the name field populated as "LIS name - copy" and other fields filled in from the original LIS. You can then edit the LIS as normal.
- Delete: Click to permanently delete a LIS. This can also be done by clicking the check box next to the LIS name and then selecting Delete.
-
Associations
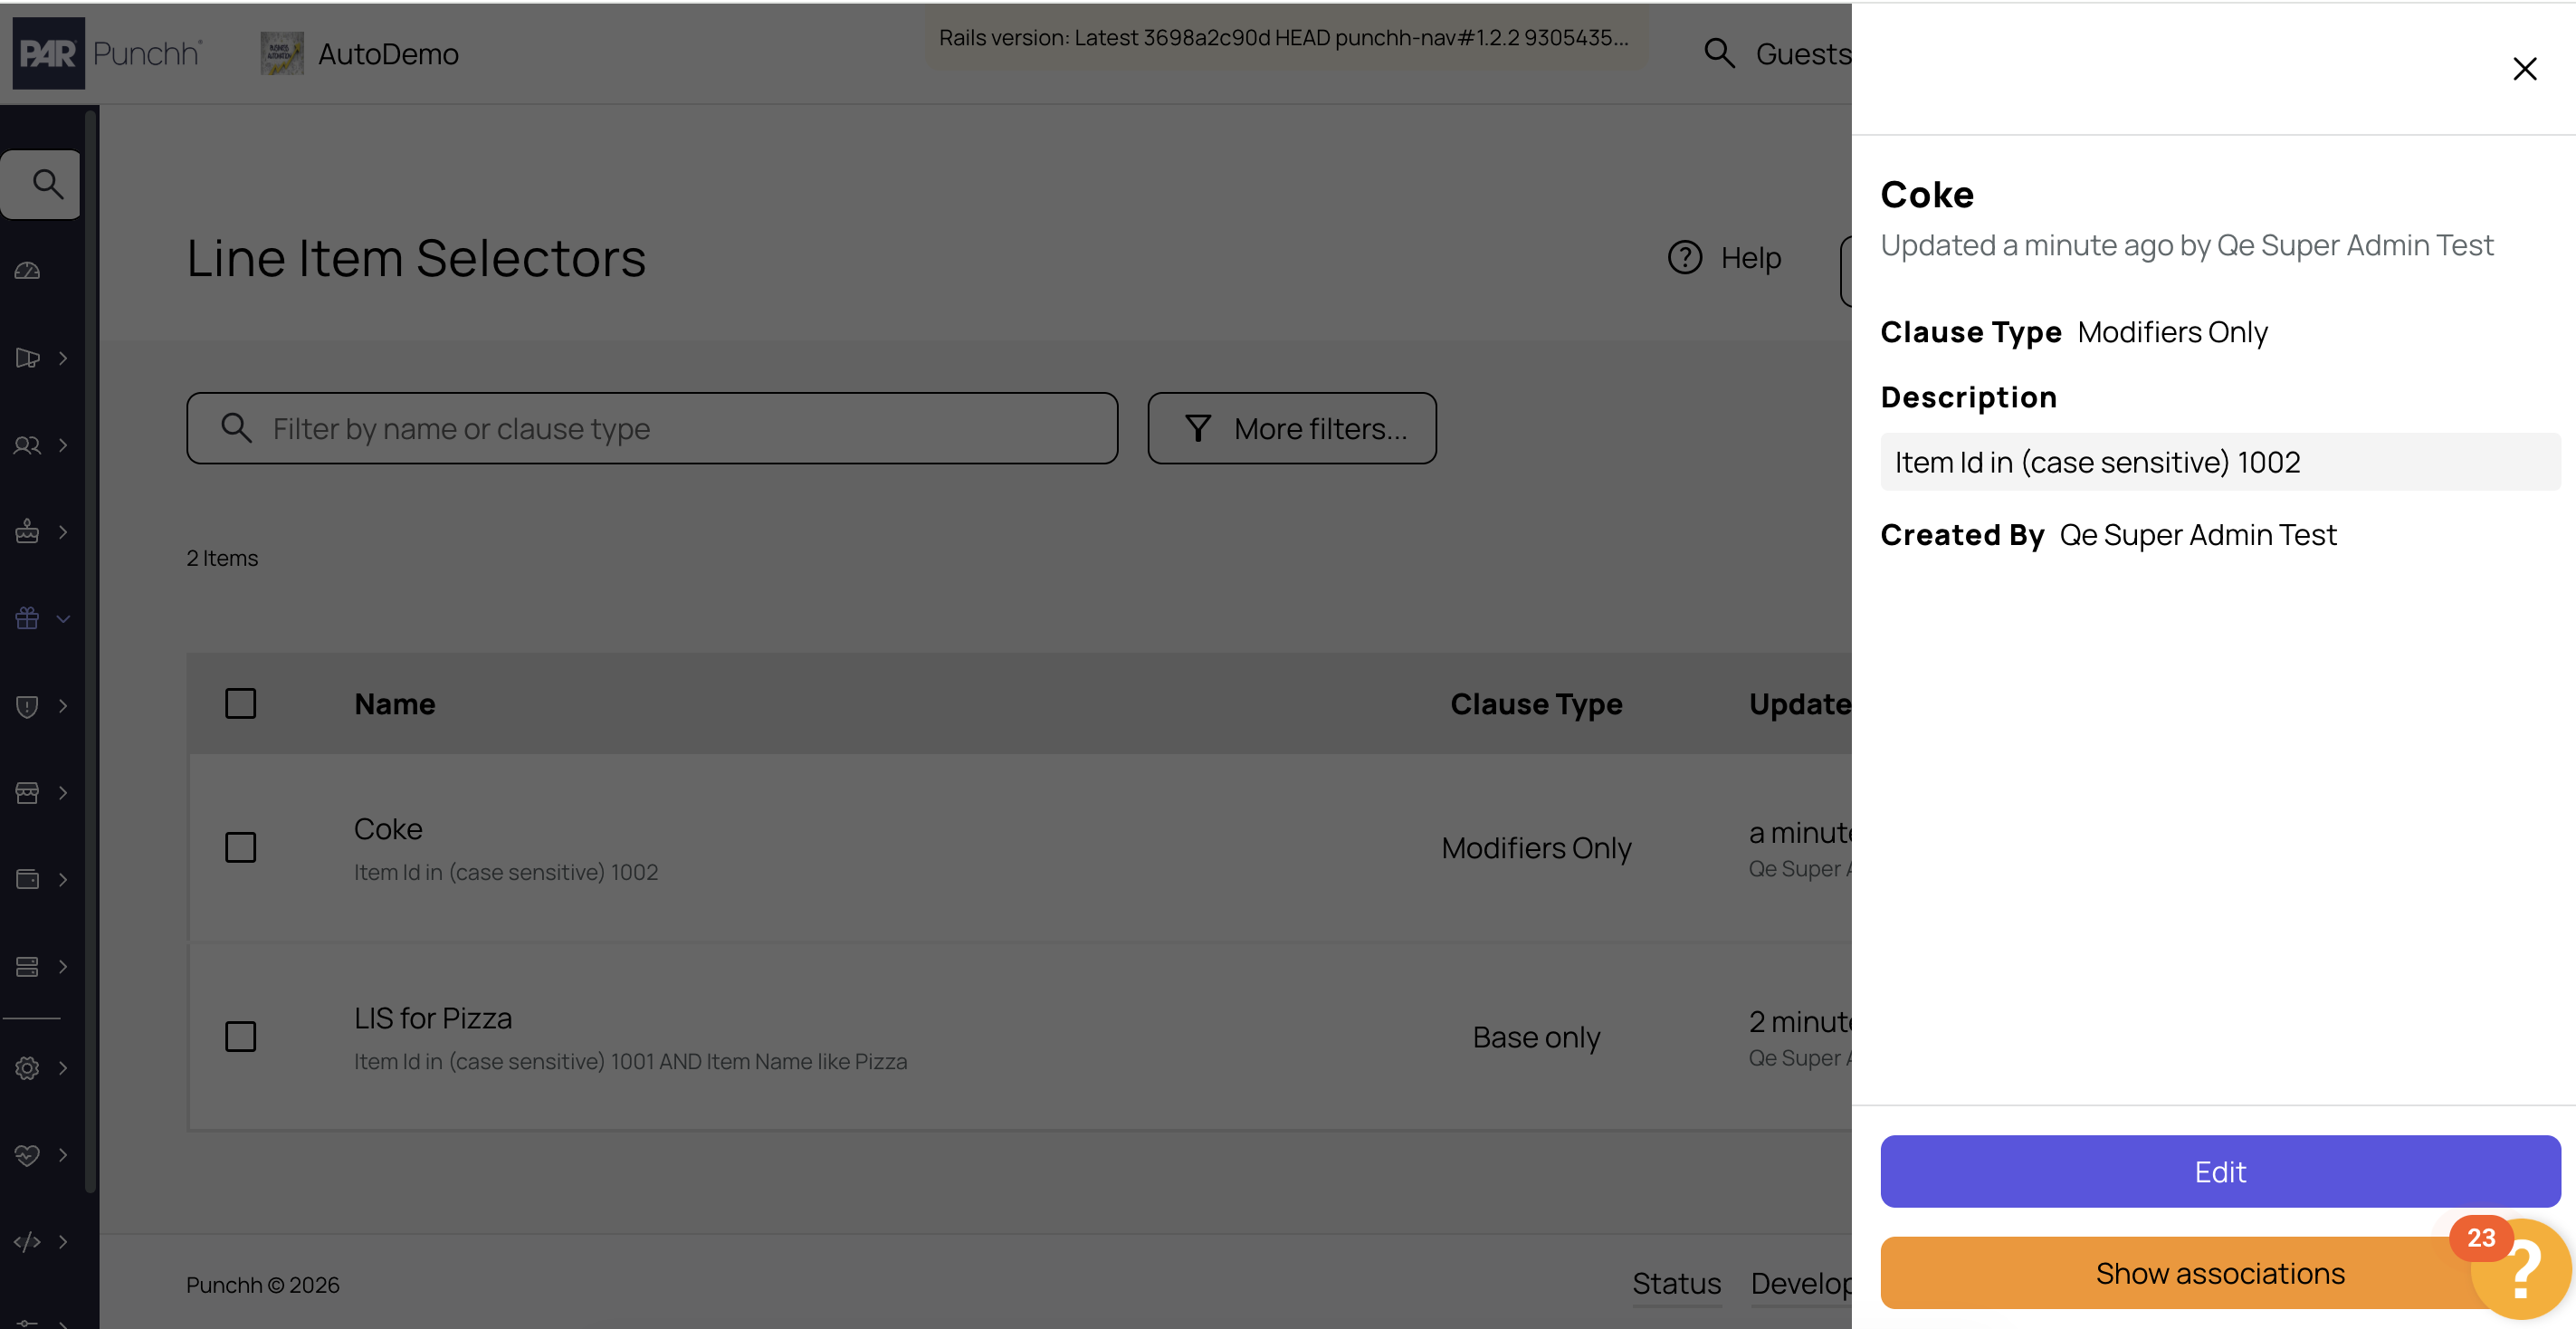
You can check to see which qualification criteria your line item selector is associated with under Associataion.
- Click the name of one of your line item selectors.
- Click the Show Associations at the the bottom of the panel.
Review your Line Item Selectors during your initial setup with Punchh. It's helpful to review your list of line item selectors as they have been set up for after implementation. Doing so will assist you in knowing by what operator(s) your POS functions.
