Awaiting Migration
As part of your initial implementation with Punchh, you may have provided a list of guests from another loyalty program you've maintained in the past. Upon pulling data for those guests into Punchh from your previous program, each of the guests from that data dump will be given an initial status of Awaiting Migration. Those guests will be stored as part of the Awaiting Migration list until they have signed up for your new app, whereupon their point/punch/checkin total will automatically be transferred from their old account to their new account, so they don't lose any of their accumulated rewards.
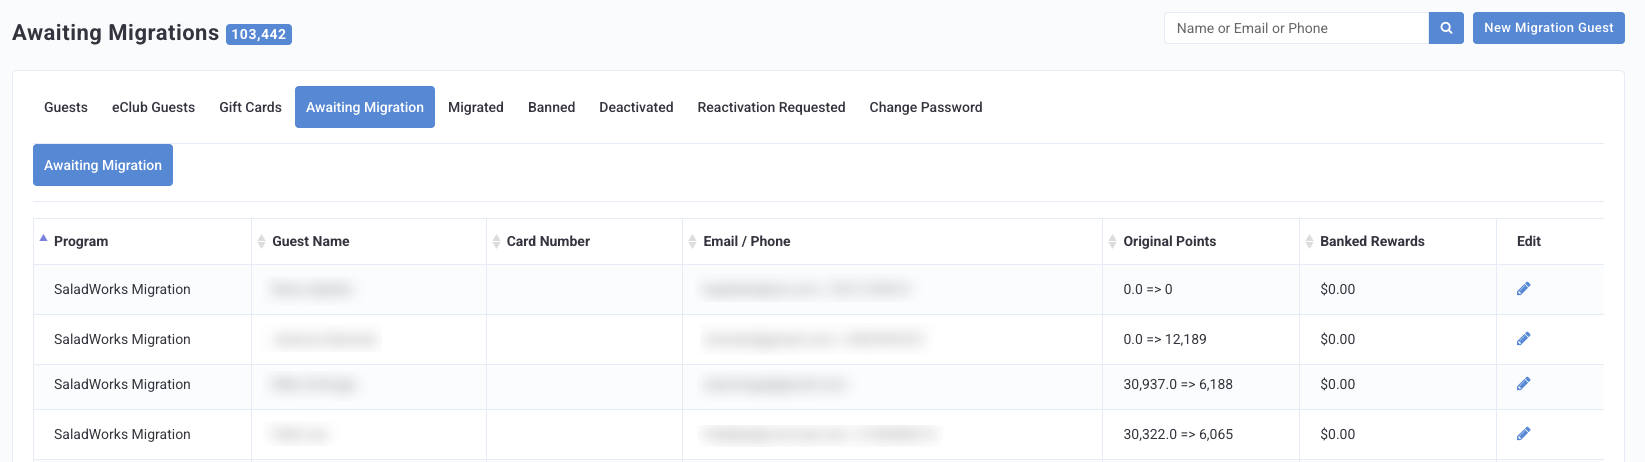
We know when a specific user has signed up if the information they provide matches that of a guest in this Awaiting Migration list. For example, if a guest signs up for your app with the email address loyalcustomer@email.com, and that address matches a user in the Awaiting Migration list, that guest will be moved to the Migrated Guests list as well as to your comprehensive Guests list. Any additional information collected during their new app sign-up will be merged with information we already knew about them previously.
Duplicate Entries
It is possible for there to be multiple entries for the same user in the Awaiting Migration list. If this happens, the user record that was uploaded first to the Awaiting Migration list will be selected for migration, and the gifting will be applied as specified in that particular record. The other duplicate user records in the Awaiting Migration list for that user will remain there. Please note that gifting from these subsequent records can happen. In the rare instance of a user being deleted and signing up again, it would be treated as a new migration.
When a guest migrates to your new app, any points or rewards they earned in the prior program will follow along with them. It is important to note that points pending to be gifted to users in the Awaiting Migration table are not subject to the expiry rules set by your business and do not expire from the Awaiting Migration list. Once a user has migrated and the points have been gifted, at that time, the points will be applicable for expiry.
Add a User to the List
If any guests are missing after the data dump is performed during your initial implementation, you may manually add those guests here. From the Guests > Awaiting Migration page:
-
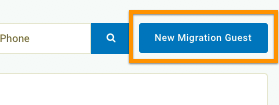
Click the New Migration Guest button at the top right.
-
Enter all known information about the guest:
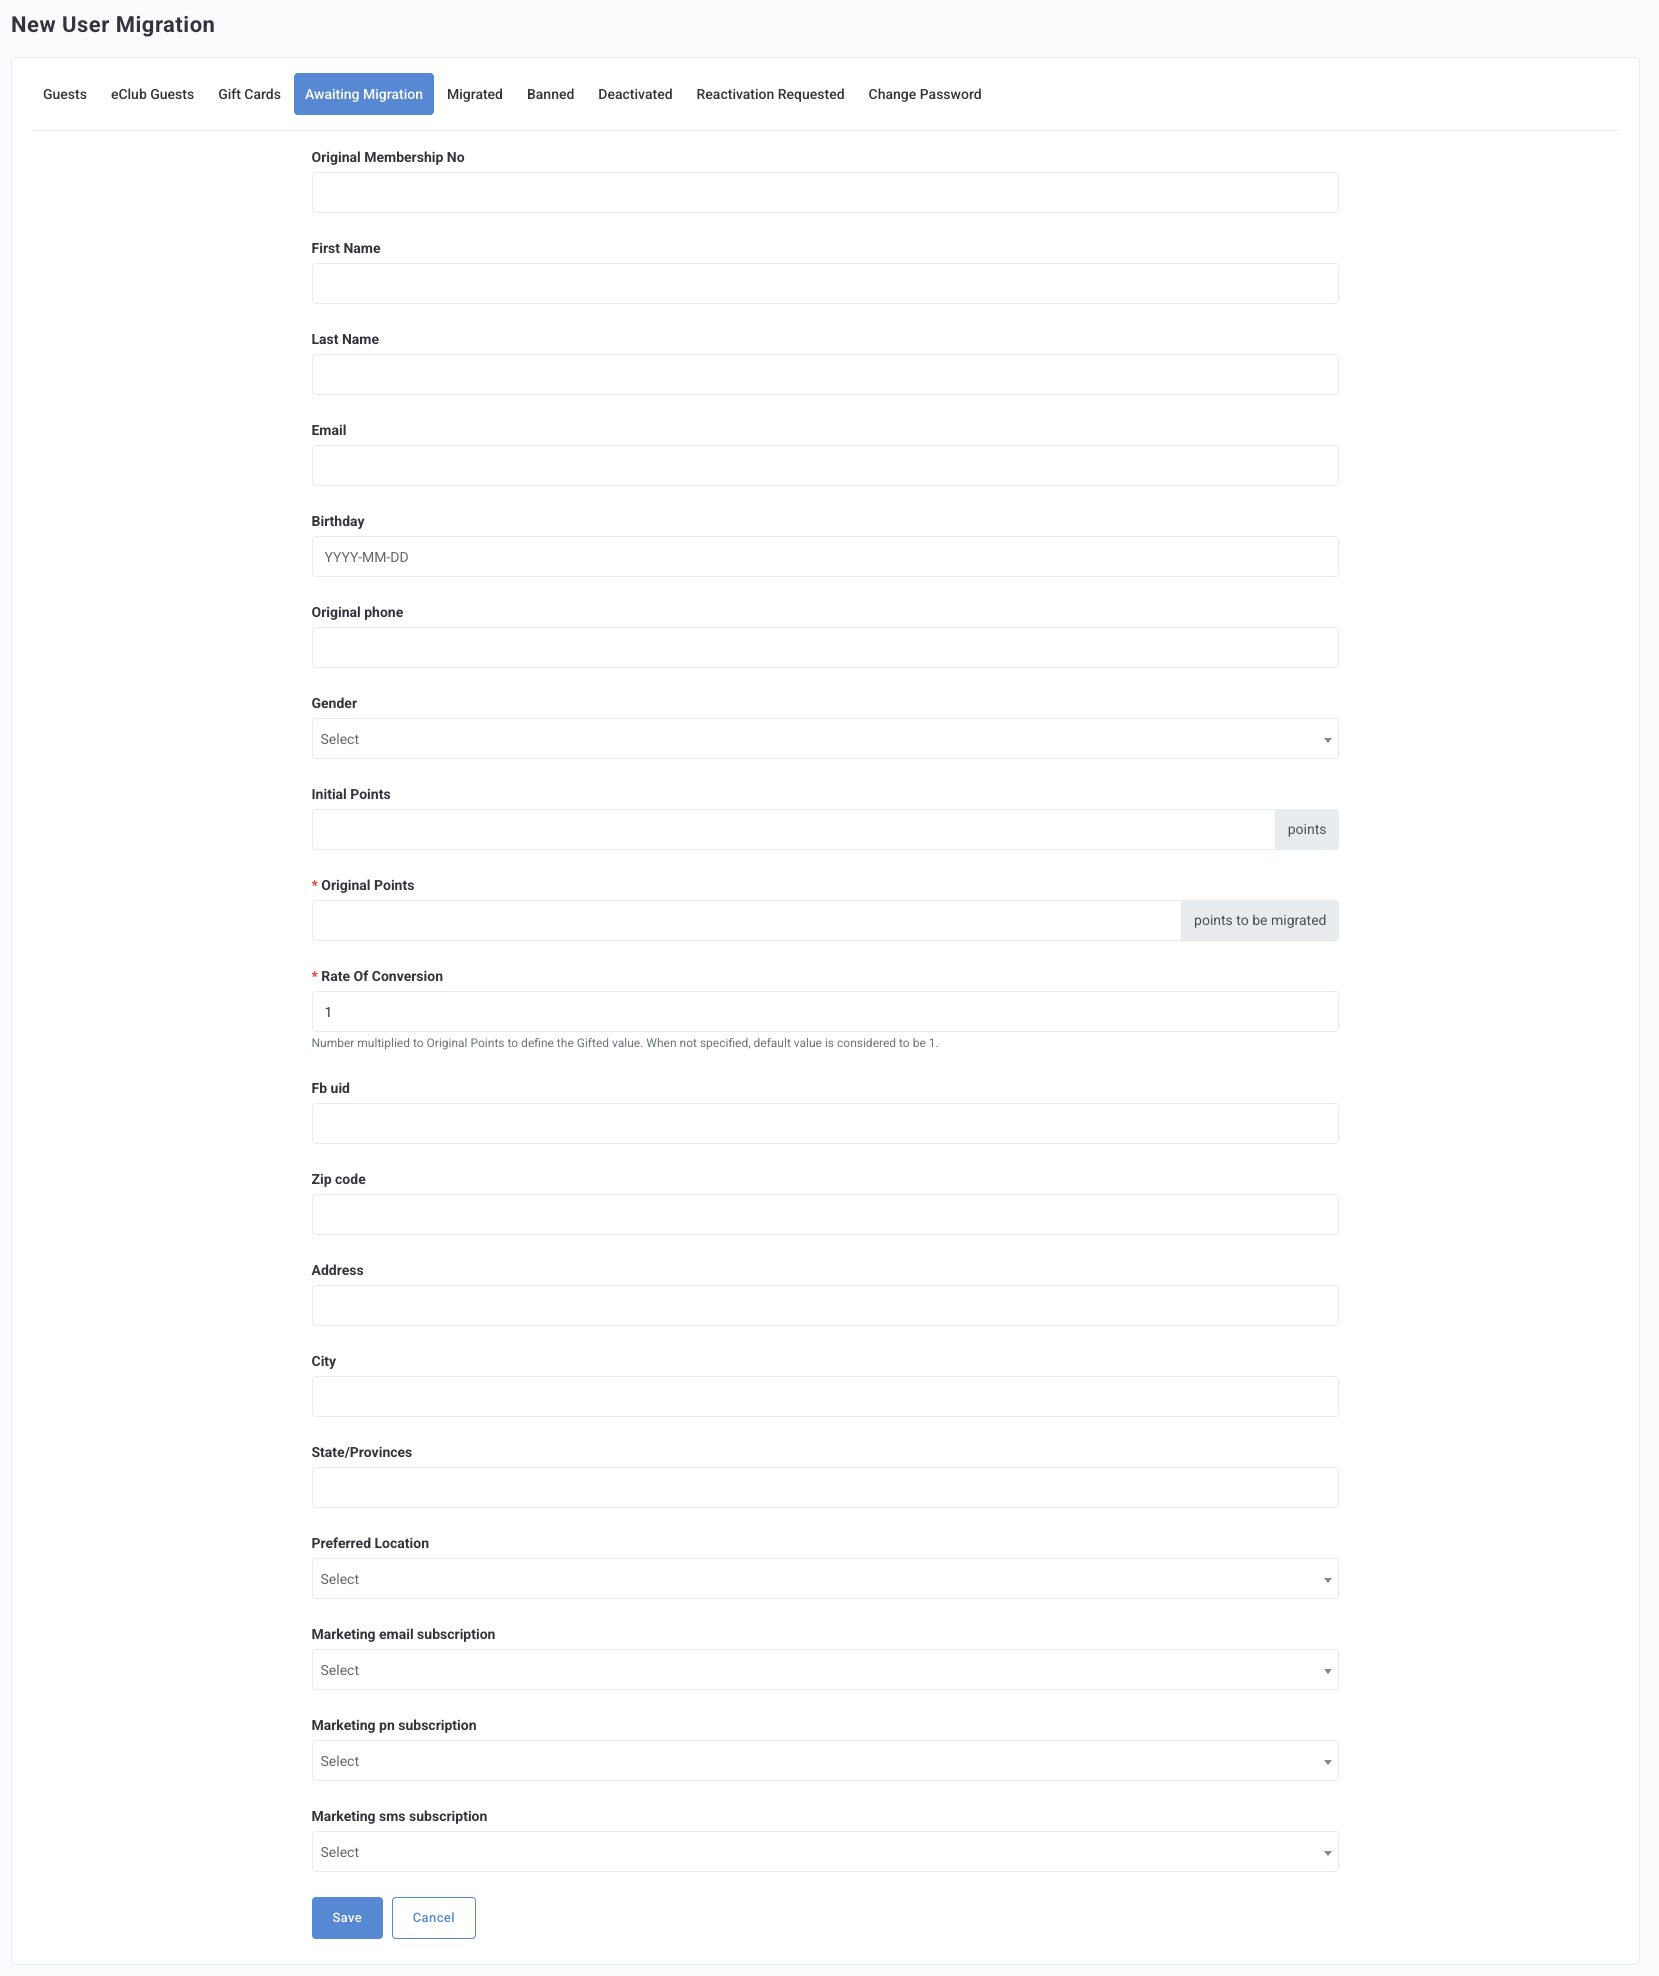
- Original Membership No: The membership/account number for the guest's prior loyalty account. This is necessary for migrating their rewards history.
- First Name/Last Name: The guest's name. Typically this is not the most reliable way to match prior guests.
- Email: The surest way to identify a user belonging to your previous program.
- Birthday: The guest's provided date of birth.
- Original Phone: Phone number is dependent upon the number entered by the guest, not by the phone number of the particular device the guest uses while signing up. (Phone numbers are normalized to digits only. If the normalized number exceeds 10 digits, only the last 10 digits are stored in the phone field. The full normalized number is stored separately in the
original_phone_numberfield.) - Gender: The guest's provided gender identity.
- Initial Points: When the guest signs up for your current program, they will be credited with this amount of points/punches/checkins to start. This value will override the "Original Points" value.
- Original Points: This represents the number of points/punches/checkins the guest had on their account in your prior program. When migration occurs, this total will be transferred into their new loyalty account.
- Rate of Conversion: This represents the number multiplied to Original Points to define the Gifted value. (When not specified, default value is set to 1.)
- FB UID: For users who signed up by linking their Facebook account, the FB UID represents their unique identifier code, found in their FB profile.
- Address (Zip Code, City, State): If provided by the guest while in your prior program. This is not used for guest matching.
- Preferred Location: Also known as "Favorite Location". This information affects the store location a guest is shown while online ordering.
- Marketing Email Subscription / Marketing PN Subscription / Marketing SMS Subscription: Use the drop-downs to indicate (Yes / No) if the guest agreed to receive marketing email, push, or SMS notifications.
-
Once finished, click Save to add the guest to the Awaiting Migration list.
Edit Guest Information
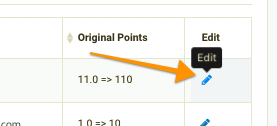
To add or edit information about guests in the Awaiting Migration list, click the blue pencil Edit icon corresponding to that guest. From there, you may modify information as shown in the section above.
Migration Flow
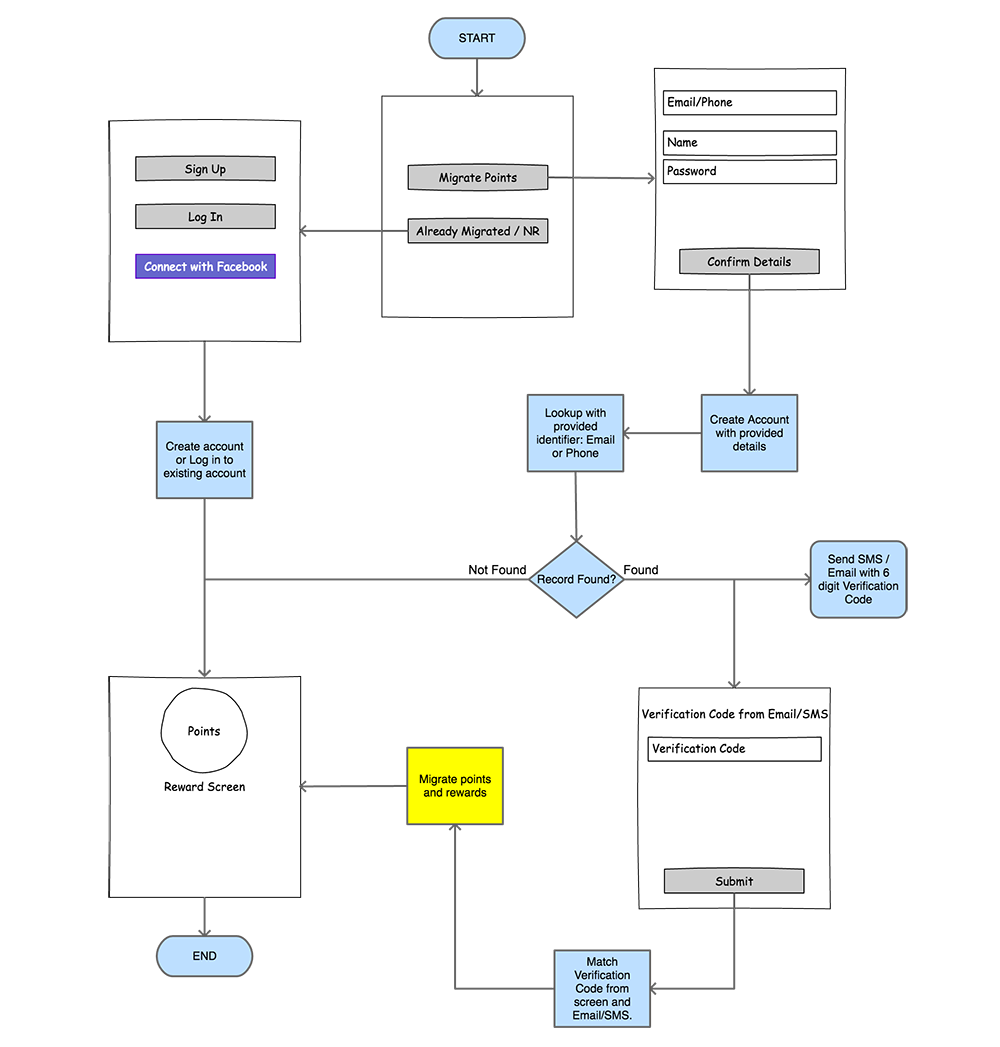
The following diagram shows how migration functions when guests sign up for the loyalty app. Once their information is recognized by the Punchh system, they enter into the migration flow as opposed to the new user flow.
Bulk Business Migration User Upload
Note: This feature is for new brands onboarding at Punchh. If you are an established brand, this feature is not required to use.
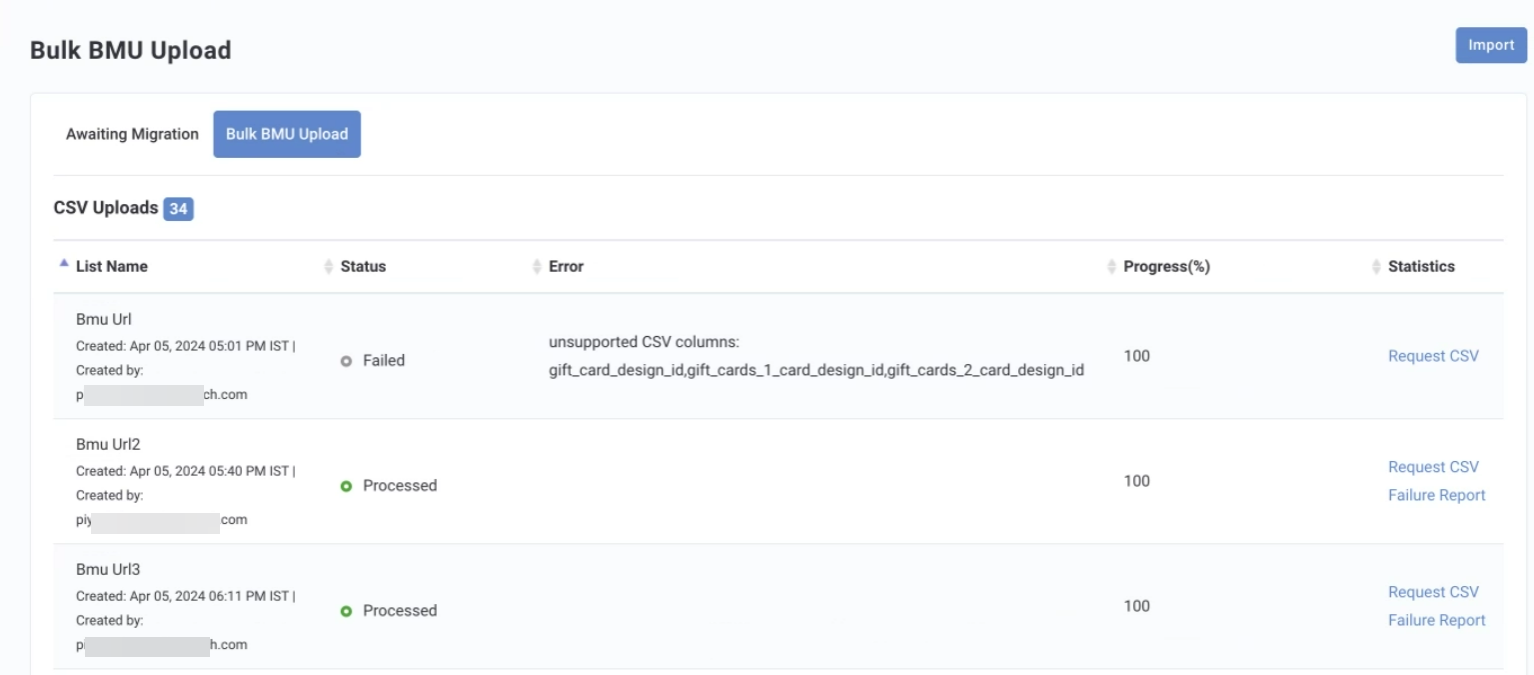
- Navigate to Guests > Awaiting Migration. Click on the Bulk BMU Upload tab.
- The Bulk BMU Upload screen will display a table listing all previously uploaded files along with the status of each request, such as success or failure. If any records fail, the Error column displays the reason for the failure, and you can download the failure report from the Statistics column. If all records are processed successfully, no failure report is generated.
- To create a new request, click on the Import button.
- A new screen will open, prompting you to input the name of the request and upload a CSV file.
-
Upload CSV file: The file size must NOT exceed 15 MB for this option. If the data size is substantial, it must be split into multiple files, each not exceeding 15 MB.
Note: Phone numbers included in your CSV file are normalized to digits only. If the normalized number exceeds 10 digits, only the last 10 digits are stored in the
phonefield. The full normalized number is retained in theoriginal_phone_numberfield. -
Enter CSV file URL: The file size can be up to 50 MB. Use this option if your file is hosted on a cloud service. Please note that the file must be hosted in a public folder for the bulk BMU feature to read its contents.
-
- (Optional) Select Mark all profiles as verified? to mark all profiles created through force sign-up as verified immediately, skipping the email verification step. This setting applies only to the current upload.
- Click Upload.
Below are the maximum number of values that can be ingested in the bulk BMU CSV at a per-user level.
- Gift Cards: 15
- User Relations: 6
- Profile Fields: 25
- Rewards: 15
- Challenge Progress: 15
- Loyalty Cards: 10
Visit our Developer Portal for more information on this feature.
Force BMU Sign-Up
After a BMU upload has finished processing, a Sign-Up button appears next to that upload row. Click it to trigger force sign-up, which automatically creates loyalty accounts for the uploaded records and transfers their BMU data, including points, rewards, and challenge progress.
Note: This feature must be enabled for your account before the Sign-Up button appears. Contact your PAR representative to enable Force BMU Sign-Up.
If a record contains conflicting identity data, for example, it matches an existing user by email but the phone number does not match, the record is skipped and an error appears in the response CSV.
Bulk BMU Delete
Use the Bulk BMU Delete tab to remove guest records in bulk from the Awaiting Migration list. This is useful when you need to clean up large numbers of outdated or incorrect records before or during your loyalty program migration.
Caution: Deletion is permanent. Deleted records cannot be restored. Make sure you have verified the BMU Guest IDs before uploading your file.
To delete BMU records in bulk:
- Navigate to Guests > Awaiting Migration.
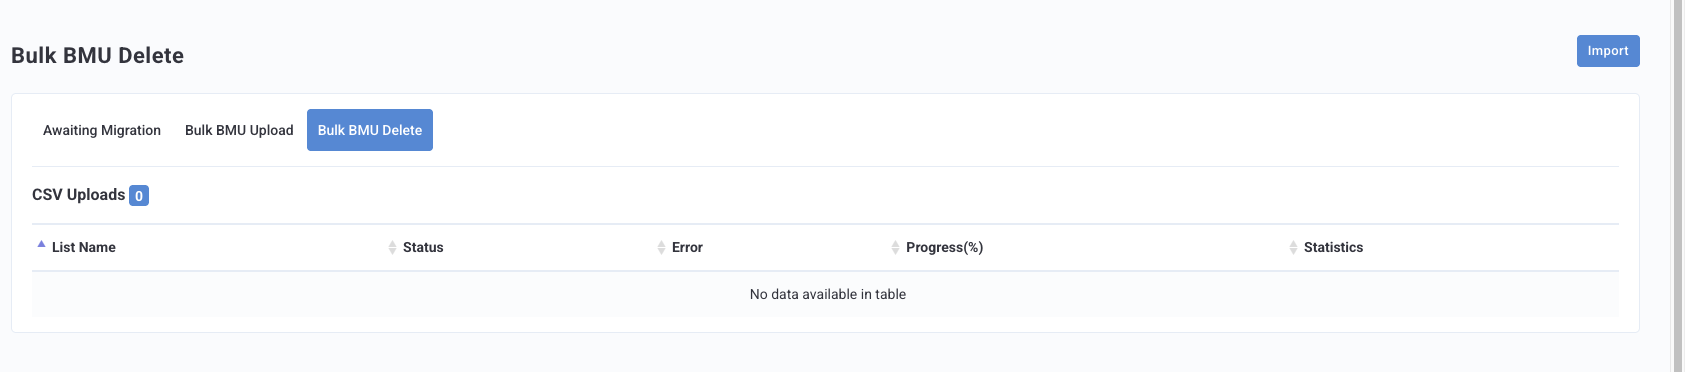
- Click the Bulk BMU Delete tab. The tab displays a table listing all previously submitted delete requests, along with the status of each request.
- Click the Import button.
- Enter a name for the request.
- Upload your CSV file using one of the following options:
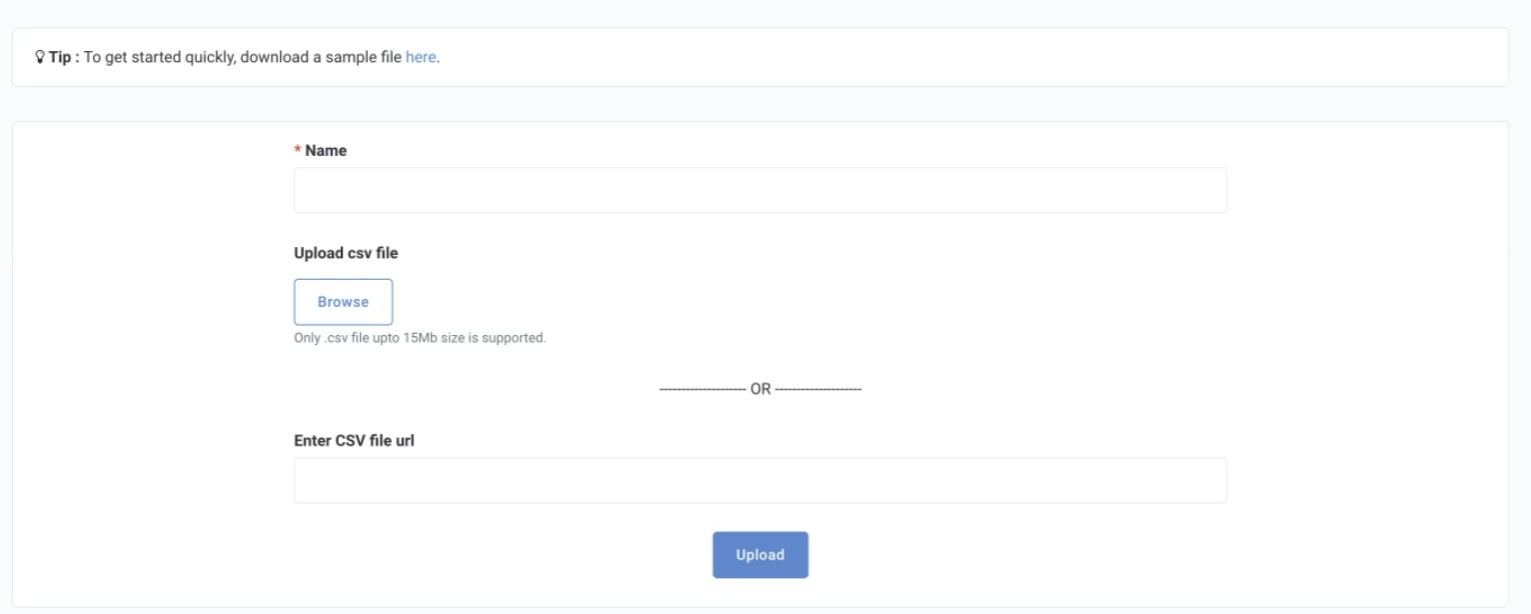
- Upload CSV file: The file must not exceed 15 MB.
- Enter CSV file URL: The file can be up to 50 MB. The file must be hosted in a publicly accessible folder. Private or presigned URLs are not supported.
- Click Upload.
Tip: Your CSV file must contain a single column: bmu_guest_id. To get started quickly, download the sample file from the Import screen. You can retrieve BMU Guest IDs from the Data Export section.
The system processes your file in the background. Once complete:
- A response CSV file is generated and available for download in the Bulk BMU Delete tab table. The file lists each BMU Guest ID along with its status (Deleted or Failed) and a reason for any failures.
- You receive an email notification confirming that the job is complete. The email includes the response CSV as an attachment.
- If all records are deleted successfully, no failure report or download link is generated.
Note: Only guests with Awaiting Migration status are deleted. Records that have already migrated are skipped and appear as Failed in the response CSV.
Response CSV Columns
| Column | Description |
|---|---|
| BMU Guest ID | The unique identifier for the record submitted for deletion. |
| Status | The result of the deletion attempt: Deleted or Failed. |
| Reason | The reason the record was not deleted. Populated only for failed records. |
Note: Request and response CSV download links expire after 7 days.
