SMS Marketing (Acquire) and Text to Join
This article was previously titled "Text to Join (SMS Marketing)."
Added Module The SMS Notifications feature is bundled as part of the SMS Messaging Integration with Twilio, available for an additional cost. To enable SMS Messaging, speak to your Punchh Customer Success Manager about adding it to your service contract. Note: This article only explains the functionality of the Twilio integration, if you are looking for information on SMS marketing integration with Attentive, please review this article: Attentive Integration User Guide
Text-to-Join with Twilio is a feature of SMS-based mobile marketing. With the Twilio Text-to-Join feature, businesses can acquire users, as well as communicate with them, via the SMS channel. Guests can be signed up for both eClub and loyalty programs in addition to your business engaging with them for various marketing communications directly through text messages.
Capabilities:
- Configure a Text-to-Join program using an SMS Short-code, custom keyword, opt-in message, confirmation message, and optional coupon offer
- Configure an incentive reward as part of the sign-up process to encourage sign-ups
- Configure the opt-in message as one message
- Configure a fallback message (in case a wrong or expired keyword is sent to the shortcode). This will ensure that the signup is handled when users enter an invalid keyword
- SMS regulation compliance
- Support for HELP, STOP text
Instructions & Walkthrough
Let's walk through an example of setting this up.
Scenario: Business wants to enroll guests using the guest Custom keyword 'PIZZA'
STEP 1: Enable Text-to-Join in the Punchh Platform
First, please confirm with your CSM that the appropriate settings are enabled.
STEP 2: Visit the SMS Marketing Home Page
Once the 'Text-to-Join 'setting is enabled you will be able to view the SMS Marketing Home Page. Navigate to Custom > SMS Marketing (Acquire).
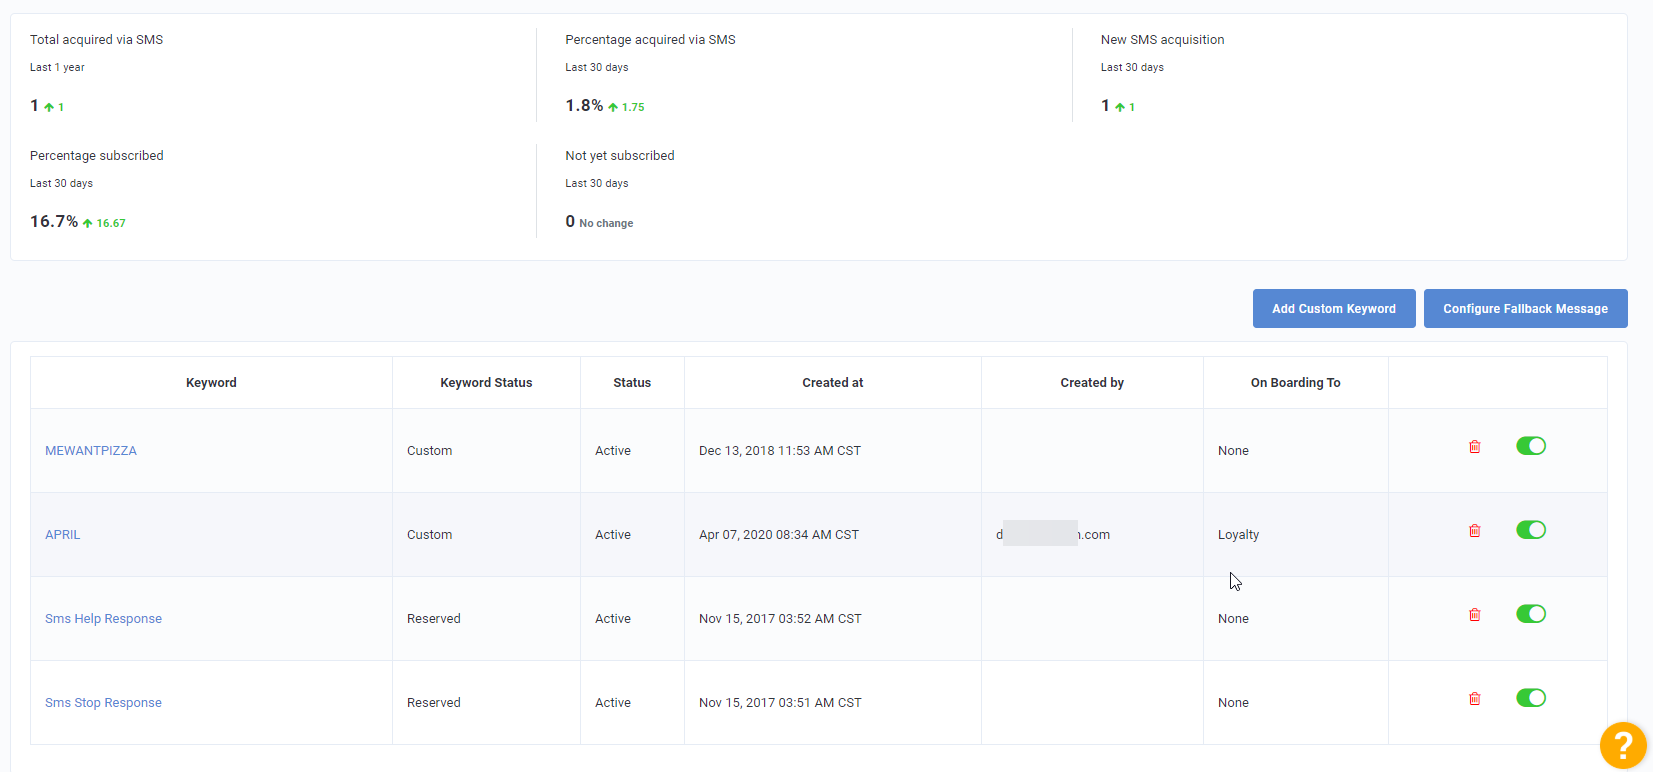
The home page will display metrics tracking the utilization of your SMS Marketing along with keyword analytics. The home page will allow you to delete a keyword using the
 symbol. You can pause any keyword using the
 toggle.
Clicking on a keyword will take you to the System Messages associated with the keyword. From here, you will be able to edit settings such as the SMS Body, SMS Description, add messaging tags, and more.
STEP 3: FALLBACK MESSAGE
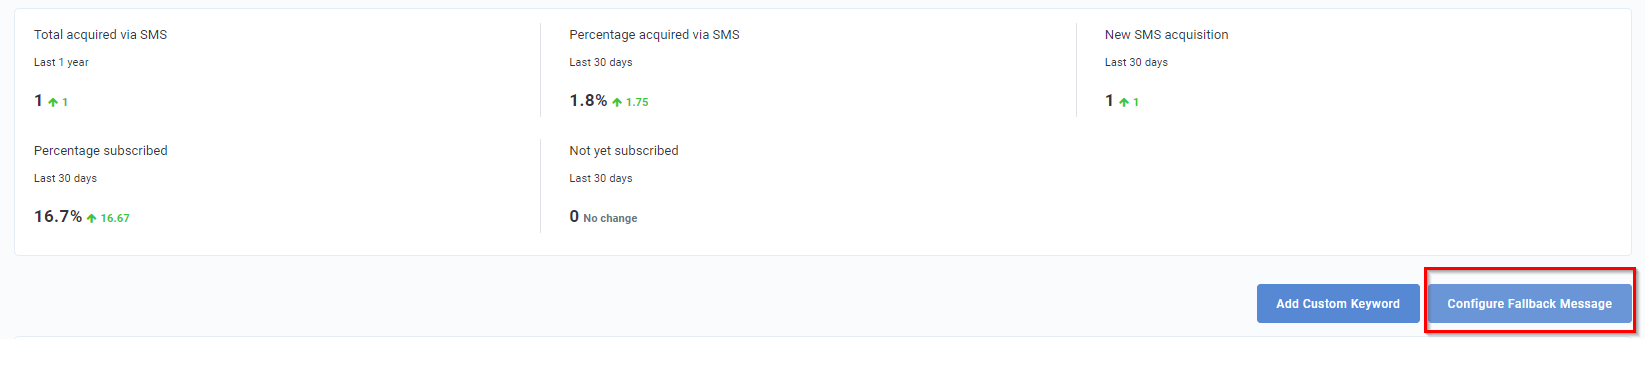
To configure fallback messaging, open the Punchh Platform and navigate to Acquire >SMS Marketing. To the right of the screen, there's a 'Configure Fallback Message'button (see below):
This page allows admins to configure single and double opt-in keywords and messaging for the same.
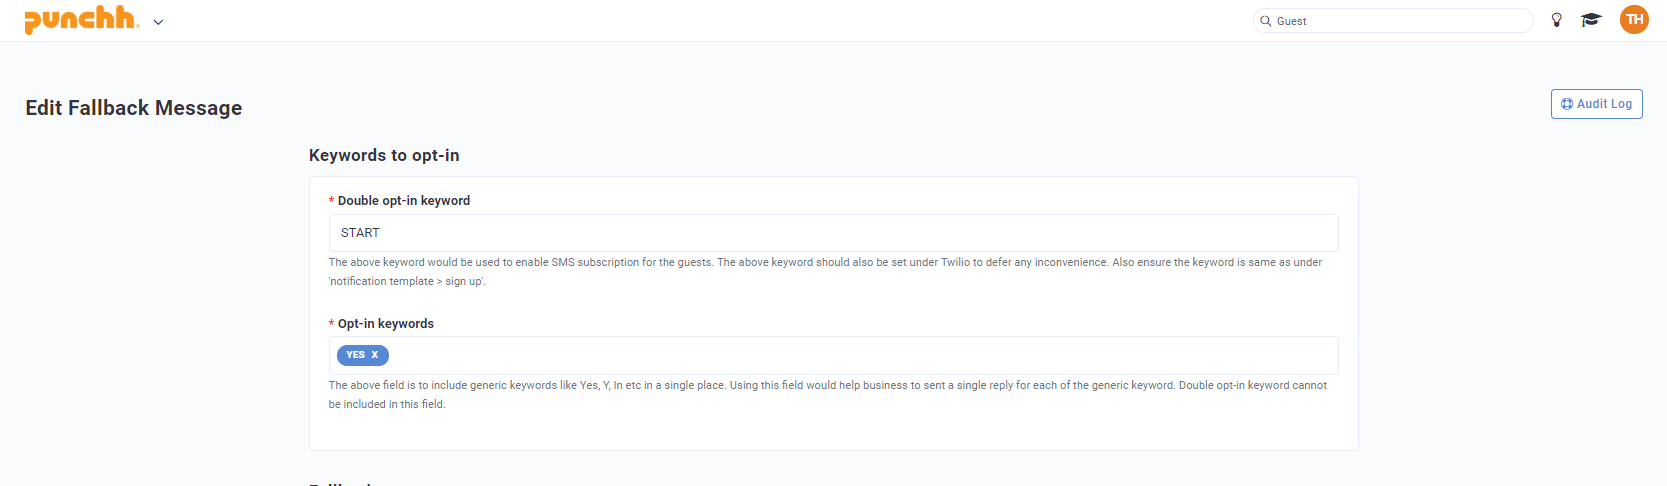
The screenshot above shows the first part of the form that configures the Fallback Message.
This section includes two tabs: Double opt-in keyword & Opt-in keyword
- Double opt-in Keyword: By default, the word 'START' will be entered here. This means any guest sending a custom keyword would be asked to text the word 'START'to double opt-in.
- Opt-in Keyword: Use this tab to fill in all the generic opt-in keywords (for example: YES, Y, ENTER, GO, IN, etc.).
The next section configures the Fallback message. See below:
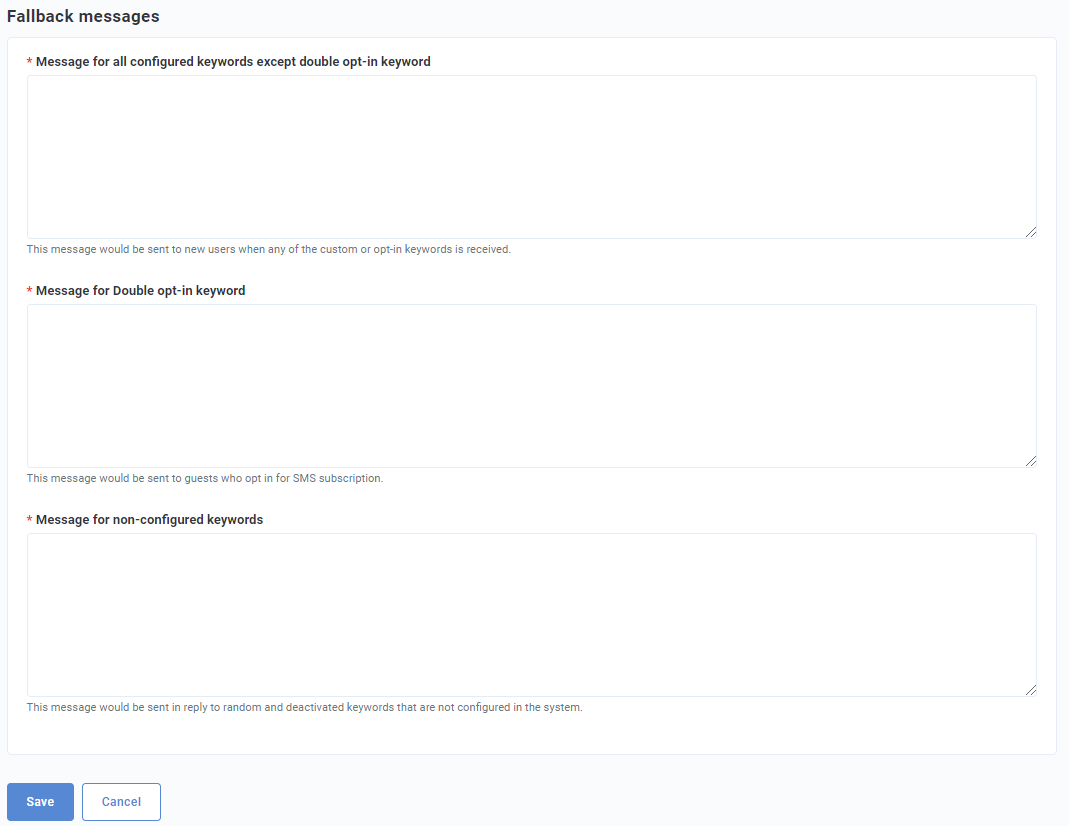
The Fallback message has three components:
- Message for all configured keywords except double opt-in keyword: This message will be sent to guests whenever they send an opt-in keyword or custom keyword. This message should include compliance information.
- Message for double opt-in keyword: This message will be sent once the guest sends the double opt-in keyword [In this case, it's 'START'].
- If the keyword is changed, you must do the following:
- Message for non-configured keyword: If a guest sends a random keyword, the message defined in this section will be triggered.
STEP 4: CUSTOM KEYWORD
The final step will be to create a custom keyword. After saving the Fallback message form, you will be taken back to the keyword listing page. Select Add custom keyword from the right side of the page (located next to the Configure Fallback Message displayed above).
This will open the form that configures the Keyword:
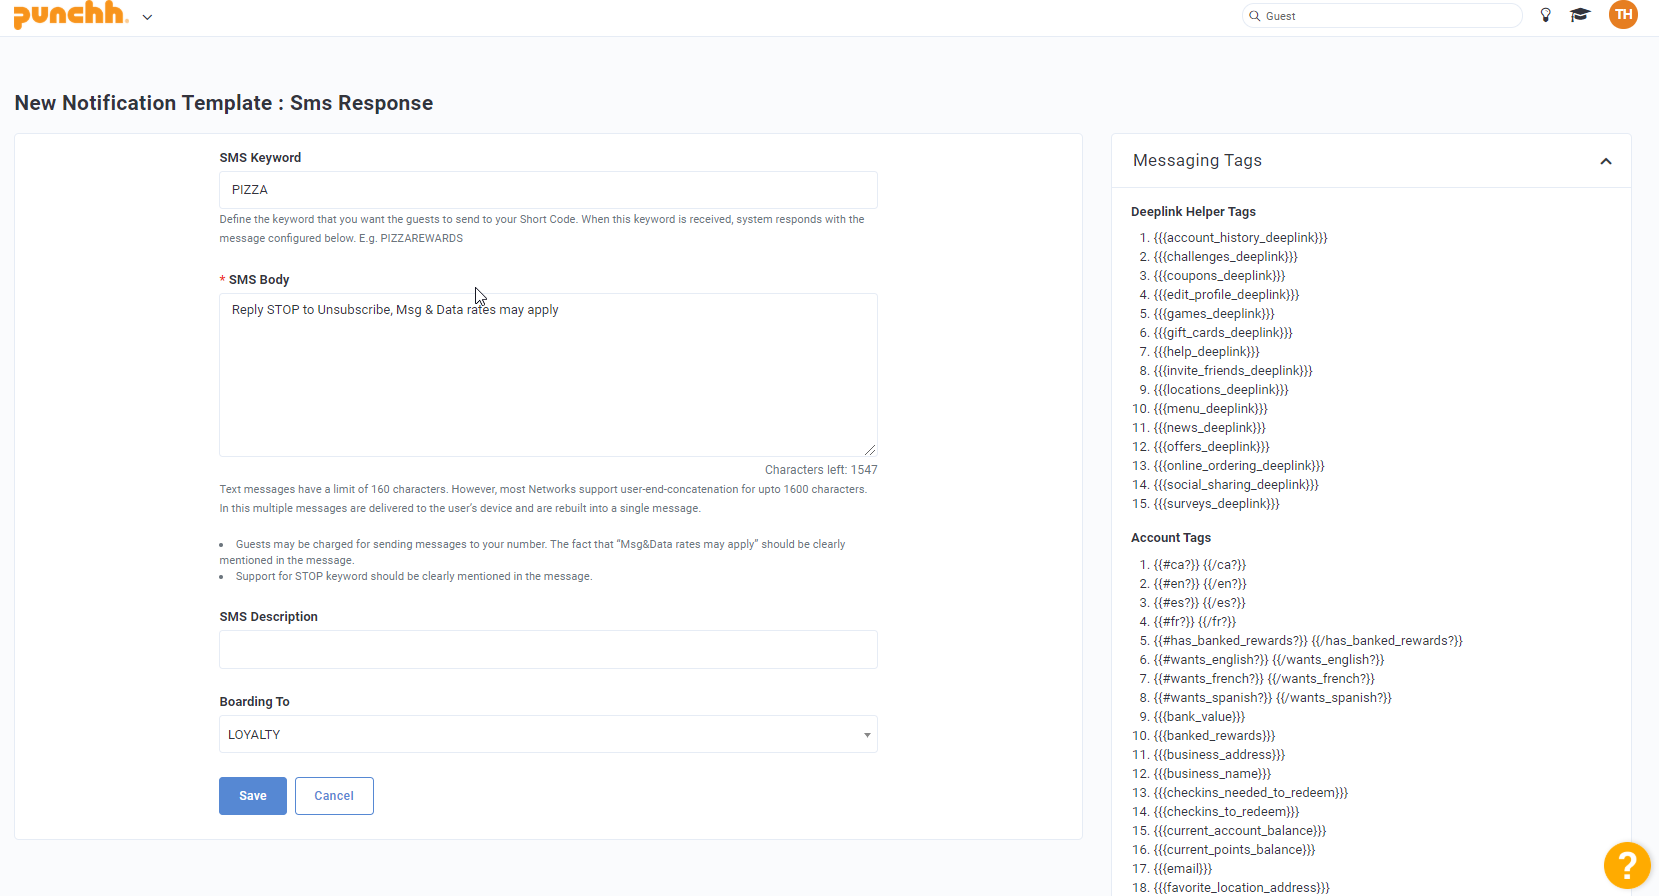
- SMS Keyword: This is the 'title' of the actual keyword. For the purpose of our walkthrough, type in the custom keyword 'PIZZA' into this tab
- SMS Body: SMS body is the reply the guest will receive when they send the custom keyword 'PIZZA'. If the guest is new, they would first need to double opt-in and then this response will be sent.
Once this form is saved, the keyword will start appearing on the keyword listing page and will be active. Any guest sending the above keyword will be signed up for loyalty.
Measuring Effectiveness

To help measure the effectiveness of the Text-to-Join keywords, the following stats are available in the Punchh Platform from the SMS Marketing Home Page page:
- Total Acquired via SMS: Total number of users acquired through Text-to-Join in the last 1 year.
- Percentage acquired via SMS: Total users with SMS subscriptions divided by the total number of loyalty users acquired in the last 30 days.
- New SMS Acquisition: Total number of users signed up through custom keyword in last 30 days
- Percentage Subscribed: Percentage of guests subscribed through SMS in the last 30 days
- Not yet subscribed: These are guests who have sent a custom keyword but have not subscribed for SMS marketing in the last 30 days
These stats would be visible when an admin clicks on any of the custom keywords.
- Total Sign-up from keyword: Depicts the total number of signups made from the specific keyword.
- SMS Sign-up from that keyword as a % of total sign-ups: Sign up from a specific keyword divided by the total number of signups in the given time period
- Sign-up trend: Gives the sign-up trend for the time duration selected above
