How to Use the Order Desk
Welcome to the Order Desk
Your all-in-one tool for managing catering orders with ease.
Whether you're a Catering Manager or part of the restaurant team, this guide will walk you through everything you need to know to confidently take and manage catering orders over the phone.
Getting Started
Who Can Use the Order Desk?
- Only Admin users can turn on the Order Desk.
- Once enabled, it's available to Admins and team members with brand-level access.
Viewing Orders
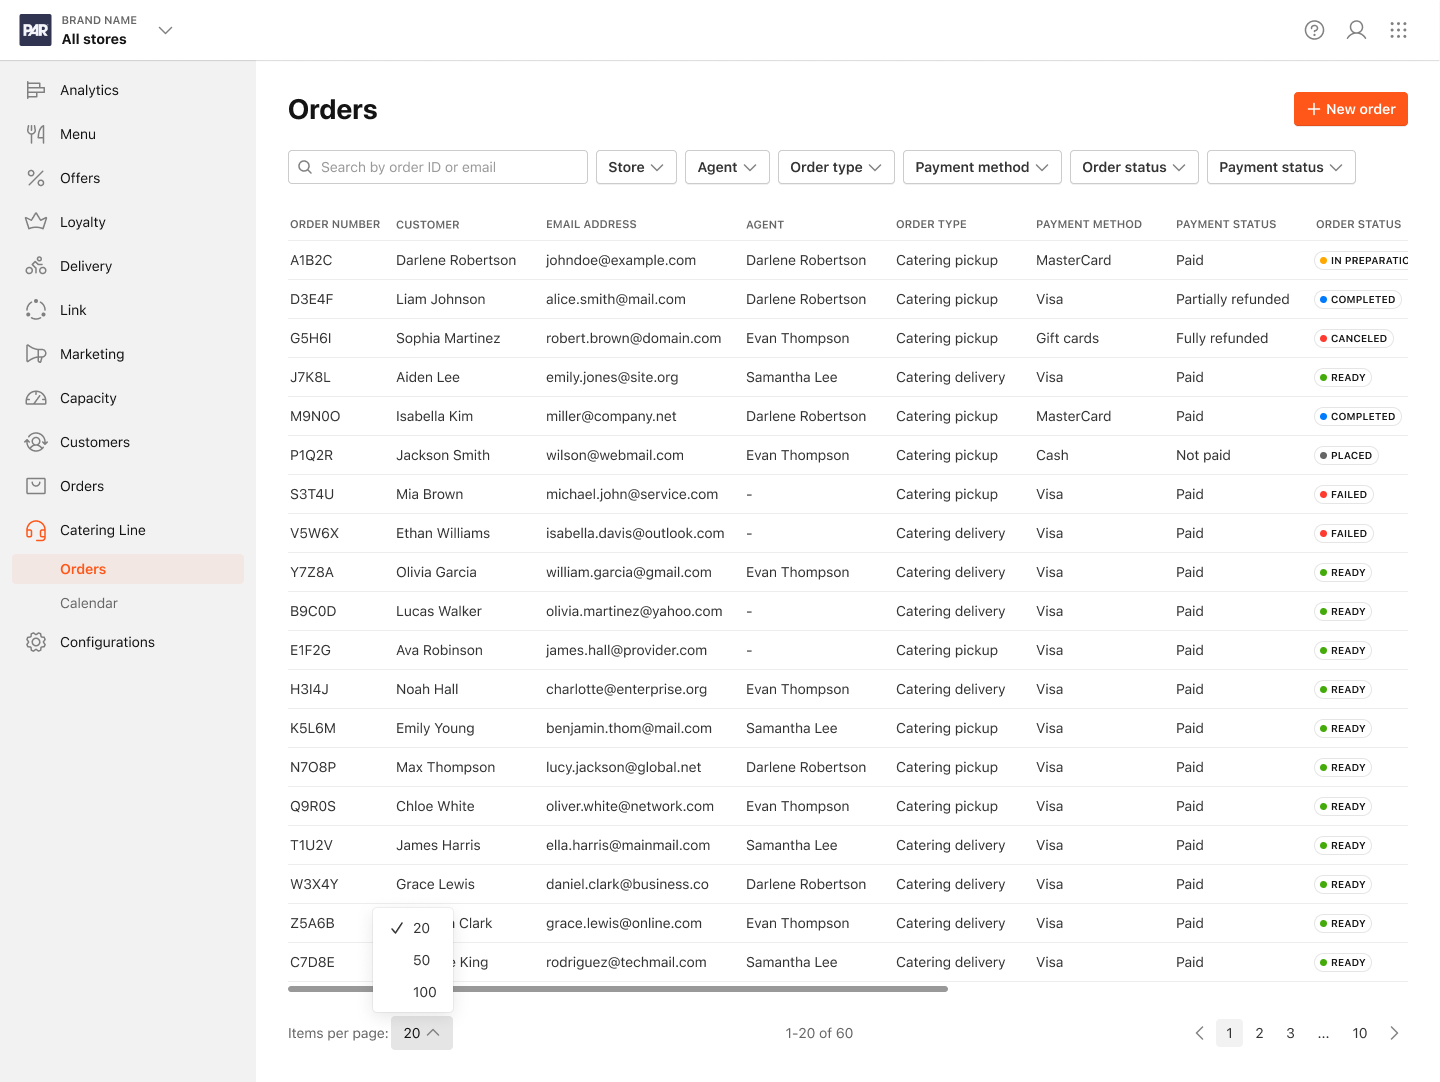
Orders Overview
When you log in, you'll land on the Orders Overview page. Here’s what you’ll see:
- Only catering orders placed through the Order Desk.
- Orders from all stores.
- A column showing the Agent (the team member who placed the order).
Filters You Can Use
- Store(s): View orders from one or multiple locations.
- Agent: See who placed the order—or find orders without an agent.
- Order Type: Choose between Catering Pickup or Delivery.
Customizing Your Column View
You can choose which columns appear in the Orders table and save your layout as your personal default. Each user's preferences are saved independently, so your changes won't affect other team members' views. All existing columns are shown by default. No setup is required to start customizing.
To customize your columns:
- Open the Order Desk.
- Click the column settings icon in the table header.
- Toggle columns on or off.
Your selection saves automatically and appears the next time you open the table.
Additional columns available:
| Column | What it shows |
|---|---|
| Store name | The store the order is placed at |
| Start prep by | When the kitchen should start preparing the order (pickup time minus prep time) |
| Ready by | Scheduled pickup time |
| Deliver by | Scheduled delivery time |
| Catering services | Catering fee line items applied to the order |
| Invoice status | House Accounts invoice status: Invoiced, Paid, Overdue, or Cancelled |
| Channel | External channel name (e.g., DoorDash, UberEats); blank for direct orders |
| Prep sheet | Download link for the kitchen preparation sheet PDF |
| POS ticket ID | Ticket ID from the connected POS system |
The Start prep by column is sortable. Click the column header to sort ascending or descending. Start prep by is calculated as pickup time minus your configured preparation time. For example, an order due at 12:00 PM with a 45-minute prep time displays Start prep by: 11:15 AM.
Need More Info?
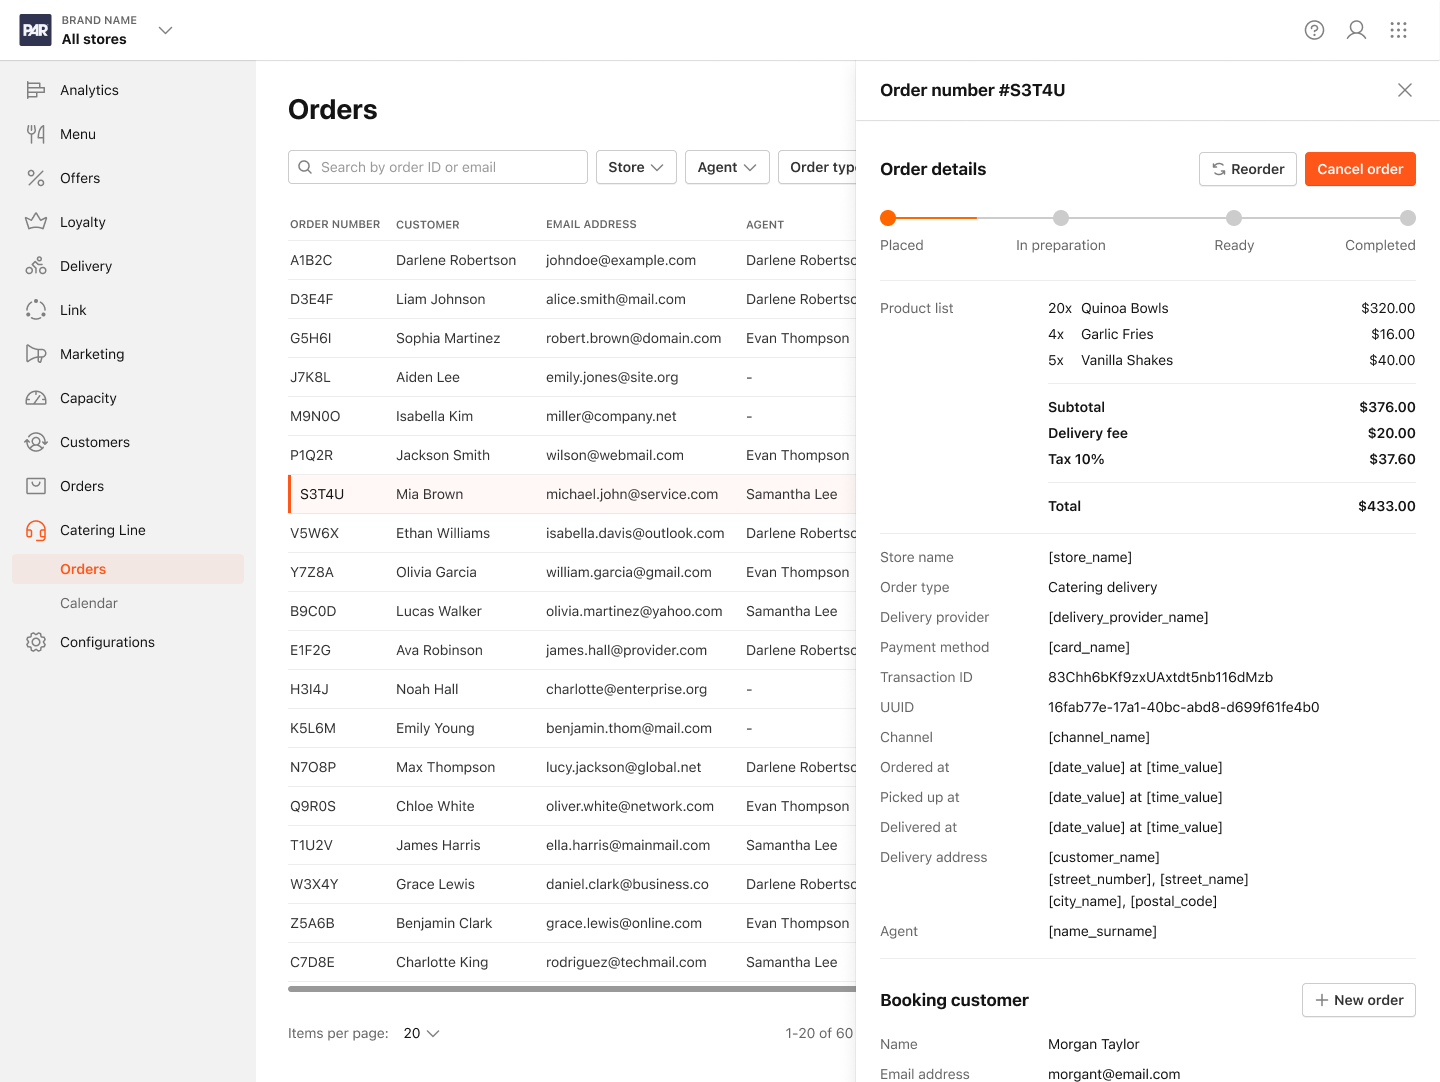
Click on any order to open a detailed view, including:
- Customer info (Booking and Receiving)
- Agent name
- Reorder and New Order buttons
You can also search orders by:
- Order number
Resending an Expired Payment Link
If a customer's SMS payment link has expired before they've paid, you can resend a fresh link directly from the order details drawer.
The Resend payment link button appears only when all of these conditions are met:
- The order is unpaid.
- The order has a payment link that has expired.
- The payment link has not already been used.
- You have the manage orders permission.
To resend a payment link:
- Open the order in the Order Desk.
- Under the payment status, click Resend payment link.
- A confirmation dialog appears. Click Confirm.
The customer receives a new SMS payment link with a fresh expiry, and the button disappears from the order.
This action sends a text message only. The customer must have a phone number on the order. If the link is still active or the order has already been paid, the button will not appear.
Placing a New Order
Step 1: Start a New Order
Click the New Order button. If you're starting from an existing order, customer info will be pre-filled.
Step 2: Find the Customer
Search by:
- Name
- Phone number
If no results appear, you can create a New Customer profile.
Step 3: Confirm Customer Info
- You'll see the Booking Customer details (read-only).
- If the Receiving Customer is different, toggle the switch and fill in their info.
Step 4: Begin the Order
Once customer info is confirmed, you’ll move into the ordering flow.
Step 4: Order prioritization
Choose to bypass order preparation, capacity and serving time rules to allow high value orders to be places on shorter timelines.
Ordering Process
Choose Order Type
Select Catering Pickup or Catering Delivery.
Store Selection
- For Delivery: Enter or select a saved address.
- For Pickup: Enter the customer’s address to find nearby stores.
Menu & Checkout
-
The menu works just like the regular web app.
-
At checkout, you can choose:
- SMS Payment Link
- Cash or Gift Cards (if enabled)
Agents cannot use the customer’s saved store payment methods.
Applying a Manager Discount
When you're placing an order on behalf of a customer or building a catering quote in the Order Desk, you can apply a manager discount directly to the order or quote. The discount can be a flat dollar amount or a percentage of the subtotal.
Use manager discounts for situations like service recovery or one-time courtesy adjustments. Customers cannot apply this type of discount on their own.
To apply a manager discount:
- In the checkout flow, locate the Manager Discount card.
- (Optional) Enter a name for the discount (for example, "Service recovery"). If you leave this blank, it displays as "Manager discount."
- Select Amount or Percentage using the toggle.
- Enter the value. Percentage values can include decimals (for example, 12.5).
- Click Add discount.
After you add the discount, the card shows the name, amount, and a remove button. To change it, remove the current discount and add a new one.
See also:
Key rules:
- One discount at a time. A manager discount cannot be combined with any other discount, including loyalty rewards, offers, and promo codes. If a manager discount is applied, the rewards and promo code sections are hidden. To switch discounts, remove the current one first.
- Flat discounts are capped at the order total. The order total will never go negative.
- Percentage discounts recalculate automatically. If you add or remove items after applying a percentage discount, the discount value updates to reflect the new subtotal.
- Loyalty points are not affected. Manager discounts are processed separately and do not earn or spend loyalty points.
The Manager Discount option is only visible when you're in the call-center checkout flow or editing a catering quote in the Order Desk, and no other discount is currently applied to the cart. If you apply a manager discount to a quote, it carries over automatically when the customer accepts and converts the quote to an order. See How to Create and Manage Catering Quotes and Leads.
After Placing the Order
You’ll be taken back to the Management Center, where you can review the full order summary.
Using the Catering Calendar
What It Shows
- Today + the next 3 days
- Dots under dates with catering orders
- Orders from all or selected stores
Navigating the Calendar
-
Click a store to expand and view orders for 3 days.
-
Each order appears as a color-coded card:
- 🟪 Placed
- 🟨 In Preparation
- 🟩 Ready
- 🟦 Completed
Each card includes:
- Time (Pickup or Delivery)
- Status
- Customer name
- Order number
- Total
- Order summary
Filters & Search
- Filter by date, store, order type, or status.
- Search by email or order number.
You're Ready to Go!
With the Order Desk, managing phone orders is faster, easier, and more organized than ever. If you need help or have questions, reach out to your PAR Ordering representative or the PAR Ordering Support Team.
