How to Edit a Catering Order
This article explains how brand/store managers, store staff, and guests can edit catering orders after they are placed, as well as what to expect with timing, payments, and confirmations.
What is Catering Order Editing?
Catering order editing lets you change certain details of a confirmed catering order before the restaurant begins preparing it. For example, you may be able to:
- Add or remove menu items
- Change quantities
- Update pickup or delivery time (if allowed)
- Edit notes or special instructions
- Update contact or pickup person details
These changes are only allowed for a limited time before the scheduled pickup or delivery. We call this the edit period.
Review How to Configure the Catering Order Edit Period for details on how to set up catering order editing by brand or store.
When Can a Catering Order Be Edited?
If an order is eligible for editing, you will see:
- An Edit until date and time (the edit deadline)
- An Edit Order button on the order receipt or confirmation screen
Once the edit deadline passes:
- The Edit until time disappears
- The Edit Order button is removed
- The order can no longer be edited online
Where Can Catering Orders Be Edited?
Catering orders can be edited from:
- Web app (customer-facing website)
- Hybrid mobile app (customer-facing app)
- Order Desk (used by store or brand staff in the Management Console)
Some rules may depend on where the order was originally placed and where it is being edited, but the general editing experience is similar across these channels.
How to Edit a Catering Order via Order Desk
Store or brand staff can also edit eligible catering orders from the Order Desk in the Management Center.
Step 1: Open the Order in Order Desk
-
Sign in to the Management Center.
-
Go to Order Desk > Orders.
-
Find and open the catering order you want to edit.
-
If the order can still be edited:
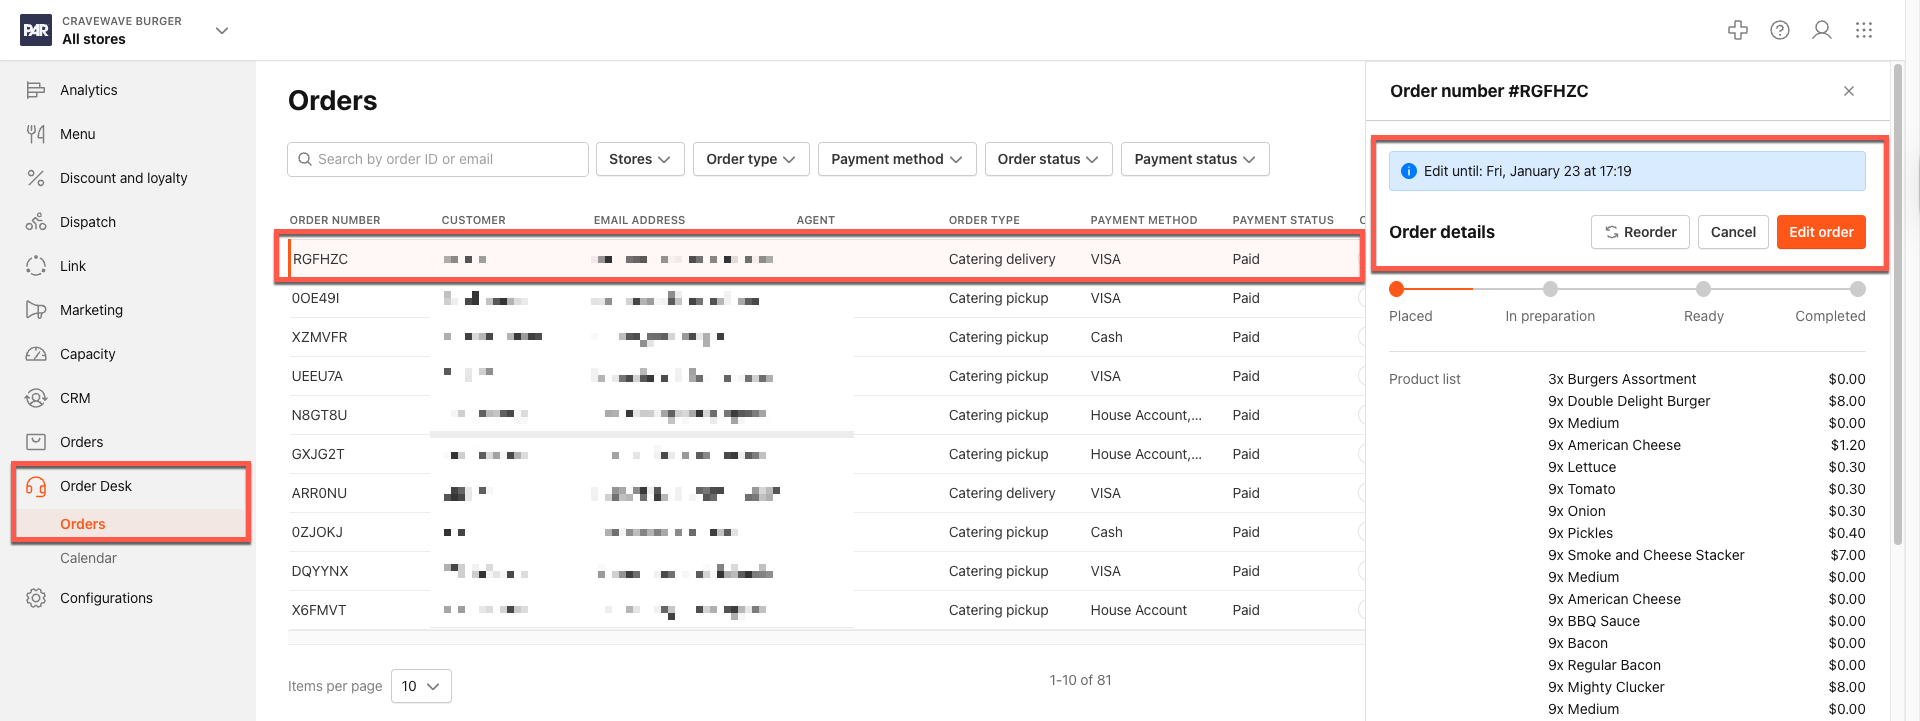
- You will see an edit deadline on the receipt page.
- An Edit Order button will appear with the other actions, and it will be shown as the primary action.
Once the deadline has passed, the edit deadline and Edit Order button will disappear, and editing will no longer be available.
Step 2: Start Editing
-
Click Edit Order.
-
The order opens in edit mode, similar to the guest experience:
- Items and quantities are pre-filled
- Event details, instructions, and contact info are carried over
-
In Order Desk, payment options are typically:
- SMS payment link
- Cash
If an additional payment is needed after editing, staff can send an SMS link or collect cash according to the specific setup.
Step 3: Make and Confirm Changes
- Update items, quantities, and event details as requested by the customer.
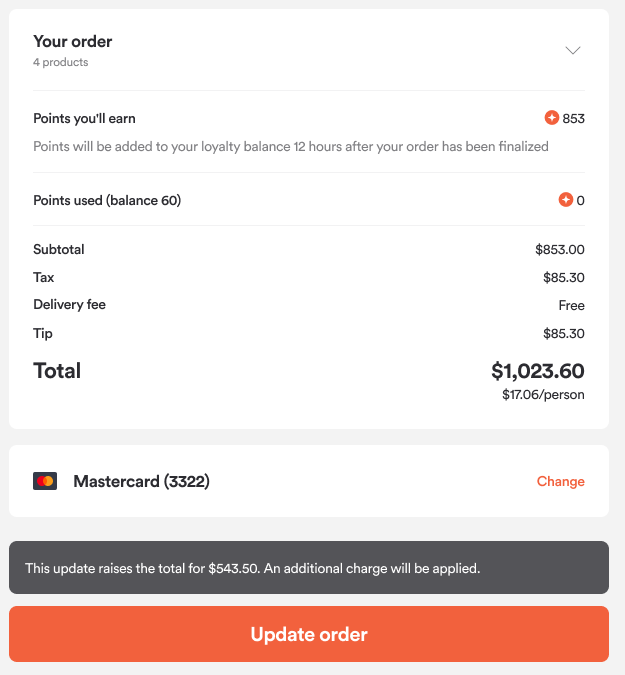
- Review the updated total and selected payment method (for example, SMS link).
- Confirm and update the order.
Depending on whether the total goes up, down, or stays the same, additional payments or refunds will be handled based on the payment flow rules defined for the brand. See example below:
Step 4: Confirmation for Store-Edited Orders
When a store updates an order:
- The system sends a confirmation email to the customer with the updated details.
- The confirmation screen in Order Desk also shows:
- The edit deadline (if still within the edit period)
- An Edit Order button so staff can make further edits if still allowed
User Experience: How Guests Edit a Catering Order (Web or Mobile App)
The following are steps a guest would follow in order to edit their own order through the web or mobile app.
Expand for details
Step 1: Open Your Receipt or Order History
-
Sign in to your account in the web app or mobile app.
-
Go to your order history or order receipt page.
-
Find the catering order you want to edit.
-
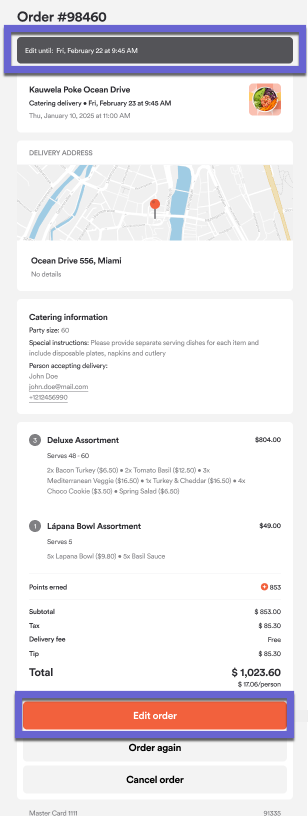
If the order is still within the allowed edit period, you will see:
- An Edit until time (for example, “Edit until: Oct 20, 3:00 PM”)
- An Edit Order button
If you do not see an Edit button or edit deadline, the order is no longer eligible for editing.
Step 2: Start Editing
-
Click or tap Edit Order.
-
You will be taken back to the menu, and your existing cart will be pre-filled with:
- The store and order type (pickup or delivery)
- Delivery address (if applicable)
- Scheduled pickup or delivery time
- All items and quantities in your catering order
- Headcount and catering details
- Special instructions and pickup person info (if previously entered)
- Any applied discounts, rewards, and promo codes
- The selected payment method, tip, taxes, and fees
If anything in your original order is no longer available (for example, an item or time slot), the system will clearly show messages or prompts and guide you to adjust your order.
Step 3: Make Your Changes
While in edit mode, you can typically:
-
Update items and quantities:
- Add new menu items
- Remove items
- Increase or decrease quantities
-
Adjust event details (as allowed):
- Confirm or change pickup/delivery time if prompted
- Update headcount
- Update special instructions
- Update pickup or contact details
-
Review pricing:
- If prices or fees have changed since you placed the order, the totals will be recalculated based on the latest information.
- Any discounts, rewards, or promo codes are reapplied where possible.
Step 4: Proceed to Checkout to Confirm Changes
-
When you’re done editing, go to Checkout.
-
Review:
- Updated items and quantities
- Updated totals, including tax, fees, and tip
- The selected payment method
-
Depending on how your order changed, you’ll see one of these outcomes:
-
No changes
-
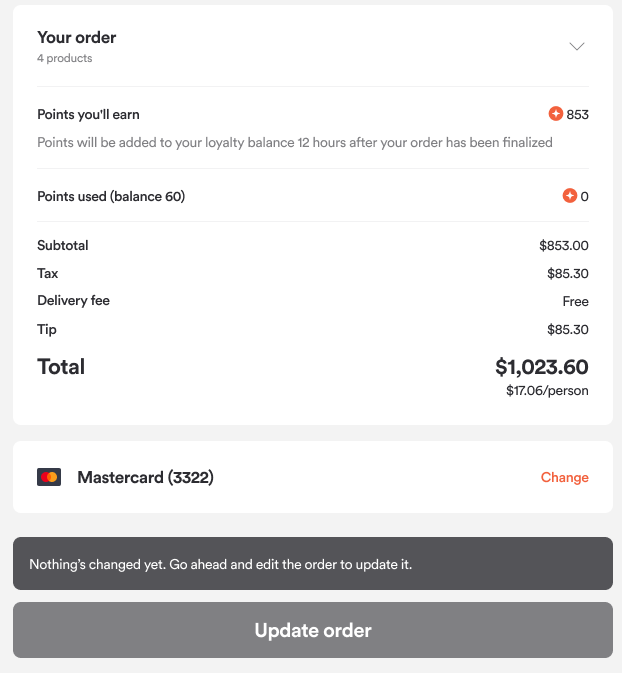
If nothing meaningful has changed, the Update button is disabled, and a message will tell you there’s nothing to update.
-
If nothing meaningful has changed, the Update button is disabled, and a message will tell you there’s nothing to update.
-
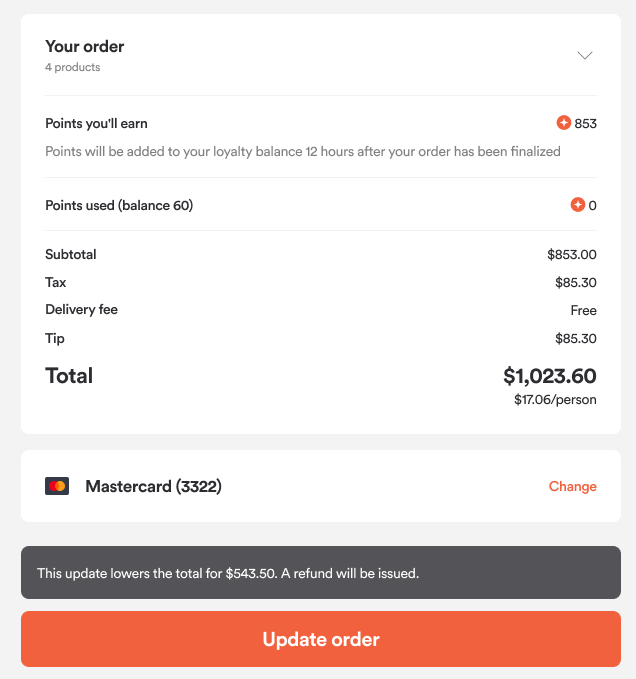
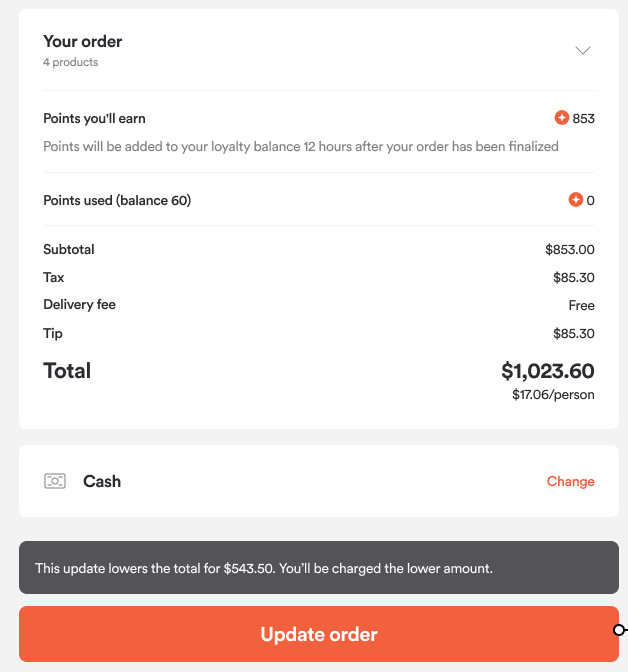
Total decreased
- If your new total is lower, the Update button is enabled.
- You’ll see a message explaining that the total is lower and the difference will be refunded (or adjusted) after the update is confirmed.
-
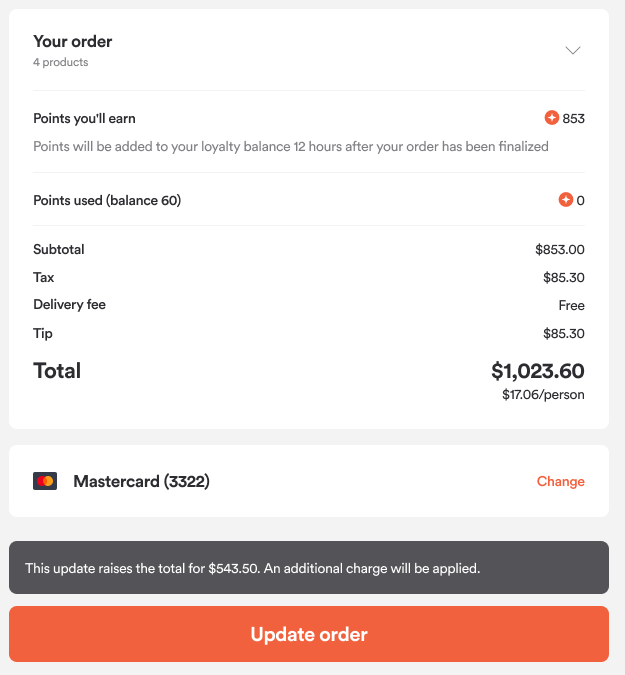
Total increased
- If your new total is higher, the Update button is enabled.
-
You’ll see a message explaining that the total is higher, and your card (or chosen method) will be charged the additional amount.
-
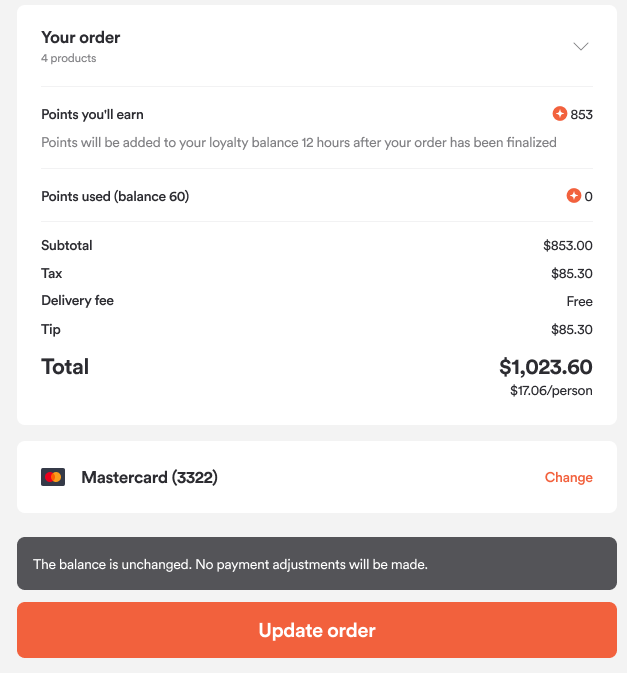
Same total, different details
-
If the total stays the same but youritems or details changed (for example, swapping one item for another of the same price), the Update button is enabled, but no extra charge or refund will be made.
-
If the total stays the same but youritems or details changed (for example, swapping one item for another of the same price), the Update button is enabled, but no extra charge or refund will be made.
-
-
Click or tap Update Order to confirm.
For some setups, your card may not be charged immediately at checkout. In those cases, the system will show you when the payment will be processed (for example, later, closer to the order time).
Step 5: View the Updated Confirmation
After you update your order:
-
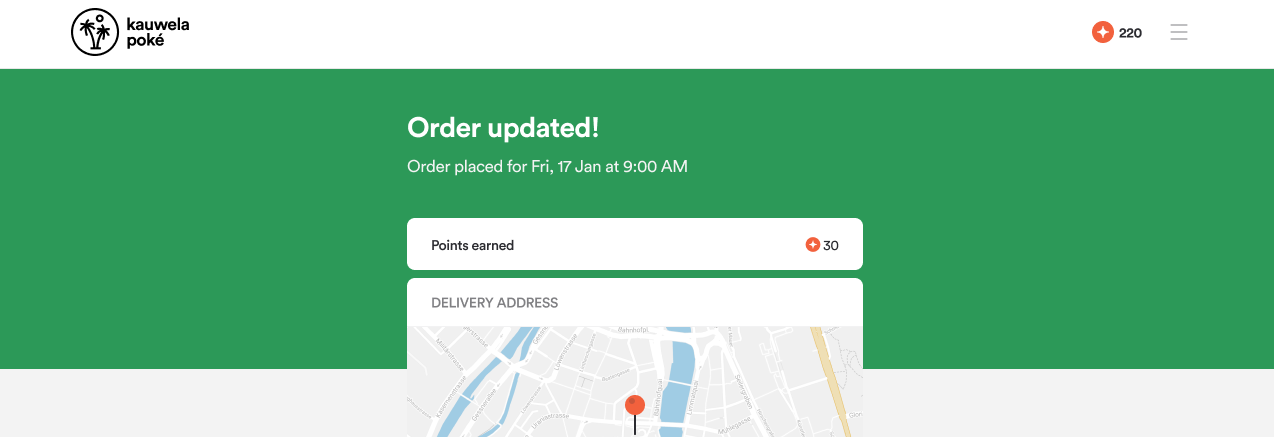
You’ll see a confirmation screen showing “Order updated!” instead of “Order placed!”.
-
If you’re logged in, you’ll see a View receipt button that takes you to the updated receipt.
-
If your order is still within the edit period, the confirmation screen will continue to show:
- The Edit until time
- The Edit Order button
Only the latest version of your order appears in your order history and receipts. The original version is not shown separately.
What Happens to Receipts, Reports, and Emails?
Receipts and Order History
-
After any update, the receipt is refreshed everywhere:
- Customer web and mobile apps
- Store Order Desk
- Brand-level order views
-
Only the updated order is visible in the order history.
-
All payment methods used for the order (for example, card and SMS link) are shown on the receipt when applicable.
Emails
-
When a customer updates their own order (from web or app):
- A confirmation email is sent to the customer and the store manager with the updated details.
-
When a store updates an order from Order Desk:
- A confirmation email is sent to the customer with the updated details.
In both cases, the email looks similar to the original “Order placed” email, but clearly states “Order updated” and reflects the latest order details.
Reporting and Analytics
- Edited orders are treated as a single order in reports and dashboards.
- Updates do not create new orders; they simply change the existing ones.
When Editing Is Not Allowed
In addition to the edit deadline, some types of orders are not eligible for editing at all. This also includes guest (non-logged-in) orders.
In these cases, guests and staff will not see the Edit Order option, and any changes must be handled manually outside the online editing flow.
