POS Control Center
Note: The Punchh POS Control Center is currently only available for Aloha.
Punchh POS Control Center
The Punchh POS Control Center (PPCC) is designed to easily manage your brand's POS configurations, Proxy updates, and more across all of your stores. The purpose of this guide is to document how to use PPCC and define common terminology.
Getting Started
- To access PPCC, click Store Locations > POS Control Center.
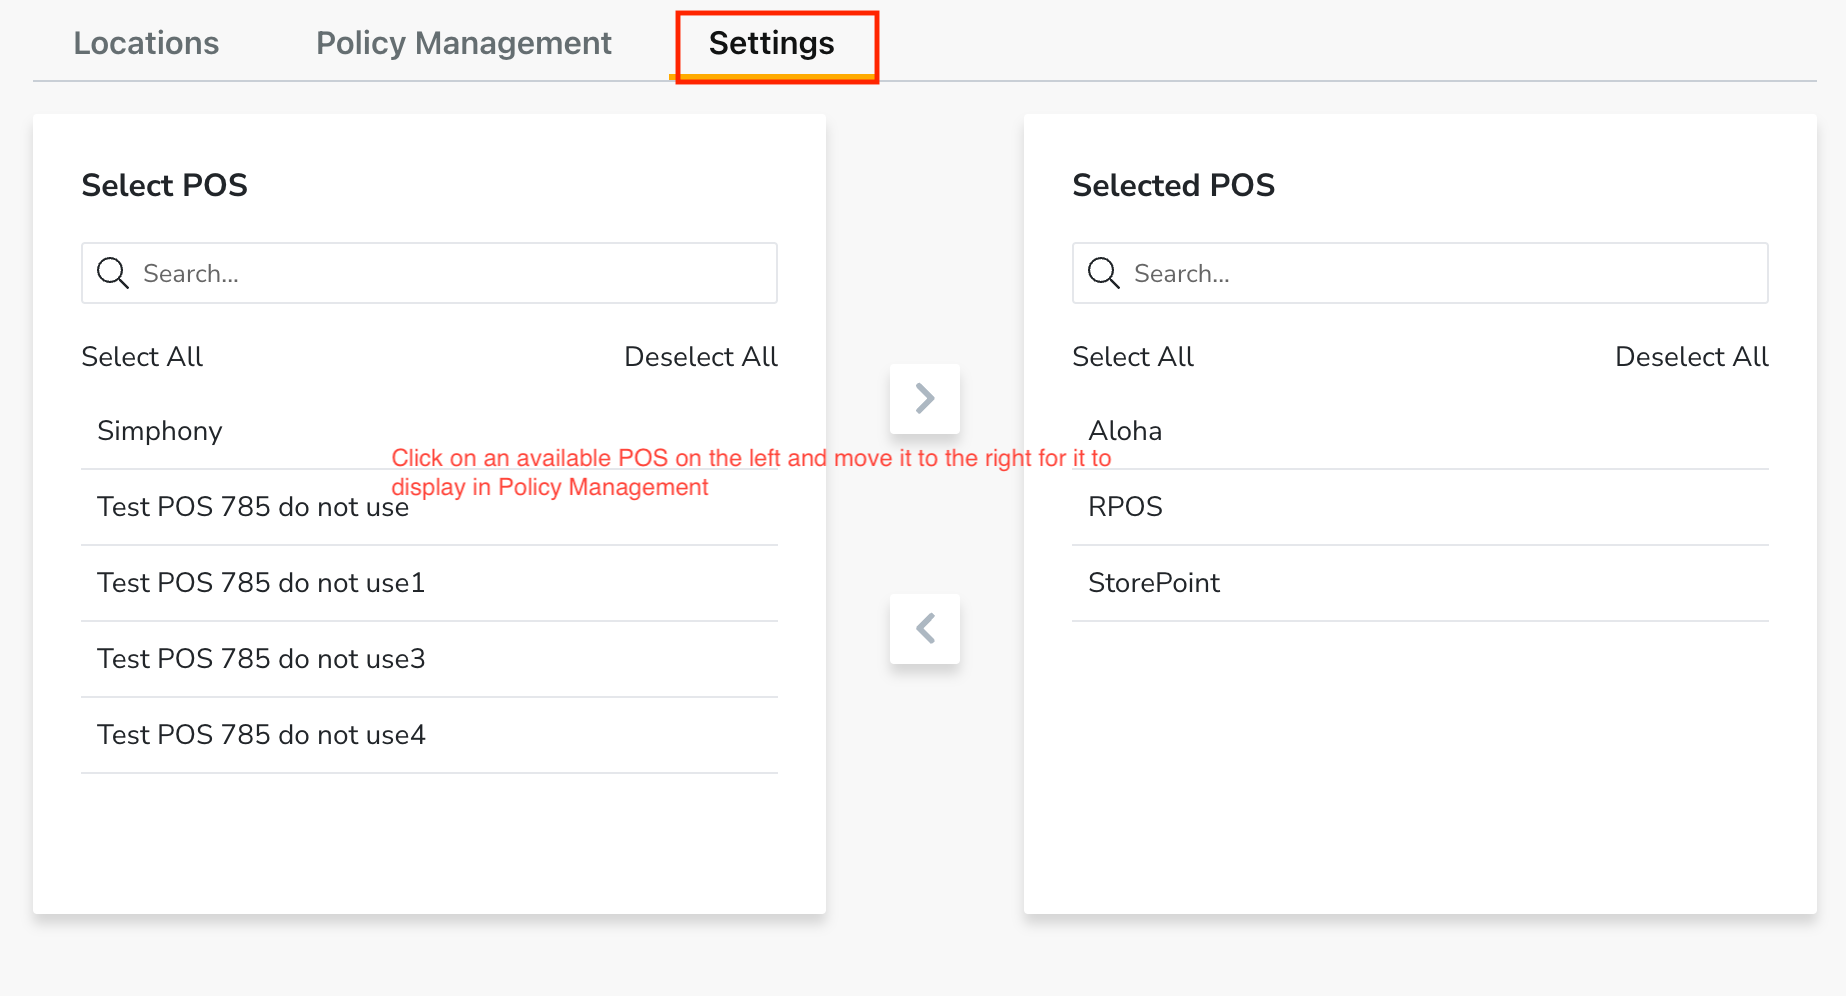
- Click the Settings tab and select the POS type(s) that your brand uses. This setting indicates which POS type(s) are available when you define policies, see below.
Policy Management
Creating a Policy
- Once your brand’s POS type(s) are selected, go to the Policy Management tab.
- Click the Create Policy button. It displays fields to enter the Policy Name, Policy Description, and a drop-down for POS Type.
- Once a POS type is selected, click Next. Common Configurations are then displayed. These configurations are non-POS-specific Proxy configurations and, with few exceptions, should not be changed.
If at any point during the policy creation process you need to leave, feel free to use the Save as Draft button and revisit later to finish the configuration.
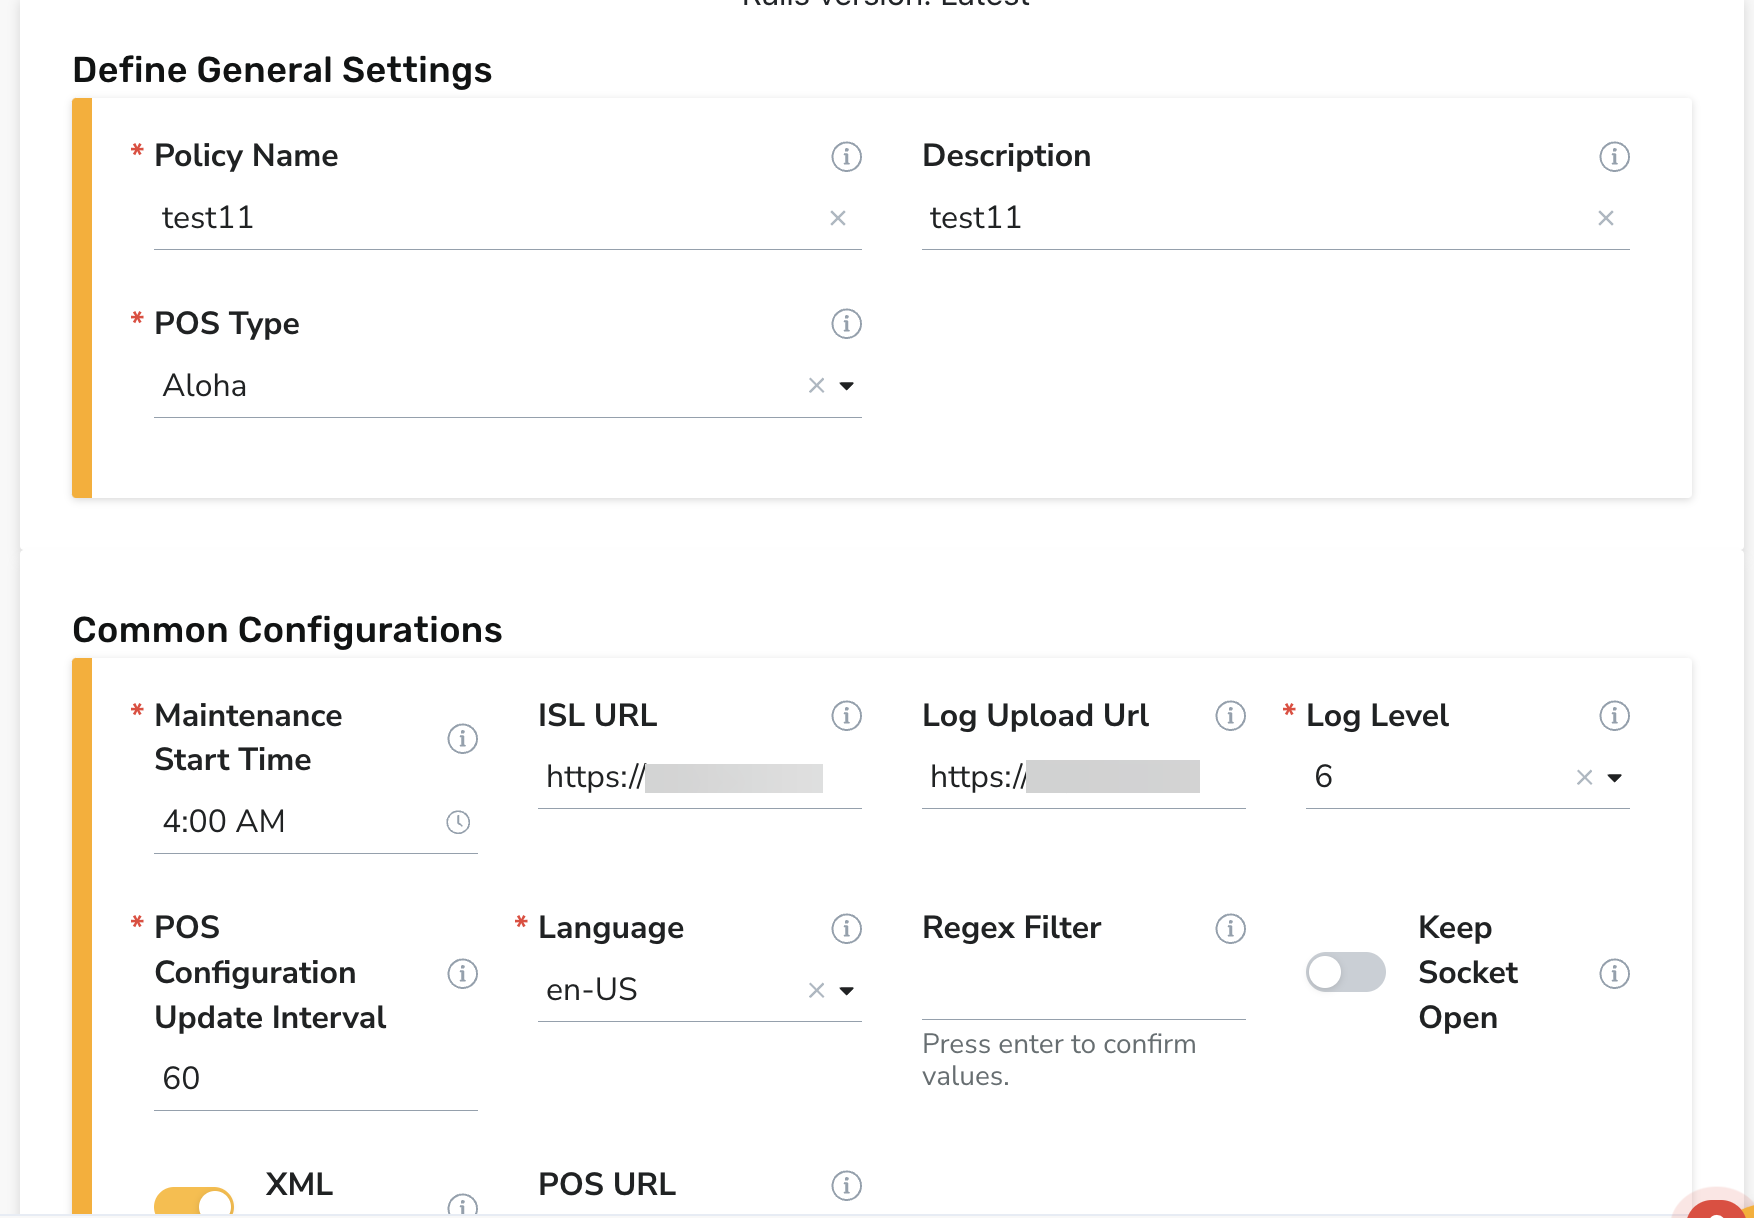
- Click Next to display the POS configurations. These configurations will vary depending on the POS type selected. For example, Aloha will display all relevant Aloha-specific configurations that may be made.
- Once all required fields are filled, click Publish to save the policy.
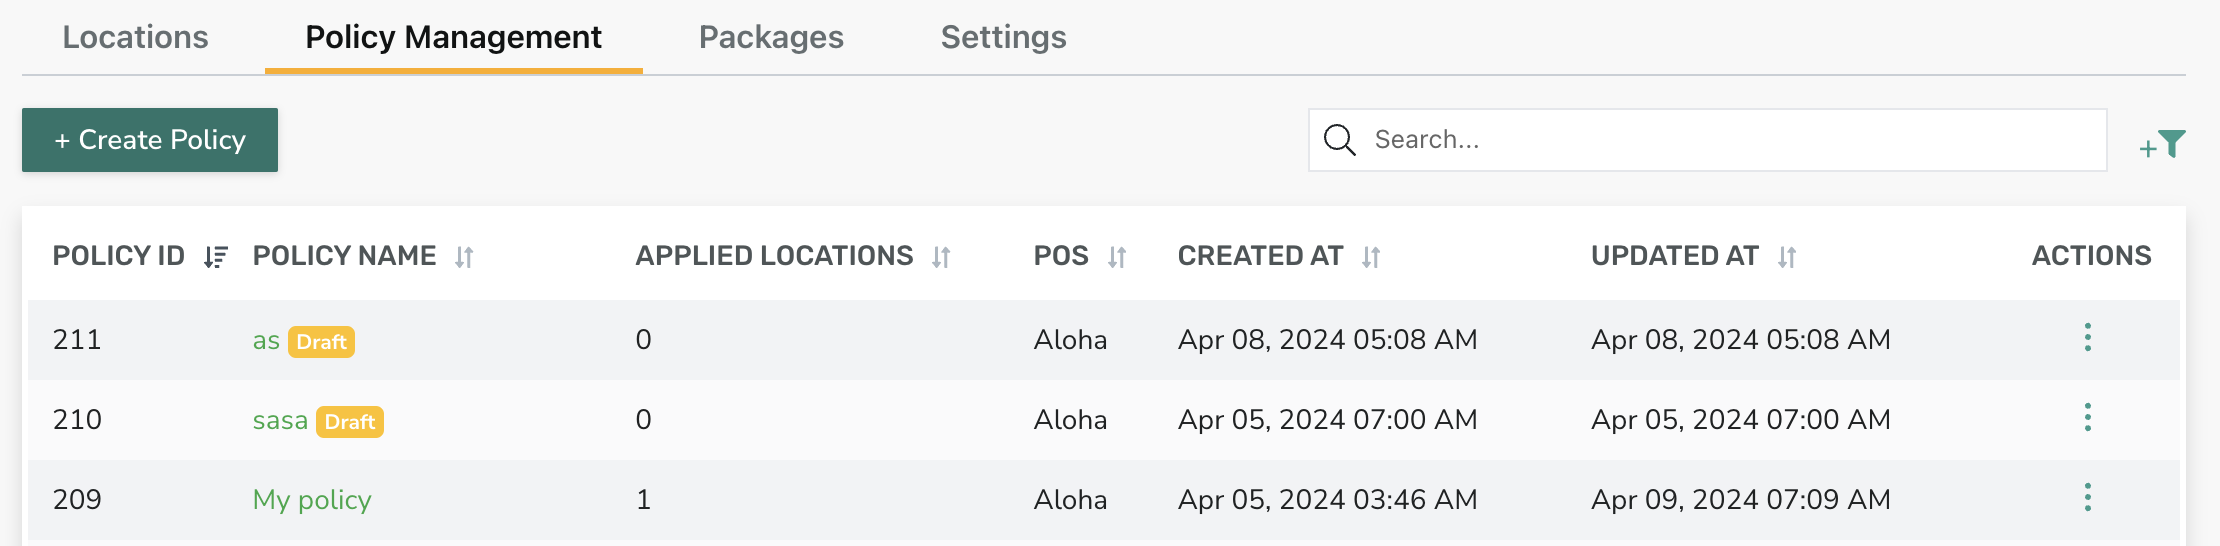
Now you should see the saved policy in the Policy Management grid along with any other policies that have been created.
Assigning Locations to a Policy
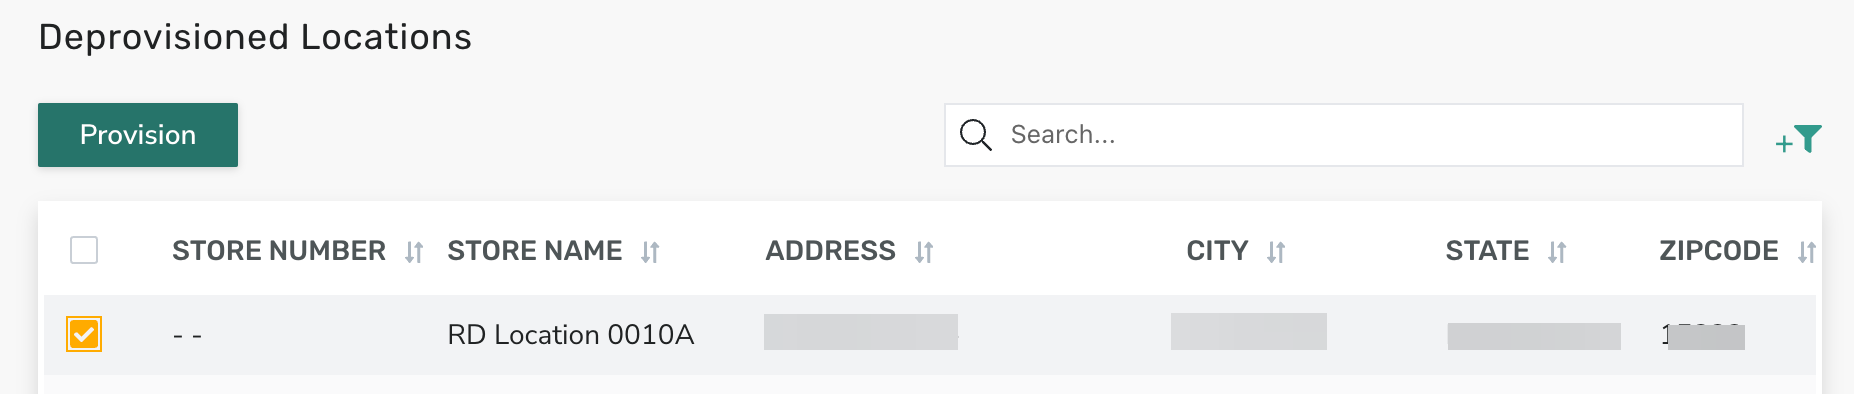
- Go to the Locations tab in the POS Control Center. There are two separate grids: one with “Provisioned” locations and another with “Deprovisioned” locations. Any stores without a policy attached will appear under the “Deprovisioned” grid.
- Select one or many locations and click Provision.
- Select the correct POS type and policy to use for this location(s). Then, you can select the package to identify which version of the Proxy software will be used at the location.
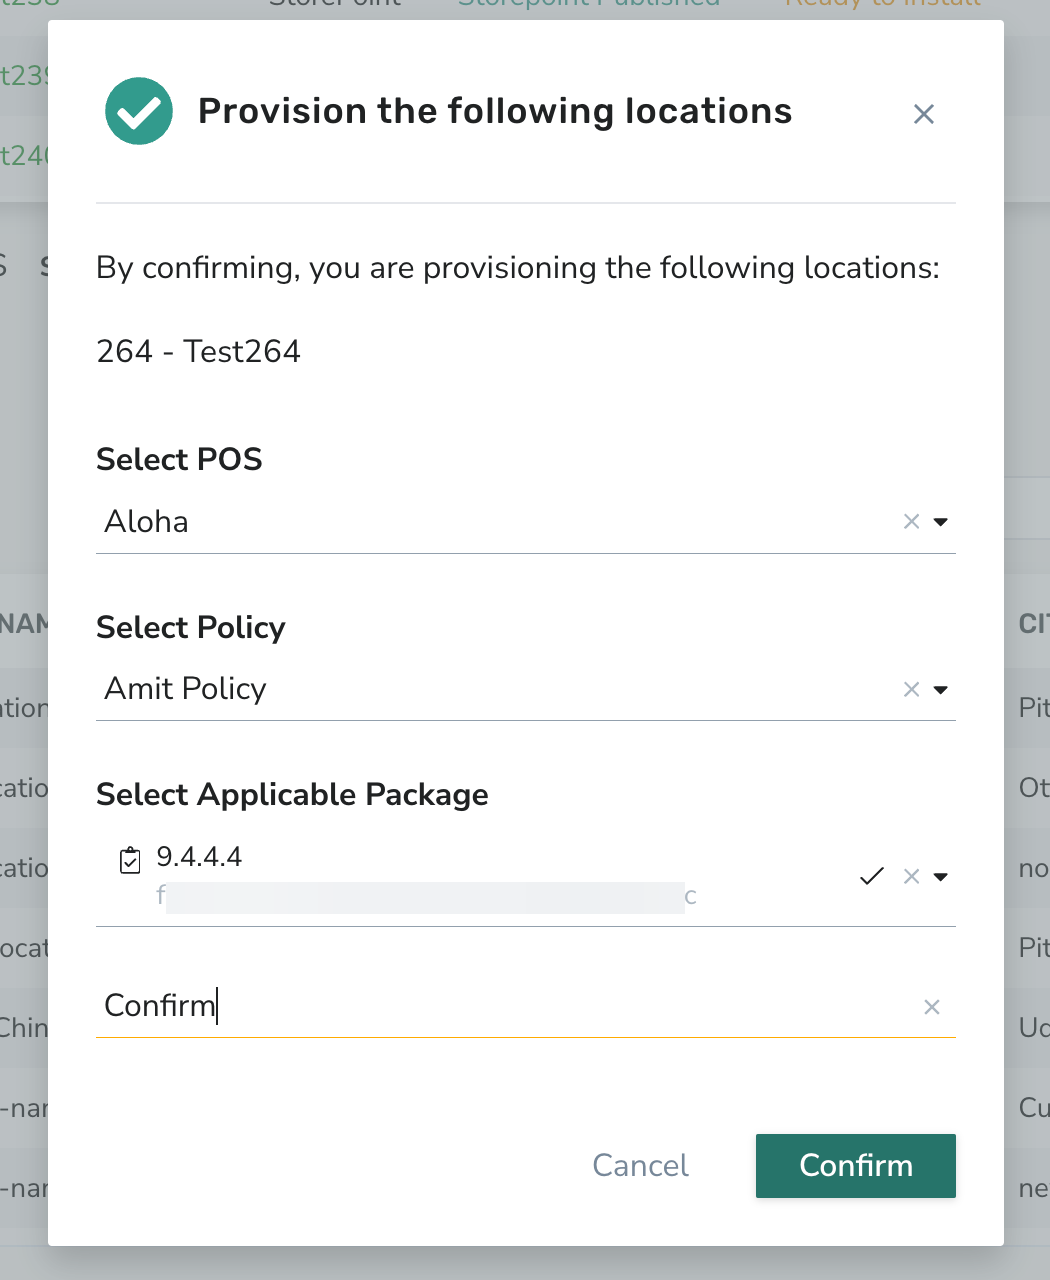
- Type Confirm and click the Confirm button. Once the location is provisioned, the location will appear in the top grid with the “Ready to Install” status.

From here, the location will get the appropriate Proxy installer (outside of PPCC; either from POS Utils for mainline or via EPS ticket for NCR Proxy) and follow the installation documentation to install at the store. Once the Proxy is installed, it will begin sending heartbeats back to PPCC, and the status will update to “Installed”.
Offline Locations
You may see an Offline tag next to a store name. This means the POS Control Center (PCC) isn't receiving regular heartbeats from the Punchh software at those locations, specifically from the Aloha Punchh Monitor/Punchh Control Center service. This tag only indicates the connection to PCC is down and does not necessarily mean loyalty features at the store are down.
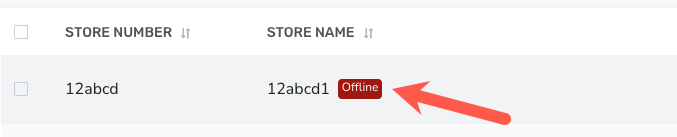
If you see this tag:
- Check that the Aloha Punchh Monitor/Punchh Control Center service is running on the store’s BOH server.
- Restart the service if needed.
- If the issue continues, contact Punchh Support.
Triggering Upgrades
Remote Upgrades
Above the Provisioned Locations grid, you’ll notice a button for Remote Upgrade. Once the Proxy is installed at a location, the status will update in the grid, and you will be able to trigger remote upgrades when available. To do so, select the applicable store(s) in the grid and click the Remote Upgrade button.
Manual Upgrades
If you prefer to manually upgrade your store’s Proxy, you can retrieve the latest version directly from PPCC.
Click on the Packages tab and a grid will display any available versions for your selected POS type.

In this grid, you can see the Version, POS, Created Date, and perform actions.
Actions include:
- View abbreviated release notes.
- Download the Proxy package.
- Copy a link to the Proxy package.
Error Messages
Below is a list of known error messages you may encounter:
| Message | Description | Resolution |
|---|---|---|
| "The selected policy is already assigned to some locations." | This error occurs when attempting to change a policy for multiple locations, but the newly selected policy is already active on some of those locations. The system prevents reassigning the same policy to locations that already have it, to avoid redundant updates. |
|
| "Updates can only be cancelled for locations in Validating status." | This error occurs when attempting to cancel updates for a location that is not in the Validating status. The Cancel Update action is only allowed during the validation window — a short period provided after any policy change or update. During this window (typically 5 minutes), the system pauses rollout of changes so users can review and confirm if the updates align with their intent. |
|
| "Initiate Update only works for locations in Cancelled Update Status." | This error occurs when attempting to initiate an update for a location that is not in Updates Cancelled status. The Initiate Update action is designed to resume a previously cancelled update. If a location is not in Updates Cancelled status, it means there is no pending update to restart. |
|
| "Ensure remote upgrade is enabled for locations and the selected package is different." | This error occurs when a provisioned location is checked, and then the remote upgrade button is selected, BUT a remote upgrade was not enabled when the location was added. A remote upgrade must be enabled for locations first. |
|
Audit Logging
PPCC provides fully filterable and searchable audit logging to ensure admins have visibility into any PPCC actions taken.
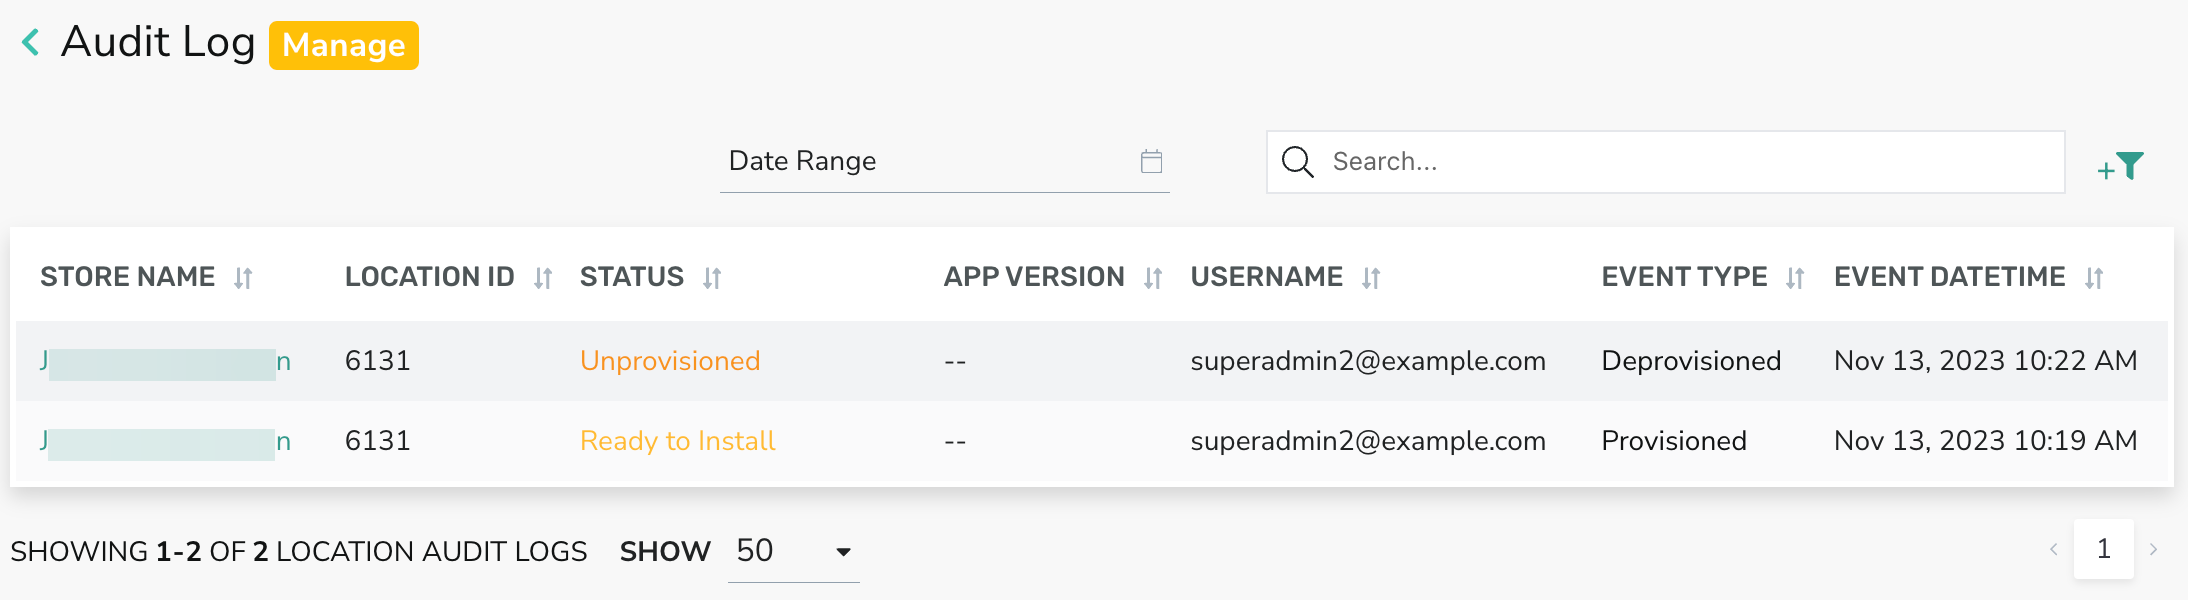
Any action taken to any brand location is logged, along with the corresponding Event Type, Date/Time, and Status change.
Glossary
| Term | Definition |
|---|---|
| Policy | A set of Proxy and POS configurations. Locations can be associated with a policy to utilize the set configurations in that policy. These configurations are synced with the Proxy when a location is provisioned. Any changes to the policy are then synced with associated stores on a regular basis. |
| Provision | Associating a location with a policy and package – essentially creating the POS integration connection for a store. |
| Deprovision | Unassociating a location with a policy. You can either leave the location unassociated with a policy or change to a different policy. |
| Status | The store’s current PPCC state. Statuses can be:
|
| Package | The Proxy software is being delivered to the store. Updates are facilitated by the Punchh Monitor Service. |
