Email Templates, Gift Card Filters & Images
Email Templates
Email templates define common elements of various email that are generated by the system, such as order confirmations.
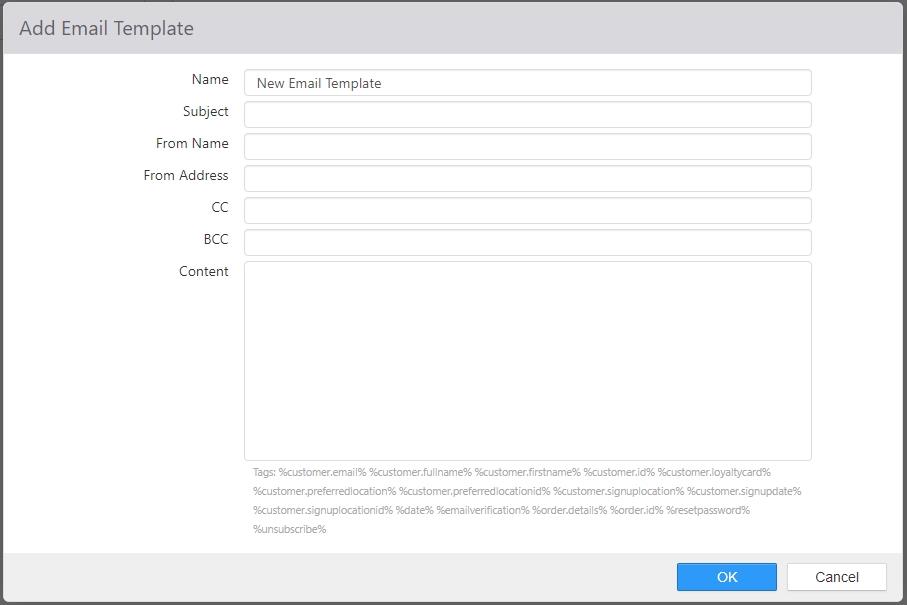
- Name: Name of the email template.
- Subject: Subject line of emails sent.
- From Name: Name displayed in the From field when email is received.
- From Address: Email address displayed in the From field when email is received.
- CC: Email addresses to be CC'd when email is sent, separated by semicolon.
- BCC: Email addresses to be blind CC'd when email is sent, separated by semicolon.
- Body: Body of the email to be sent.
- Tags: List of replaceable parameters that can be entered in the body.
Gift Card Filters
Gift card filters are defined to restrict the locations at which gift cards can be redeemed or applied as tenders. This is commonly used to restrict redemption of promotional gift cards.
-
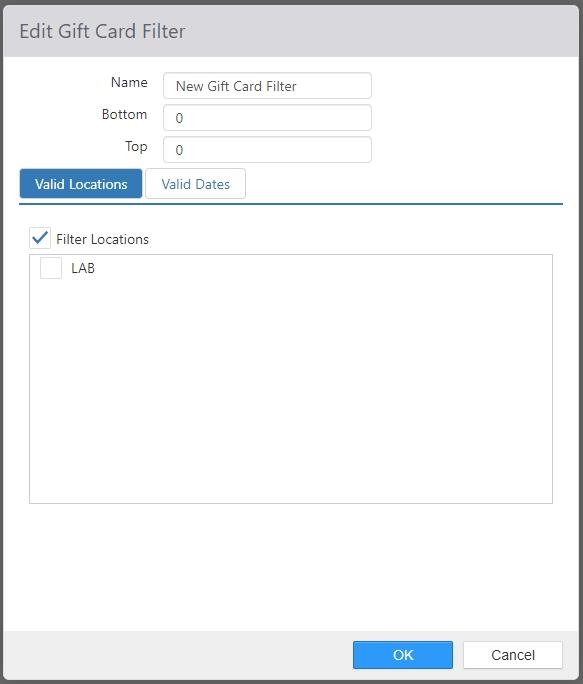
Name: Name of the gift card filter.
-
Bottom: First number in the matching gift card account number range.
-
Top: Last number in the matching gift card account number range.
-
Valid Locations tab:
- Filter Locations: Limit gift card tendering by location.
- Locations list: Check the check boxes of the locations where the gift cards will be valid.
- Filter Locations: Limit gift card tendering by location.
-
Valid Dates tab:
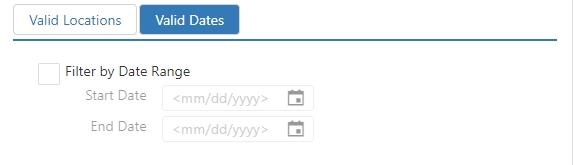
- Filter by Date Range: Limit gift card tendering date range.
- Start Date: The first day that the gift cards will be valid.
- End Date: The last day that the gift cards will be valid.
- Filter by Date Range: Limit gift card tendering date range.
Images
Images can be uploaded to show in image controls on the register or assigned to menu items to show in the Customer Portal.

-
Filter: Enter text in this field to only show images whose names contain that text. Use the Clear button to erase all text from this field.
-
Add: Click the Add button to open the Add Image dialog.
-
Delete: Select an image and click Delete to remove it from the system.
-
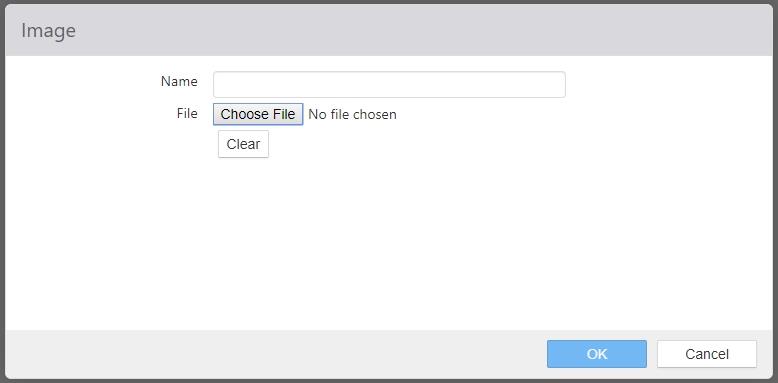
Name: The name of the image. This should be descriptive so that it's easy to find later.
-
Select an Image: Click this button to open a Windows selection screen. When you've selected an image, it appears in the frame next to the button.
