Adding New Controls & Button Behaviors
Adding New Controls
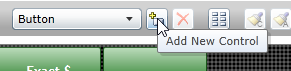
Use the drop-down list to select the type of control you want to add, then click the `Add New Control' button.
The types of controls that can be added are as follows:
| Control | Description | Key Properties (in properties area) |
|---|---|---|
| Button | When selected, executes a particular button behavior. | Text: Text that appears on the button. Behavior: Button behavior that executes when the button is selected. If the selected behavior had configuration options, a Configure button appears directly to the right. Permission: Permission needed by the current employee to access the button. Allow Override: When enabled and the current employee does not have selected permission, PIN pad displays to allow authorization by an employee with adequate permissions. Require Reverification: Requires a logged-in register user to re-enter their login credentials to use the button for added security. |
| Clock | Displays the current local time. | None |
| Edit Sent Items | Allows a sent item to be edited | None |
| Image | Displays a single image. | Image: Image to display. |
| Item Group Navigator | Dynamically generates buttons with the Order Item button behavior. Buttons are sorted alphabetically by item name. | Item Group: Item group containing items to display. |
| Key Ingredient Summary | Displays key ingredient summaries for the current order. | None |
| Label | Displays text. | Text: Text to be displayed. |
| Lane | Lane: Default lane to display. | |
| Lane Preview | Adds the "Lane Preview" panel to any existing screen. Note: Panel is 815 x 605 in size – ensure adequate space is available |
None |
| Menu Category Navigator | Dynamically generates buttons for each menu category in the current menu. Used in conjunction with the Menu Item Navigator control. | None |
| Menu Item Navigator | Dynamically generates buttons for each of the menu items in the currently menu category. Used in conjunction with the Menu Category Navigator control. | None |
| Order List | Displays the current order details. | Consolidate Like Items: Group order items of the same item and modifiers as a single entry with a quantity count to the left. Show Offline Indicator: Displays "Offline" at the top of the panel on the Register when the connection status of the current register is offline. Highlight Entire Combo: Highlights the entire combo when it is first added to the order, whenever any of its components is selected, or whenever an item is made into a combo using the 'Make Combo' button behavior. To differentiate between the highlighted combo and the selected item, set the Selected Item Color and the Selected Combo Color to different values using the drop-down lists in the Size and Style section of the configuration panel. Show Scroll Bars: Display buttons for scrolling the order list up or down. Show Sub-Total by Seat: When employee's current job has "Group Items by Seat" enabled, shows sub-total of the items per seat. Hide Totals When Unsent: When the current order has unsent items, the bottom portion of the order list control, which displays Subtotal, Tax, Total, and Balance Due, is not visible. Allow Modifier Selection: Allows direct selection of modifiers without selecting the parent item. Allow Multi Selection Mode: Multiple items can be selected, and touching a selected item deselects it. Auto Select Combo Item Component: Either the first or last item in a combo is selected when the combo is first added to the order or when an item is made into a combo using the 'Make Combo' button behavior. Select either First or Last using the drop-down list. Appearance: Add or change the colors on a selected button. |
| Pivot Seat | Dynamically displays buttons for each guest/seat on the current order. Also includes a Table button for ordering items that are common to the entire order. | None |
| Party List | Displays a list of open orders as selectable buttons. Each button shows the order name and total. | Show Arrow Keys: Display buttons for scroll the list of orders when there are more orders than can be displayed based on the size of the control. Show Future Orders: Include future orders in the list. Show Tables: Include tables in the list of orders. Show Tabs: Include tabs in the list of orders. |
| Separator | Used to separate and label groups of controls. | Text: Text to appear adjacent to the separator line. |
| Table | Represents a table and shows the table's current status. | Table: Table assigned to the control. |
If the control added is a Button, then the properties area shows a Behavior drop-down list. Some behaviors must be configured; if one of these is selected, a Configure button is displayed. The possible button behaviors are as follows:
Button Behaviors Table
| Behavior | Description | Configuration Parameters |
|---|---|---|
| Add Order | Adds a new order to the current party, buttons automatically appear at the bottom of the Order List control for toggling between orders on the party. | None |
| Add Panels to Screen | Displays the selected panels, and any overlapping panels previously visible will be hidden. | List of panels. |
| Adjust Payment | Opens tender dialog to allow adjustment of the amount of the selected payment. Adjustments are not supported by all payment processors. | None |
| Adjust Tips | Opens system screen that allows input of tips on credit card payments applied against the current employees till. | None |
| Assign Cash Drawer | Assigns the cash drawer on the current register to the current employee. If more than one cash drawer is available a prompt to choose a cash drawer will appear. Current employee must be logged in under a job with "Can Assign Cash Drawer" enabled. |
None |
| Assign Delivery Order | Opens `Assign Delivery Order' screen, which allows for assigning delivery orders to delivery drivers. Only orders with a destination marked as delivery will appear, and only employees clocked in under a job marked as delivery driver will appear. Current employee must be logged in under a job with "Delivery Dispatcher" enabled. Assigning an order to a delivery driver transfers ownership of non-cash payments to the driver. |
None |
| Bank Deposit | Opens a Bank Deposit dialog which allows employee to enter Amount, Bag, Type, and Notes. This functions exactly like the Bank Deposit function in Admin Portal. | None |
| Break Combo | Breaks up an item combo, leaving all the components of the combo as individual items in the order list. | None |
| Cancel | Dismisses a model panel without making a combo component selection. | None |
| Change Item Size | Changes the size of the selected item up or down, depending on configuration. Used in conjunction with defined Item Size Group. | Up, Down, or Maximize |
| Change Kitchen Load Balancing | Changes the kitchen load balancing setting either automatically or via prompt. | Prompt to select a kitchen queue and override setting or set the Kitchen Queue and Override to be automatically set. |
| Change Lane | Changes the currently visible lane for the current employee's session. Lane reverts back after employee logs out. | Prompt User to select or set to a specific lane. |
| Change Menu | Changes the currently visible menu the current employee's session. Menu reverts back after employee logs out. | Select Menu |
| Change Seat | Changes the seat of the select items in the order list. Items must be unsent in order to change seats. | None |
| Charity | Assigns a select charity to the current order. | Select charity |
| Check Gift Card Balance | Opens the gift card dialog and allows the retrieval of the stored value balance via an integrated gift card processor. | Type: Print, Display, or Both |
| Checkout | Checks out the till assigned to the current employee. | Type: Self-banking Employee or cash Drawer. Optional:
|
| Claim Order Confirmation Display | Claim a pre-configured Order Confirmation Display. | Select Order Confirmation Display |
| Clear | Removes all unsent order items from the current order. | None |
| Clear Current Party | Clears the current party, leaving no current order. | None |
| Clear Customer | Un-assigns the customer from the current order. | None |
| Clear Note | Removes the note from the select order item. | None |
| Clear Selected Items | Removes selected unsent order items from the current order. | None |
| Clock In | NO LONGER USED | |
| Clock Out | Clocks out the current employees, and forces checkout if a till is assigned to the employee. | None |
| Close Order | Closes the current order. Current employee must be logged in under a job with "Cannot Close Orders" disabled. |
Optional: Show Change Due dialog Prompt For Receipt Automatically Print Receipt Send Electronic Receipt via email. |
| Close Table | Closes the current table. Table cannot have any open orders. Only allowed when the current mode is Table Service. | None |
| Combine Orders | Prompt to select another open order, which is to be combined with the current order. The selected order is closed after the items are moved to the current order. | None |
| Combo | NO LONGER SUPPORTED | NO LONGER SUPPORTED |
| Comp Card | To trigger a comp Card integration, button behavior must exist | None |
| Credit Card | Opens credit card dialog of card swipe or manual entry. Tender applied is the first active tender of the matching card type. | None |
| Delete | Removes unsent order items, or voids sent order items. | None |
| Delete All | Removes all unsent order items and voids all sent order items. | None |
| Deposit | Obsolete | None |
| Destination | Sets the destination of the order and all unsent order items. | Prompt User – prompts the user with a list of available destinations. Prompt User Only When Unsent Items – the list of available destinations will only display if there are unsent items in the order list. Select a destination from the list. |
| Discount | Applies a discount to the current order. | Prompt User to select or set to a specific discount. |
| Done | Closes a system panel. | None |
| Dynamic Included Modifier | Configures to a position rather than a specific modifier. | Numbered Position |
| Edit All Sent Items | Allows the register user to apply edits to the entire order, instead of having to select all items manually to edit them all. | None |
| Edit Checkout | Prompts employee to select a previously checked out till to re-enter the declared cash. | None |
| Edit Customer | Opens the `Edit Customer' screen for the customer assigned to the current order. | None |
| Electronic Receipt | Prompts for an email address and then sends an electronic receipt via email. Email is prepopulated with the email address of the customer assigned to the current order. | None |
| Edit Shifts | Opens the `Edit Shifts' screen which allows for shift maintenance for the current business day. | None |
| Employee Discount | Applies a discount that has the Employee Discount option selected. | Prompt Type: Select Employee or Swipe Employee Card Discount Source: All Employee Discounts or Employee Specific |
| End Break | Obsolete | None |
| End of Day | Runs the end of day process and advances the business date by one day. | None |
| Ensure Items Selected | Validates that at least one order item is selected on the current order. | None |
| Equal Payments | Prompts the employee for the number of payments to apply, then prompts for the tender type for each payment. Payments are applied at equal amounts based on the balance due. | None |
| Execute Macro | Executes a series of button behaviors. | List of button behaviors to execute |
| Execute Payment Device Action | Instructs an attached payment device to capture information from the customer. | Type: Get Customer Email Address, Get Customer Phone Number, or Get Gift Card Tender |
| Execute Script | Executes a VB script or VB script function. | Script |
| Exit | Shuts down the Register application. | None |
| Fast Cash | Applies a cash payment to the current order for the balance due, opens the cash drawer, and displays the payment amount. Current employee must be logged in under a job with "Bartender" enabled. |
None |
| Finish Future Order | Processes a future order from any panel outside of the Future Order panel | None |
| Hold | Places selected order items on hold, to be sent at a later time. | Clusivity: Inclusive of the order items selected, or Exclusive of the order items selected. Release Type: Manual: Order items will be held until employee explicitly releases. Prompt: Employee must enter hold minutes. Specific: Predefined hold minutes. Optional: Default/predefined Minutes to be held. |
| Ingredients | Opens `Ingredients' screen, which displays the ingredients for all of the selected order items. | None |
| Item Availability | Opens `Item Availability' screen, which allows for setting availability of all items. | None |
| Lane Manager Screen | Opens the `Lane Manager' screen for drive thru order lane manipulation and operations | None |
| Logout | Logs the current employee out of the Register, returning to the login screen. | None |
| Lookup Customer | Opens the `Customer Lookup' screen, which allows for searching the customer database and assigning a customer to the current order. | None |
| Lookup Item | Opens the `Lookup Item' screen, which allows searching items by name and adding items to the current order. | None |
| Make Combo | With an item in the order list selected, allows the user to create a combo, based on existing item combos. | None |
| Manage Drawers | Opens the `Manage Cash Drawer' screen, which allows for assigning cash drawers, checking out cash drawers, and performing paid ins/outs. Current employee must be logged in under a security level with "Manage cash Drawers" enabled. |
None |
| Manage Future Orders | Opens the `Manage Future Orders' screen, which allows for viewing, editing, cancelling, and sending future orders that are unsent. | None |
| Manage Payment Device | Opens a dialog listing options to download or reset payment device related data, depending on the configured payment device. | None |
| Modifier Code | Sets the modifier code to be applied to the next modifier ordered. | Select modifier code |
| Modify | Opens the `Modify' screen, which allows for ordering and removing modifiers. | None |
| Move Party | Opens a dialog listing all open tables, the current party is moved to the selected table and the current table is closed. | None |
| Name Order | Prompts to enter a name for the current order. | None |
| Name Party | Prompts to enter a name for the current party. | Optional: Use Numeric Keypad Or enter default text |
| New Customer | Opens the `New Customer' screen for entry of a new customer record. After created, the new customer is assigned to the current order. | None |
| New Order | Creates a new party with a single new order. | Optional: Suppress "Already On New Order" Error Message |
| New Tab | Creates a new party as a tab. | Optional: Prompt for Name |
| New Table | Prompts use to select from a list of open tables, selected table is opened with a single new order. | None |
| Next Person | Advances to the next seat number. | None |
| Note | Adds a note to the select order item. | Optional predefined note value |
| Open Cash Drawer | Opens a specific cash drawer on the current register. | Select cash drawer number |
| Open Panels | Hides all currently visible panels and displays select panels. | Select panels |
| Open Panels with Saved Return | Saves the currently visible panels, then hides all currently visible panels, and displays select panels. To be used with the `Restore Panels' behavior. | Select panels |
| Order Confirmation Display Configuration | Select multiple claimable Order Confirmation Displays for a single register | None |
| Order Item | Adds select item to current order. | Price Method: Item Price: The price used is the price set in the Edit Item dialog Button Price: Set the price of the item in the Price field Select item |
| Order Item by SKU | Prompts employee to enter item SKU. If only one matching item is found the item is added to the current order, but if more than one matching item is found the employees receives a prompt to select the correct item. | None |
| Order Modifier | Adds select modifier to the currently selected order item. | Select item |
| Order Weighted Items | Opens `Order Weighted Items' screen for ordering items with Quantity Counted enabled. | Select items |
| Override Order Confirmation Display | Overrides the previous register sending orders to the Order Confirmation Display. The current register will now send orders to the Order Confirmation Display. | None |
| Payment Device | Initiates payment from payment device associated with the current register for the balance due on the current order. | Prompt Employee for Payment Method: Do Not Prompt or Prompt Employee for Payment Method (Gift Card, Credit Card, Debit Card, Manual Credit Card) NOTE: Manual Credit Card only functions when the Payment Device Model is Tender Retail or VeriFone Point. |
| Print Member Summary | Prints loyalty plan summary for the customer assigned to the current order. | No longer supported as of March 31st, 2024. |
| Print Label | Opens `Print Label' screen, which allows for printing Item SKU barcode labels on the label printer assigned to the current register. | None |
| Print Last Order | Prints a receipt for the last order viewed on the current register. | None |
| Print Last Order Credit Drafts | Reprints all credit drafts for the last order viewed on the current register. | None |
| Print Order | Prints a receipt for the current order. | None |
| Promotion | Applies select promotion to the current order. | Select promotion |
| Promotion Code | Prompts for code of promotion to be applied to the current order. | Select promotion code processor |
| Quantity | Sets the quantity of the next item or modifier ordered or gift card issued. | Optional: Specify a Quantity; Append to Current Quantity |
| Recall Next | Sets the current order to the next order in the current lane created after the current order. | None |
| Recall Order | Opens the `Recall Order' screen, which allows for reprinting and reopening orders. | Recall Type: Open, Closed, or Both |
| Recall Previous | Sets the current order to the previous order in the current lane created before the current order. | None |
| Redeem Rewards | When a loyalty customer is assigned to the order, brings up a dialog with available rewards. NOTE: This is only available with certain non-PAR POS loyalty providers. Will display the message "This button behavior is not valid with the configured loyalty provider" if not allowed. |
None |
| Refund | Converts the current order to a refund. | None |
| Release | Releases selected items that are currently being held so that they can be manually sent to the kitchen. | None |
| Reopen Order | Reopens the current order. Current employee must be logged in under a security level with "Reopen Orders" enabled. | None |
| Repeat | Repeats the last item or modifier ordered. | Optional: Prompt for Quantity (number of times to repeat) |
| Replace Customer Card | Prompts employee to swipe the new loyalty card for the customer assigned to the current order. The customer account number is updated with the new card number. Only valid when the loyalty provider is set to PAR POS. |
No longer supported as of March 31st, 2024. |
| Report | Opens a selected report. | Select report |
| Reprint Checkout | Prompts the employee to select a previously checked out till to reprint the checkout slip. | None |
| Reprint All Credit Drafts | Reprints all credit drafts for the current order. | None |
| Reprint Credit Draft | Reprints the selected credit drafts on the current order. | None |
| Reprioritize Kitchen Order | Reprioritizes an order that has been sent to the kitchen. | New Position: The priority number to assign to the reprioritized order. |
| Reroute Kitchen Display | Reroutes the kitchen video display from one display to another. | Prompt for kitchen displays or select from/to Kitchen Display. Optional: Persist at End of Day: Yes, No, or Prompt |
| Reroute Kitchen Queue | Reroutes kitchen video queues from one queue to another. | Prompt for kitchen queues or select origin Kitchen Display and destination Kitchen Queue. Optional: Persist at End of Day: Yes, No, or Prompt; |
| Reroute Printers | Opens the `Reroute Printers' screen, which allows for rerouting specific printers or resetting the routing. | None |
| Restore Panels | Opens panels that were last saved by the Open Panels with `Saved Return' behavior. | None |
| Reward History | Opens `Reward History' screen, which displays loyalty reward history for the customer assigned to the current order. Only valid when the loyalty provider is set to PAR POS. |
No longer supported as of March 31st, 2024. |
| RQ – Cancel Order | Used to cancel orders when Revenue Quebec is enabled | Revenue Quebec must be enabled |
| RQ – Print Duplicate | Used to reprint a receipt that the store will keep. The store's customers must not be given this receipt, per Revenue Quebec. | Revenue Quebec must be enabled |
| RQ – Print Receipt | Used to print a receipt when Revenue Quebec is enabled. | Revenue Quebec must be enabled |
| RQ- Send Offline Transactions | Used to manually send offline transactions to Revenue Quebec | Revenue Quebec must be enabled |
| Save Card to Party | Opens the credit card dialog, which tokenizes a credit card and stores the token on the current party for future use. Requires that credit card tokenization be enabled. |
None |
| Save Tab | Prompts for party name if no name previously entered. | None |
| Select Order | Obsolete | None |
| Select Entire Combo | Selects a combo parent item and all components (when only one is highlighted) with one click | None |
| Send Order | Sends to the kitchen all unsent order items, which are not being held, on the current order. | Optional: Suppress Error Messages |
| Send Order Items | Sends to the kitchen selected unsent order items, which are not being held, on the current order. | None |
| Send Party | Sends to the kitchen all unsent order items, which are not being held, on all orders on the current party. | Optional: Suppress Error Messages |
| Send with Destination | Sets the order destination, then sends to the kitchen all unsent order items, which are not being held, on the current order. | Select destination |
| Set Future Order | Opens the `Future Order' screen, which allows for selecting order date/time, assigning customer, and selecting destination. | None |
| Set Future Order Parameters | Sets future order lead time minimum and enables/disables online ordering. These are reset by the end of day process. |
Future Order Lead Time in Minutes (0 to Prompt) Optional: Online Ordering Unavailable |
| Set Guest Count | Prompts employee to enter guest count for the current party. If party is assigned to a table, this also updates the seat count. | None |
| Set Login | Prompts to select employee to update, only employees with the selected login type enabled are displayed. After selecting an employee, the appropriate dialog for updating the selected login type is displayed.
|
Login type: Prompt for type, Card, Finger Scan, or PIN |
| Set Party Contact Data | Opens a dialog where the pager # can be entered for the current order. | Contact Method: None, Pager, or SMS |
| Set Section | Changes the section that the current register is assigned to. | Select section, or Prompt User to choose |
| Set Tax Exempt | Toggles the current order to tax exempt or not. When setting to tax exempt, prompt to enter Tax ID is presented. Example: Start a new order and select this button. The order is now tax exempt (no tax applied). Select the button again and the order is no longer tax exempt. No matter what tax-exempt state the previous order is in, selecting a new order sets the Set Tax Exempt status for the new order to not tax exempt. |
None |
| Show Default Screen | Opens panels assigned to the current employee's default screen as defined on their current Job. If no default screen is set on the current job, then the default screen on the current register is used. | None |
| Show Order Screen | Opens panels assigned to the current employee's order screen as defined on their current Job. If no order screen is set, then the default screen is used. | None |
| Show Screen | Opens panels assigned to a select screen. | Select screen |
| Smart Item | Adds item to the current order based on the active smart element for a given smart group. If no active smart element is set, then the default item is added. Use in conjunction with `Smart Select' behavior. |
Smart Group: Select smart group Default Item: Select a default item, or None Smart Element: Element number Item: Item name |
| Smart Select | Sets the active smart element for a specific smart group. Use in conjunction with `Smart Item' behavior. |
Smart Group: Select smart group Smart Element: Element number |
| Split Order | Opens `Split Order' screen, which allows for adding new orders to the current party, moving items between the orders, splitting individual items, and combining (un-splitting) split items. Current employee must be logged in under a security level with "Split Check" enabled. |
None |
| Start Bank | Assigns a new self-banking till to the current employee. Current employee must be logged in under a job with "Self-Banking" enabled. | None |
| Substitute | Adds panels to the screen for the selected combo component on the current order. | None |
| Surcharge | A select surcharge applies to the current order. | Select surcharge, or Prompt User to select |
| Tables Screen | Hides all currently visible panels and displays the `Tables' system panel. Only allowed when the current mode is Table Service. |
None |
| Transfer | Opens the Transfer Party window that allows the current employee to select tables or tabs to transfer to another employee. | None |
| Transfer Items | Prompts employee to select an open order to move the selected sent items to from the current order. | None |
| Tender | Applies a payment of a select tender type. | Select tender |
| Toggle Order List Selection | Switches between multi-selection mode and single-selection mode. After the current employee logs off, the setting returns to the default as set in the Order List control. | None |
| Toggle Show Employee Names | Toggles the visibility of the employee name on table controls. | None |
| Unassigned | Button does not perform any function. | None |
| Undo Checkout | Prompts employee to select a previously checked out till, undo, and return to the cash drawer or employee. | None |
| Update Table Status | Updates the current status of the selected tables. | Table Status: Closed, Clean, Seated, Dirty, Preassigned, CheckDown, or Reserved |
| Use Paid Order Sequencing | Applies order sequencing to drive-thru orders based on order payment. | No longer supported as of the 5.0m Release |
| Validate Combos | Checks all combo items on the current order to make sure that all component requirements have been satisfied. | None |
| Vehicle ID Panel | Displays the Vehicle ID Panel to associate a vehicle color and type with a drive-thru order. | None |
Adding Multiple "Order Item" Buttons
You can use the 'Add Order Items' button to add multiple buttons to the panel which are all set to the 'Order Item' behavior. When you click the `Add Order Items' button, the Select Order Items dialog is displayed.
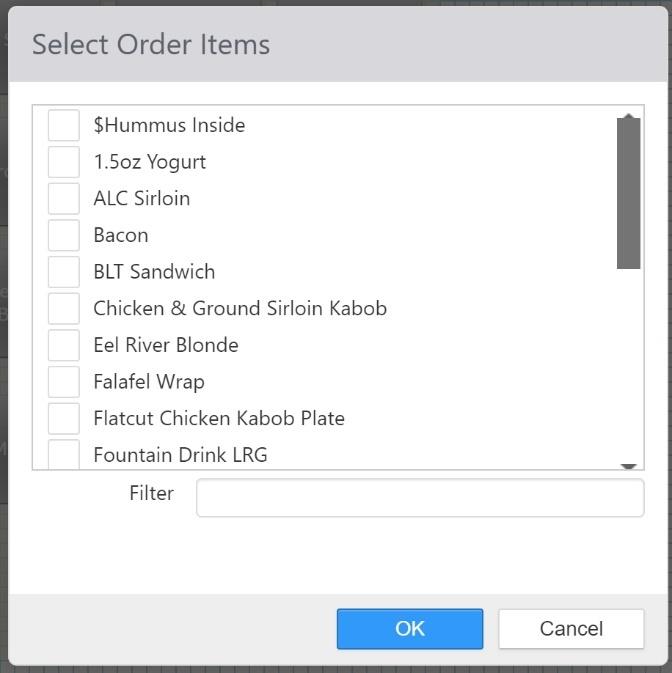
When you click the OK button, new buttons will be added for each item in the Selected list.
