Zebra DS9308 Barcode Scanner Setup Guide
Note: This guide is for installing the Zebra DS9308 barcode scanner. With each device, there could be unforeseen or unspecified configurations that may require further development and troubleshooting.
Prerequisites
- Install the Zebra_CDC_ACM_Driver (Virtual COM port driver). In some cases, this may already be in the PAR POS™ folder location on the C: drive for PAR hardware, or download the driver from the vendor website: Download USB CDC Driver | Zebra.
- Connect the Zebra DS9308 Barcode Scanner to an open USB port on the terminal.
Setup
-
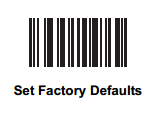
Scan the code below to restore default settings.
-
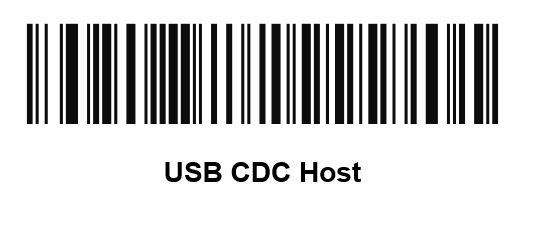
Scan the code below to set configuration.
-
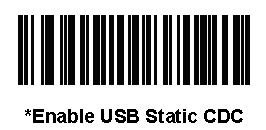
Set a static COM port.
-
Open Device Manager on the terminal:
- Right-click on the Start menu and choose Device Manager.
- Find Ports (COM & LPT) and look for Zebra CDC Scanner (COMx).
- Take note of the COM port that the Zebra CDC Scanner is assigned to. This COM port is what needs to be configured later in Settings Editor.
- "COM 7" is used in the example below. Expect the COM port number to be different on each terminal. Device Manager may show a different COM port, as it looks for the first available COM port to assign the scanner to.
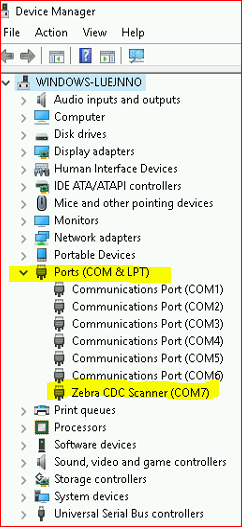
- "COM 7" is used in the example below. Expect the COM port number to be different on each terminal. Device Manager may show a different COM port, as it looks for the first available COM port to assign the scanner to.
-
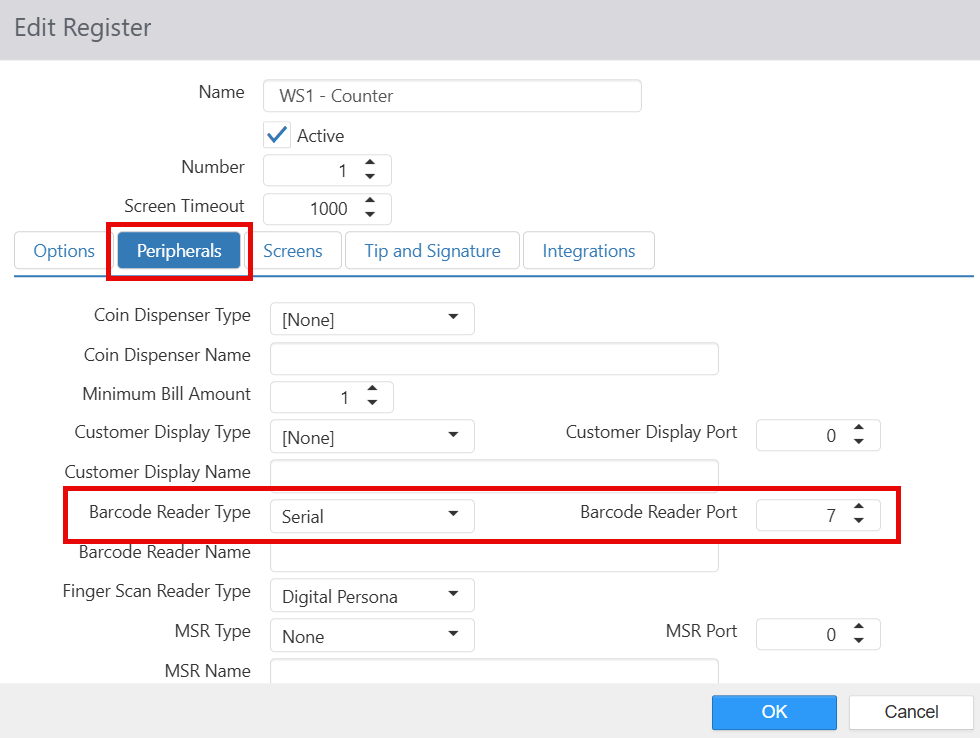
Configure Settings Editor:
- Navigate to Settings Editor > Registers and select the register that is using the scanner.
- Select the Peripherals tab.
- Find Barcode Reader Type and choose "Serial".
- Update the Barcode Reader Port to the COM port used for the scanner within Device Manager.
- Select OK to save the configuration.