PAR Pay EMV Ingenico Lane 3000/3600/7000/8000 Setup Guide
Installation
Installation requires:
- Ingenico Payment Device (Lane 3000, Lane 3600, Lane 7000, Lane 8000)
- Power Cable (left)
- Y-Adapter Cable (right)
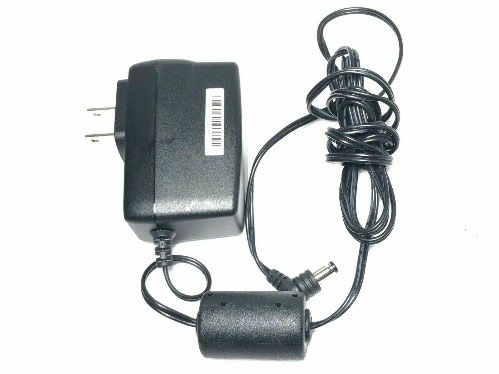
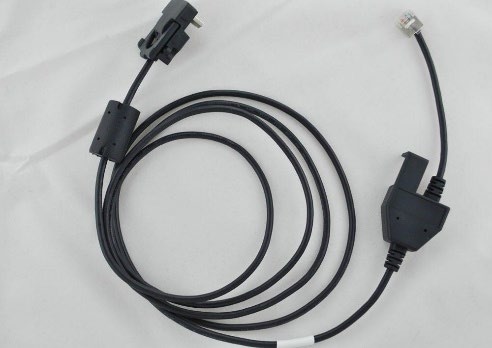
- The Ingenico payment device ships with the Y-Adapter cable attached and can be routed through the counter (if applicable).
- The RJ-45 connector on the other end of the cable is plugged into the LAN Port under the counter, or an open port on the switch depending on the store network.
- Plug one end of the power adapter cable into the power port of the Y-Adapter cable.
- Plug the other end of the power adapter cable into the outlet.
- Repeat steps 1-5 for any other Ingenico Payment Devices using a Y-Adapter cable.
- Once all the Ingenico Payment Devices are set up and powered on, the PAR Pay EMV Setup needs to be completed and a changeset published.
Note: The Ingenico payment device is programmed and mapped to the specific IP address of its register (via ECR IP and ECR URL). The device obtains a DHCP address from the local LAN for connectivity. Each Ingenico payment device is labeled (e.g., Store XXXXXX REG1) to indicate its physical installation location.
Register the Ingenico Payment Device
Important: The register must be connected to the same network as the payment device.
-
On payment device, the Welcome Store User screen will display. Press the GREEN keypad button to continue.
-
Enter the Store ID and press the GREEN confirm button on the keypad.
- The Store ID may be found on the Store Place Portal of the store for which the device is being registered.
-
Enter the Zip Code of the store for which the device is being registered and press the GREEN confirm button on the keypad.
-
Enter the Lane/Register Number and press the GREEN confirm button on the keypad.
- This value is the number of the POS Register the payment device will connect to (i.e., 1, 2, 3, etc.).
-
The payment device connects to the gateway and registers itself under the Store ID entered in Step #2.
-
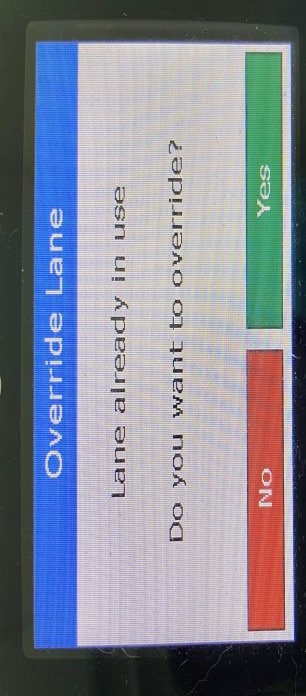
If the screen below is encountered, select "Yes" to overwrite the existing terminal with the new payment device.
-
After successful registration, the CCT will reboot.
Re-register the Ingenico Payment Device
To re-register the Ingenico payment device, please follow the steps below:
-
While the device is on the idle screen, enter 1957 and press the green button.
-
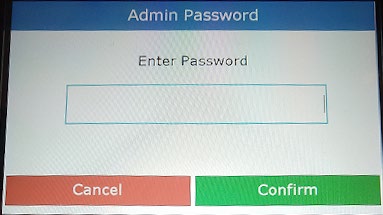
Enter 911985.
-
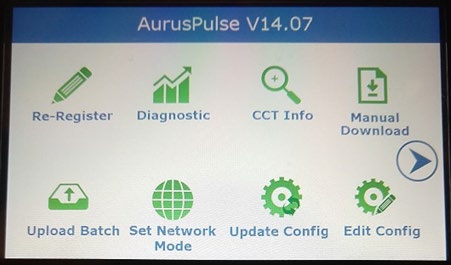
Navigate to Re-Register in the AurusPulse Menu
-
Enter the Store ID and press the GREEN confirm button on the keypad
- The Store ID can be found on the Store Place Portal of the store for which the device is being registered.
-
Enter the Zip Code of the store for which the device is being registered and press the GREEN confirm button on the keypad.
-
Enter the Lane/Register Number and press the GREEN confirm button on the keypad.
- This value is the number of the PAR POS Register the payment device will connect to (i.e., 1, 2, 3, etc.).
-
The payment device connects to the gateway and registers itself under the Store ID entered in Step #4.
- NOTE: If a previous device was already registered, this initial registration will fail.
-
If the screen below is encountered, select Yes to overwrite the existing terminal with the new payment device.
-
After successful registration the CCT will reboot.
NOTE: If the register returns a "CCT Not Ready" after the PAR Pay device reboots, restart PAR POS and perform a test transaction.
Verify ECR IP and ECR URL
The ECR IP and ECR URL should be automatically retrieved during the registration process, eliminating the need for manual updates. However, to verify or update the ECR IP and ECR URL (IP address of the register) on the Ingenico payment device, please follow the steps below:
-
On the idle screen, enter 1957 and press the green button to access the AurusPulse Menu.
-
Enter 911985.
-
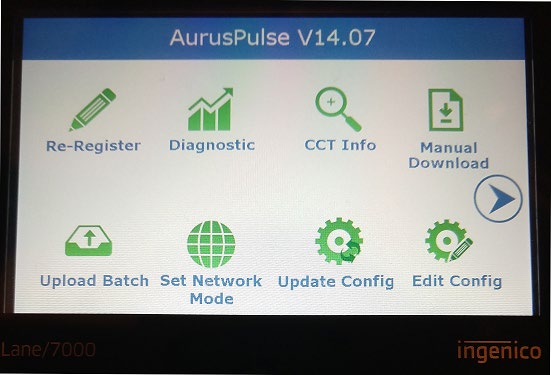
From the AurusPulse Menu, select Edit Config.
-
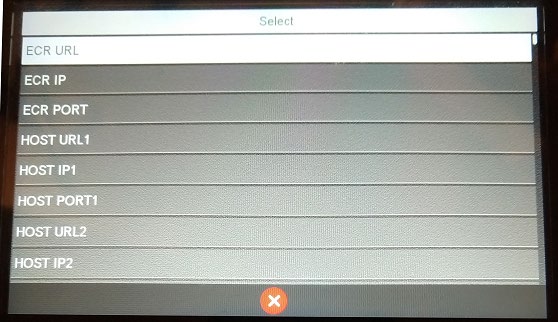
Tap ECR URL on the screen and press the green button to confirm.
-
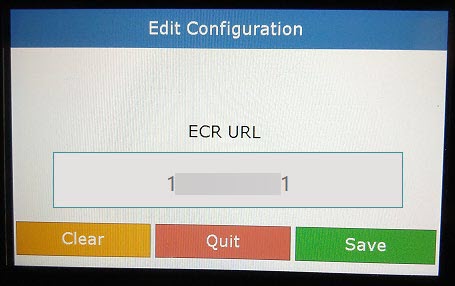
Verify the ECR URL is correct. If not, enter the IP address of the register for which the Ingenico payment device should be paired.
-
Tap the Save button on the screen OR press the green button to confirm.
-
The device will exit to the Config screen.
-
Tap ECR IP on the screen AND press the green button to confirm.
-
Verify the ECR IP is correct. If not, enter IP address of the register to which the Ingenico payment device should be paired.
-
Tap the save button on the screen or press the green button to confirm
-
Exit the AurusPulse Menu by pressing the red cancel button. The device may reboot or exit to the Welcome (PAR Pay) screen.
If you run into any issues or have questions, please contact our support team for assistance.
