PAR EverServ PAR Pay EMV — Ingenico Link 2500/Move 5000 Setup Guide
Rev 06
Overview
Purpose
This document provides detailed instructions on how to set up the Ingenico Link 2500 and Move 5000 payment devices.
Basic Operations
Powering on the Ingenico Link 2500/Move 5000
- If the device is OFF, press and hold the GREEN confirm button for a few seconds.
- The device should power ON.
Shutting Down the Ingenico Link 2500/Move 5000
- From the Idle Screen (PAR Pay logo), simultaneously press and hold the YELLOW and # keys together.
- After a few seconds the device displays "Shutdown in progress".
- The device then shuts down.
NOTE: If the device is plugged into the AC power adapter, the above key sequence prompts for the device to Restart vs. Shutdown.
Restarting the Ingenico Link 2500/Move 5000
- Simultaneously press the YELLOW and # buttons on the keypad to shut down / restart the device.
- If the device is plugged in, the device will display "Restart In Progress".
- If the device is not plugged in, it will display "Shutdown In Progress"
- Once the device shuts down successfully, press and hold the GREEN button on the keypad to power the device on.
- The Ingenico device will power up.
- During the boot up process, you will see a TSA screen that will show the Wi-Fi connected (GREEN Wi-Fi icon).
Registering the Ingenico Link 2500/Move 5000
-
On the Welcome Store User screen, press the GREEN keypad button.
-
Enter the Store ID and press the GREEN confirm button on the keypad.
- The Store ID can be found on the Store Place Portal of the store for which the device is being registered.
-
Enter the Zip Code of the store for which the device is being registered and press the GREEN confirm button on the keypad.
-
Enter the Lane/Register Number and press the GREEN confirm button on the keypad.
- This value is the number of the PAR POS Register the payment device will connect to (i.e., 1, 2, 3, etc.).
-
The payment device connects to the gateway and registers itself under the Store ID entered in Step #2.
- NOTE: If a previous device was already registered, this initial registration will fail.
-
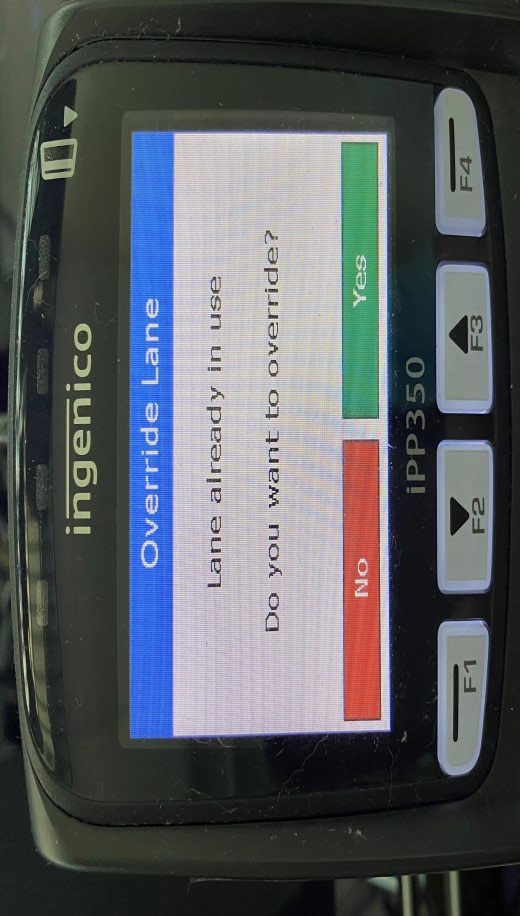
If the screen below is encountered, select Yes to overwrite the existing terminal with the new payment device.
-
After successful registration the CCT will reboot.
Re-Registering the Ingenico Link 2500/Move 5000
-
While the device is on the idle screen, enter 1957 – DO NOT press Enter.
-
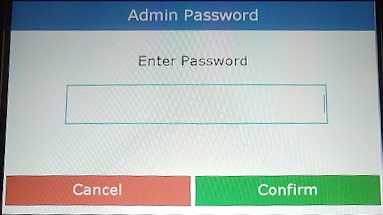
Enter 911985 as the Admin Password.
-
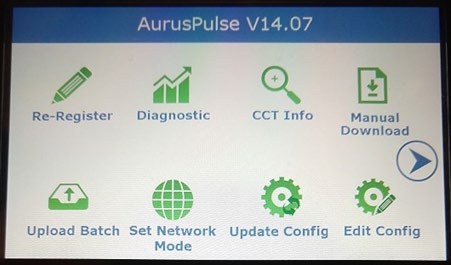
Navigate to Re-Register in the AurusPulse Menu.
-
Enter the Store ID and press the GREEN confirm button on the keypad.
- The Store ID can be found on the Store Place Portal of the store for which the device is being registered.
-
Enter the Zip Code of the store for which the device is being registered and press the GREEN confirm button on the keypad.
-
Enter the Lane/Register Number and press the GREEN confirm button on the keypad.
- This value is the number of the PAR POS Register the payment device will connect to (i.e., 1, 2, 3, etc.).
-
The payment device connects to the gateway and registers itself under the Store ID entered in Step #4.
- NOTE: If a previous device was already registered, this initial registration will fail.
-
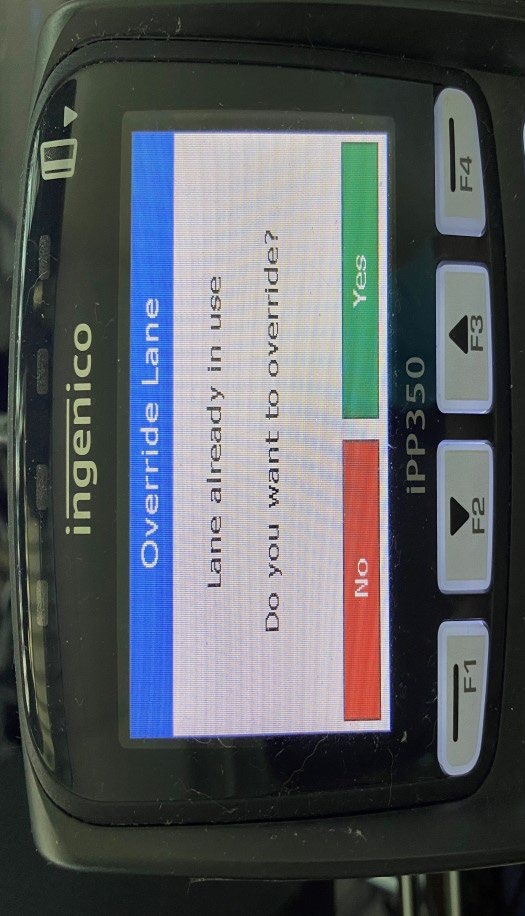
If the screen below is encountered, select Yes to overwrite the existing terminal with the new payment device.
-
After successful registration the CCT will reboot.
NOTE: If the register returns a "CCT Not Ready" after the PAR Pay device reboots, restart PAR POS and perform a test transaction.
Telium Manager Menu
Accessing the Telium Manager Menu
- On the Idle Screen (PAR Pay logo), key in 3826.
- The Ingenico device displays a "PED Restarting... Please Wait" message and reboots.
- After device restart the screen displays "Payment – AMOUNT 0.00 EUR".
- Key in 2634 and press the
 key.
key.
- The Telium Manager Menu appears.
Telium Manager Menu Timeout
If the Telium Manager Menu times out:
- On the "Payment – AMOUNT 0.00 EUR" screen, key in 2634.
- Press the
key.
- The Telium Manager Menu appears.
Wi-Fi Network Operations
Clearing out Old Wi-Fi Network Information
- From the Telium Manager menu, use the F2 / F3 buttons to navigate up and down.
- Navigate to Control panel and press the GREEN confirm button.
- Navigate to Terminal settings and press the GREEN confirm button.
- Navigate to Comm means and press the GREEN confirm button.
- Navigate to Wi-Fi and press the GREEN confirm button.
- Navigate to Advanced options and press the GREEN confirm button.
- Navigate to My networks and press the GREEN confirm button.
- Navigate to Delete all and press the GREEN confirm button - a Remove profiles OK dialogue appears.
- Press the YELLOW back button.
- To join a new Wi-Fi Network Proceed to the either the Joining a Visible Wi-Fi Network or Joining a Hidden Wi-Fi Network section.
Joining a Visible Wi-Fi Network
- Navigate using F2 / F3 to Scan networks and press the GREEN confirm button - the device scans for and displays all available networks.
- Navigate using F2 / F3 to your preferred Wi-Fi network and press the GREEN confirm button.
- The device displays an "Enter Wi-Fi password" screen.
- Use the F1 / F2 / F3 / F4 buttons to navigate the input types which consist of:
- #$% -> Special characters
- ABC -> CAPS
- 123 -> Numbers
- abc -> Lower case
- RED, YELLOW, GREEN buttons
- Press the GREEN confirm button on the keypad to select an input type.
- Once within an input menu (i.e. CAPS; etc.) Use the F1 / F2 / F3 / F4 buttons to navigate Up, Down, Left, and Right.
- Use the GREEN confirm button on the keypad to enter a value (i.e. "@" or "a").
- When finished entering the Wi-Fi password, navigate to the GREEN circle icon at the bottom of the onscreen keyboard.
- Press the GREEN confirm button on the keypad to save the Wi-Fi password.
- Use the F1 / F2 / F3 / F4 buttons to navigate the input types which consist of:
- A "New Profile OK" prompt appears.
- Navigate using F2 / F3 to Advanced options and press the GREEN confirm button.
- Navigate using F2 / F3 to My networks and press the GREEN confirm button.
- Navigate using F2 / F3 to the network just added and press the GREEN confirm button.
- Navigate using F2 / F3 to Connect and press the GREEN confirm button.
- The Ingenico device will now connect to the Wi-Fi network.
- Proceed to the Restarting the Ingenico Link 2500 section.
Joining a Hidden Wi-Fi Network
- Navigate using F2 / F3 to Scan networks and press the GREEN confirm button - the device scans for and displays all available networks.
- Navigate using F2 / F3 to Other and press the GREEN confirm button.
- Navigate using F2 / F3 to 1-Hidden and press the GREEN confirm button.
- Use the F1 / F2 / F3 / F4 buttons to navigate the input types which consist of:
- #$% -> Special characters
- ABC -> CAPS
- 123 -> Numbers
- abc -> Lower case
- RED, YELLOW, GREEN buttons
- Press the GREEN confirm button on the keypad to select an input type.
- Once within an input menu (i.e. CAPS; etc.) Use the F1 / F2 / F3 / F4 buttons to navigate Up, Down, Left, and Right.
- Use the GREEN confirm button on the keypad to enter a value (i.e. "@" or "a").
- When finished entering the ESSID, navigate to the GREEN circle icon at the bottom of the onscreen keyboard.
- Press the GREEN confirm button on the keypad to save the ESSID.
- Use the F1 / F2 / F3 / F4 buttons to navigate the input types which consist of:
- On the Security type screen, navigate to 0-Home security and press the GREEN confirm button.
- Use the F1 / F2 / F3 / F4 buttons to navigate the input types which consist of:
- #$% -> Special characters
- ABC -> CAPS
- 123 -> Numbers
- abc -> Lower case
- RED, YELLOW, GREEN buttons
- Press the GREEN confirm button on the keypad to select an input type.
- Once within an input menu (i.e. CAPS; etc.) Use the F1 / F2 / F3 / F4 buttons to navigate Up, Down, Left, and Right.
- Use the GREEN confirm button on the keypad to enter a value (i.e. "@" or "a").
- When finished entering the Wi-Fi password, navigate to the GREEN circle icon at the bottom of the onscreen keyboard.
- Press the GREEN confirm button on the keypad to save the password.
- Use the F1 / F2 / F3 / F4 buttons to navigate the input types which consist of:
- A "New Profile OK" prompt appears.
- Navigate using F2 / F3 to Advanced options and press the GREEN confirm button.
- Navigate using F2 / F3 to My networks and press the GREEN confirm button.
- Navigate using F2 / F3 to the network created above and press the GREEN confirm button.
- Navigate using F2 / F3 to Connect and press the GREEN confirm button.
- The Ingenico device will now connect to the Wi-Fi network.
- Proceed to the Restarting the Ingenico Link 2500/Move 5000 section.
Version History
| Version | Date | Updates |
|---|---|---|
| 01 | 3/13/20 | Initial Release |
| 02 | 6/3/20 | Updates to make document Link 2500 specific |
| 03 | 6/22/20 | Corrected page number formatting |
| 04 | 6/30/20 | Corrected Low Level ECO mode setting and re-organized order |
| 05 | 10/7/20 | Removed ECO Mode settings |
| 06 | 9/24/24 | Reformatted/rebranded document and added steps to register/re-register the payment device. |
