PAR POS/Punchh Loyalty Setup Instructions
Punchh Loyalty allows users to participate in the Punchh loyalty program by assigning users to orders on the POS and allowing them to redeem earned rewards.
PAR POS Settings Editor Setup
-
Navigate to Settings Editor > Layout > Create and create buttons with the following behaviors:
-
Lookup Customer
-
Clear Customer
-
Redeem Rewards
-
-
Navigate to Settings Editor > Discounts > Add New Discount
-
Populate the discount fields with the following values:
-
Active: Enabled
-
Type: “Comp”
-
Must Enter Amount: Enabled
-
Loyalty Discount: Enabled
-
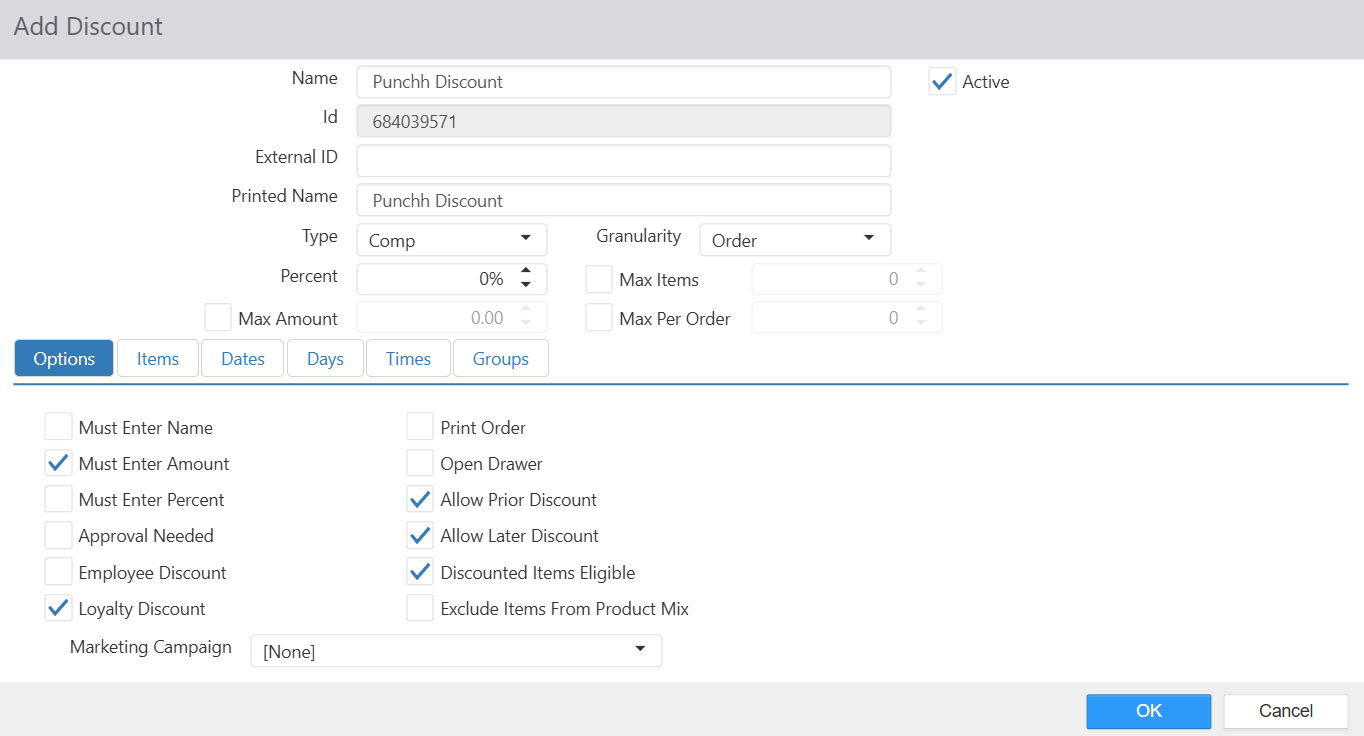
- Select OK to save changes.
PAR POS Integrations Portal Setup
-
Navigate to Admin Portal > Integrations Portal.
-
Select the ALL tab on the portal home page.
-
Select Loyalty under the “Solutions” section.
-
Click the plus sign icon
 to add an integration to an active list of integrations.
-
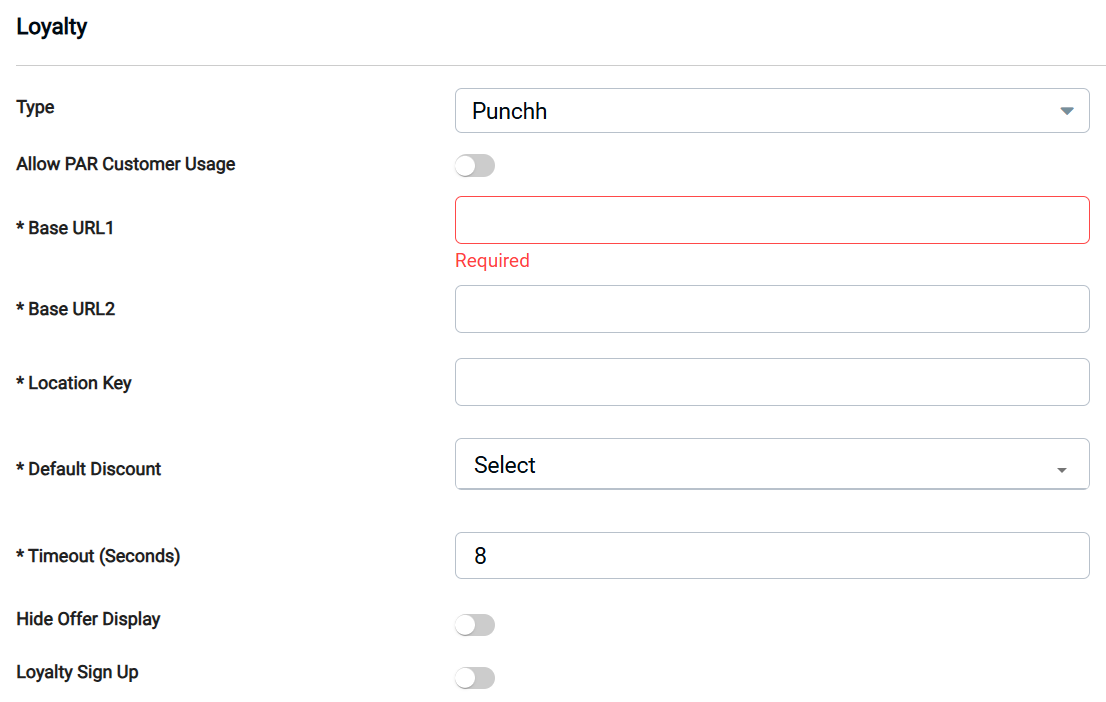
Populate the fields with the following values:
| Field | Value |
|---|---|
| Type |
“Punchh” Note: “Punchh 2.0” is used for Redemption 2.0/Multiple Redemption purposes. |
| Allow PAR POS Customer Usage |
Allows non-PAR POS loyalty providers to utilize the PAR POS customer database. Note: In most cases, this box should be checked. If unchecked, contact a PAR POS integration technician for guidance |
| Base URL 1 | pos.us-west.punchh.com/api/pos |
| Base URL 2 | pos.us-west.punchh.com |
| Location Key | Provided by Punchh |
| Default Discount |
Choose desired discount from the dropdown Important: To appear in the dropdown, discounts must be
|
| Timeout (Seconds) | Timeout period if Punchh cannot be reached (default = 8) |
| Hide offer display | Prevents the offer display screen from automatically displaying when customer scans QR code for identification |
| Loyalty Sign Up | Allows the guest to sign up for loyalty in the store via cashier action on the POS |
Using Punchh on the PAR POS Register
Loyalty Signup via POS
Important: “Loyalty Sign Up” toggle must be enabled in the Integrations Portal Setup for guest loyalty signup via POS workflow.
- Cashier asks the guest if they have loyalty. The guest replies “No” and cashier asks if they would like to sign up.
- Cashier selects “Customer Lookup” screen and enters the guest’s phone number.
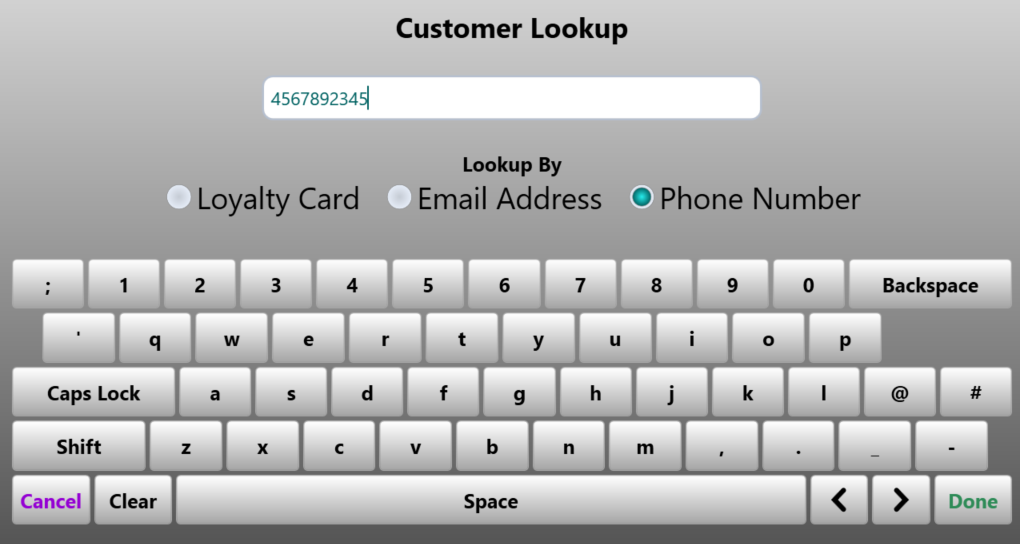
- POS performs the customer loyalty lookup.
- When the guest loyalty account is not found, cashier selects “Yes” to create a new account.
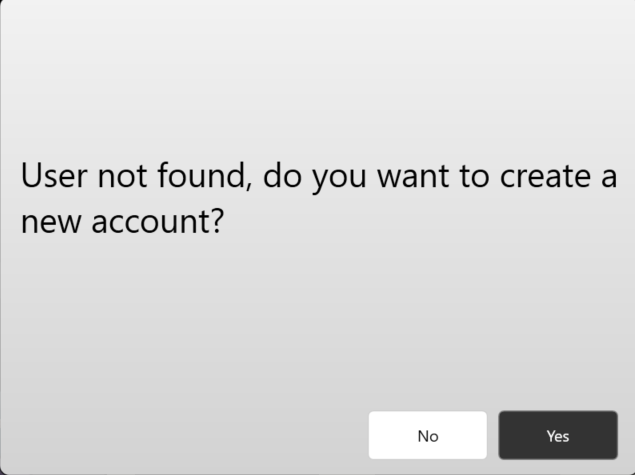
- Guest phone number is automatically populated, all other fields are typically optional.
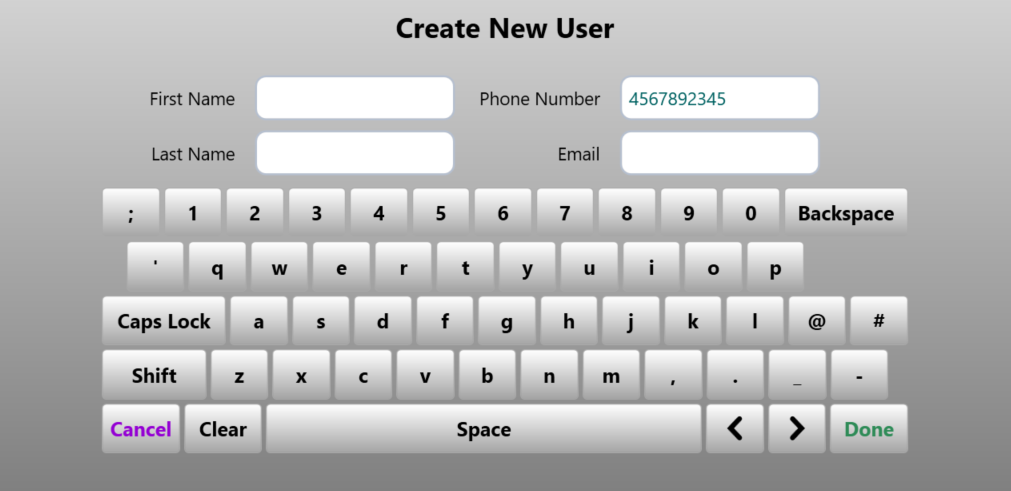
- Select “Done” when complete. The guest loyalty account is created and is assigned to the order for earning points.
Assigning User to an Order
-
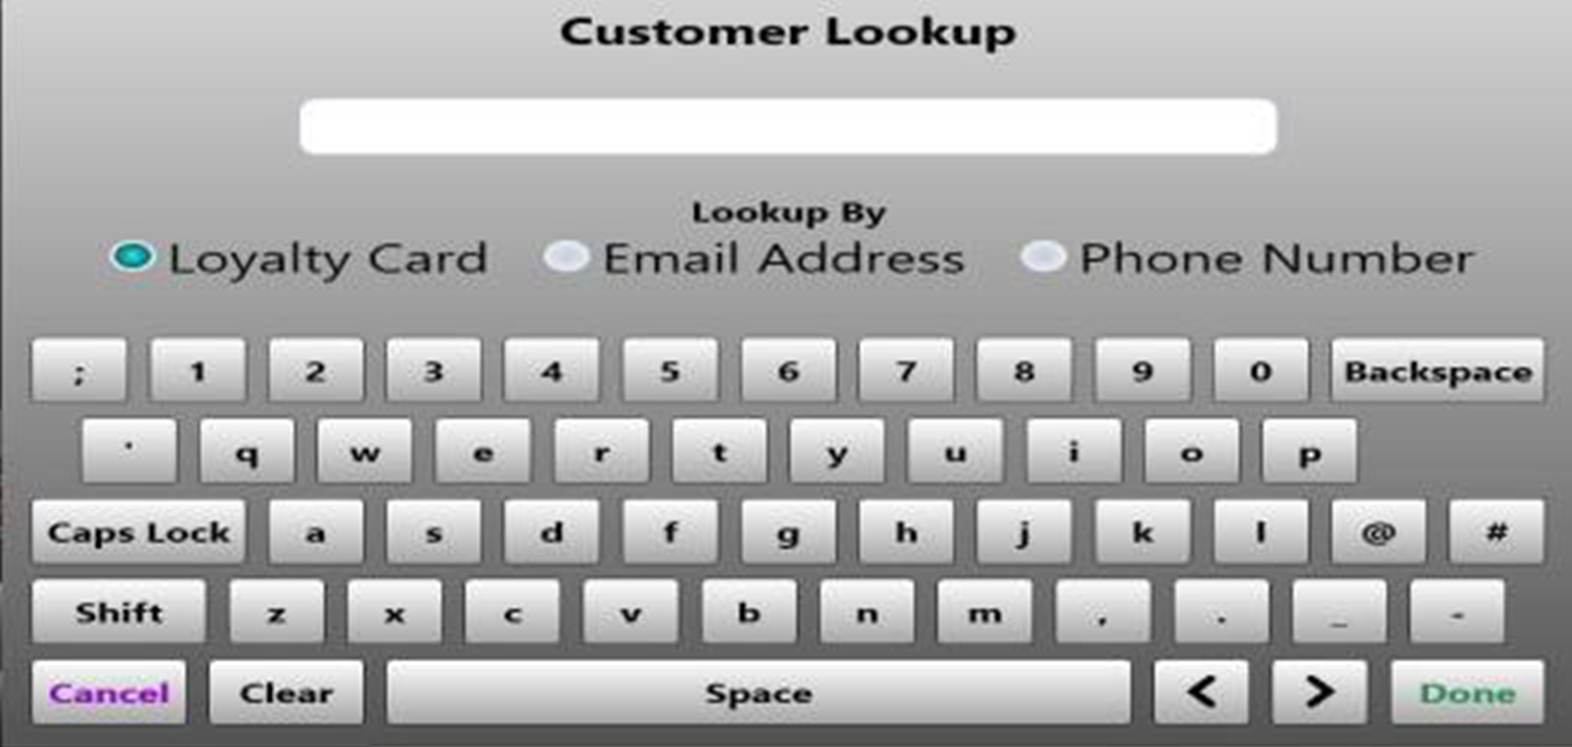
Lookup Customer button – The three options for lookup include:
- Loyalty Card
- Email Address
- Phone Number
-
Punchh QR code - Punchh uses a QR code as an identifier, this can be scanned at any time to add a user to an order.
-
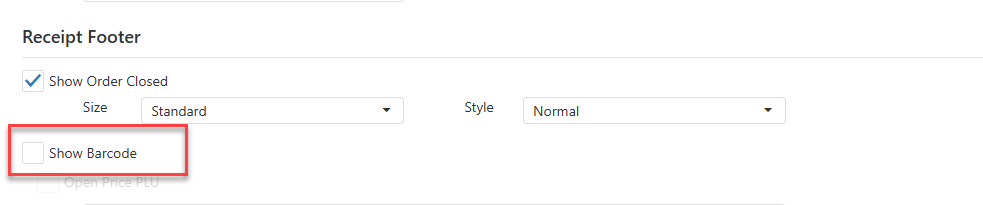
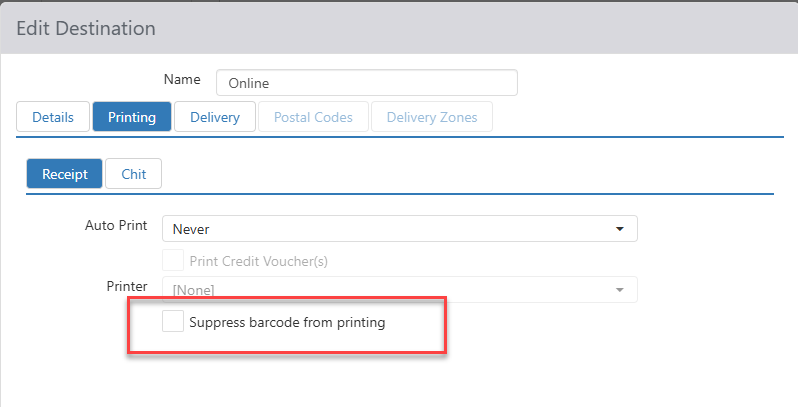
Punchh Barcode - Printed receipts display a Punchh barcode at the bottom of the receipt. User can either manually enter the barcode number on the Punchh website/app or scan the barcode from their smart phone for rewards. Barcode printing may be supressed via Settings Editor at the order level or destination level.
- Settings Editor > Options > Printing > Receipt:
- Settings Editor > Destinations > Printing:
Redeeming Rewards
Users earn rewards for specific dollar amounts spent. These can be
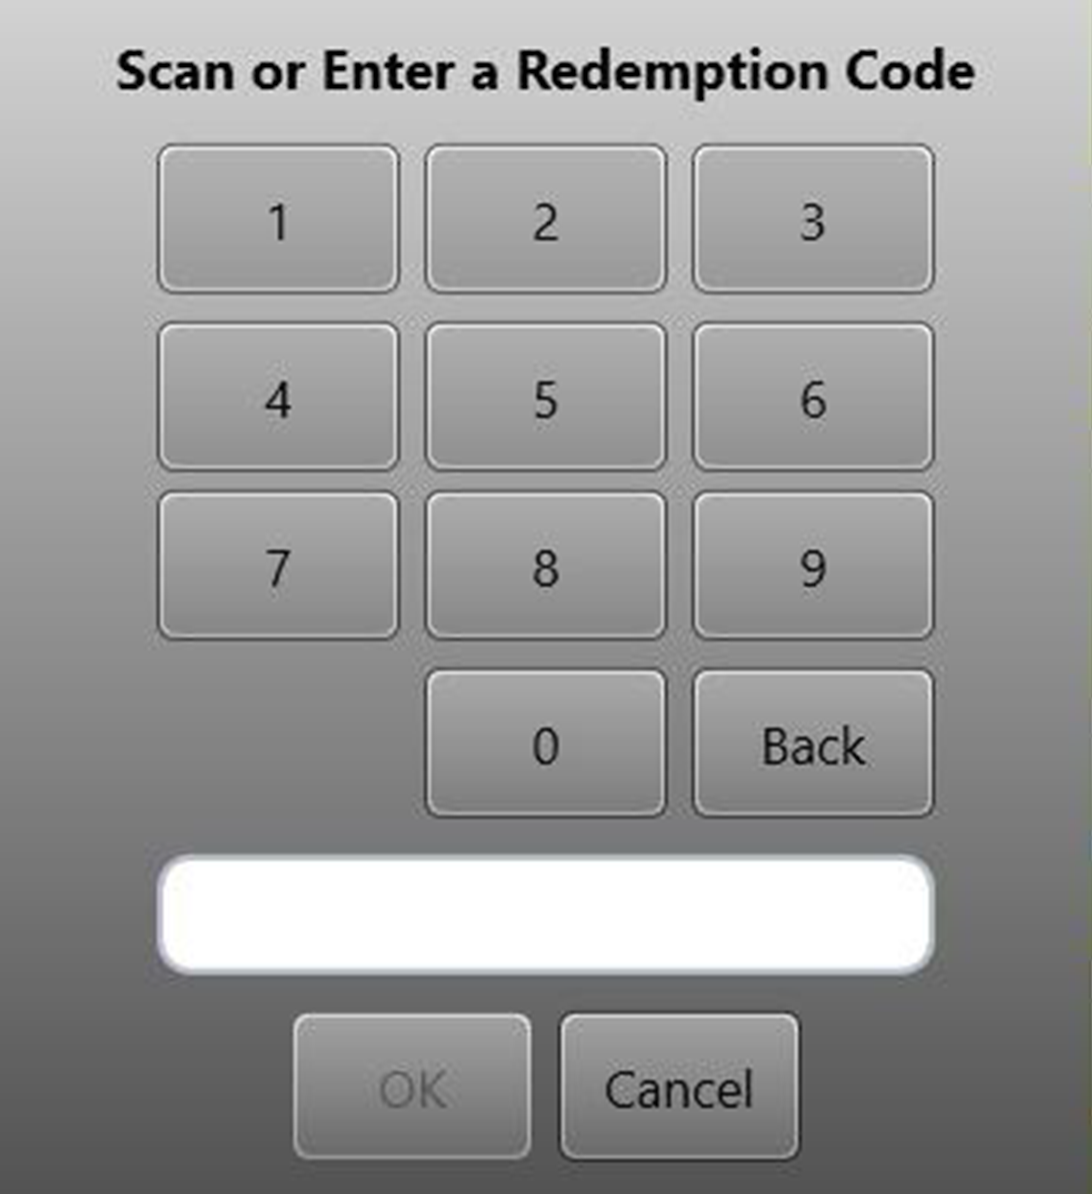
redeemed via the Redeem Rewards button which allows two options on the PAR POS Register:
- Punchh QR Code: Punchh QR code with a redemption code can be scanned.
- Manual Entry: Redemption code provided by Punchh can be entered in the register dialog.
Please work with your Punchh onboarding representative or Customer Success Manager for Punchh-specific offers and discounting configuration within the Punchh platform. For Punchh-specific setup information, please see the Punchh Loyalty Signup configuration documentation.
