How to Link a Virtual Container to a Product Group
You are able to connect a Virtual Container modifier group to an existing POS-synced product group. You can use this functionality to curate a tailored subset of products for online display with a custom name, min/max quantities, and preselect options, while keeping pricing and availability driven by your POS.
For information on configuring the "Linked to product" state, see How to Link a Product Group to a Product
Prerequisites
- A Virtual Container modifier group created (or are ready to create one)
- The POS-synced product group you want to link to already exists in your system
- Brand-level manager permissions
Setting Up the Link
Step 1: Create a Virtual Container
- Navigate to the brand-level product group page under Menu > Product Groups.
- Click Create product group.
-
Select Virtual container as the creation type and Modifier as the type.
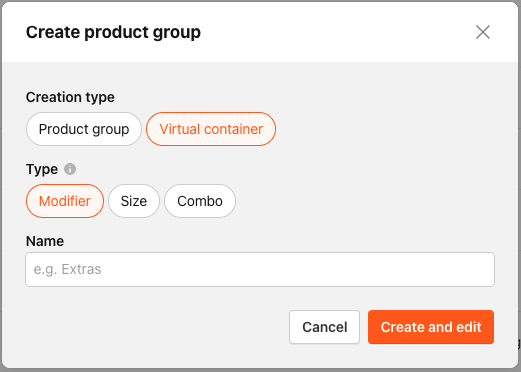
- Click Create and edit.
Step 2: Link to a POS Product Group
-
On the Virtual Container page, click the Link button in the Link to Product Group row.
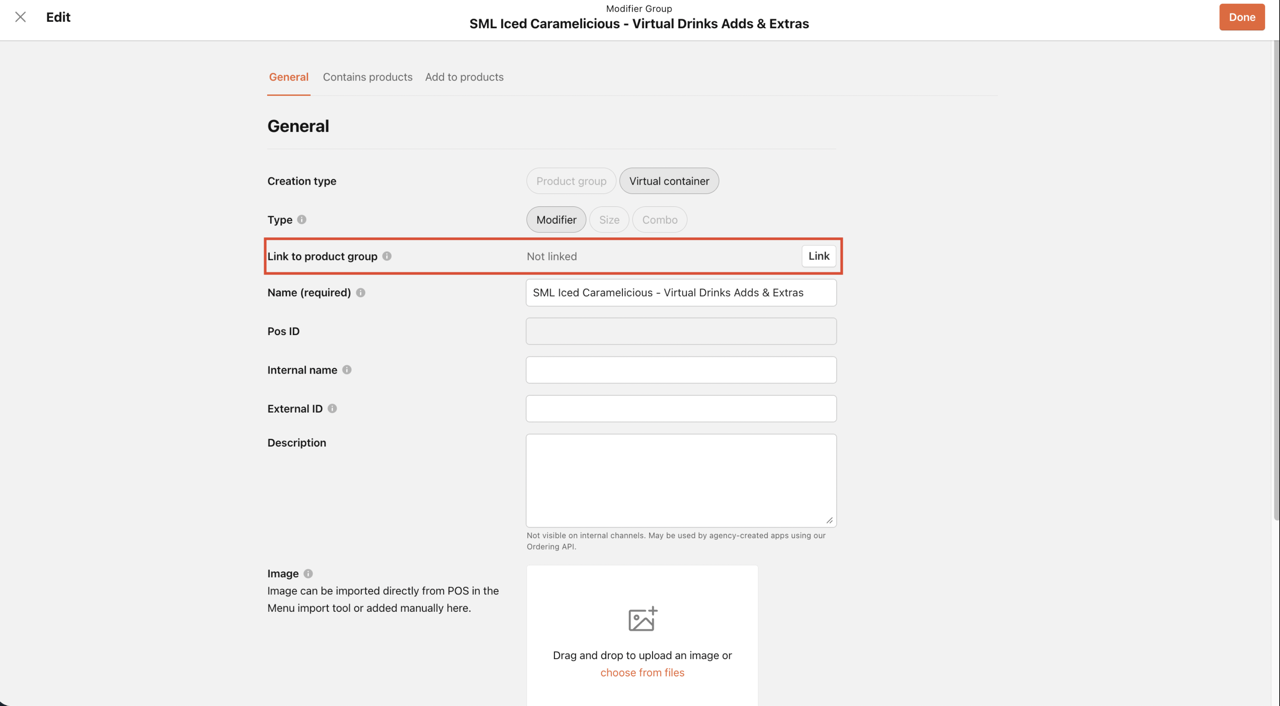
-
In the window that appears, search for the POS product group you want to connect to.
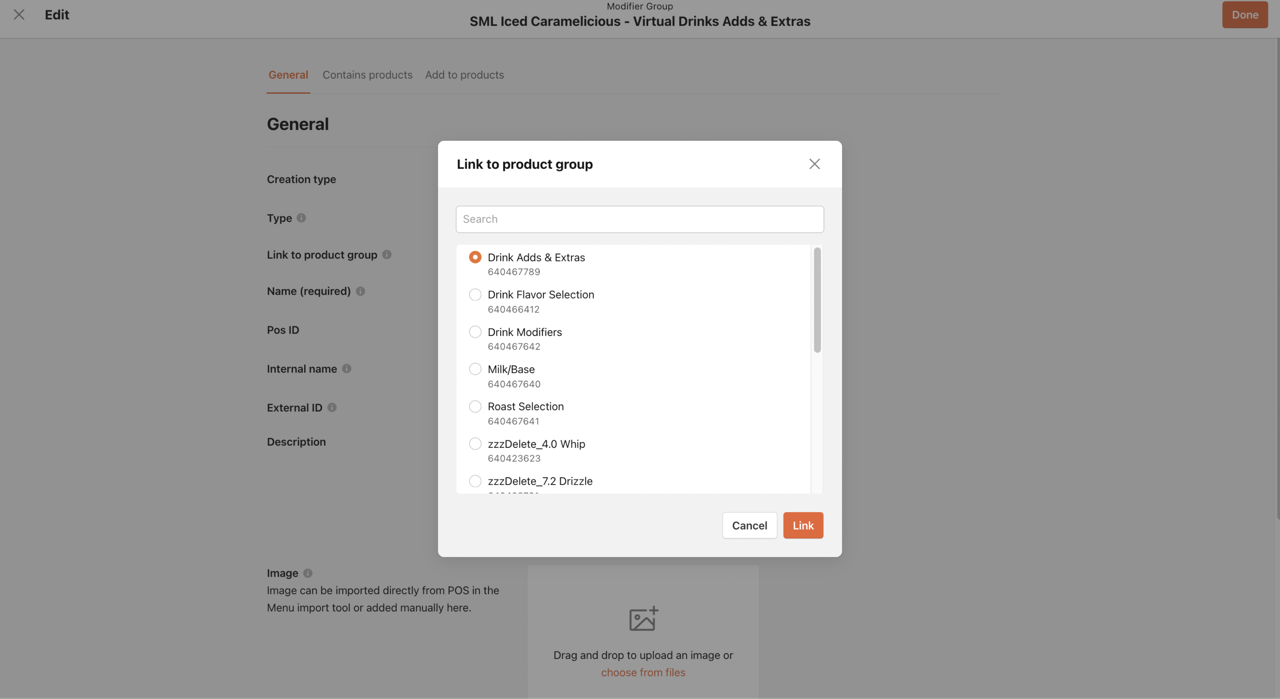
- You can search by name, internal name, or POS ID.
-
Select the product group and click Link.
Step 3: Confirm the Connection
The page updates to show the linked product group's name and POS ID.
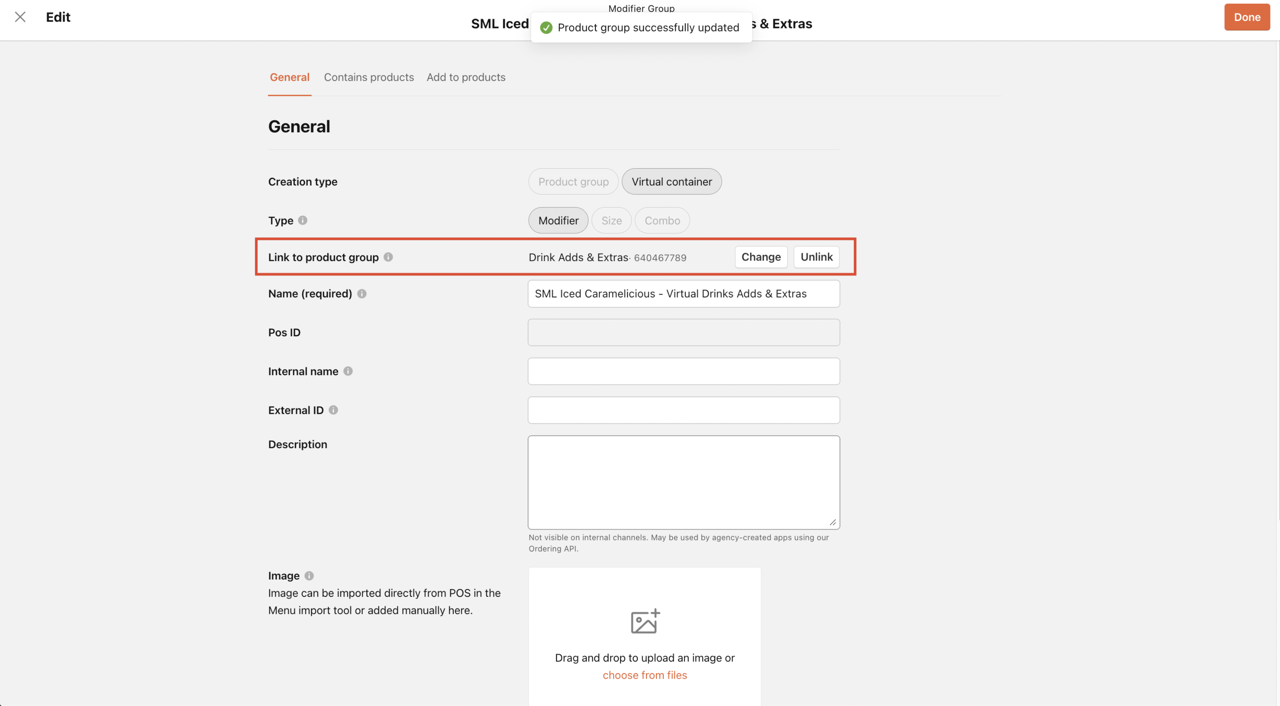
Tip: You can re-link to a different group or remove the connection at any time using the Change or Unlink buttons on this page.
Step 4: Add Products
-
Go to the Contains products tab.
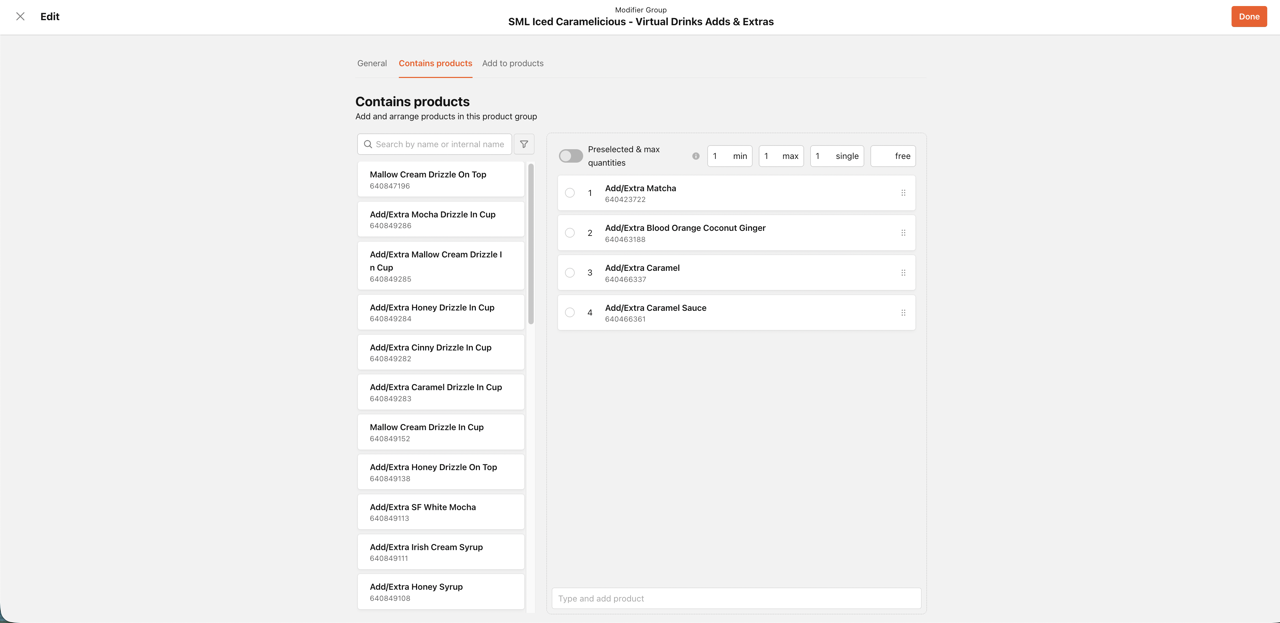
- Add the products you want to surface online.
Products added to your Virtual Container must exist in the linked POS product group. You can choose any subset of those products, but you cannot add products from outside the linked group. When a Virtual Container is linked, the product sidebar automatically filters to show only products in the linked group. Each product also displays its POS ID below the name to help you identify the right items.
Step 5: Add to a Menu Item
-
Go to the Add to products tab.
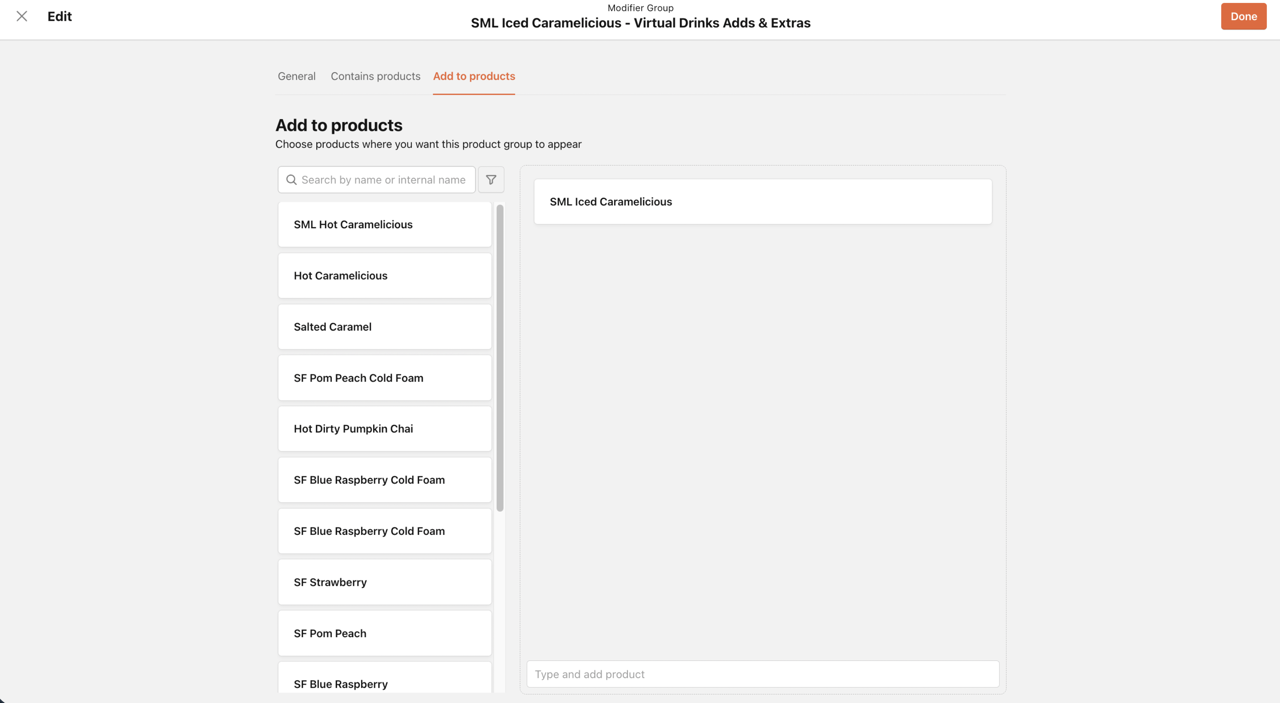
- Attach the Virtual Container to the relevant menu item.
Step 6: Review in Menu Preview
- Navigate to Menu Preview and open the corresponding item.
-
Your Virtual Container appears with a chip showing which POS product group it is linked to.
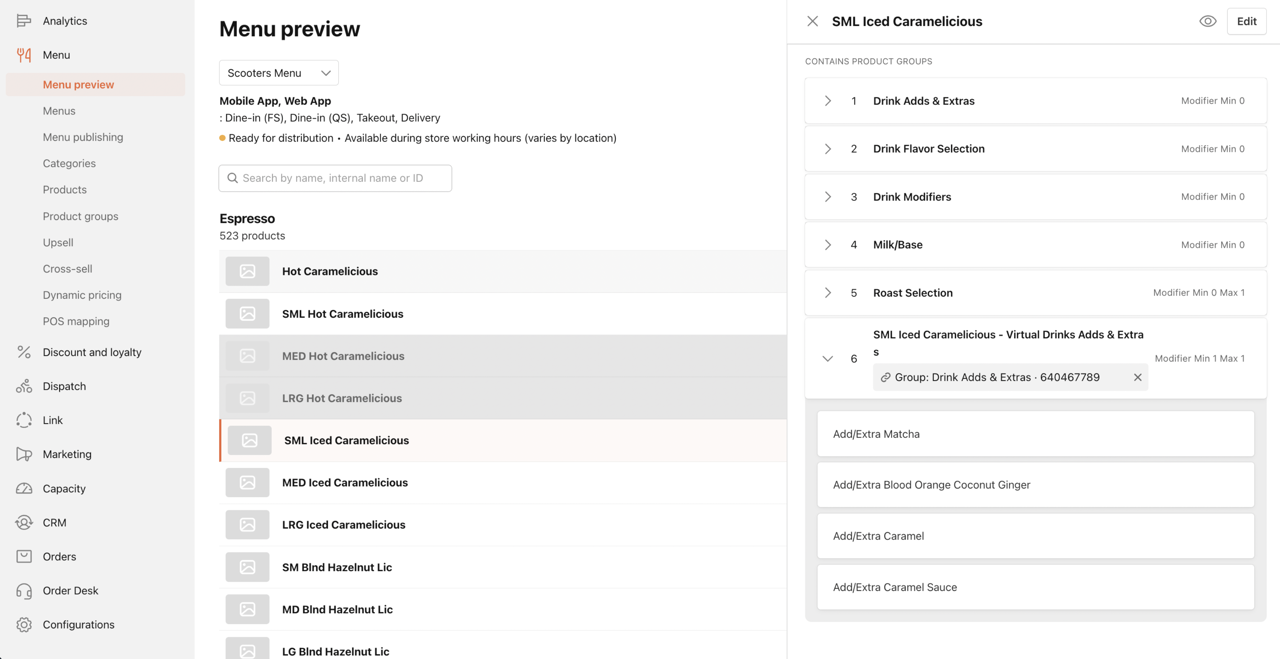
From Menu Preview, you can also:
- Use the three-dot menu on the Virtual Container card to re-link it to a different POS product group.
- Click the × on the chip to remove the link.
Step 7: Distribute and Publish
Distribute and publish your changes from brand to store level. Pricing and availability will sync on the next POS sync (automatic or manual).
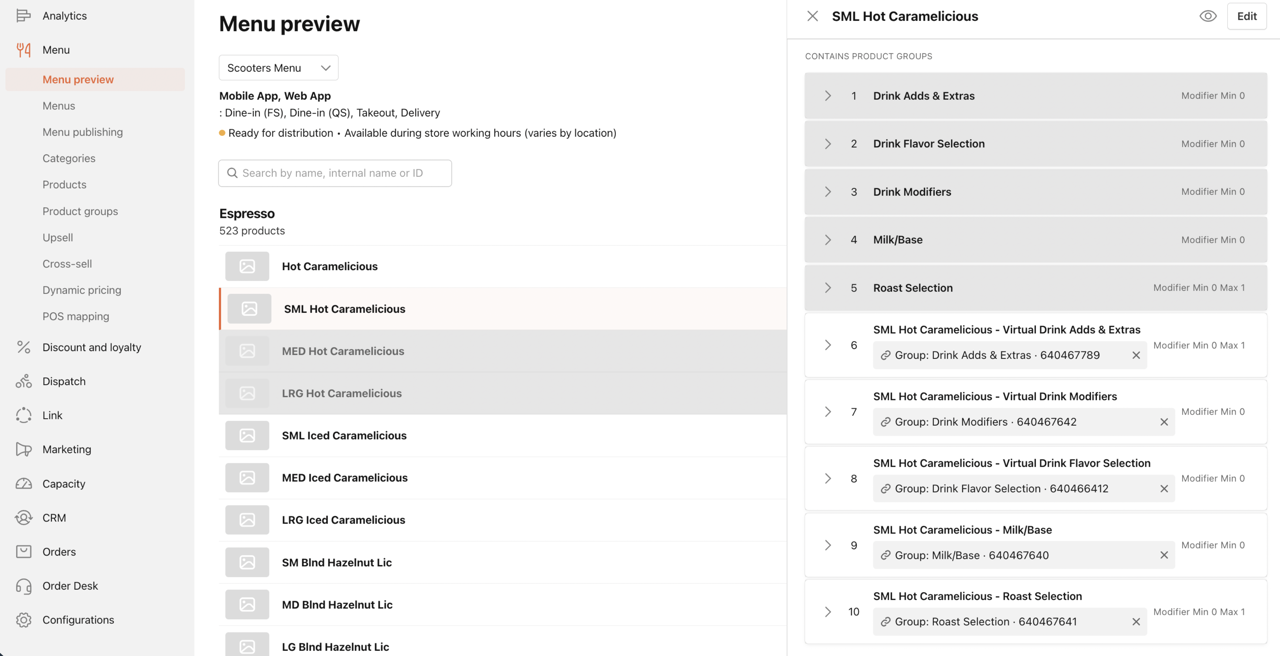
The original POS-synced product group must remain attached to the menu item — it is the source of pricing and product availability. If you want to hide it from displaying in the menu, use the eye icon in Menu Preview to toggle its visibility without removing it.
What Happens When the Link Breaks
If the linked POS product group is deleted or detached from the category-level product:
- The link is automatically cleared.
- The Virtual Container retains its curated product list, but pricing clears on the next POS sync.
- No notification is sent.
- Re-linking is manual — the system does not automatically reconnect if the group is re-attached later.
Virtual Container State Reference
| State | Product List Source | Pricing & Availability | PAR POS Order Injection |
|---|---|---|---|
| Unlinked | User-picked; any products from the same category | User-defined | Virtual Container is flattened; child products become top-level line items |
| Linked to POS group only | User-curated subset from linked group | Inherited from linked POS group | Sent using the linked POS group's identity and hierarchy |
| Linked to product only (no POS group link) | User-picked; any products | User-defined | Same as Unlinked — a product link alone has no effect on a Virtual Container |
| Linked to both POS group and product | User-curated subset from linked group | Inherited from linked POS group | Sent as linked POS group, nested under linked ancestor product |
