Workday Setup
To integrate with Workday, you must create a dedicated Integration System User (ISU) and assign it to an Integration System Security Group (ISSG). This ensures the integration has the specific "Read" permissions required to sync worker data without compromising overall system security.
Instructions
Step 1: Create an Integration System User (ISU)
- Log into your Workday tenant with Administrator privileges.
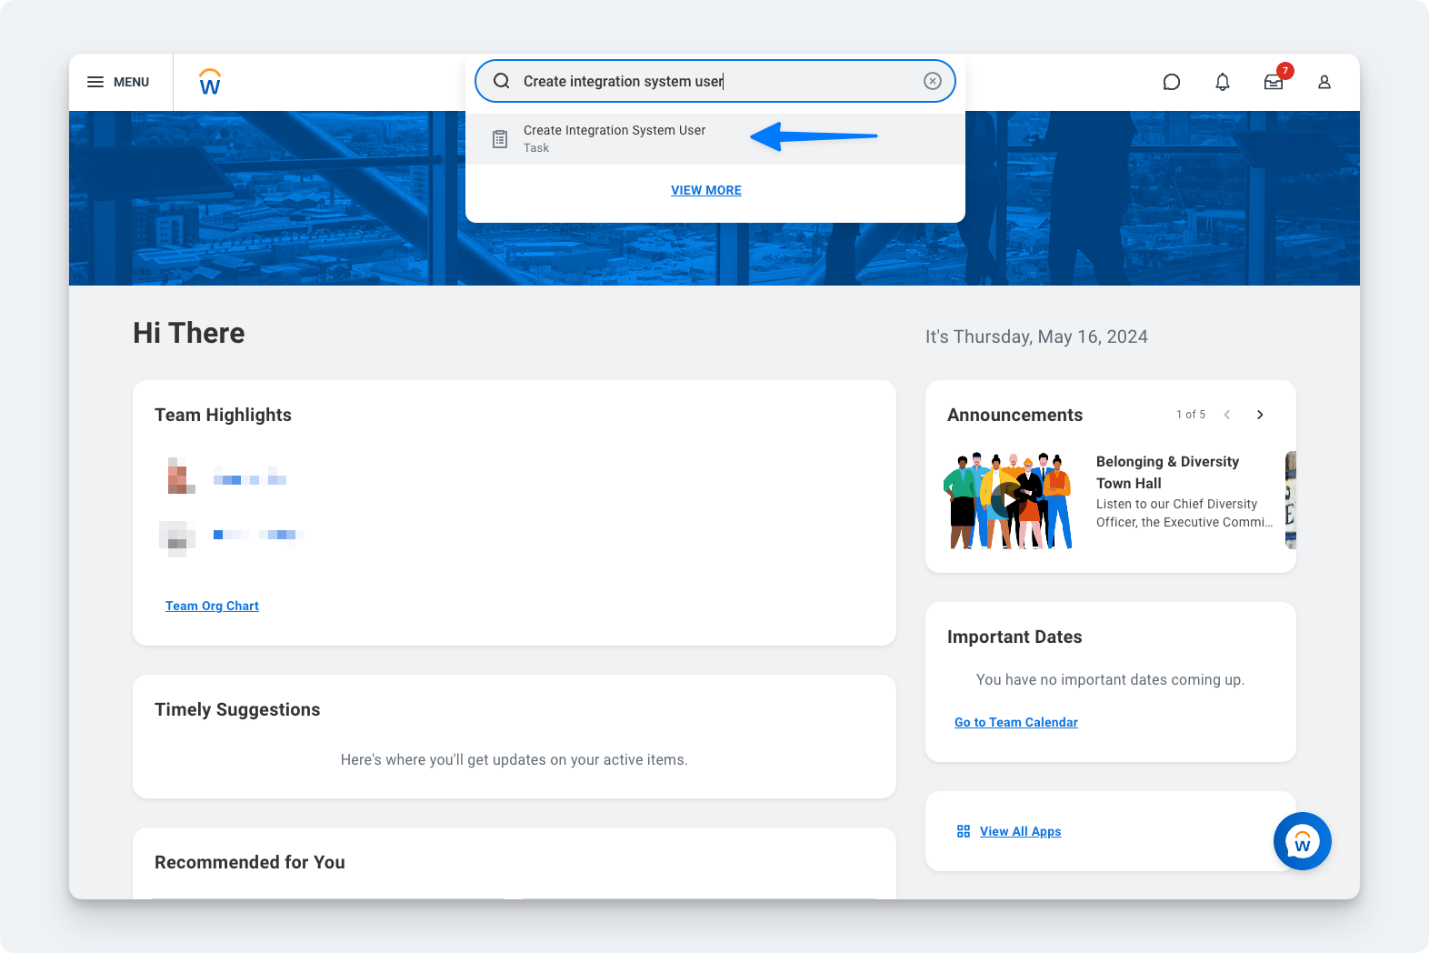
- In the search bar, type "Create Integration System User" and select the task.
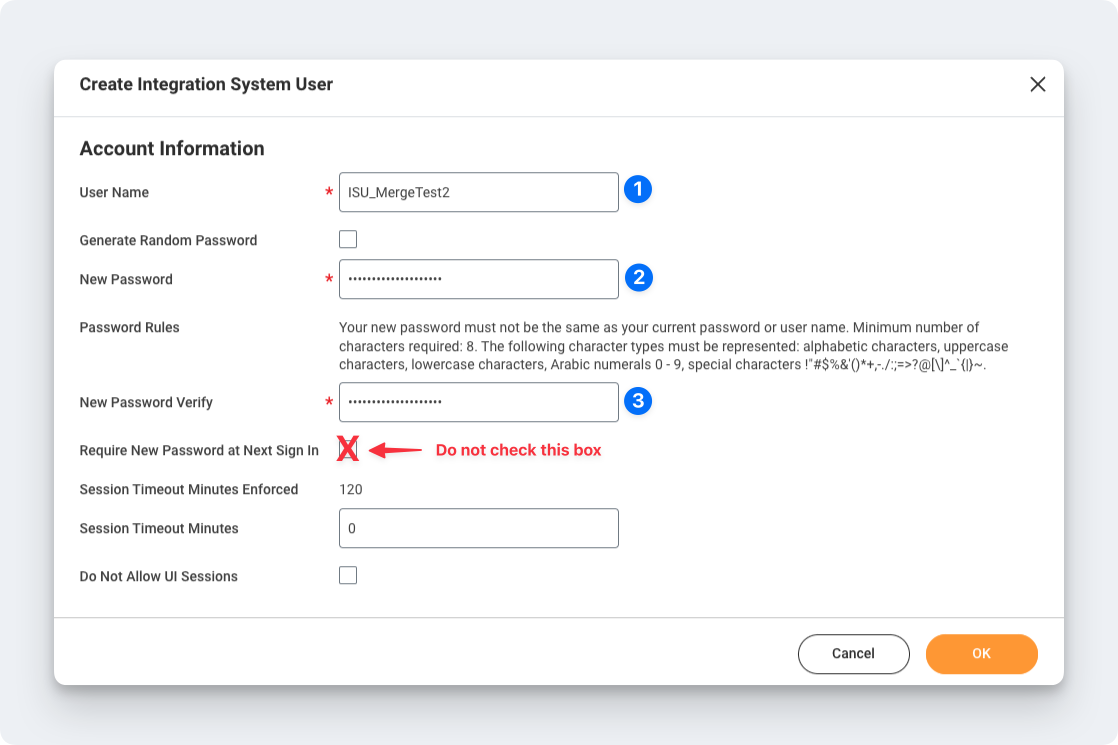
- Enter a User Name (e.g.,
ISU_Integration). - Enter and confirm a secure Password.
- Important: Uncheck the box Require New Password at Next Sign In.
- Check the box Do Not Allow UI Sessions (this prevents the user from logging into the Workday interface manually).
- Click OK.
The characters "&", "<", or ">" cannot be included in the password.
Step 2: Ensure Password Does Not Expire
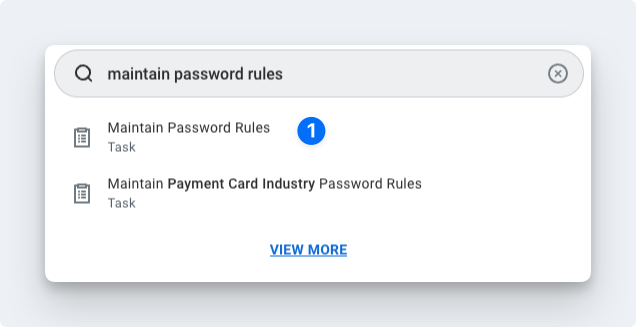
- To ensure the password doesn't expire, add this new user to the list of System Users. Search for the Maintain Password Rules task.
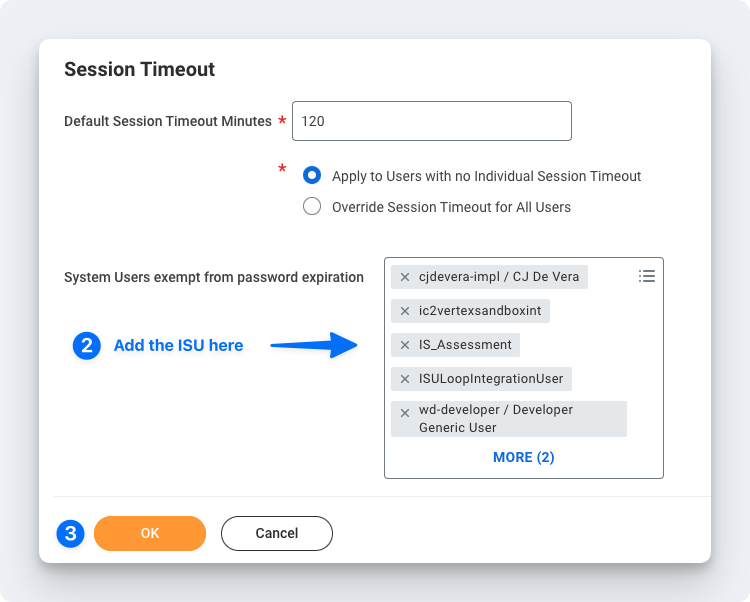
- Add the ISU to the System Users exempt from password expiration field.
Step 3: Create a Security Group
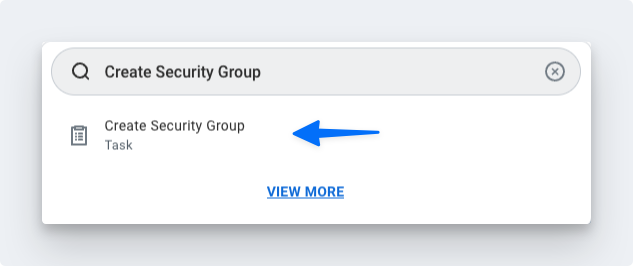
- Search for "Create Security Group" in the search bar.
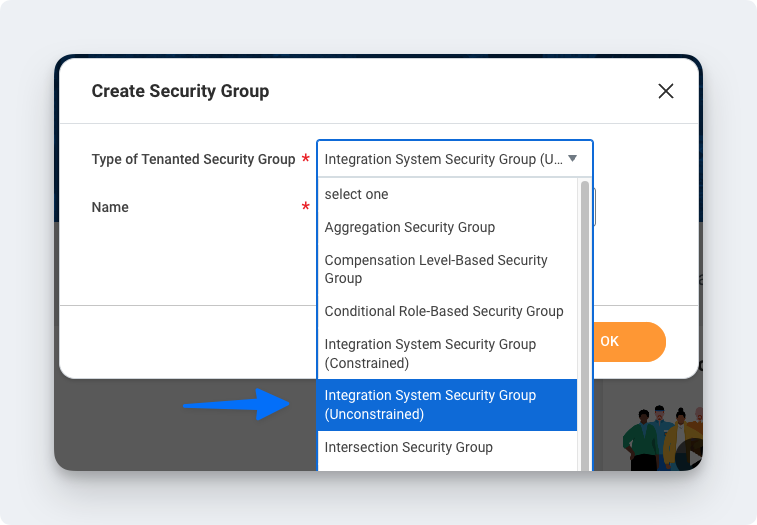
- Select Integration System Security Group (Unconstrained) from the Type of Tenanted Security Group dropdown.
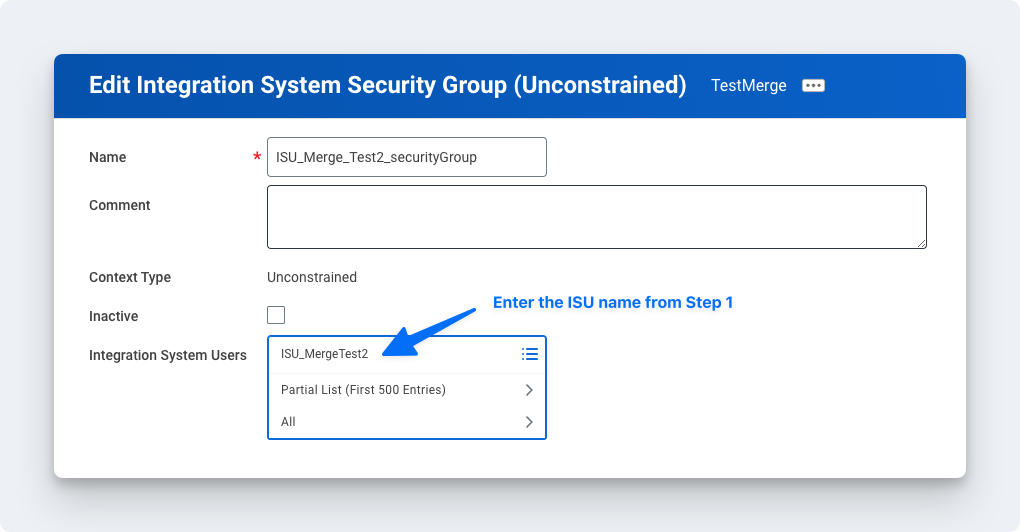
- Enter a name for the group (e.g.,
ISSG_Integration) and click OK. - In the Integration System Users field, search for and select the user you created in Step 1.
- Click OK.
Step 4: Assign Domain Security Policy Permissions
-
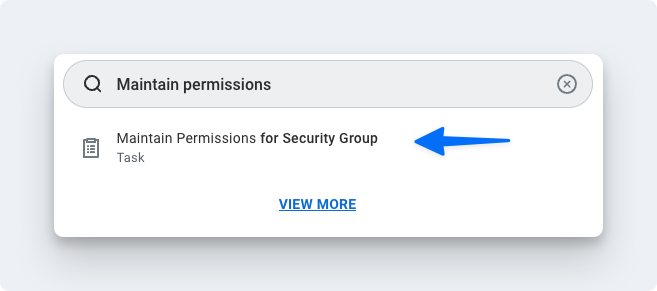
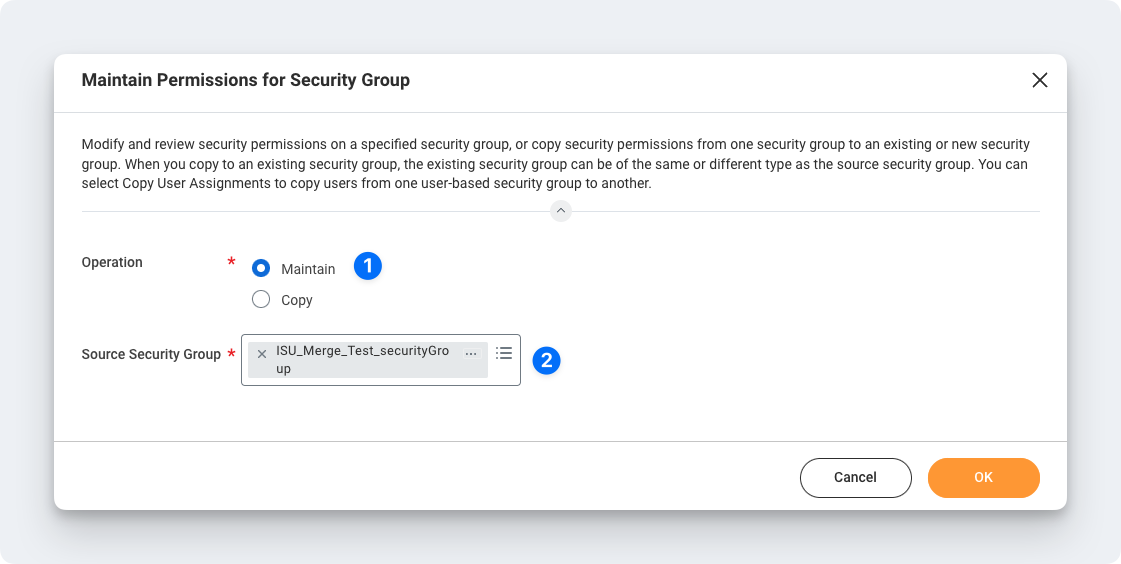
Search for "Maintain Permissions for Security Group".
-
Ensure Operation is set to Maintain and select your security group in the Source Security Group field. Click OK.
-
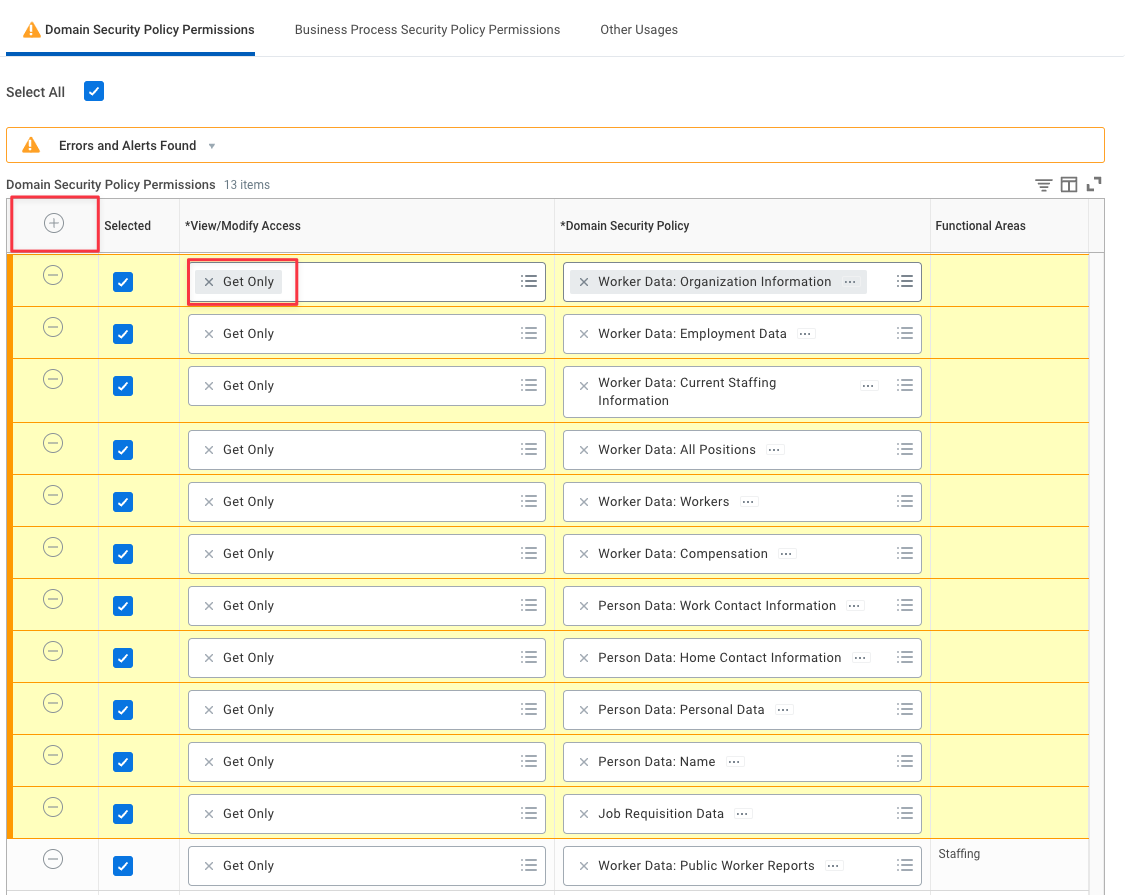
Under the Domain Security Policy Permissions tab, use the (+) icon to add the following domains:
Operation Domain Security Policy Get Only Worker Data: Public Worker Reports Get Only Manage: Organization Integration Get Only Worker Data: Organization Information Get Only Person Data: Name Get Only Person Data: Personal Data Get Only Person Data: Home Contact Information Get Only Person Data: Work Contact Information Get Only Person Data: Private Work Email Integration Get Only Person Data: Public Work Email Address Integration Get Only Locations Get Only Job Profiles Get Only Job Profiles Information Get Only Job Information Get Only Worker Data: All Positions Get Only Worker Data: Compensation Get and View Only Worker Data: Compensation - All Worker's Positions Past and Present Get Only Worker Data: Compensation by Organization Get Only Worker Data: Current Staffing Information Get Only Worker Data: Employment Data Get Only Worker Data: Workers -
For each domain, check the box under the Get column (Integration Permissions).
-
Click OK and then Done.
Step 5: Activate Security Policy Changes
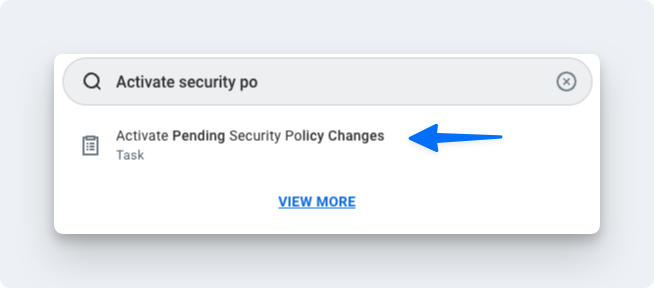
- Search for "Activate Pending Security Policy Changes".
- Enter a comment (e.g., "Permissions for API Integration") and click OK.
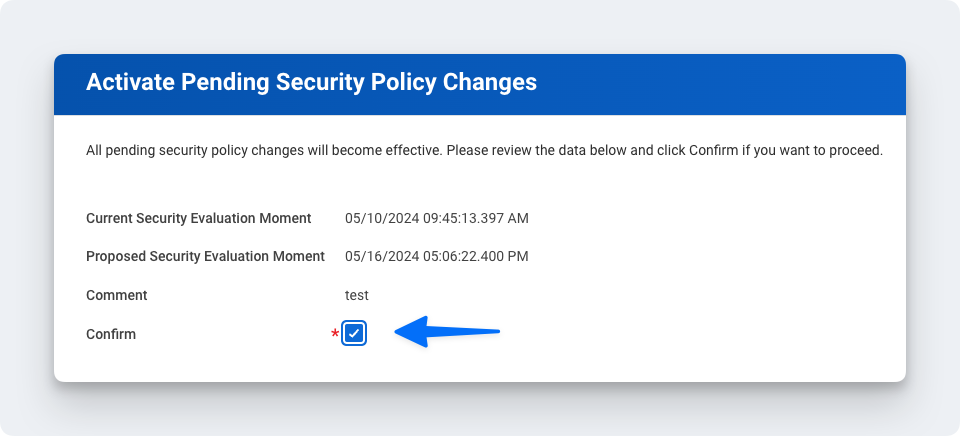
- Review the summary of changes, check the Confirm box, and click OK.
Step 6: Obtain Web Services Endpoint Information
Web Services Endpoint:
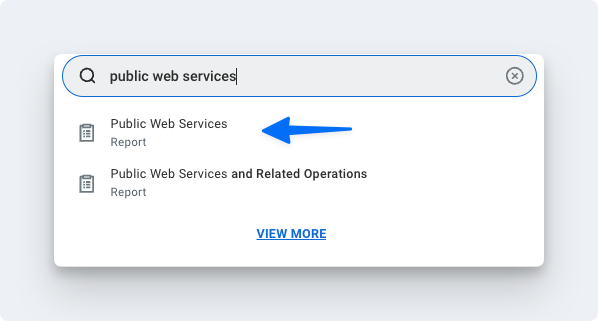
- Search for "Public Web Services" and open the report.
- Find Human Resources (Public), click the ellipsis (...) > Web Services > View WSDL.
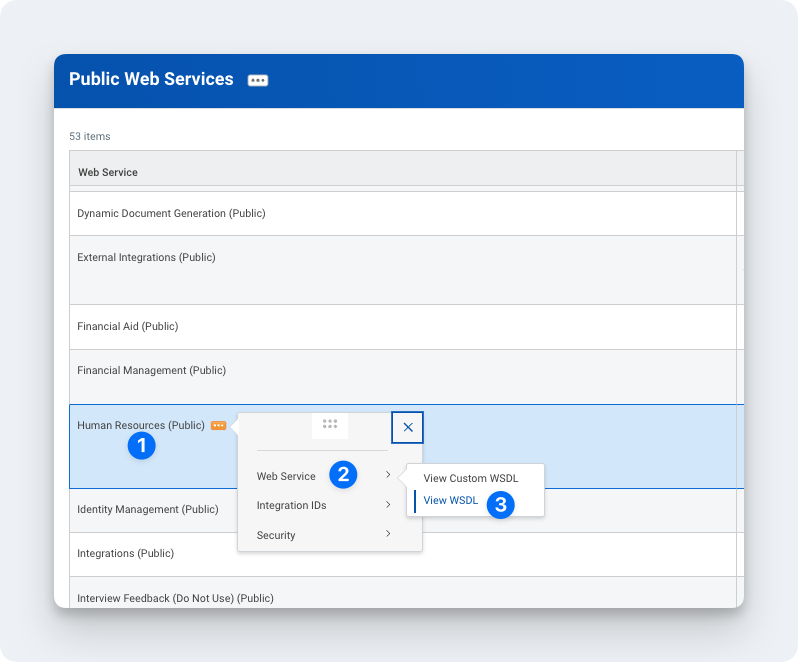
- Scroll to the very bottom of the WSDL page and copy the full URL provided under
Human_ResourcesService.

Tenant Name:
- From the web services URL, find your tenant name. In this example, the value is "acme".

Step 7: Locate the Email from PAR OPS
- Check your email inbox for an email from noreply-parops@partech.com with the subject line PAR OPS Integrations Credentials Request.
- This email contains a unique link to the credentials request form specific to your company. This link is only valid until you successfully provide credentials, or until the time indicated in the email has passed.
If the link is no longer valid, request a new link from the PAR OPS team.
- Click the Enter Credentials button in the email.
Step 8: Enter Credentials
- After validating your email, you will be presented with the form to enter and validate your credentials.
- Enter the information from the previous steps.
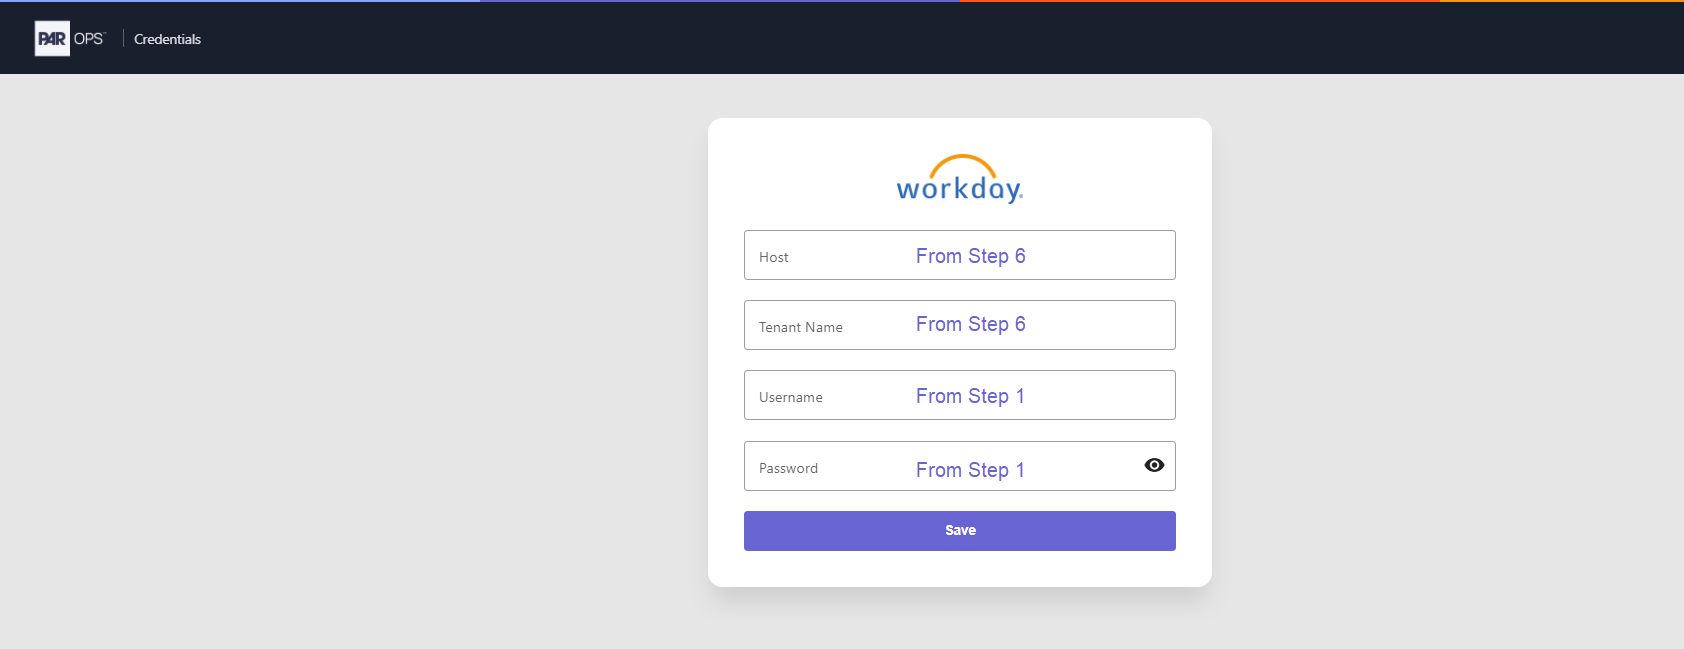
- After entering your credentials, click Save.
- If your credentials are valid, you will see a success message. You may close the window.
- If your credentials are invalid, you will see an error message from the Workday API.
If you run into issues, the PAR OPS team you're working with may have limited visibility into the cause of the error. For questions about the error or its cause, it's best to reach out directly to Workday.