AllianceHCM Client Setup
To integrate with AllianceHCM, we recommend creating a dedicated service account user. This guide walks you through creating the new service account and generating the API key for that account. It also walks you through finding the Company IDs and Cost Center used for mapping locations.
Instructions
Step 1: Enable API Access for the Company
Before a user can use the API, access must be enabled at the organizational level.
- Log in as a Company Administrator.
- Navigate to Company > Security > Security Settings.
- Locate the API Access setting and change it to your desired level (typically "Allowed from any IP Address").
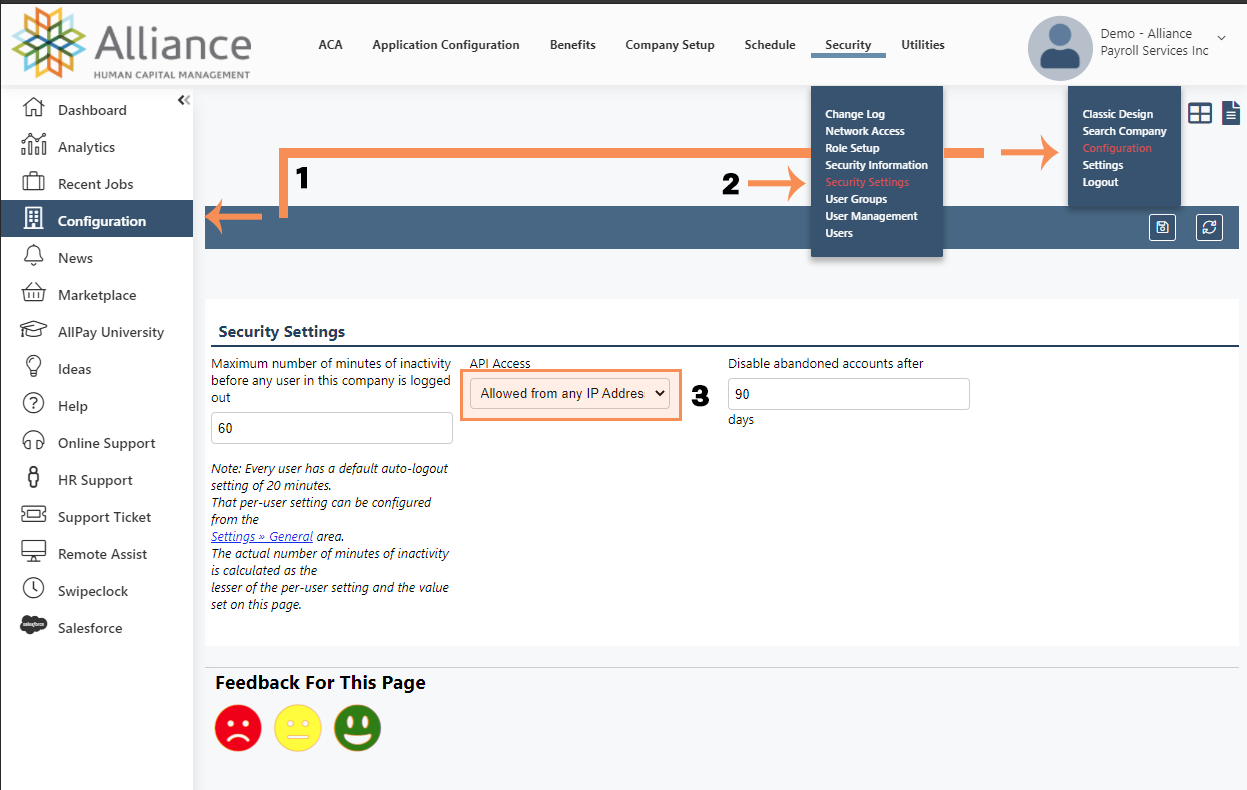
- Save your changes.
Step 2: Create the Service Account User
AllianceHCM uses standard user accounts as service accounts. It is recommended to create a dedicated user for this purpose.
- Navigate to Configuration > Security > Users.
- Click Add New at the top right.
- Username: It is best practice to use a unique name, such as
SVC_API_PAROPS. - Role: Assign a role that has permissions to view employee data (e.g., Company Administrator or a custom API role).
- Allowed Companies: This is where you restrict access.
- Click the dropdown and select only the specific companies this API should be allowed to view.
- Email Address: Use an email address you have access to, as the API token will be sent here.
- Click Save.
Step 3: Generate the API Token
- Log in to the newly created service account.
- Navigate to Settings > Profile.
- Locate and click the Reset API Token button.
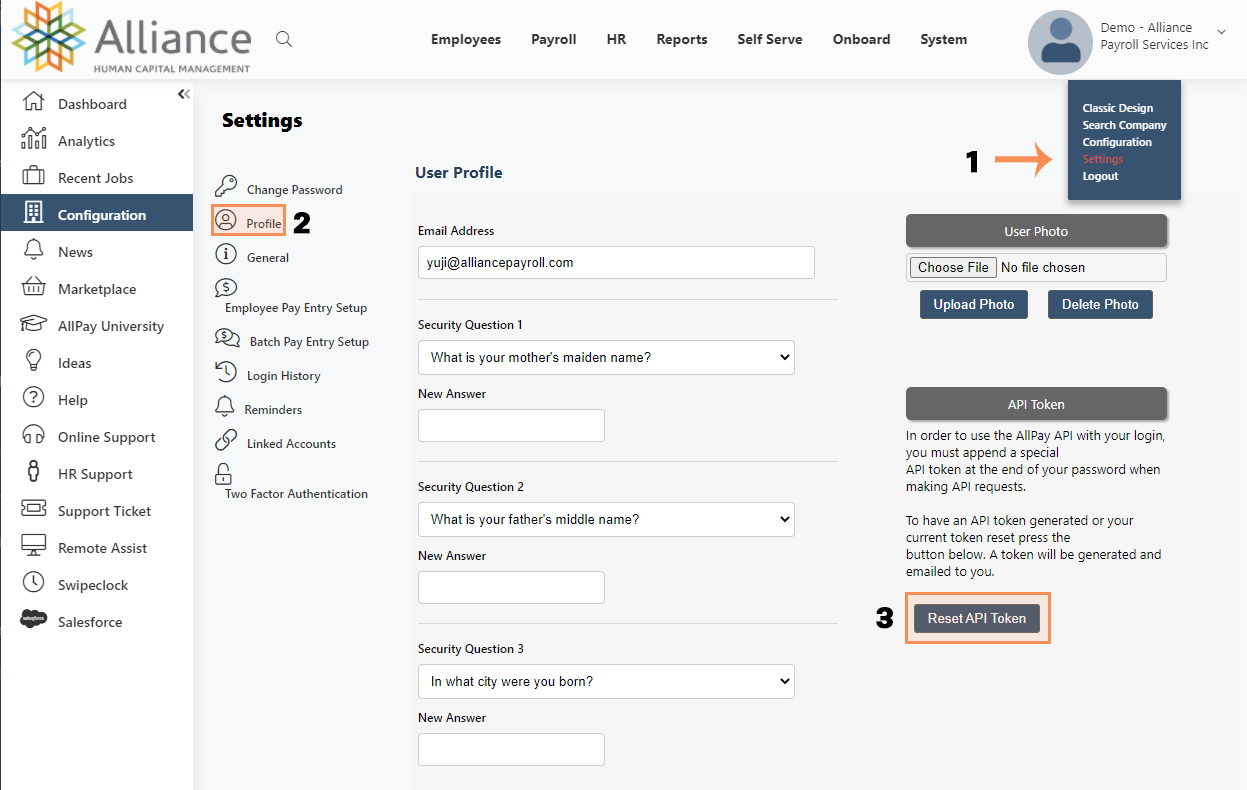
- Check the service account's email inbox. You will receive an automated email containing your unique API token.
- We recommend storing this token in a secure place, such as a password manager, in case you need it in the future.
Step 4: Locate Company IDs
- While logged into the service account you created, navigate to Search Company using the user picture in the top right corner of the screen.
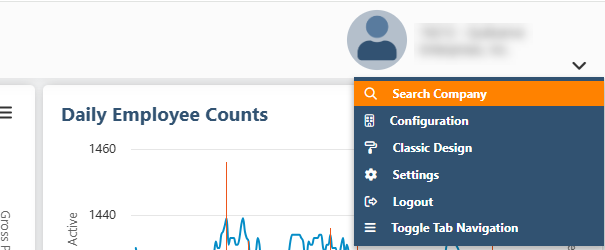
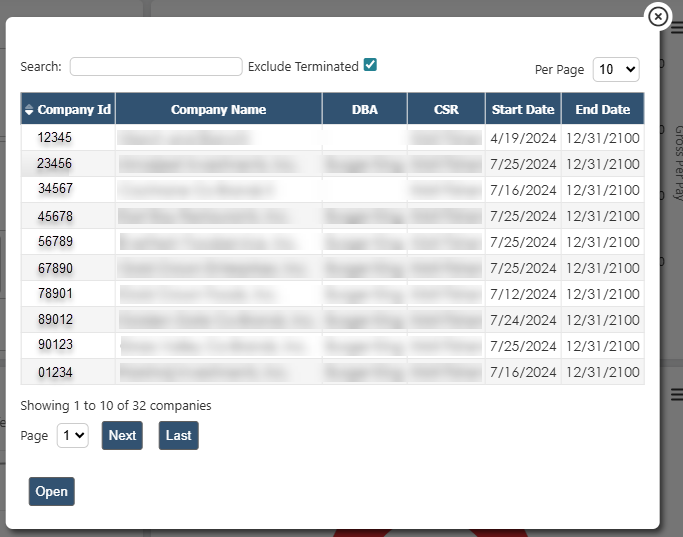
- Locate the Company Id column and take note of all the Company IDs listed.
Step 5: Locate the Cost Center Used for the Location Employees Work In
- Log in to your Alliance AllPay account and navigate to an employee who is Active.
- On the Employment tab, look for the Cost Center section.
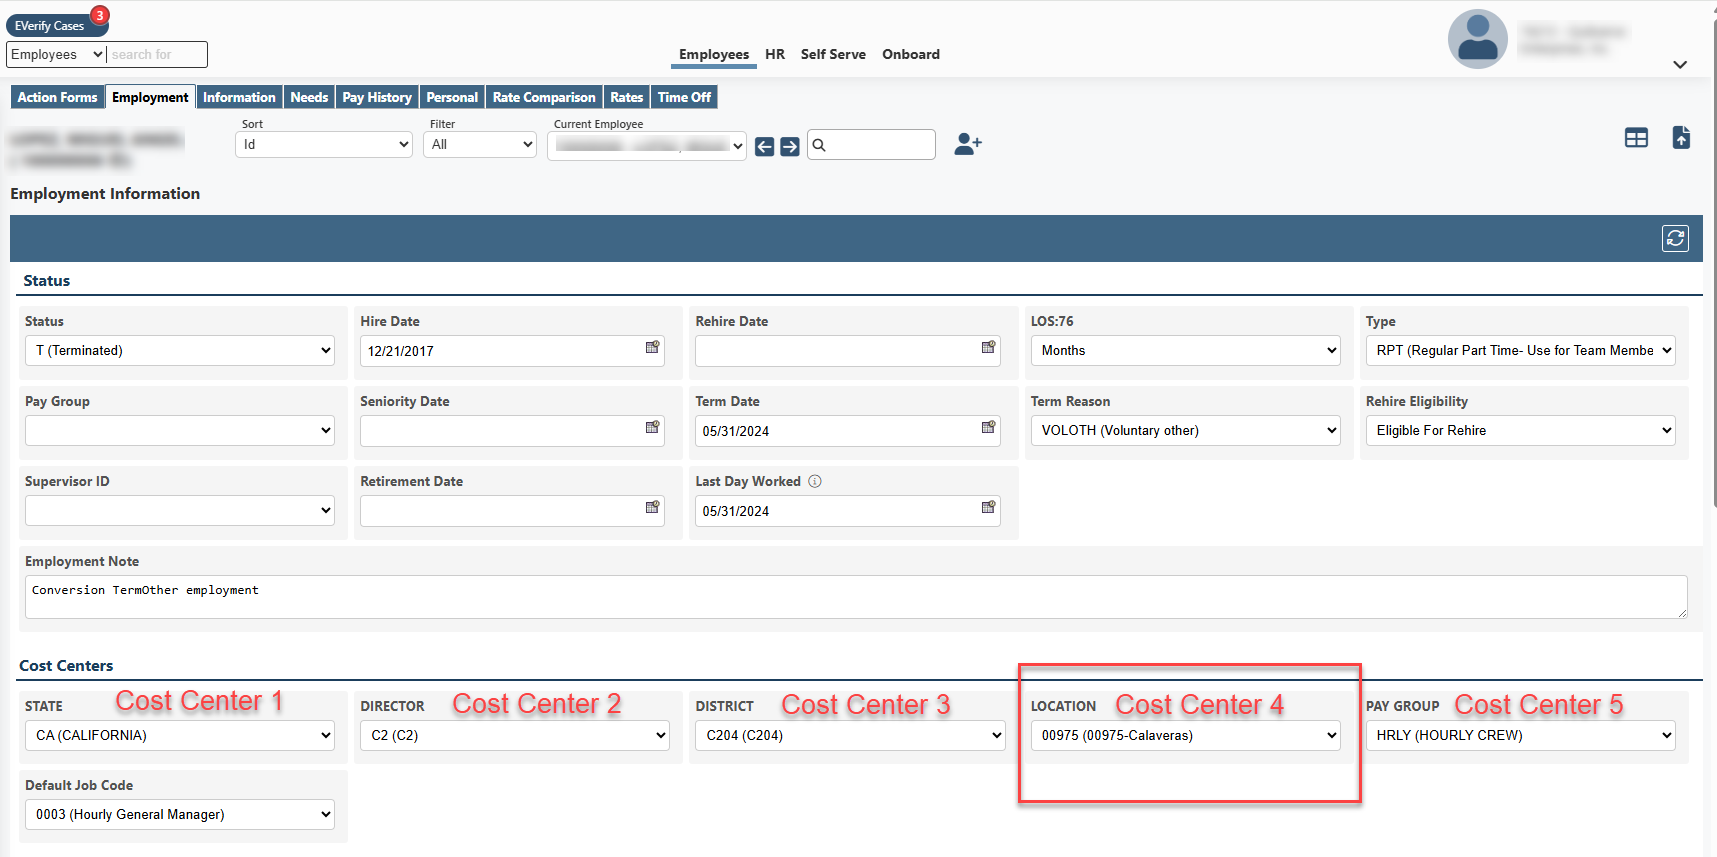
- In the screenshot above, this customer has renamed Cost Center 4 to be "Location" in their instance, and that is where they select which location the employee works at.
- Take note of which Cost Center your company uses to store the location for which employees work (ex: Cost Center 4).
Step 6: Locate the Email from PAR OPS
- Check your email inbox for an email from noreply-parops@partech.com with the subject line PAR OPS Integrations Credentials Request.
- This email contains a unique link to the credentials request form specific to your company. This link is only valid until you successfully provide credentials, or until the time indicated in the email has passed.
If the link is no longer valid, request a new link from the PAR OPS team.
- Click the Enter Credentials button in the email.
Step 7: Enter Credentials
- After validating your email, you will be presented with the form to enter and validate your credentials.
- Enter the information from the previous steps.
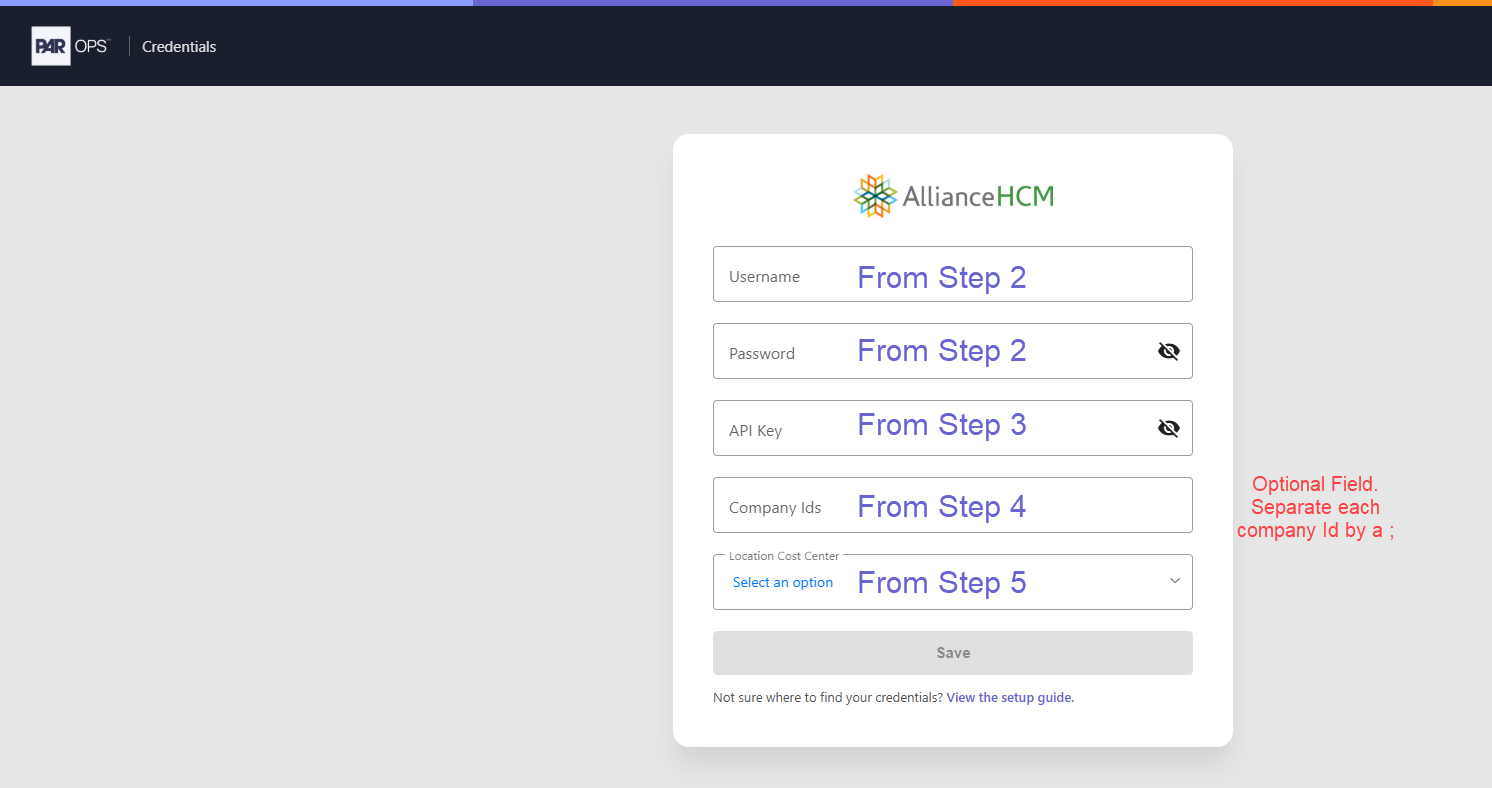
- After entering your credentials, click Save.
- If your credentials are valid, you will see a success message. You may close the window.
- If your credentials are invalid, you will see an error message from the AllianceHCM API.
If you run into issues, the PAR OPS team you're working with may have limited visibility into the cause of the error. For questions about the error or its cause, it's best to reach out directly to Alliance.