Micros Simphony POS - Zebra/Motorola DS9308/DS9208 Scanner Setup Guide
Step 1 - Install the Barcode Scanner on Windows POS Terminal
Prerequisites
-
Windows 10/11
-
The Zebra/Motorola barcode scanner must be connected to an open USB port on the terminal. The scanner will be configured as virtual serial COM port connected device.
-
Make sure that Punchh Loyalty is up and running on the terminal.
Note: When using Windows 10, the CDC drivers are already pre-installed. For more information, see Zebra Support Community.
Ensure That the Device Is Plugged Into an Available Terminal USB Port
When the device is powered up, you will hear a beep and see flashing of the light on the device.
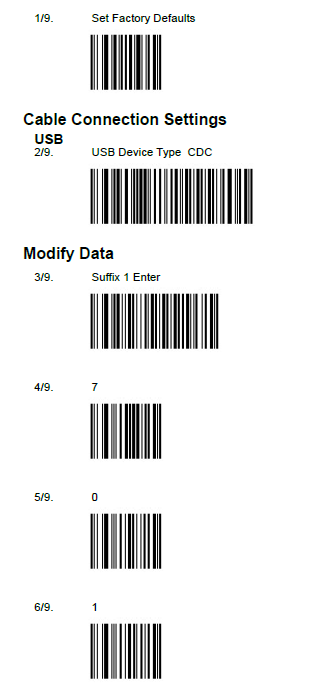
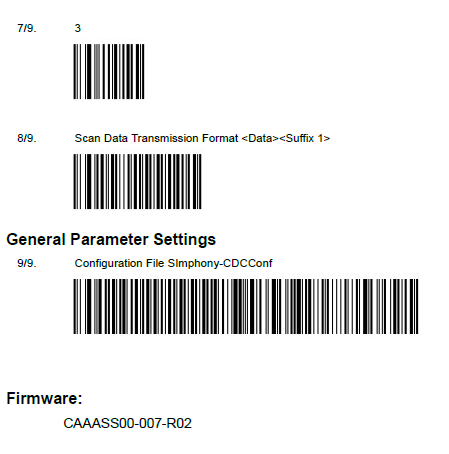
Scan the following barcodes in order, starting with programming barcode 1.
Step 2 - Validate COM Port on the Terminal
1. Open Device Manager:
a. Press Windows key + R to open a “Run” window.
b. In the “Open:” text box, type devmgmt.msc.
c. Click OK. Device Manager opens.
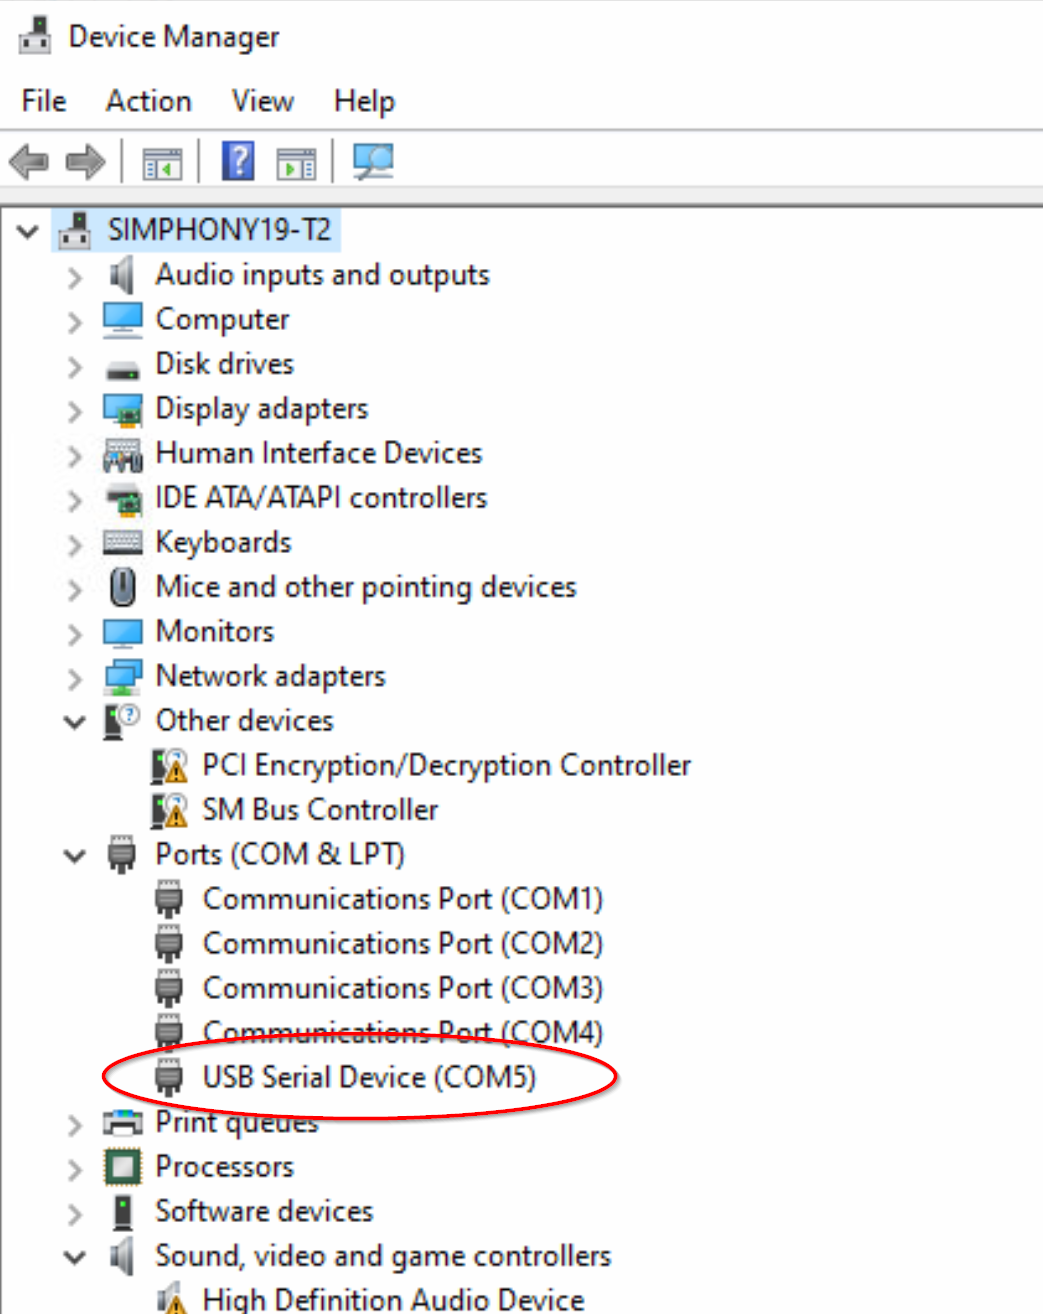
2. Find “Ports (COM & LPT)”. Click to expand.
3. Look for any new USB Serial Device COM port added (e.g., COM5).
Take note of the COM port to which the scanner is assigned. You will need this COM port when configuring the scanner in Simphony EMC Workstation.
Step 3 - Configure Simphony Enterprise Management Console (EMC)
-
Log in to EMC.
-
Select the location.
-
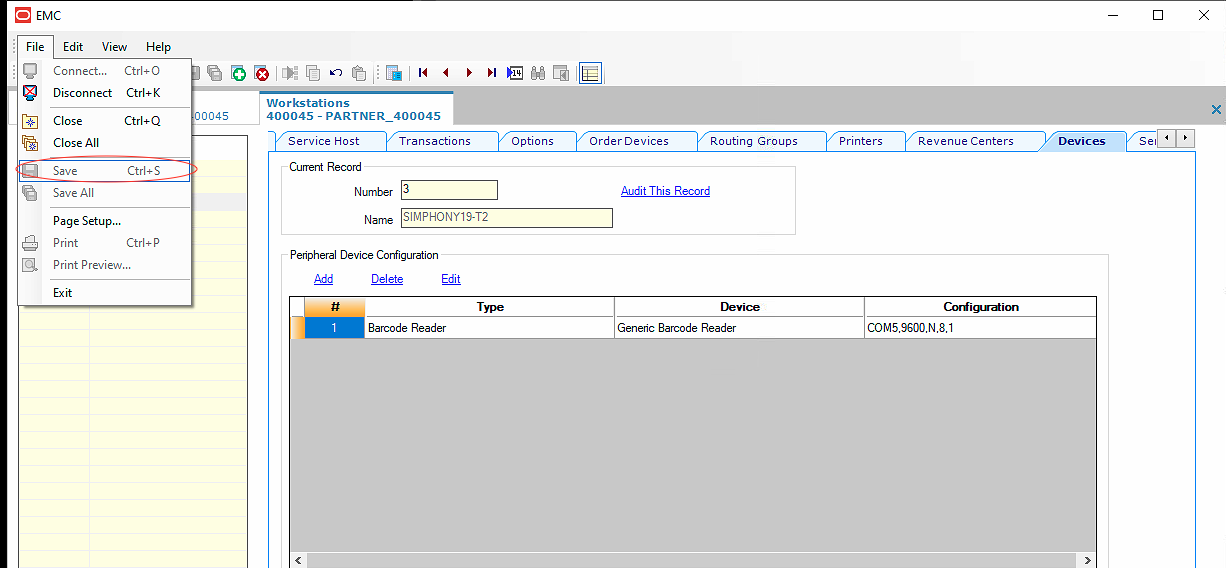
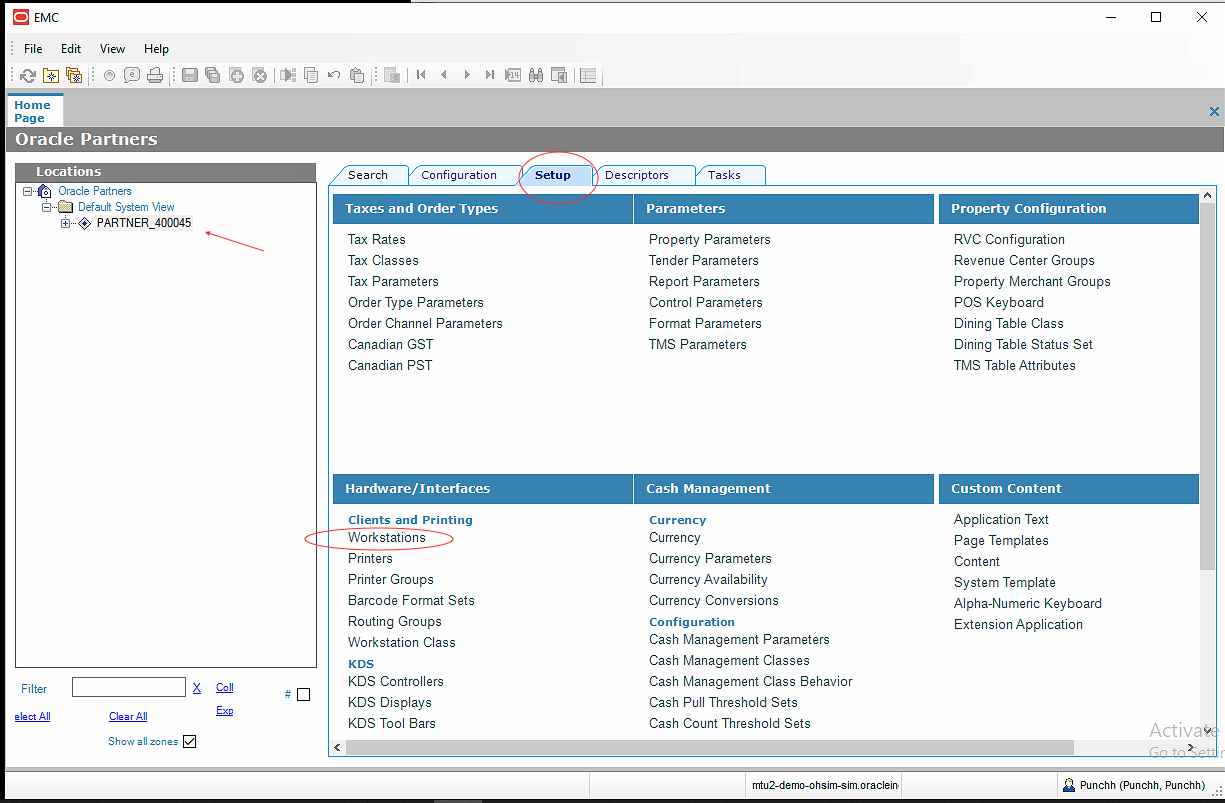
Go to Setup > Hardware/Interfaces > Workstations.
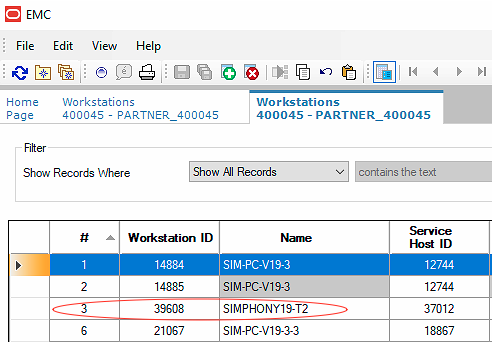
- Select the terminal that you want to configure by double-clicking the terminal.
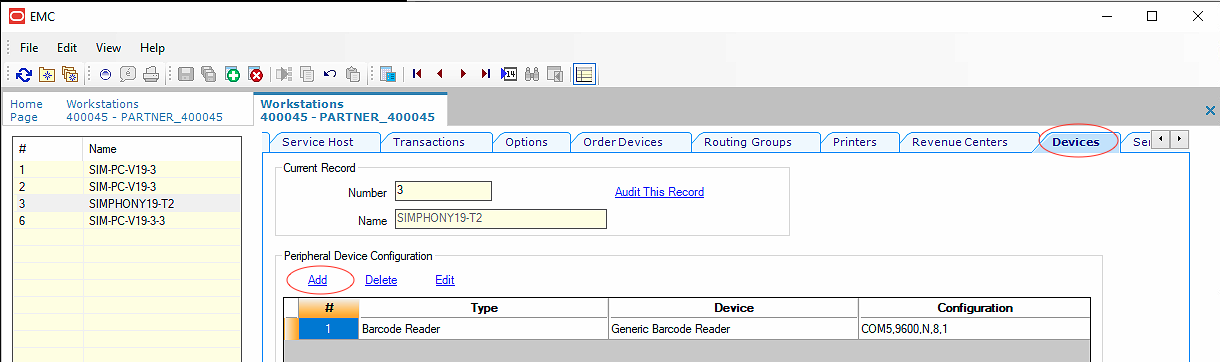
- Go to Devices > Add.
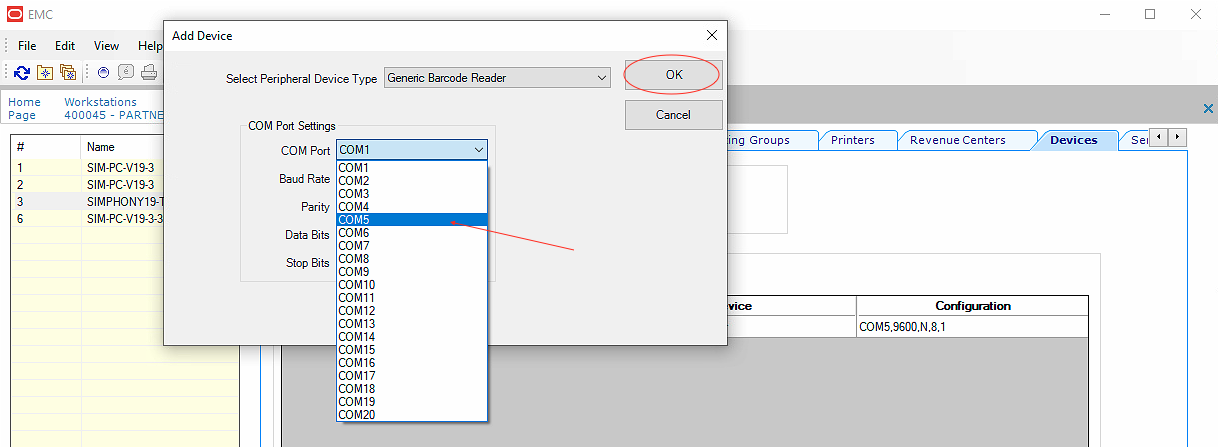
- Select Generic Barcode Reader from the Select Peripheral Device Type drop-down list. Configure the COM port settings per the terminal. Make sure that the selected COM port matches the COM port specified in the Windows Device Manager (e.g., COM5). Then click OK.
- Save the changes and pull the changes to the terminal.