CheckPlease QR Code Contactless Payment Setup Guide
This Contactless Payment feature lets guests pay for their order by scanning a QR code printed on the order receipt. When the QR code is scanned by any mobile device, it redirects the guest to a CheckPlease webapp, where the guest sees all ordered items along with the amount due.
The CheckPlease webapp can be customized to your logo. This personalization ensures that the webapp aligns with your brand identity, providing a seamless and professional experience for your guests.
This feature is native to PAR POS and PAR Pay and is powered by CheckPlease. To utilize this feature, enablement on the CheckPlease platform is also required. For assistance, please contact your sales representative or account manager.
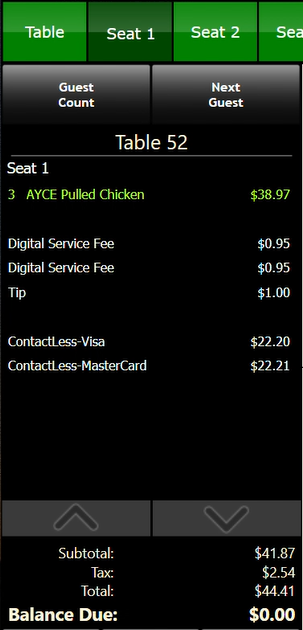
NOTE: An additional Digital Service Fee is added to the check if payment is made by scanning the QR code. The Epson T88 printer supports this feature.
Feature Enablement – Integrations Portal
- Navigate to Integrations Portal > Integrations > All tab > Contactless Payment:
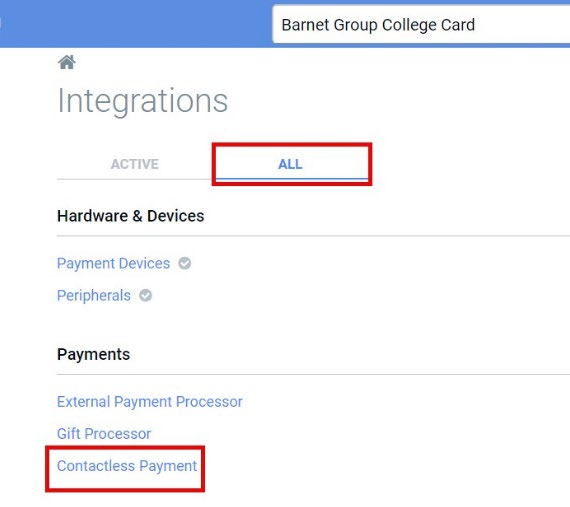
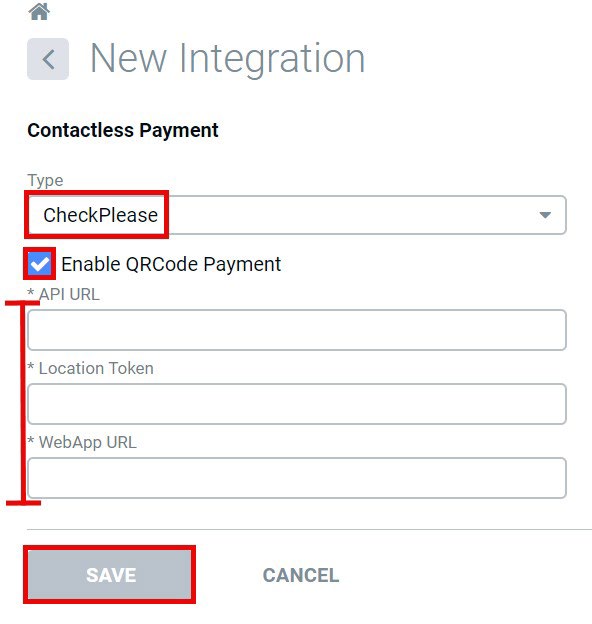
- Select CheckPlease from the "Type" dropdown menu.
- Check the box for "Enable QRCode Payment".
- Populate the following three fields:
- API URL – This is the API endpoint from CheckPlease, which needs to be configured when onboarding a location to use QR code payments.
- Location Token – This token is provided by CheckPlease and is also configured at the time of onboarding.
- WebApp URL – This is the default CheckPlease webapp URL to which users are redirected once they scan the QR code. This is also a part of the onboarding process.
- Click Save.
Feature Enablement – Settings Editor
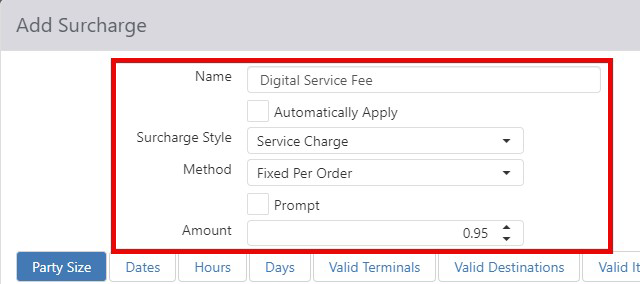
- Navigate to Settings Editor > Surcharges > Add New Surcharge
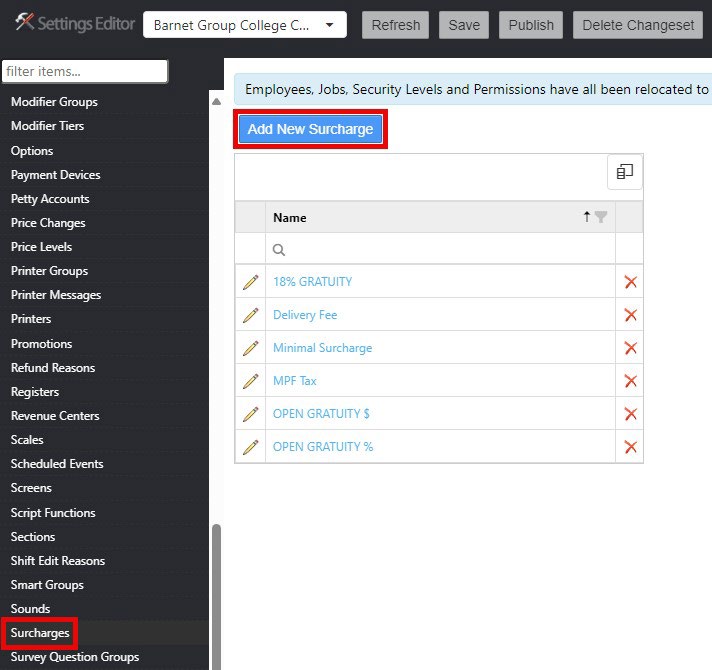
- Populate the available fields as follows:
- Name: Digital Service Fee
- Surcharge Style: Service Charge
- Method: Fixed Per Order
- Amount: Enter the amount value specified in the sales agreement
Note: The settings and surcharge amount must match those on the CheckPlease platform.
- Select OK.
To receive payment from the desired credit card providers, configure tenders in Settings Editor as follows:
- Navigate to Settings Editor > Tenders > Add New Tender
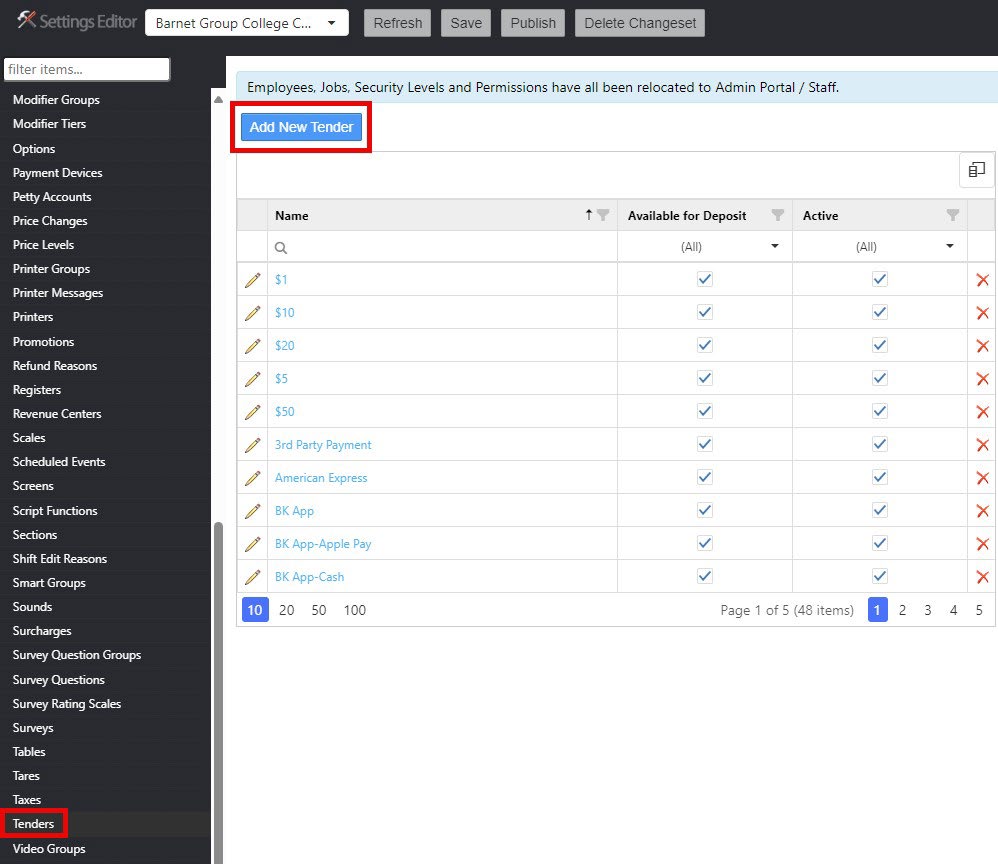
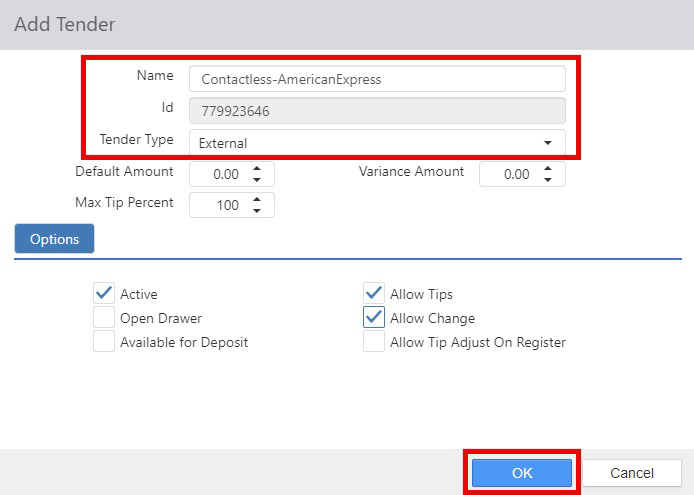
- Name each new tender "ContactLess-AmericanExpress", "ContactLess-Visa", etc.
- Set Tender Type to "External".
- Select the desired checkboxes in the Options section.
- Select OK.
CheckPlease QR Code Workflows
Full Payment Method
Guests can now seamlessly pay for their entire order using their mobile device by simply scanning the QR code on their receipt.
- On PAR POS, add items to the order.
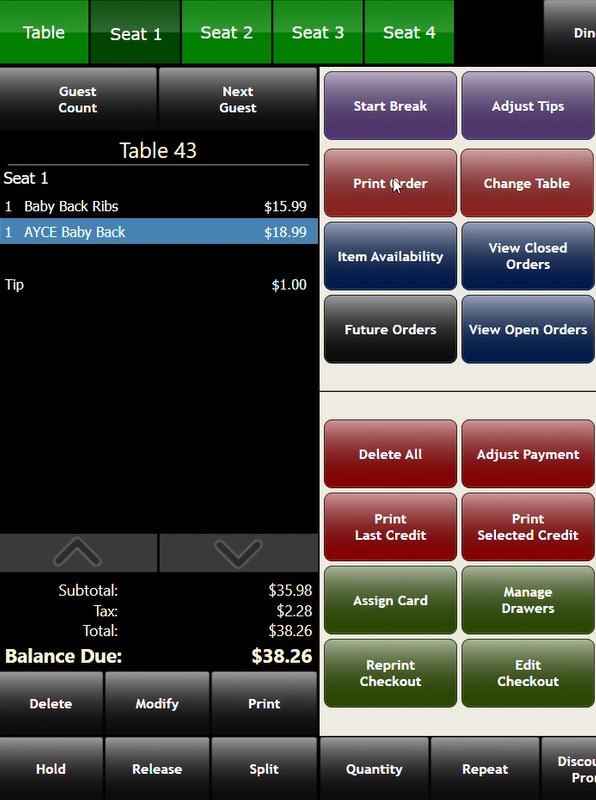
- Select the Print Order button (This triggers the order receipt to print out with a QR code)
- The guest scans the QR code with a mobile device.
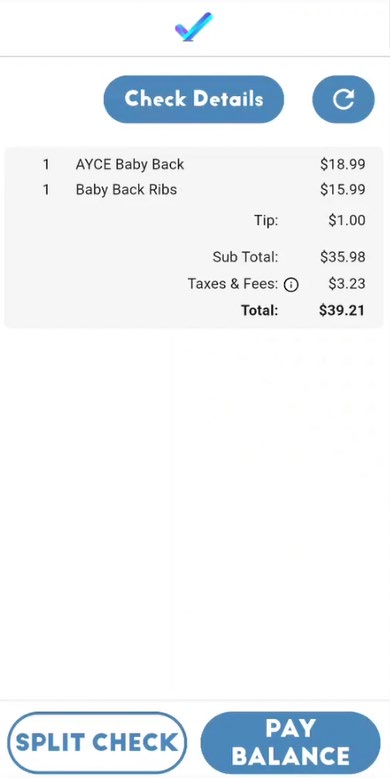
- The Check Please app opens on the mobile device and displays the order details and payment options.
- Guest selects "Pay Balance".
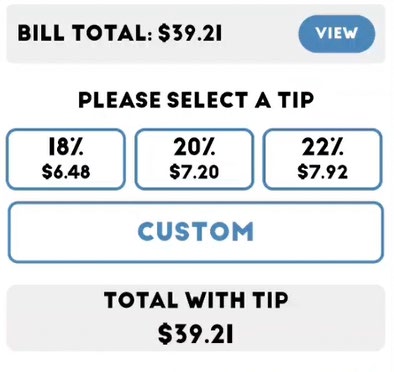
- Guest selects a tip option and selects "Next"
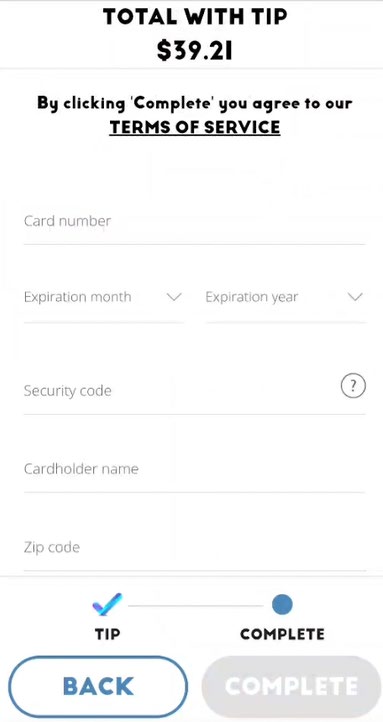
- The guest enters their credit card details and selects "Complete"
- Card number
- Expiration month
- Expiration year
- Security code
- Cardholder name
- Zip code
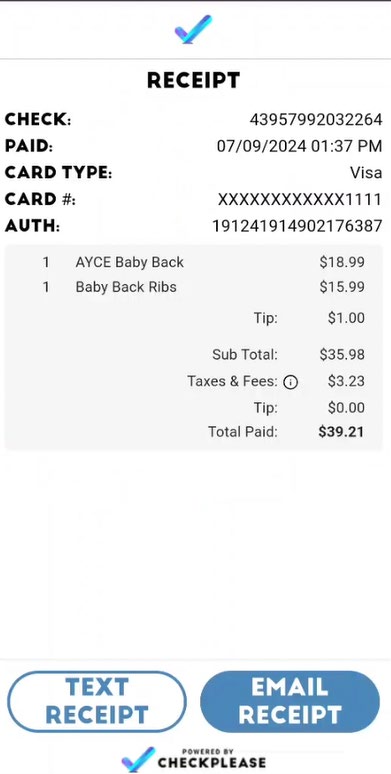
- Guest selects "Done" and an option for receipt delivery
- On the register, the payment is applied to the order and the order may be closed.
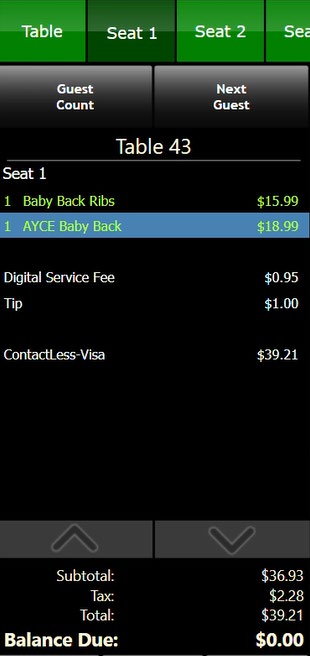
Split Payment Method
Guests can now conveniently split their order into multiple payments by simply scanning the QR code on their receipt.
- On PAR POS, add items to the order.
- Select the Print Order button (this triggers the order receipt to print out with a QR code).
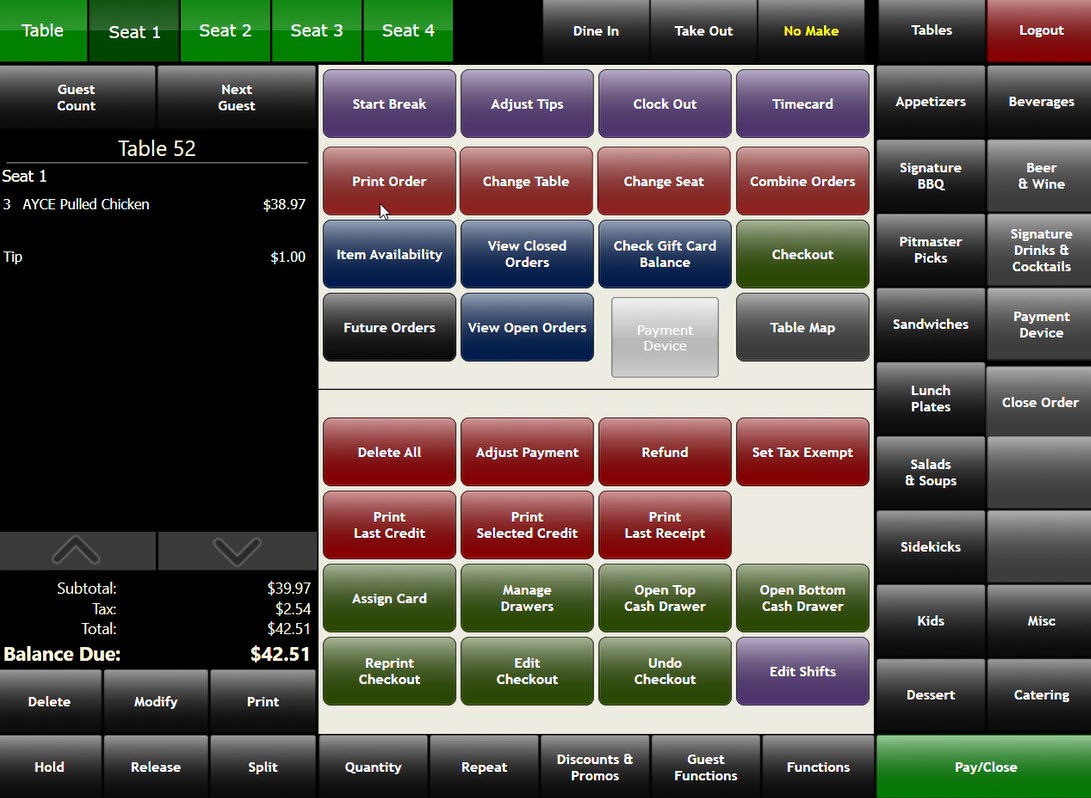
- The guest scans the QR code with a mobile device.
- The Check Please app opens on the mobile device and displays the order details and payment options.
- Guest selects the "Split Check" option.
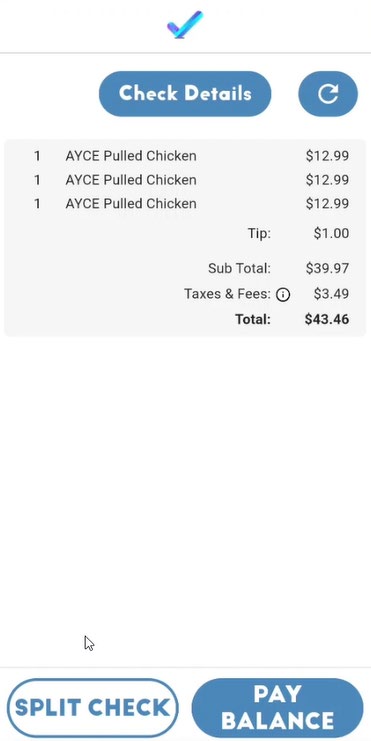
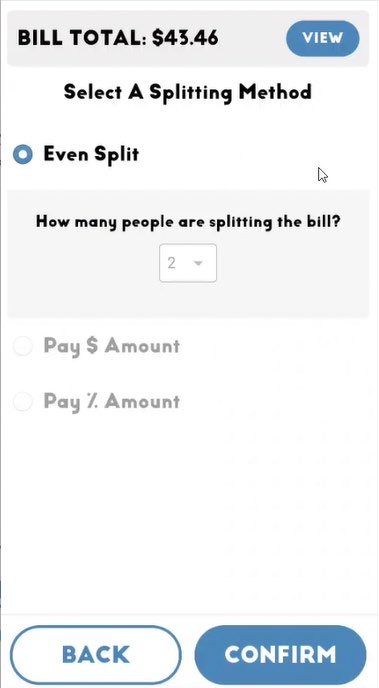
- Guest selects a splitting method and selects "Confirm":
- Even Split: Guest enters how many people are splitting the bill evenly.
- Pay $ Amount: Guest enters the dollar amount they will pay on the split.
- Pay % Amount: Guest enters percentage of bill they are paying on the split.
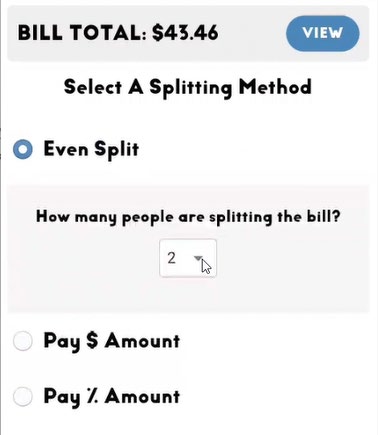
- Guest selects a tip option and selects "Next".
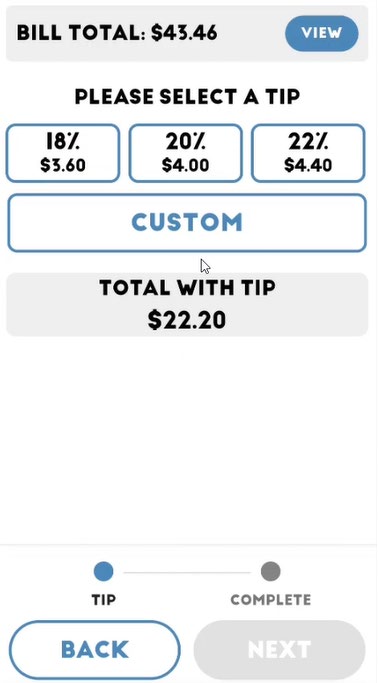
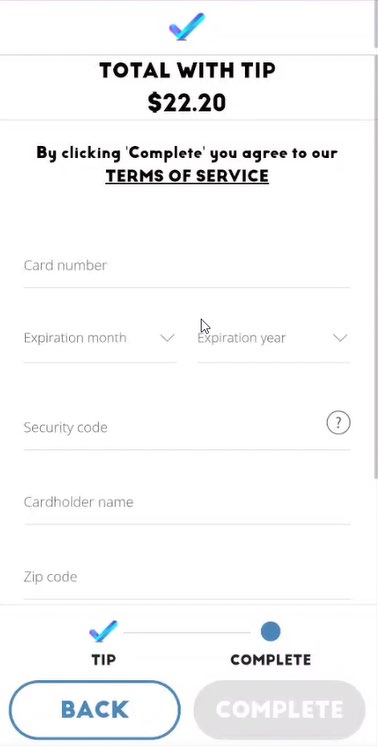
- The guest enters their credit card details and selects "Complete"
- Card number
- Expiration month
- Expiration year
- Security code
- Cardholder name
- Zip code
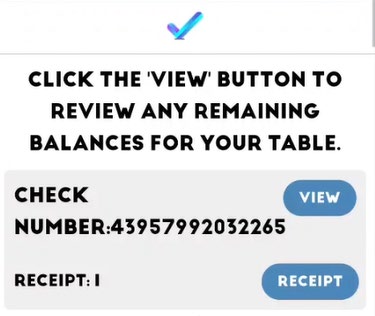
- Guest selects the "View" button to review any remaining balances for the table:
- Guest selects "Pay Balance" to pay off the remaining balance of the order using a different guest's card.
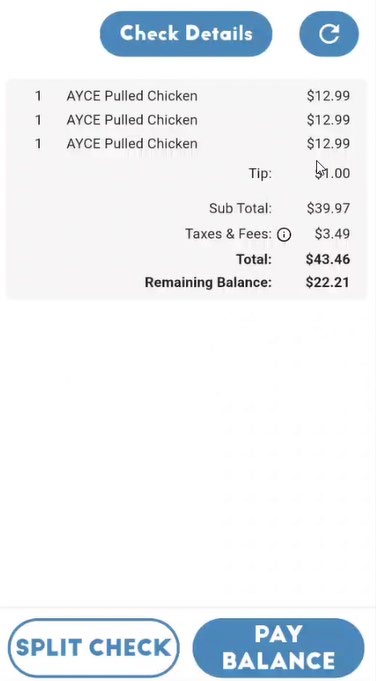
- Additional guest/s select "Confirm".
- Additional guest/s select tip amount and enter their credit card details.
- Guest selects "Done" when all payments are complete.
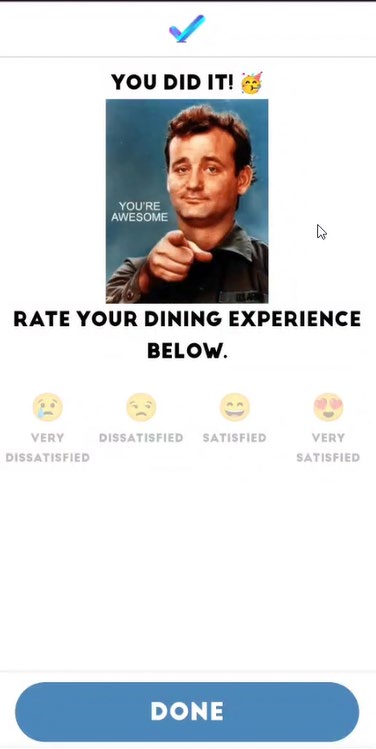
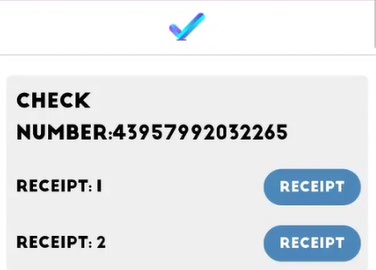
- Guests may select the "Receipt" button to view individual receipts.
- The payment transactions are reflected on the register.