Product Group Swaps
Product Group Swaps let you configure substitution options once at the product group level. Every product connected to that group receives them automatically, so you don't have to configure swap lists on each product individually.
Product Group Swaps require Menu V2 and are configured at the brand level. Store managers can view substitution settings but cannot add or change them.
Overview
When you add a swap list to a product group's Swaps tab, every product directly connected to that group receives the same list on its Substitute tab. The inherited list is labeled From product group on the product.
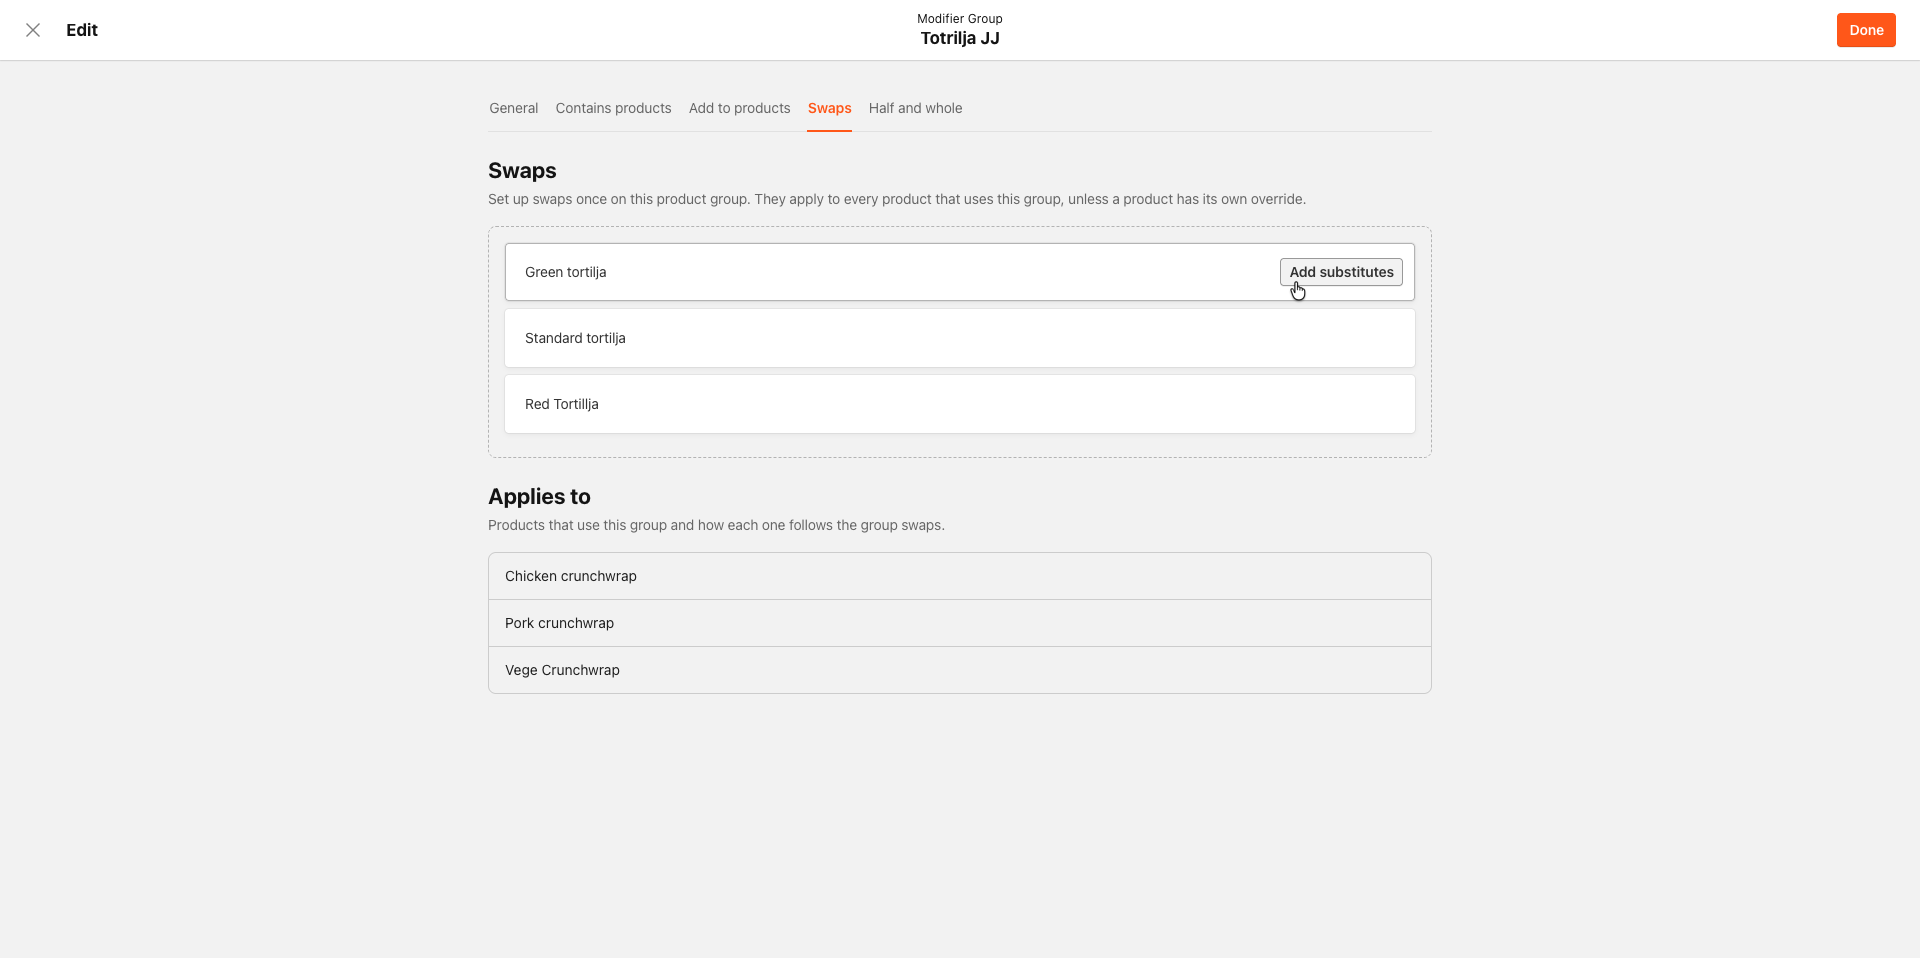
The Applies to section of the Swaps tab shows the status of every connected product. Follows group means the product is using the group's swap list. Has override means the product has a custom swap list.
When you update the group's swap list, products with Follows group status receive the updated list automatically. Products with Has override status keep their custom list and are not affected. After saving, a confirmation message shows how many products were updated and how many overrides were kept.
Inherited swaps work the same as manually configured swaps at checkout. Guests see the Swap button next to configured modifier items, and their selections carry through to the cart and the order.
Prerequisites
Before configuring Product Group Swaps, make sure:
- Your brand is on Menu V2.
- You have Brand Manager access in Management Center.
- The products you want to configure are already connected to the product group.
Configure swaps on a product group
-
Log in to Management Center with your Brand Manager credentials.
-
Navigate to Menu > Product Groups.
-
Open the product group you want to configure.
-
Click the Swaps tab.
-
Set up your substitute lists for each origin product under Add substitutes.
-
Review the Applies to section to confirm which connected products will receive the swap list.
-
Click Save.
A confirmation message appears showing how many products were updated and how many overrides were kept.
Manage product-level overrides
You can override the group's swap list for any individual product.
Override a product's swap list
- Navigate to Menu > Products.
- Open the product you want to customize.
- Go to the Substitute tab.
- Modify the substitution list for the relevant origin. The From product group label is removed and the product's status in the group changes to Has override.
- Click Save.
Revert an override to the group default
- Navigate to Menu > Products.
- Open the product with the override.
- Go to the Substitute tab.
- Find the origin with the override and click Use group default.
- Click Save.
The product returns to the group's swap list. Its status in the Applies to section changes back to Follows group.
Guest experience
When a guest customizes a product with swaps configured (whether set directly or inherited from a product group), a Swap button appears next to eligible modifier items.
- The guest taps Swap to open a list of available replacement items.
- The guest selects a replacement.
- The cart updates, showing the original item removed and the replacement added.
- The swap carries through to the order and is reflected on the POS ticket.
Guests can change or undo a swap before checkout.
Limitations
Products that use a group through nesting only (a group nested inside another group) do not receive swaps from the outer group.
If you remove all substitutions from a product group, the inherited swap lists are removed from connected products with Follows group status. Products with Has override status are not affected.
Swap configuration applies at the brand level only. Store managers see the Substitute tab in read-only mode.
