Catering Delivery Dispatch Module
Overview
The Catering Delivery feature within Dispatch allows you to manage end-to-end delivery operations for catering orders. From a centralized hub, you can view all catering delivery orders, assign drivers or delivery service partners (DSPs), update delivery statuses, and communicate with customers — all in one place.
This article covers how to set up and use Catering Delivery Hubs, manage drivers, work with the dispatch calendar, configure hub-level delivery settings, and set up notifications for drivers and customers.
Prerequisites
Before you can access Catering Delivery in Dispatch, ensure the following conditions are met:
- Catering feature: The Catering feature must be enabled at the product enablement level.
- Catering Delivery purpose: At least one store group must have a Catering Delivery purpose assigned.
Deleting a purpose removes all data associated with it. Deleting a store group removes all data associated with that store group. Please proceed with caution.
Store Groups
Store groups serve as the foundation for organizing your delivery hubs. Each store group can be configured with one or both of the following purposes:
| Purpose | Description |
|---|---|
| Catering Delivery | Manage catering deliveries, assign drivers or DSPs, and track delivery status from assigned to delivered. |
| Delivery Service Partners | Connect and manage delivery partners to handle delivery operations across your stores. |
A single store group can include both purposes, giving you flexibility in how you organize delivery operations.
Catering Delivery Hubs
The Catering Delivery Hubs page displays a list of all store groups that have the Catering Delivery purpose enabled. Selecting a hub from the list opens its dedicated hub page.
Each hub page is organized into four tabs: Dispatch, Calendar, Drivers, and Settings.
Dispatch Tab
The Dispatch tab provides a comprehensive table view of all catering delivery orders placed for stores within the selected hub. This is your primary workspace for managing delivery assignments and tracking order statuses.
Table Columns
The dispatch table displays the following information for each order:
| Column | Details |
|---|---|
| Store Name | The store the order was placed at. |
| Order Number | The unique identifier for the order. |
| Customer Name | The name of the customer who placed the order. |
| Customer Email | The customer's email address. |
| Delivery Status | Current status: Unassigned, Assigned, Picked Up, or Delivered. |
| Assigned Driver/DSP | The driver or DSP currently assigned to the order. |
| Payment Method | How the customer is paying for the order. |
| Payment Status | Whether payment has been completed. |
| Amount | The total order amount. |
| Pickup Time | Scheduled pickup time (sorted earliest first by default). |
Filters
You can filter the dispatch table using the following criteria. Each filter supports multiple selections:
- Stores: Filter by specific stores within the hub.
- Drivers: Filter by assigned drivers, including enabled DSPs.
- Delivery Status: Filter by Unassigned, Assigned, Picked Up, or Delivered.
Order Details & Delivery Assignment
Selecting any order in the dispatch table opens its order details panel. From here, you can view full order information and manage delivery assignments.
Delivery Statuses
Each order progresses through the following delivery statuses:
| Status | Description |
|---|---|
| Unassigned | No driver or DSP has been assigned yet. |
| Assigned | A driver or DSP has been assigned to the order. |
| Picked Up | The driver has picked up the order. |
| Delivered | The order has been delivered to the customer. |
Assigning a Driver or DSP
To assign a delivery to a driver or DSP:
- Select an order in the dispatch table to open its order details panel.
- Open the Assign delivery dropdown.
- Select from the available options:
- Driver — Select a driver from the list. You'll see their active order count and maximum capacity (if available).
- Delivery service partners (automatic) — Available when your hub has two or more DSPs configured. Lets the hub's selection strategy (cheapest, fastest, or preferred) pick a DSP automatically.
- Individual DSP — If your hub has two or more DSPs configured, each DSP appears as its own row showing the provider's name, icon, and current active order count in the hub. Selecting a specific DSP sends the order directly to that provider, bypassing the hub's strategy for this order only. This does not change the hub's settings or affect any other orders.
- Confirm the assignment. The customer is notified automatically.
If no drivers have been added to the hub, you'll see a corresponding message. Navigate to the Drivers tab to add drivers first.
If your hub has only one DSP configured, that provider appears as a single row in the dropdown with no automatic option — there is nothing to choose between.
If the DSP can't take the order
If the DSP you selected is unavailable, an error dialog appears and the order stays unassigned. There is no automatic fallback to another provider. Reopen the dropdown and select again — either the same provider, a different DSP, or the automatic option.
If "Confirm delivery times before assigning" is enabled for the hub
Before the assignment is finalized, a modal displays the DSP's estimated pickup time, estimated delivery time, and delivery fee for your review. You must approve the quote before the order is sent. See Confirm Delivery Times Before Assigning for full details.
Updating Delivery Status
Once a driver or DSP is assigned, you can manually update the delivery status to Picked Up or Delivered. Each status change requires confirmation and automatically notifies the customer.
When the status is changed to Delivered, the assignment option is hidden from the interface.
Unassigning or Reassigning
You can unassign a driver or reassign an order to a different driver or DSP as long as the order is in the Assigned or Picked Up status. Both actions require confirmation. Unassigning an order from a DSP cancels the DSP assignment.
Reassigning a catering order to a different DSP goes through the same delivery time confirmation step as an initial assignment (if that setting is enabled for the hub), since it is a new provider assignment. The reassignment confirmation runs first, followed by the quote modal. Reassigning from a DSP to a driver does not trigger a quote or modal.
Calendar Tab
The Calendar tab provides a visual, timeline-based view of catering delivery orders organized by driver. Instead of a store-based view, the calendar displays each driver and DSP with their assigned catering delivery orders.
How the Calendar Works
The calendar opens to the current day and shows a date range spanning three days forward. Dates with at least one catering delivery order display a dot indicator below the date. Past dates are disabled and cannot be selected. Selecting a future date updates the page title and displayed orders accordingly.
Driver View
Drivers and DSPs are listed as expandable accordions. Clicking on a driver reveals their orders across three days from the selected date. Each order appears as a color-coded card based on its delivery status and includes:
- Delivery time, customer name, and order number
- Order total, type, and a brief order summary
- Current delivery status
Each day header shows the date and a summary of the number of orders with the total amount. Clicking on an order card opens the order details drawer.
Calendar Filters & Search
The calendar supports the same filters as the Dispatch tab (stores, drivers, delivery status). When filters are applied, only relevant drivers and orders are shown. Dot indicators on the calendar also update to reflect the applied filters.
You can also search for orders by email address or order number. Search results are scoped to the currently selected days.
Drivers Tab
The Drivers tab is where you create and manage the delivery drivers assigned to your hub.
Creating a Driver
To add a new driver:
- Click Create Driver.
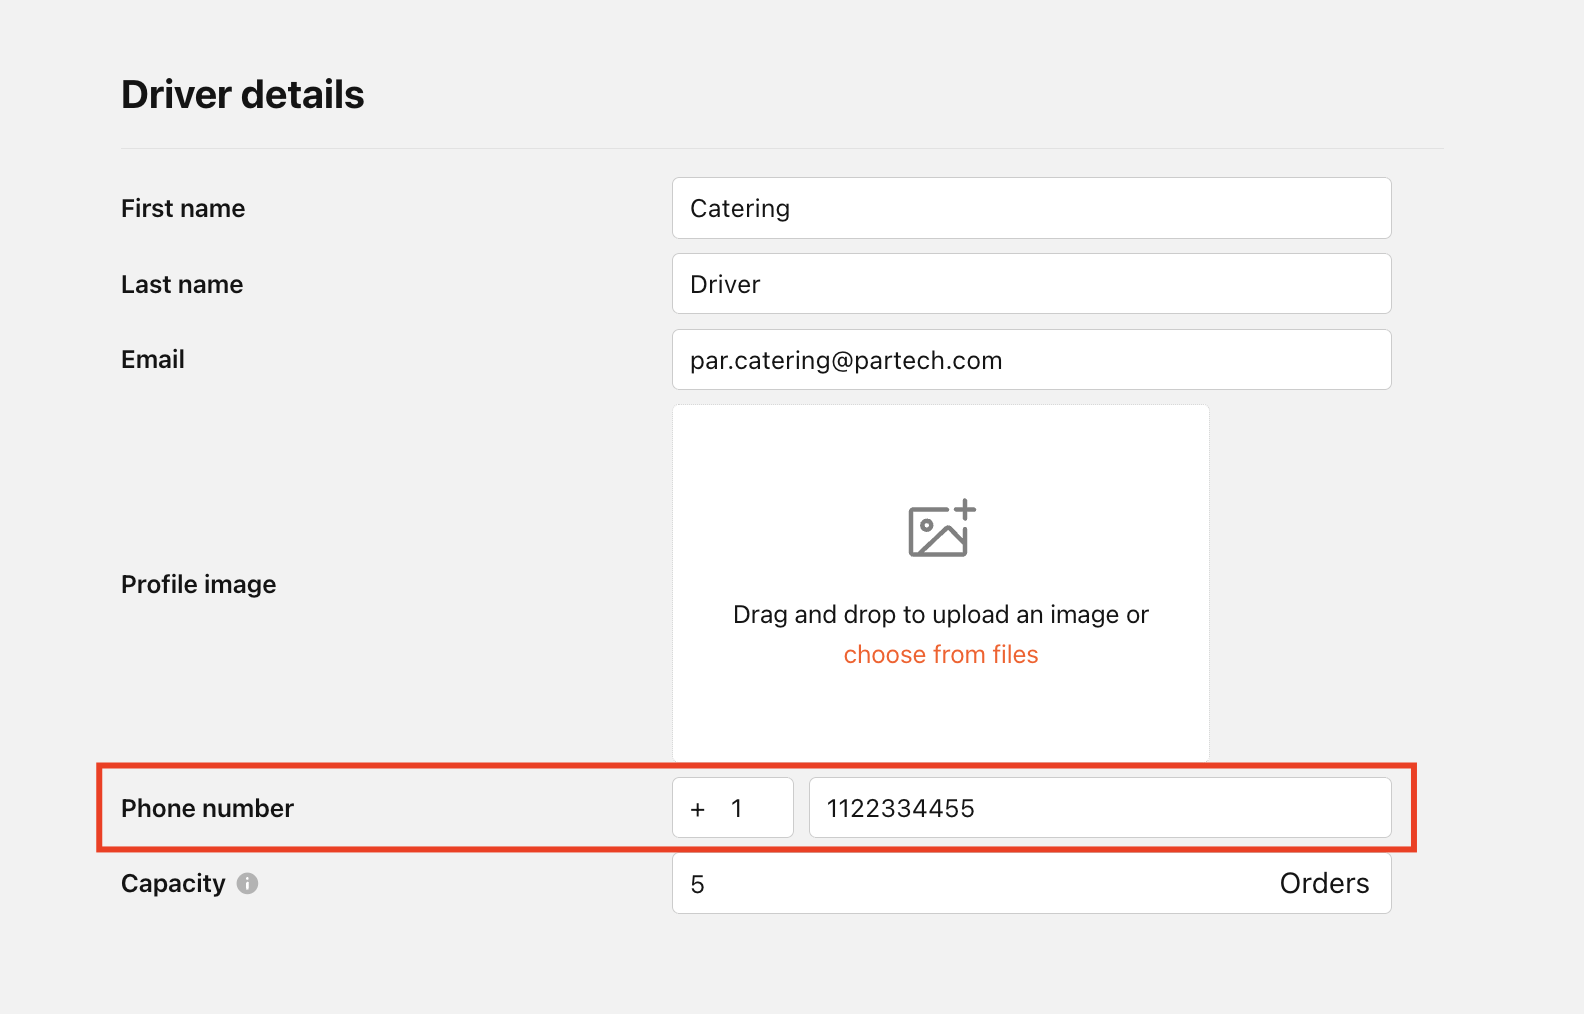
- Fill in the required fields: First Name, Last Name, and Email.
- Optionally add a profile image, phone number, and delivery capacity.
- Click Confirm to create the driver.
Delivery capacity defines the maximum number of delivery orders a driver can handle within a specific time window. Adding a phone number is required for the driver to receive SMS notifications when Driver SMS notifications are enabled for your brand.
Managing Drivers
Once created, drivers appear in a table displaying their name, email, phone number, and capacity. From this table you can:
- Edit a driver: Click on the driver row to open the edit modal. Make changes and save.
- Delete a driver: Click the trash icon to remove the driver. You'll be asked to confirm, and all actively assigned orders will be automatically unassigned.
If you close the edit modal with unsaved changes, a confirmation dialog will ask whether you want to discard those changes.
Settings Tab
The Settings tab contains hub-level configuration options for catering delivery behavior.
Confirm Delivery Times Before Assigning
When this setting is on, assigning a catering order to a DSP shows the provider's estimated pickup time, estimated delivery time, and delivery fee for your review before the order is sent. The order is not assigned until you approve the quote.
This setting is off by default and is configured per hub. Turning it on for one hub does not affect any other hub.
To enable this setting:
-
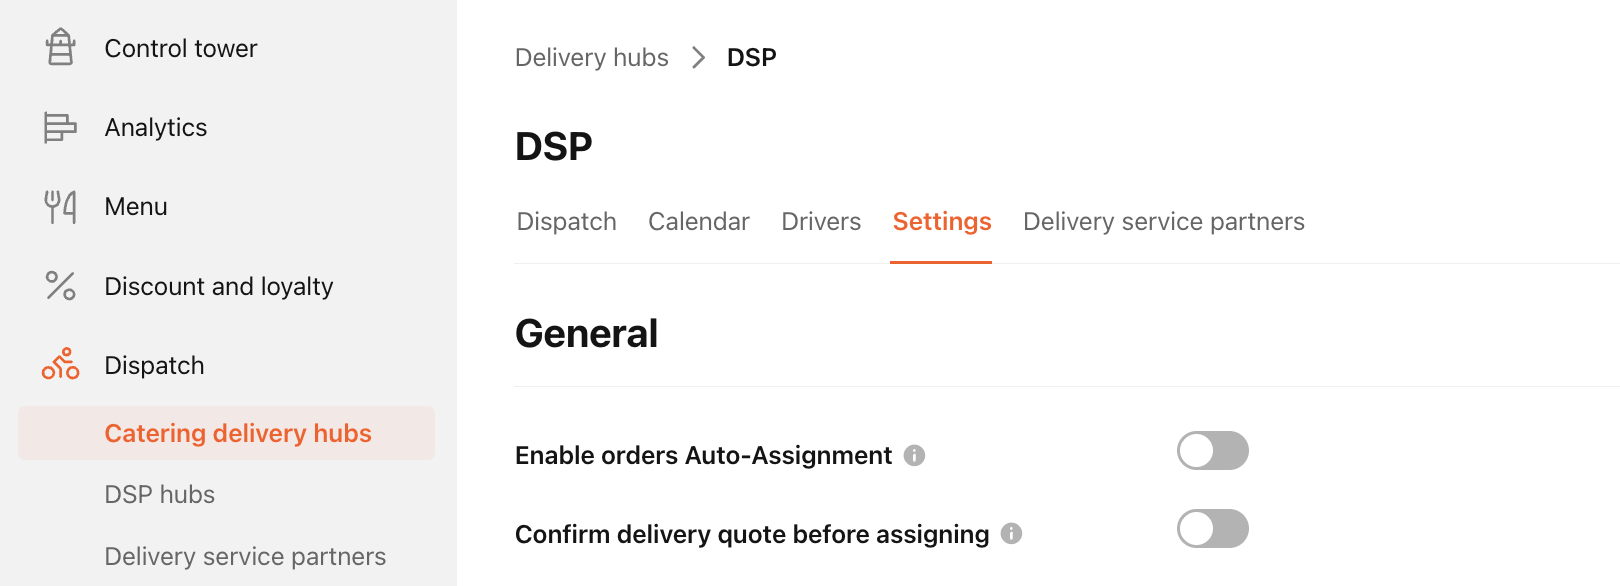
Open the hub's Settings tab.
-
Under General, locate Confirm delivery times before assigning.
-
Toggle it on.
What the confirmation modal shows
When you assign a catering order to a DSP and this setting is on, a confirmation modal appears with:
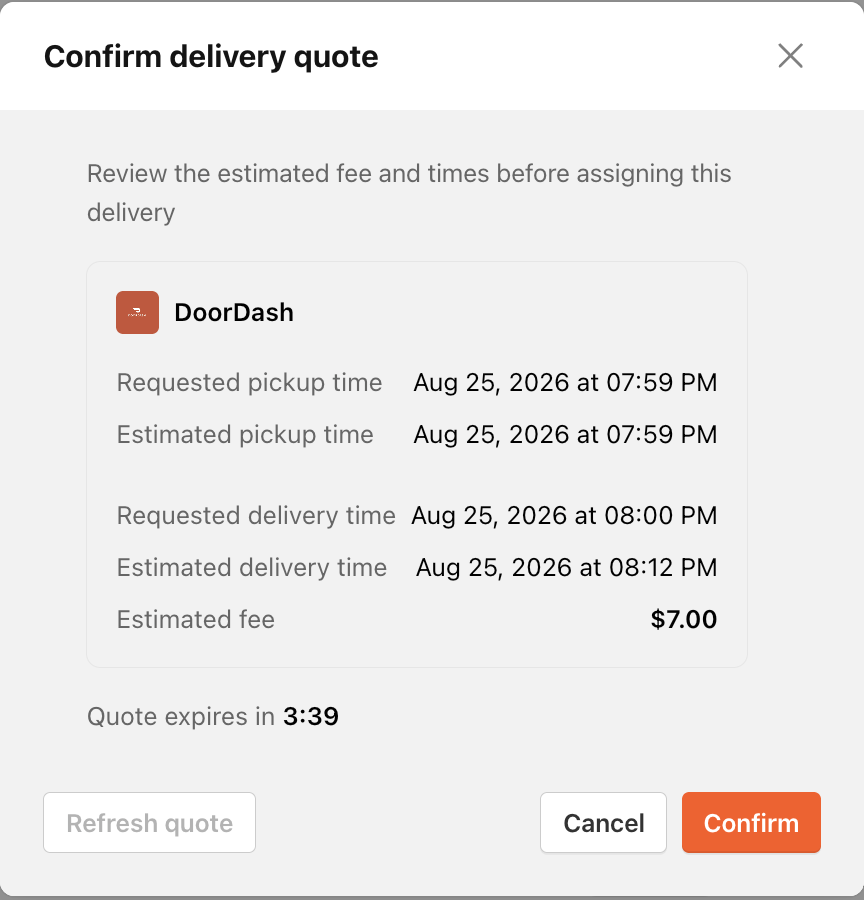
- The provider's name and icon
- Requested and estimated pickup time
- Requested and estimated delivery time
- Delivery fee (as provided by the DSP)
Approve the quote to complete the assignment. If you close the modal without approving, the order remains unassigned. You can then select a different DSP, assign a driver, or choose the automatic option.
This confirmation step applies whenever you send a catering order to a DSP:
- Manual pick — You select a specific provider by name.
- Automatic selection — You choose "Delivery service partners" and let the hub select a provider based on its strategy.
- Single-DSP hubs — The confirmation step still applies, since the order is still being sent to a provider.
Driver assignments are not affected. Assigning to a driver skips the confirmation step entirely, regardless of this setting. Background auto-assignment ("Enable orders Auto-Assignment") is also unaffected — that flow runs without an operator present and cannot display a confirmation modal.
Quote expiry
Each quote is valid for a limited time. The modal displays a countdown showing how long you have to approve. If the countdown reaches zero:
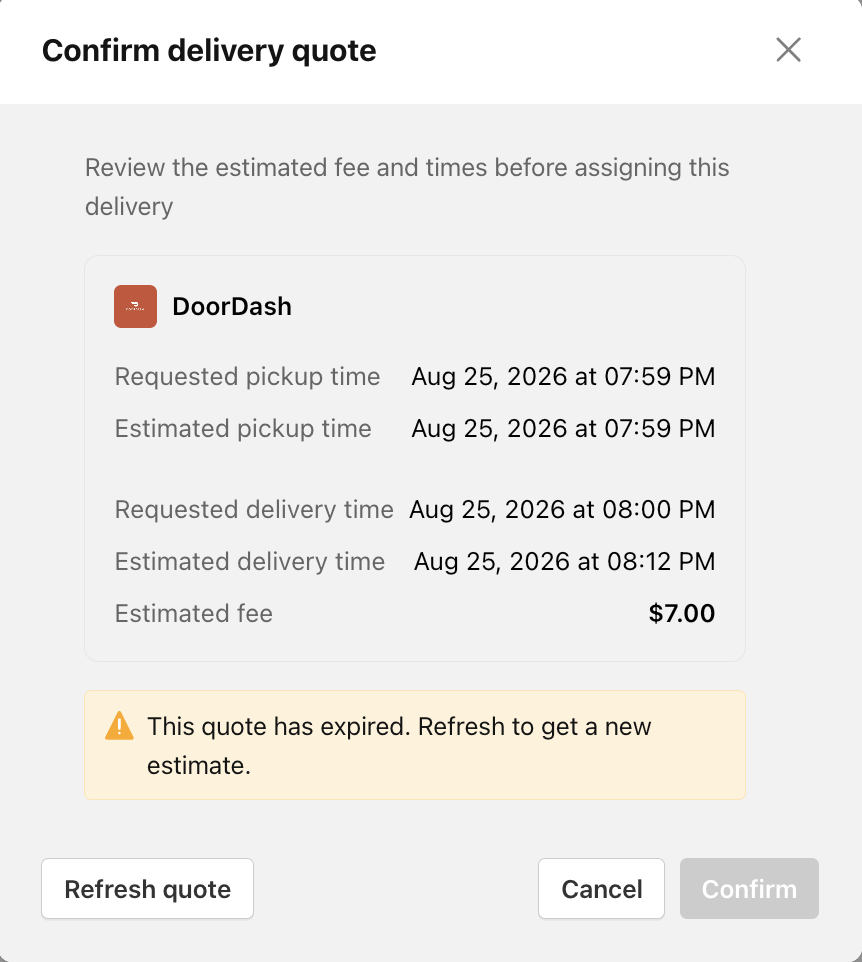
- The quote can no longer be approved.
- Select Refresh to request a new quote and reset the times, fee, and countdown.
The modal does not automatically refresh or close — you must select Refresh to continue. If you approve right as the quote expires, the system performs a final check with the provider. If the provider no longer honors the quote, the order stays unassigned and the modal returns to the expired state. Select Refresh to try again.
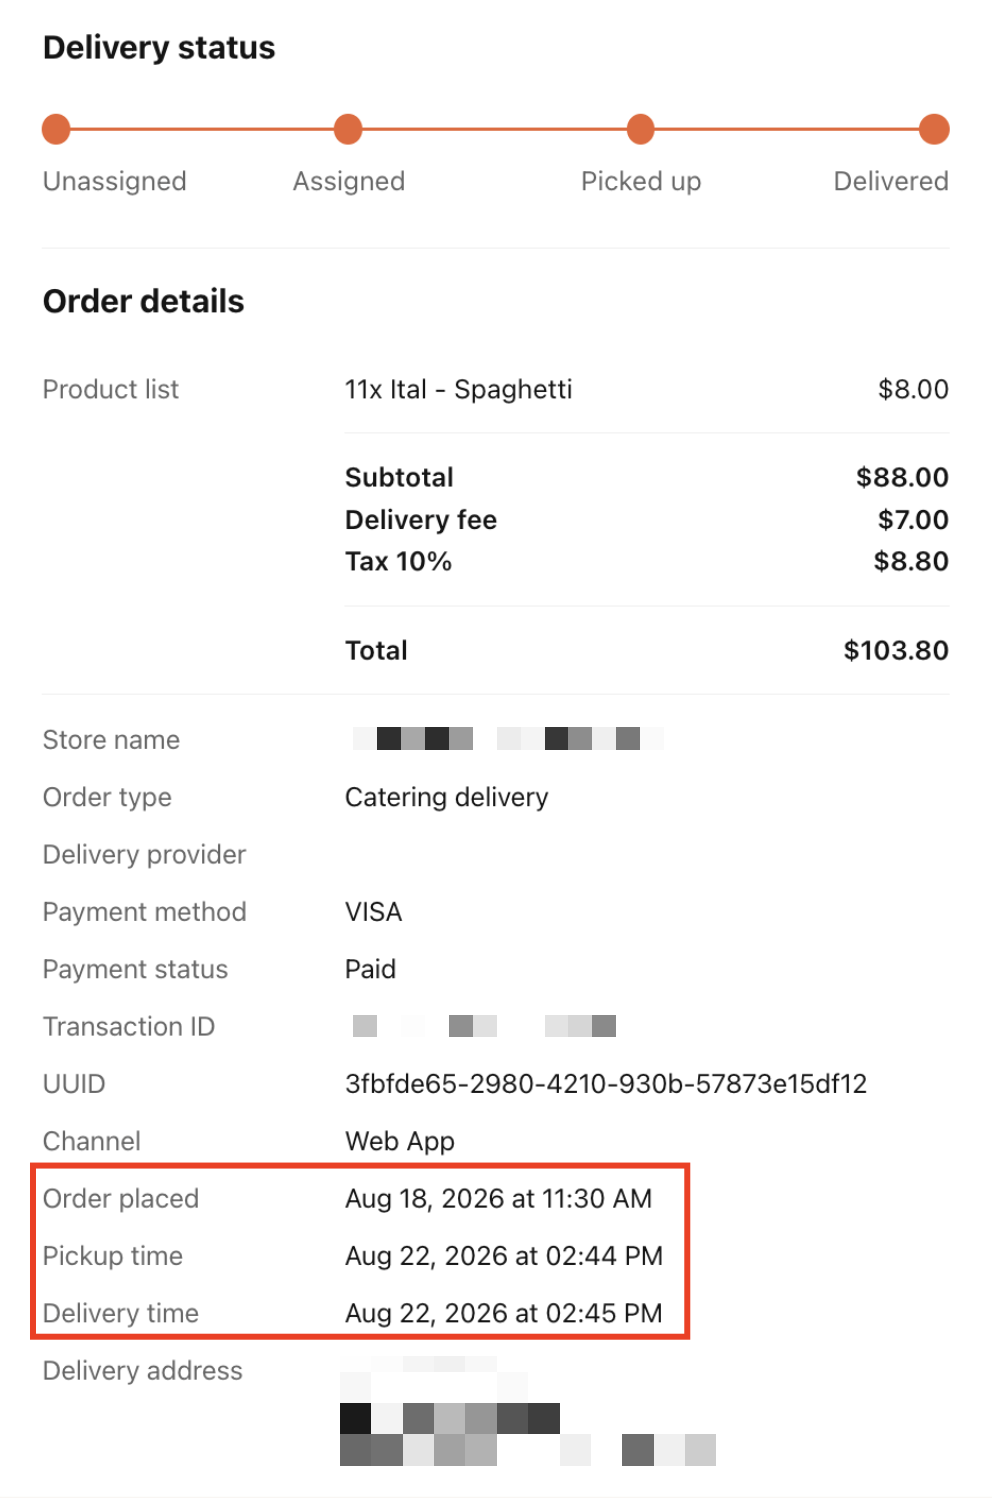
After an order is assigned, the DSP may revise its estimated pickup and delivery times as the delivery window gets closer. The times shown in the modal reflect the provider's estimate at the moment of assignment. Current expected times are displayed on the order details screen.
DSP Hubs
If the Delivery Service Partners feature is enabled at the product level, a separate DSP Hubs section appears in Dispatch. This page lists all store groups with a DSP purpose.
Each DSP Hub page contains two tabs:
- Delivery Service Partners: Add and manage DSPs within the hub, limited to DSPs enabled at the brand level.
- Settings: Hub-level configuration settings.
DSPs can also be managed at the brand level through the Delivery Service Partners section in Dispatch.
A store must belong to a store group with a DSP purpose and have an active DSP configuration to assign Catering Delivery orders to DSPs. In a hub with two or more DSPs configured, you can select a specific provider when assigning an order. See Assigning a Driver or DSPfor details.
Order Desk Integration
When a catering delivery order is accessed through Order Desk, a Driver Details section appears at the bottom of the order modal. This section shows the current delivery status, driver or DSP assignment information, and a deep-link button that opens the same order directly in the Dispatch module in a new browser tab.
Use the deep-link button for quick access to full dispatch functionality directly from Order Desk.
Email Notifications
The Catering Delivery feature sends automatic email notifications to keep all parties informed throughout the delivery process.
| Recipient | Notification Triggers |
|---|---|
| Customer | Receives notifications when a driver is assigned, when the order is picked up, and when it is delivered. |
| Driver | Receives an email when assigned to an order and when unassigned from an order. If Driver SMS notifications are enabled for your brand, drivers also receive a text message for these events plus a reminder approximately one hour before pickup. See Driver SMS Notifications. |
| Catering Manager | Receives a notification if a DSP cancels the delivery for an order that was previously successfully assigned. |
Email notifications include a delivery-status progress bar and customizable title and description fields for each notification scenario.
Notification Scenarios
| Event | Email Summary |
|---|---|
| Order assigned to driver | Informs the customer that a driver is scheduled for delivery and will pick up the order once the pickup window begins. |
| Order picked up | Notifies the customer that the driver has picked up the order and is on the way to the delivery location. |
| Order delivered | Confirms that the order has been delivered. |
| Driver assigned (to driver) | Informs the driver about the new delivery assignment and prompts them to review pickup details. |
| Driver unassigned (to driver) | Notifies the driver that they are no longer assigned to the delivery. |
| Delivery cancelled by DSP | Alerts the catering manager that the DSP has cancelled delivery and a new driver needs to be assigned. |
Driver email notifications are sent to the email address configured during driver setup in the Drivers tab.
Driver SMS Notifications
When Driver SMS notifications are enabled, your brand's first-party delivery drivers receive a text message in addition to the standard email at the following points during a catering delivery:
| Trigger | When it sends | Message includes |
|---|---|---|
| Assigned | A catering delivery order is assigned to the driver | Order code, pickup time |
| Unassigned | An order is unassigned from the driver | Order code |
| Reminder | Approximately one hour before the order's scheduled pickup | Order code, pickup time |
For a text to send, both of the following must be true:
- The brand-level Driver SMS notifications toggle is on.
- The driver has a valid phone number saved in their driver profile.
If either condition is not met, the driver continues to receive the standard email with no text message. Email and SMS fire independently off the same triggers — a driver with only an email address on file gets the email only; a driver with both gets both.
This feature applies to your brand's first-party delivery drivers only. Third-party marketplace couriers and DSP drivers (such as DoorDash Drive or Uber Direct) do not receive these messages.
Enabling Driver SMS Notifications
Driver SMS notifications are a brand-level setting. There is no per-store or per-hub override.
-
Go to Brand (All Stores) → Configurations → Brand settings → Settings.
-
Find Driver SMS notifications (located just below the DSP branding toggle).

-
Toggle it on.
No additional setup is required. The feature uses your brand's existing SMS Sender ID automatically.
To review or update your SMS Sender ID, go to Brand (All Stores) → Configurations → Brand settings → Settings.
