How to Make a Custom List Segment End to End: From Best Practices to Troubleshooting
Overview
A Custom List Segment in the Punchh Platform allows you to create a targeted group of guests based on specific email addresses or by freezing an existing segment. This feature is ideal for brands that need to build segments that cannot be automatically generated within the platform, such as importing a list of guests from an external source.
How to Create a Custom List Segment
Follow these step-by-step instructions to create a Custom List Segment in the Punchh Platform:
- Click on the Segment Type field and search for “Custom list.”
- Choose Custom list. The List type field will appear.
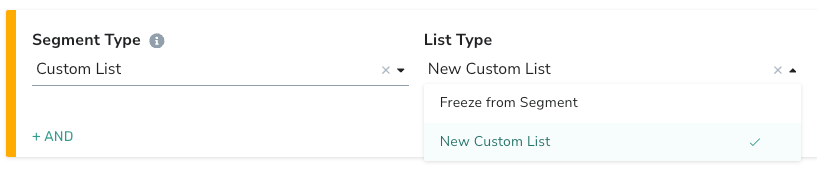
- You have two options:
- Freeze from Segment: Create a custom list by freezing an existing segment.
- New Custom List: Create a new list by uploading guest information.
Option A: Freeze from Segment
- Select the segment you wish to freeze.
- Click Save and Close.
Option B: New Custom List
- A new custom list window will appear.
- You can either:
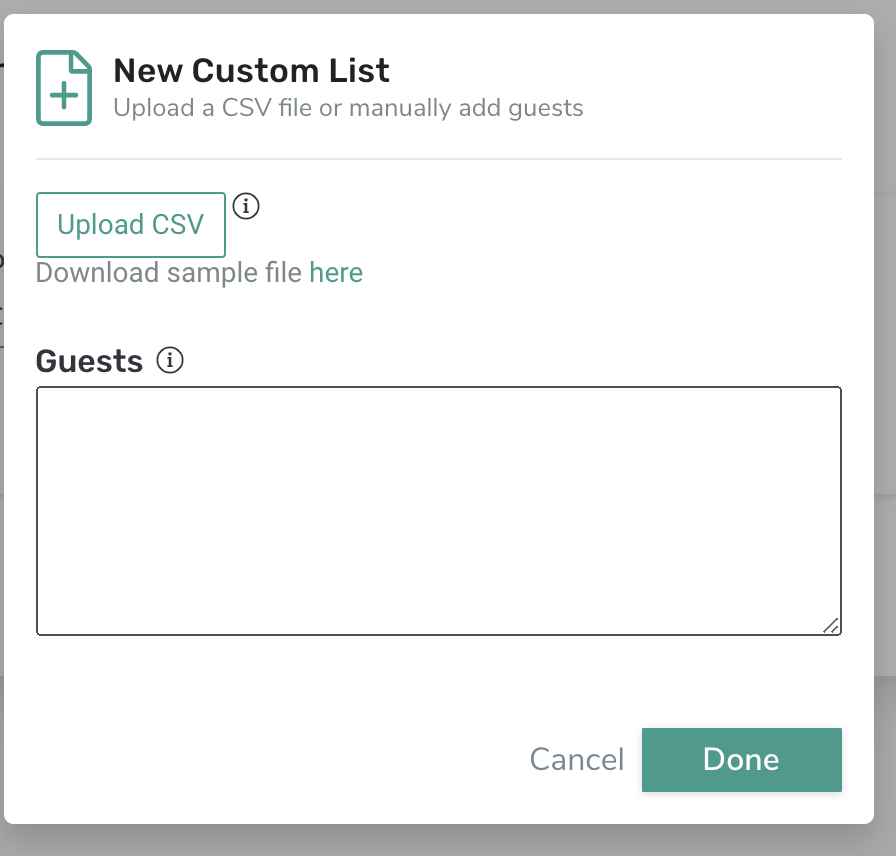
- Upload a CSV file (download the sample CSV from the New Custom List window for the recommended format), or
- Enter a list of guest email addresses or guest IDs, separated by commas.
- Click Done in the popup.
- Click Save and Close.
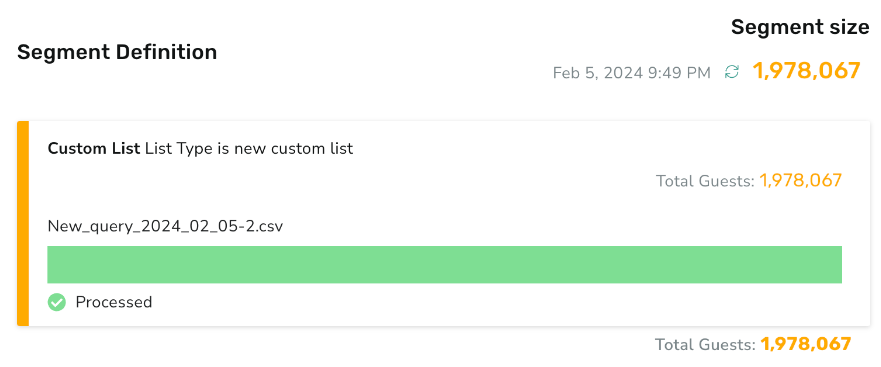
- The Segment Overview Page will open. A progress bar under Segment Definition will show the percentage of guests or members uploaded from the CSV.
Uploading a CSV File
Keep the following in mind if you choose to upload a CSV file to create the segment:
- For email addresses: Each email should be in its own cell in the same column. No column heading is required.
- For guest IDs: Each guest ID should be in its own cell in the same column. No column heading is required.
- Remove any non-email or non-guest ID entries from the CSV before uploading.
- You can only use custom segments within the segment builder where you uploaded the list.
- There is no on-screen indication when the upload is complete, but you will receive an email notification once the upload finishes or if there are errors.
You will receive an email once the upload is 100% complete or if there are any errors. The email will include the following details
- Success: Number of unique, valid entries created.
- Invalid: Total rows minus the success count (typically due to formatting errors, bad data, or duplicates).
- Total: Total number of rows in the CSV.
Note: Emails without an associated guest profile will not appear in the segment until an account is created for that email.
Troubleshooting and Tips
Removing Emails from a Custom List Segment
- You cannot remove emails directly from the Custom List edit screen.
- To remove an email:
- Navigate to the guest’s profile.
- Select Segments at the top.
- Search for the segment name.
- Click Remove from Custom Segment.
- A confirmation banner will appear. The update may take 20–30 minutes.
- For bulk removals, export the segment, edit the list, and create a new segment with the updated list.
Segment Not Reflecting All Guests
- Only guests with existing accounts will appear in the segment.
- If an uploaded email does not match a guest account, it will not be counted until an account is created.
Fluctuating Segment Numbers
- Segment counts may change over time as guest accounts are created, deleted, or archived.
- Emails added without a matching account will be included in the segment once an account is created for that email.
- If a guest changes their email address, they will be removed from the segment, even if they were originally added via User ID.
Best Practices
- Always use the recommended CSV format.
- Remove any invalid or duplicate entries before uploading.
- Monitor your email for upload completion or error notifications.
- For large updates, consider creating a new segment rather than editing an existing one.
