How to Enable/Disable Item?
| User Role | Store Groups | Store |
|---|---|---|
| Brand Manager | ❌ | ✅ |
| Area Manager | ❌ | ✅ |
| Store Manager | ❌ | ✅ |
Context
If you run out of Item or if it is no longer available, you can disable it through the MC. Disabled Items can also be re-enabled through the MC. Item availability is always controlled per Store, even if the Store belongs to Store Group.
If you have a POS integration and enable/disable Item in the POS, it will automatically be enabled/disabled in MENU within 30 minutes.
To disable an Item:
- Click Store List at the top navigation bar
- Select the Store in which you want to disable the Item
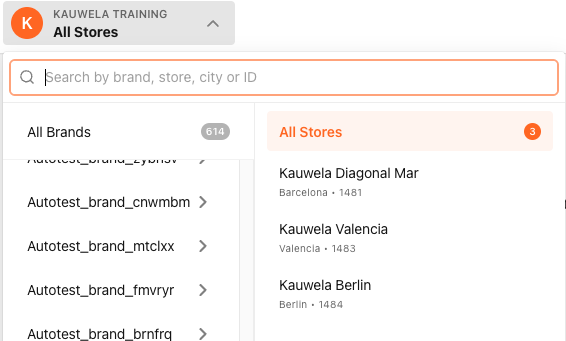
- Click Overview from the Menu on the side navigation bar
- Select Item's Subcategory
- Select Item
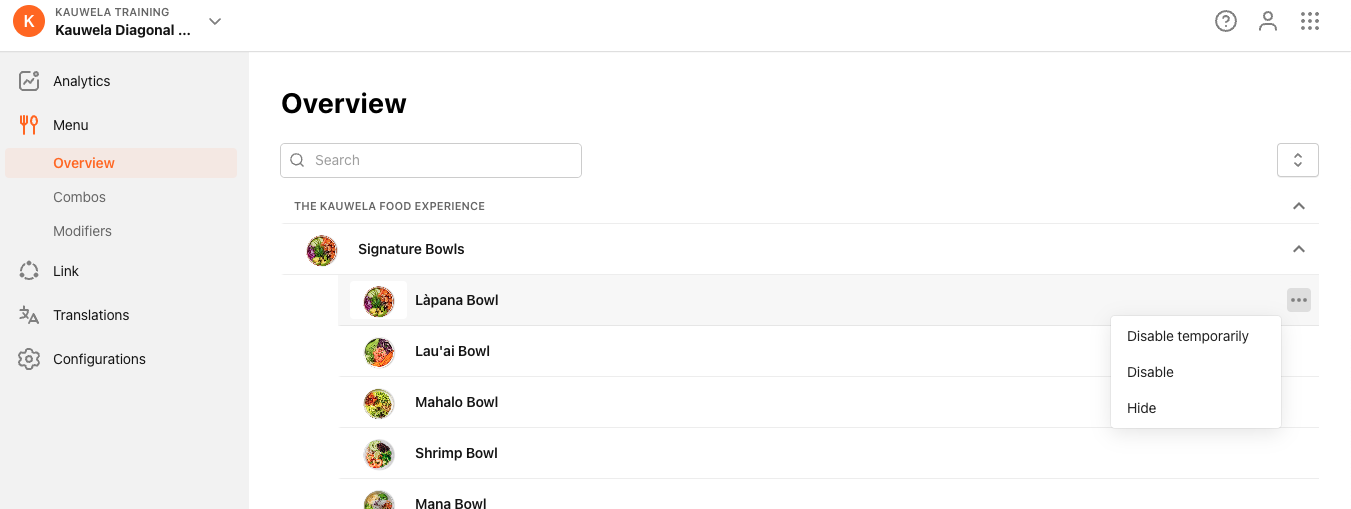
-
Click on the 3 dots and select your option
-
Disable temporarily: you can disable it for 1 hour, 4 hours or till the end of the day
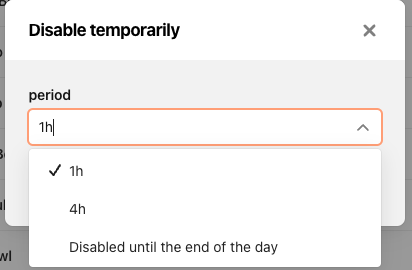
- Disable
- Hide
-
Disable temporarily: you can disable it for 1 hour, 4 hours or till the end of the day
-
Click Save to confirm the changes
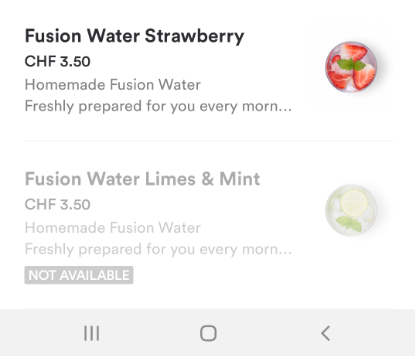
On Mobile & Web Apps, disabled Items will be marked as NOT AVAILABLE.
Disabled Item in Mobile application:
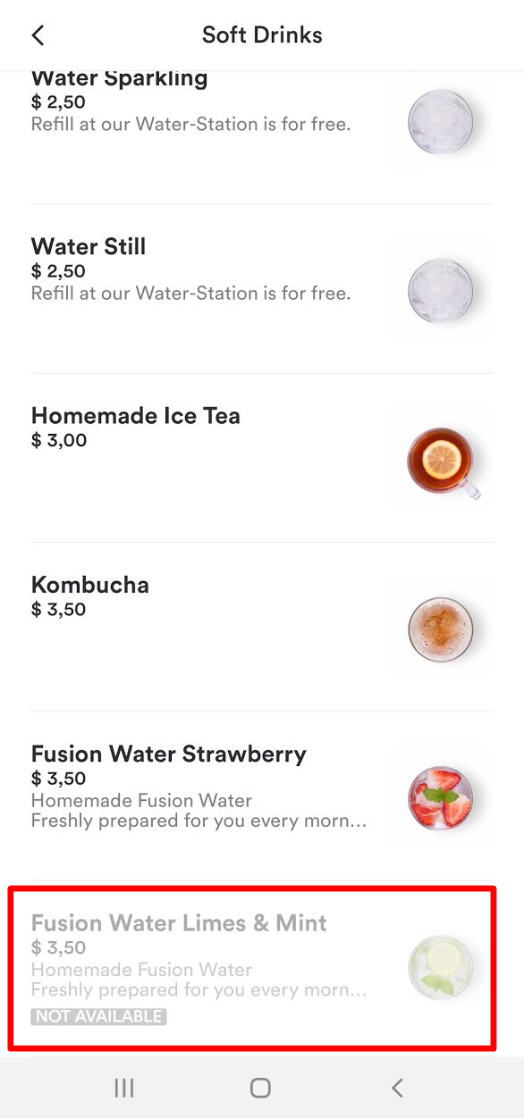
Temporarily disabled Item in Mobile application
To enable an Item:
- Click on Store List at the top navigation bar
- Select the Store in which you want to disable the Item
- Click Overview from the Menu on the sidebar
- Select Item's Subcategory
- Select Item
- Click on the 3 dots and select Enable
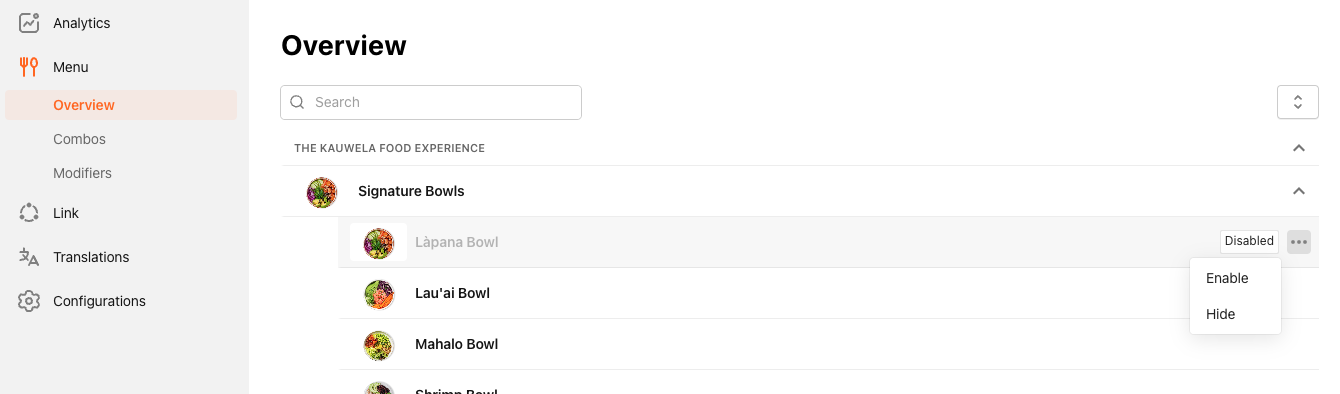
- Click Save to confirm the selection
Categories and Subcategories that are empty (don’t have items or combo clusters) in Brand Menu will be shown in Store Menu. Same goes for Modifier Groups. Don't worry - neither Visibility nor Disable flags will affect Store Menu.
