Brand Pulse Check
Brand Pulse Check gives Super Admins and Brand Managers a single view of store readiness across your entire brand. From the Pulse Check drawer in Management Center, you can see how many stores are ready, how many have errors, and how many have warnings, without opening each store individually.
Use Pulse Check to spot configuration gaps before go-live, sort issues by severity, and go directly to the settings screen where you can fix a problem.
Statuses
Here you can check the different possible statuses of each one of the Brand Pulse Check dashboard entities.
Pulse Check only runs validations for the products your brand has enabled. Checks that do not apply to your brand are skipped and do not appear in the store detail view or count toward errors and warnings. To see which products are enabled, check the product chips displayed in the Pulse Check drawer below the readiness summary.

|
Success | Configuration meets the criteria and passed all checks |

|
Warning | Configuration is missing but it is not required |

|
Failed | Configuration fails to meet the criteria and is required |
| - | Inactive / Not checked | No health check results yet, or no successful checks have been recorded for this store |
Brand-Level Readiness Summary
Click the Pulse Check icon in the top right corner to open the Pulse Check pane.

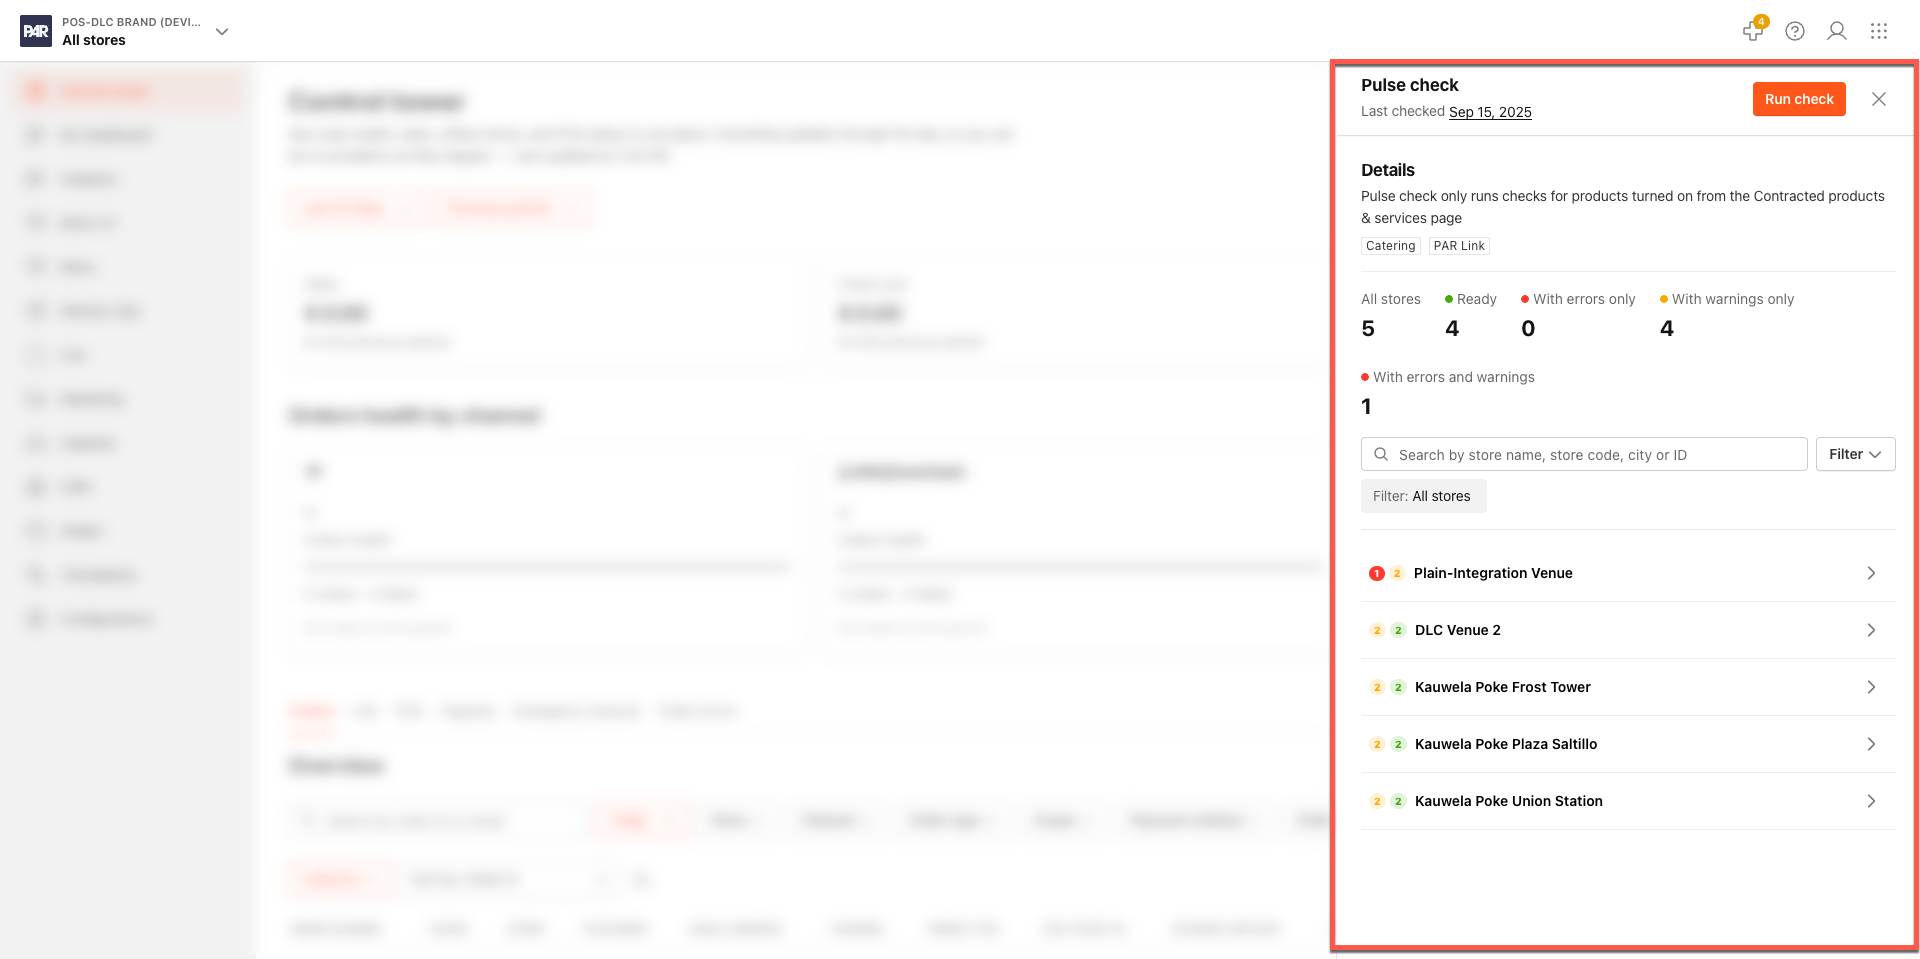
When you open the Pulse Check drawer, a summary banner at the top shows the readiness status of all stores in the brand:
- All stores: total number of stores in the brand
- Ready: stores with no errors and no warnings
- With errors only: stores with at least one failing check
- With warnings only: stores with no errors but at least one warning
Store List
The store list below the readiness summary shows every store in the brand. Each row displays:
- A red error badge with the count of failing checks
- An amber warning badge with the count of warnings
- A green checkmark if the store has no errors and no warnings
Stores are sorted by error count (highest first) by default.
Filtering the store list
When you open Pulse Check, the list defaults to showing stores with errors only. You can switch the filter at any time:
- Errors only (default)
- Warnings only
- No errors
- All stores
The filter resets when you close the Pulse Check drawer.
Last checked timestamp
The drawer header shows when the check data was last refreshed. The timestamp displays as relative time (for example, "2 hours ago") with the full date and time visible on hover. If the data is more than 6 hours old, the timestamp turns amber as a reminder to refresh. If no check has ever run for the brand, the header shows "No data yet - run a check to get started."
Running a Manual Check
To refresh the data for all stores, select Run check in the Pulse Check drawer header.
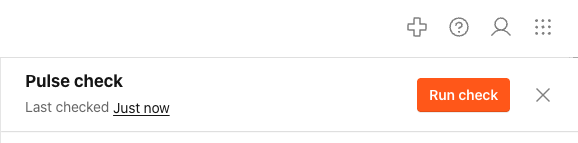
While the check is running, the button is disabled and the drawer shows a live progress indicator (for example, "Checking store 12 of 47..."). When the check completes, the store list, readiness summary, and last-checked timestamp all refresh automatically.

If the check fails or times out, an inline error message appears with a Retry option.
Only Super Admins can trigger a manual check.
Store Detail View
Select a store row to open the store detail view. Checks are organized by category (for example, Opening Hours, External Channels, Order Types, Menu Readiness).
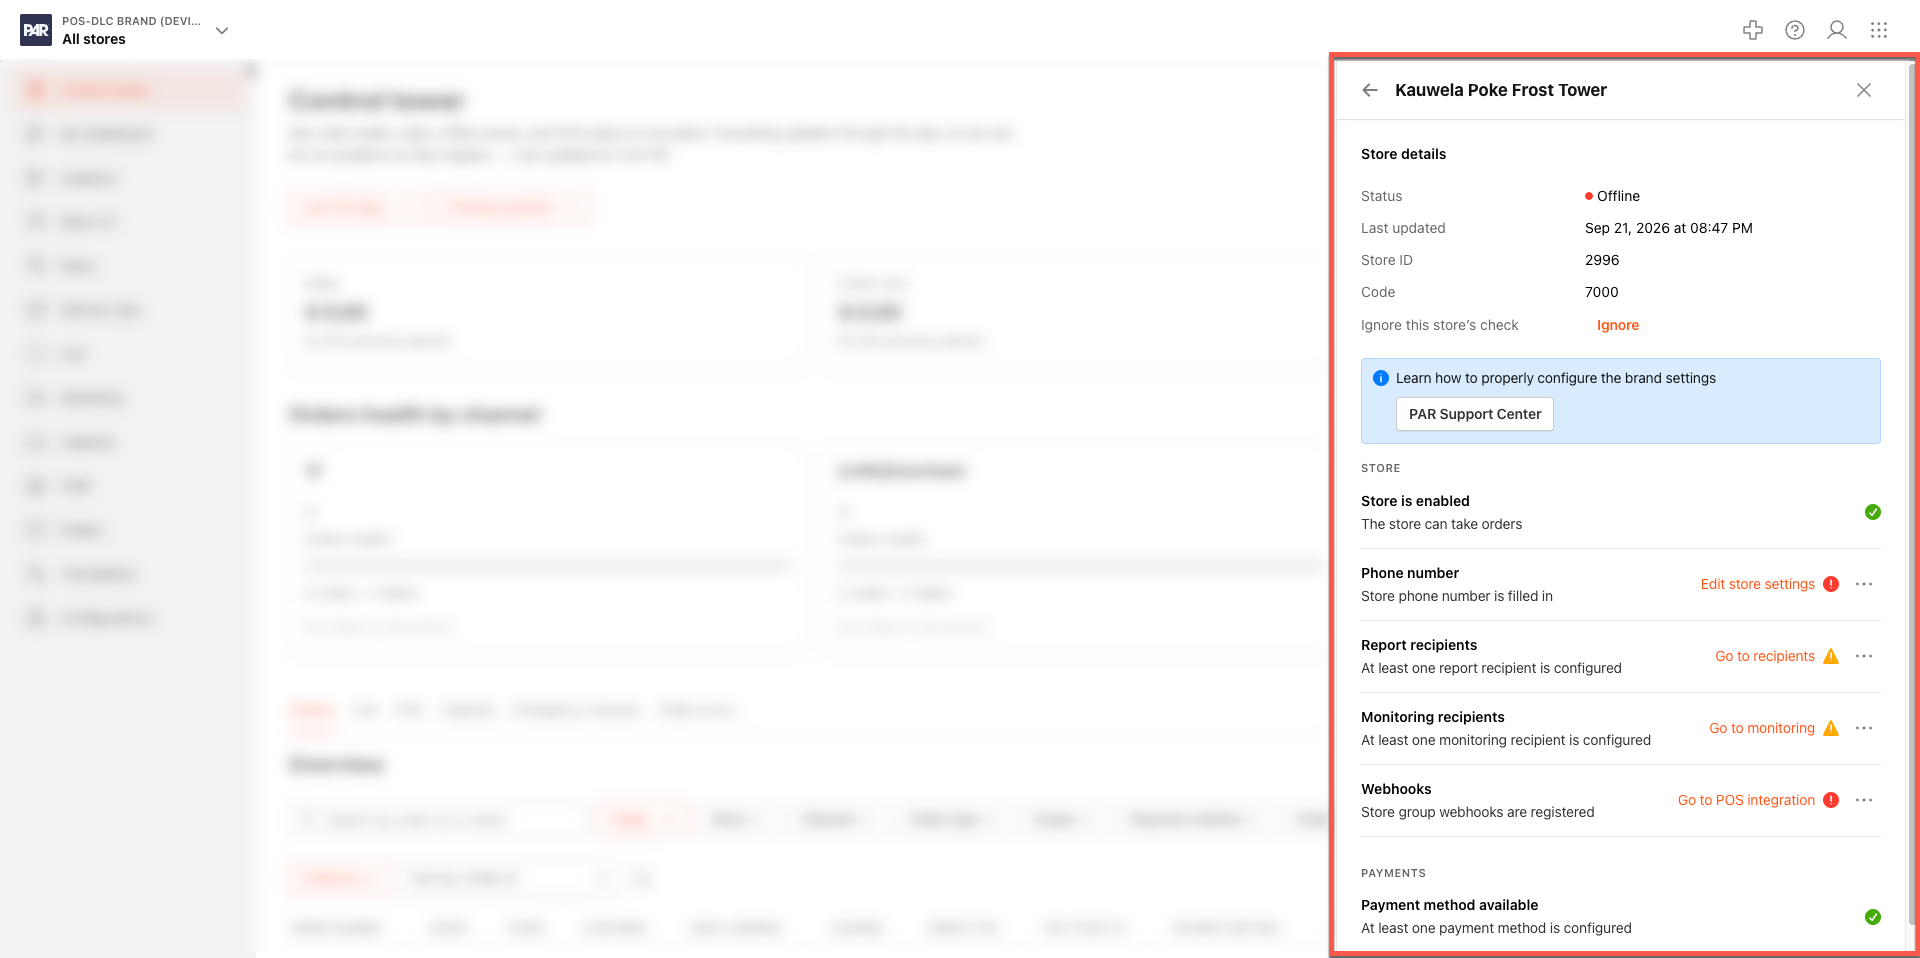
Within each category:
- If all checks pass, the category row shows a green checkmark and stays collapsed.
- If any check fails or warns, the category row shows the worst status and expands by default so you can see which criteria failed.
Each failing or warning row includes a Fix or Open settings link that takes you directly to the relevant configuration screen in Management Center.
Ignoring Checks
If an error or warning does not apply to your brand (for example, a store intentionally left offline, or a configuration your brand does not use), you can ignore it so it no longer affects the readiness score.
Ignoring an individual check
In the store detail view, select the three-dot icon next to the check. Click Ignore criteria.
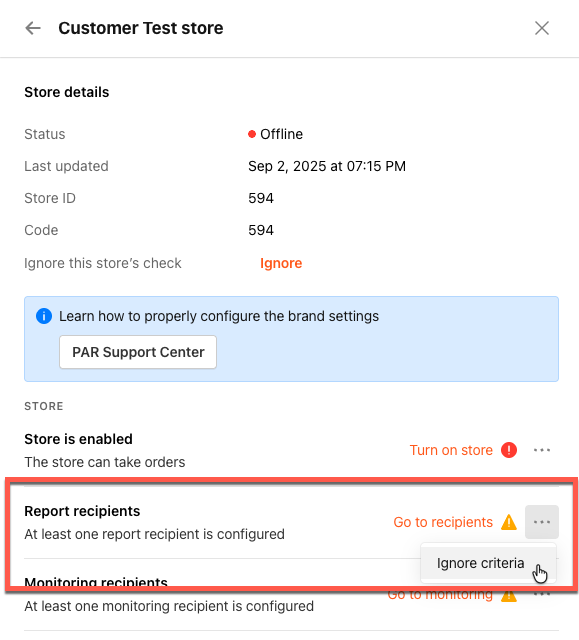
The row moves to the bottom of the list under Ignored criteria. It stays visible but is excluded from the store's error and warning counts and from the brand readiness score.
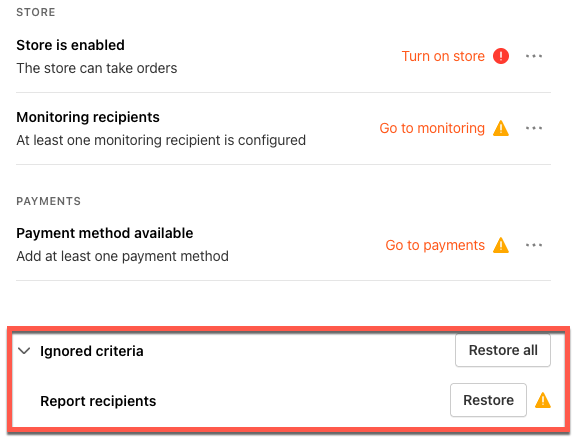
To restore an ignored check, click Restore. The row returns to its normal position and status immediately.
Excluding an entire store
Click Ignore next to Ignore this store's check at the top of the store detail view, above the criteria list. This excludes the store from all counts and the brand readiness score. It does not change the ignore states on individual criteria within that store.
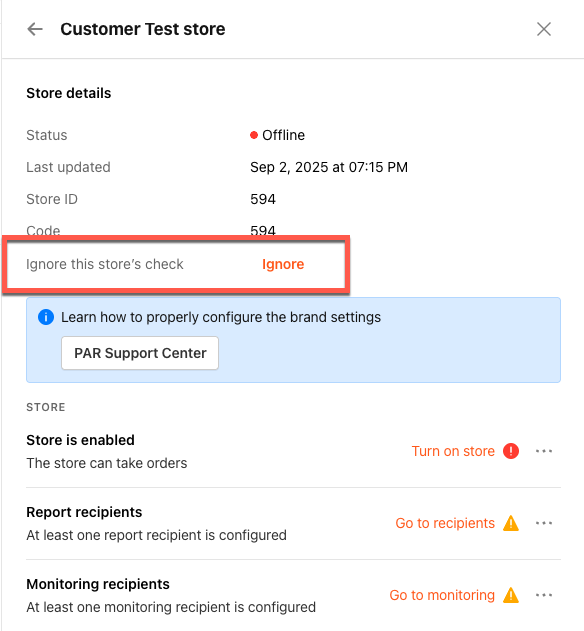
Ignored states persist across scheduled and manual check runs. If the underlying result changes after you ignore a check (for example, it passes and then fails again for a different reason), the ignore clears automatically and the issue reappears. Any user with the right permission can ignore or restore a check. There is no admin-only undo step.
Entity Checks
Pulse Check only runs validations for the products your brand has enabled. Checks that do not apply to your brand are skipped and do not appear in the store detail view or count toward errors and warnings. To see which products are enabled, check the product chips displayed in the Pulse Check drawer below the readiness summary.
| Entity | Check Criteria | Possible Statuses |
|---|---|---|
| Opening Hours | Is there at least one opening time added? | Success & Failed |
| Report Recipients | Is there at least one report recipient configured? | Success & Warning |
| Monitoring Recipients | Is there at least one monitoring recipient configured? | Success & Warning |
| Integrations | Are all fields configured that are defined in integration classes? | Success & Failed |
| Tablets | Is there at least one tablet configured? | Success & Warning |
| Payment Processors | Is at least one payment processor enabled? | Success & Failed |
| Payment Methods | Is there at least one payment method configured (other than cash)? | Success & Failed |
| External Channel | Is there at least one external channel added? | Success & Failed |
| External Channel Enabled | Is the external channel enabled? | Success & Failed |
| Order Type Catering Takeout | Is the order type enabled? | Success & Failed |
| Order Type Takeout Tips Enabled | Are tips enabled? | Success & Warning |
| Order Type Delivery | Is the order type enabled? | Success & Failed |
| Order Type Delivery Tips Enabled | Are tips enabled? | Success & Warning |
| Order Type Delivery Opening hours | Is one delivery opening hour added? | Success & Failed |
| Order Type Delivery Maps | Have delivery maps been added? | Success & Failed |
| Order Type Dine-in (FS) | Is the order type enabled? | Success & Failed |
| Order Type Dine-in (FS) Tips Enabled | Are tips enabled? | Success & Warning |
| Order Type Dine-in (QS) | Is the order type enabled? | Success, Failed |
| Order Type Dine-in (QS) Tips Enabled | Are tips enabled? | Success & Warning |
| Takeout | Is the order type enabled? | Success & Failed |
| Order Type Curbside | Is the order type enabled? | Success & Failed |
| Order Type Curbside Tips Enabled | Are tips enabled? | Success & Warning |
| Menu Items Disabled By POS | Are there items disabled by POS? | Success & Failed |
| Combos Disabled By POS | Are there combos disabled by POS? | Success & Failed |
| Modifiers Disabled By POS | Are there modifiers disabled by POS? | Success & Failed |
| Note: Menu Readiness checks apply only to brands using V2 menus. | ||
| Menu assigned | Is at least one menu assigned to the store? | Success & Failed |
| Menu published | Is the assigned menu in a published status (not draft, stuck, or errored)? | Success & Failed |
| Menu distributed | Did the most recent distribution job complete successfully? | Success & Failed |
| POS sync completed | Has a successful POS sync run since the most recent menu publish? | Success & Warning |
| Menu has items | Does the published menu contain at least one visible, orderable item? | Success & Failed |
